Hello everyone! Leanne here and I’m excited to back on the blog to share a festive holiday card featuring the Christmas Cake Pops. I loved the Halloween Cake Pop dies and was so happy to have this new set to continue the cake pop paper crafting fun well into the holiday season.
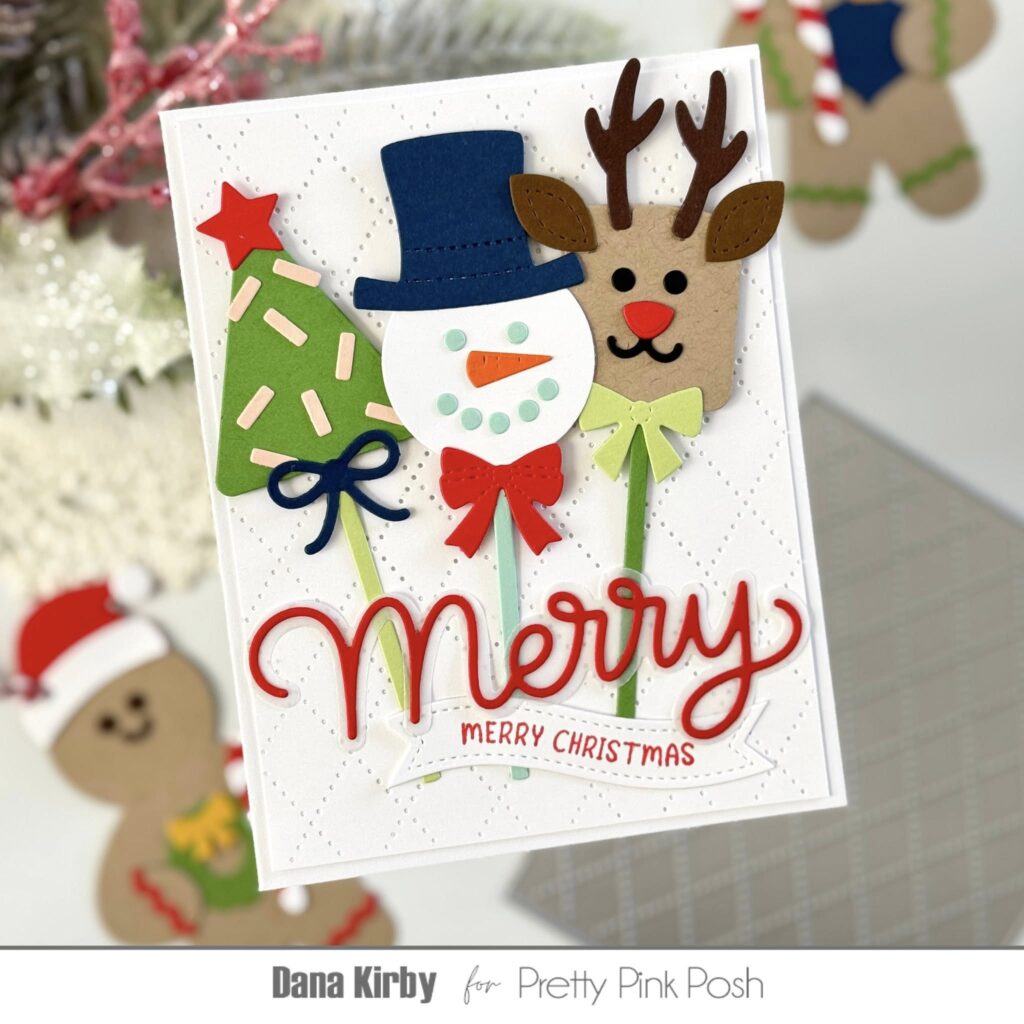
The background for my cake pop scene is an A2 size panel of light blue card stock with lots of white and silver paint splatter. I used dies from theChristmas Cake Pops set to create the tree, snowman, and reindeer cake pops complete with all the details for each character plus the bows on the sticks.
I wanted my cake pops to be arranged in a little pine greenery. I used dies from the Holiday Wreath Builder set to cut out the pine sprigs. I sprayed them with Fresh Balsam Mica Stain to add the shimmer effect before adhering them along the bottom edge of the card.
To finish the card I added a greeting and some extra pine to space above the reindeer. The Joyful Holiday Wishes sentiment comes from the new Christmas Banner Greetings stamp set. I die cut the banner shape with Banner Greetings 1 dies.
Thanks so much for stopping by today! Happy holiday crafting!
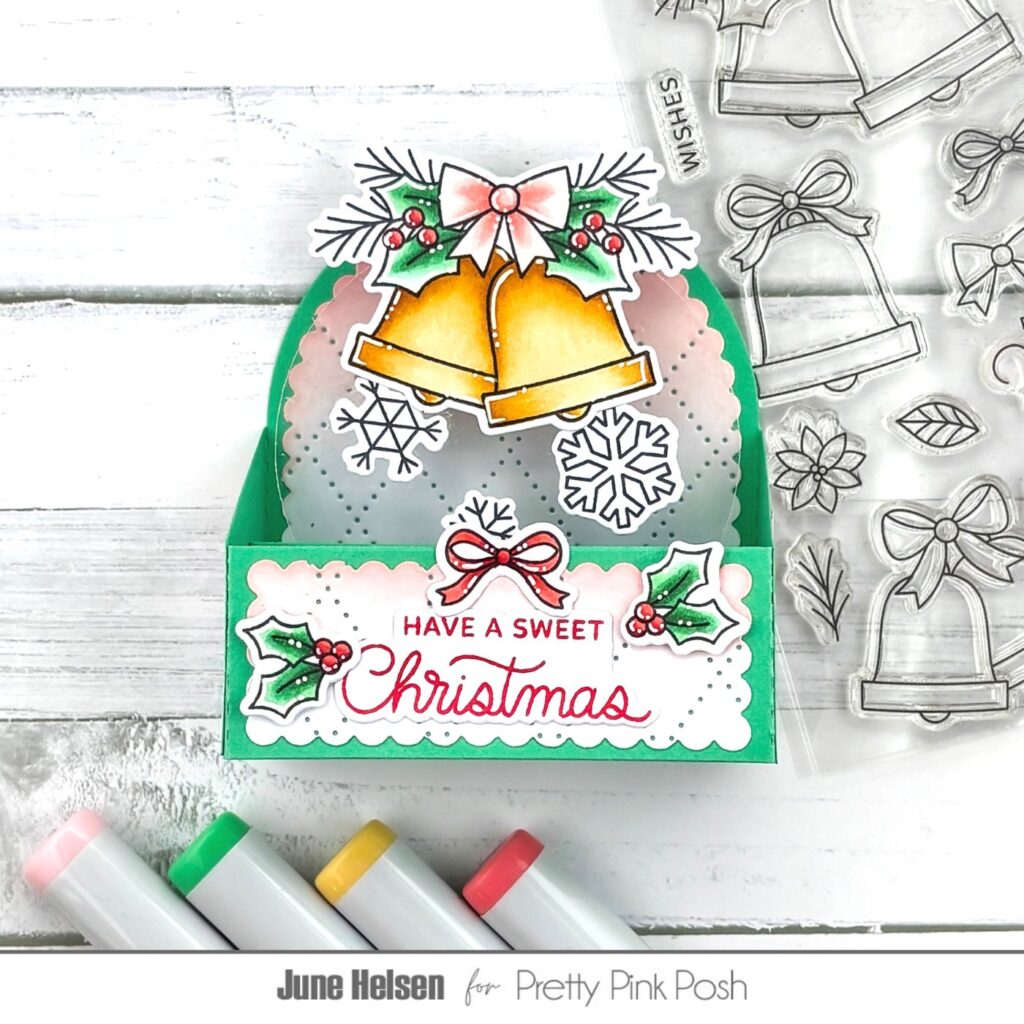
Hello crafty friends, it’s June and I’m sharing a card that has quickly become one of my absolute favorite holiday cards I’ve ever made. Something about this Christmas Bell Shaker just makes me so happy so I can’t wait to share my process with you all.
I took the traditional route and cut my bell out of yellow cardstock, so it would look gold when doing some ink blending on it. I filled the shaker with Enchanted Shaker Beads and Holly Berries Clay Confetti.
I love how there are a variety of embellishments included with theChristmas Bell Shaker, so I used them to add more details to my bell. I cut 2 of each sprig from sage green cardstock and the bow from pink cardstock. I did some ink blending on those pieces as well, and also added gel pen details to the bow and the bell. I felt like it could use even more detail though, so I also used the snowflake from the Christmas Bucket Additionsas a little embellishment.
Now here’s the favorite part of my card: the background! The new Argyle Pierced Plate and the Candy Cane Stripes Stencil are a match made in heaven! While the candy cane stripes look beautiful on their own, I’m a sucker for everything plaid, so I didn’t even think twice about creating a plaid background for my card. And when you add the nice stitching detail from the plate in the mix, it gives such a beautiful effect! I went for a pink-ish purple to add even more color variety.
To make the bell stand out from the busy background, I cut an Eyelet Circle out of white cardstock. For the sentiment I wanted to use the new Large Merry Shadow Die and complete the sentiment with one of the Christmas Banner Greetings. I cut the ‘Merry’ from pink cardstock and backed it onto the shadow piece cut from vellum. I stamped one of the sentiments in pink ink onto pastel pink cardstock and cut it out using one of the banners from the Banner Greetings 1 set. I can see this set becoming my #1 most used die set for sure, I already used one of the banners on almost all of my cards I made using this release. Such a nice basic set that still adds a bit of interest to any card!
And that’s the finished card. I hope you’re enjoying seeing all the cards the design team has made so far, cause I am for sure! Christmas card prepping season is always such an inspiring time, don’t you think? Anyway, see you again soon with another blog post, bye!
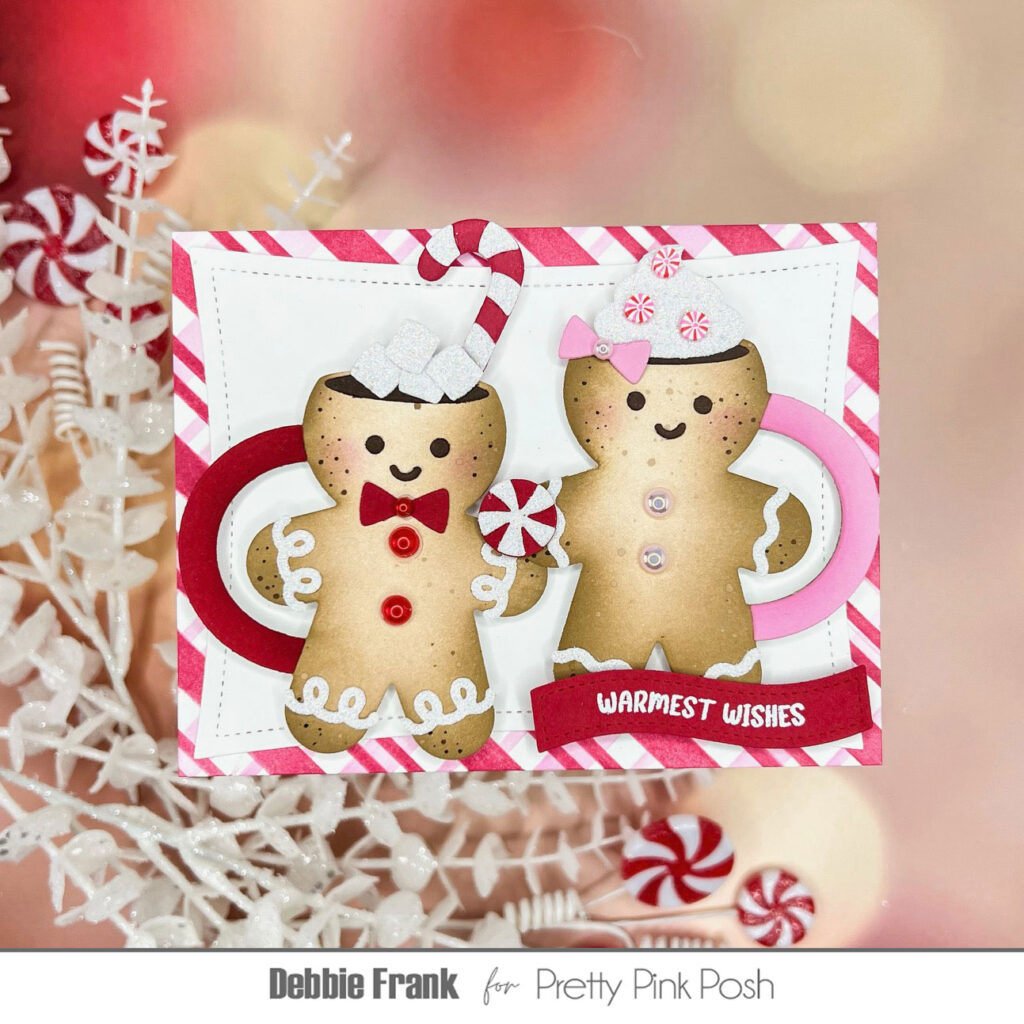
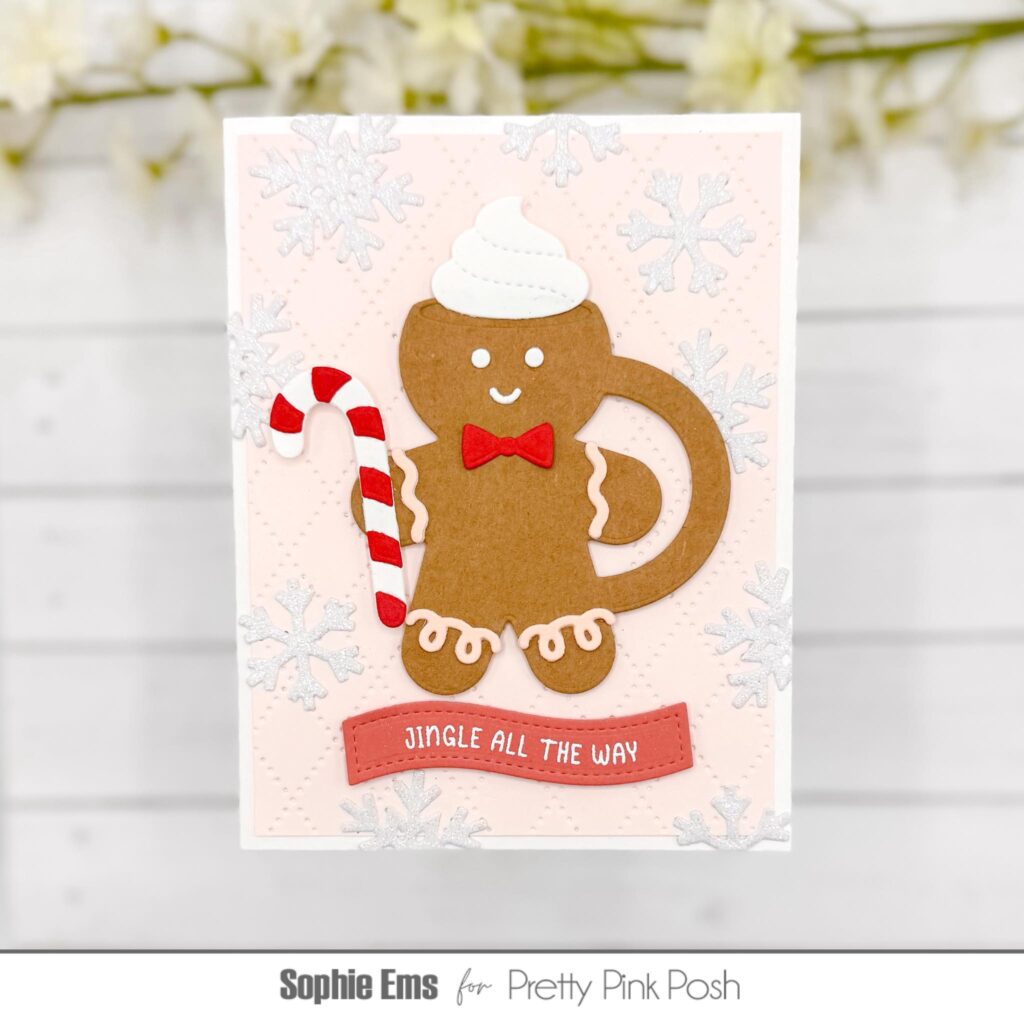
I started by making my background using the Candy Cane Stripes Stencil and ink blending with Candied Apple Distress ink onto a piece of Neenah Solar White 110 lb cardstock. I took another piece of the Neenah Solar White cardstock and trimmed it with the second largest die from the Stitched Torn Rectangles Dies.I added a piece of craft foam to the backside of the white panel before I adhered it to the candy cane panel.
Next, I diecut all of the elements from the Gingerbread Holder Dies and Christmas Holder Additions Dies out of white and colored cardstock. I love that there are so many accessories available to decorate these gingerbread men. I added some color to the white parts of the hat and candy cane with Copic markers (C00, C1 and C3) for a little more realistic look. I assembled all of the parts with liquid glue and highlighted with a white gel pen. I trimmed off part of the legs in order for him to fit onto the white panel. He was adhered to the panel with foam tape for added dimension.
For the sentiment, I stamped the Merry Christmas sentiment from the Christmas Banner Greetings Stamp set with Memento Tuxedo Black ink onto a piece of white cardstock. I used the dies from the Banner Greetings 1 Dies to trim out the sentiment as well as an additional green banner. The banners were adhered to the panel with a combination of liquid glue and foam tape.
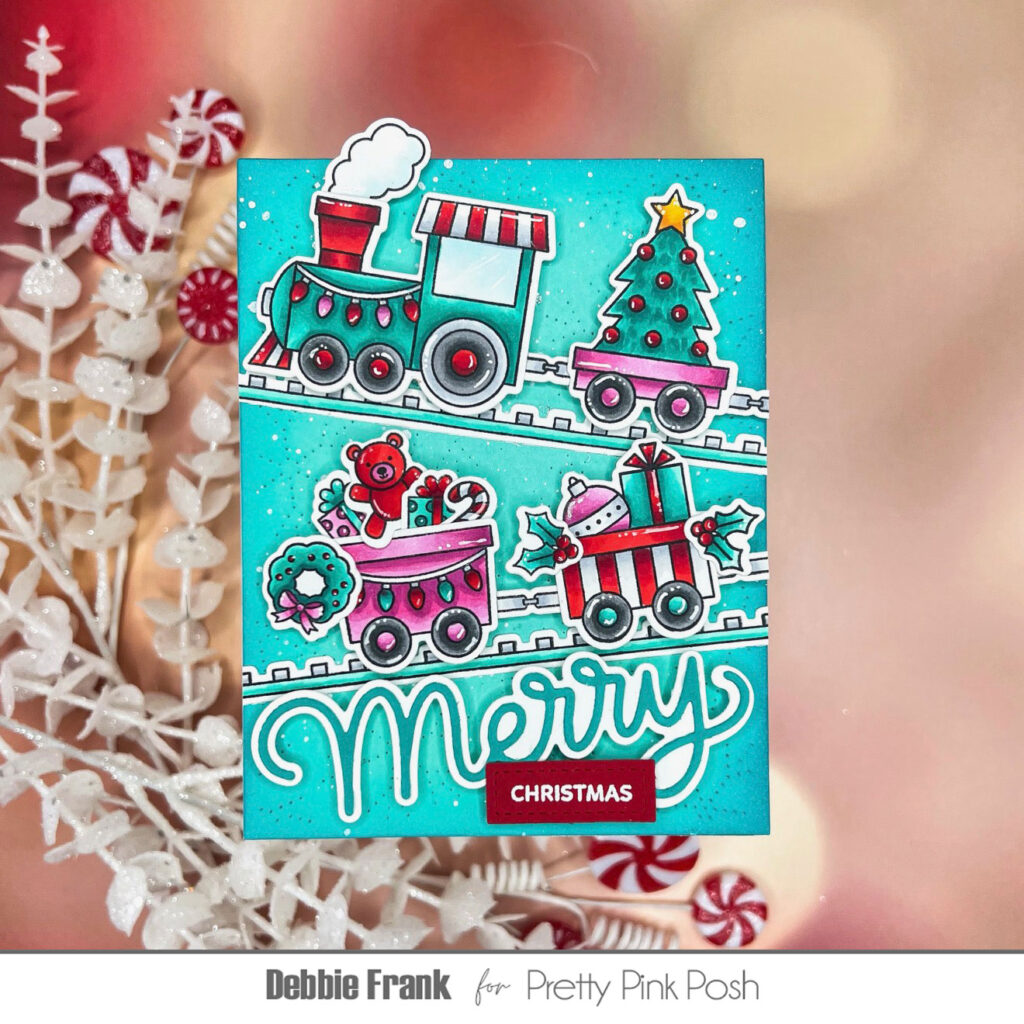
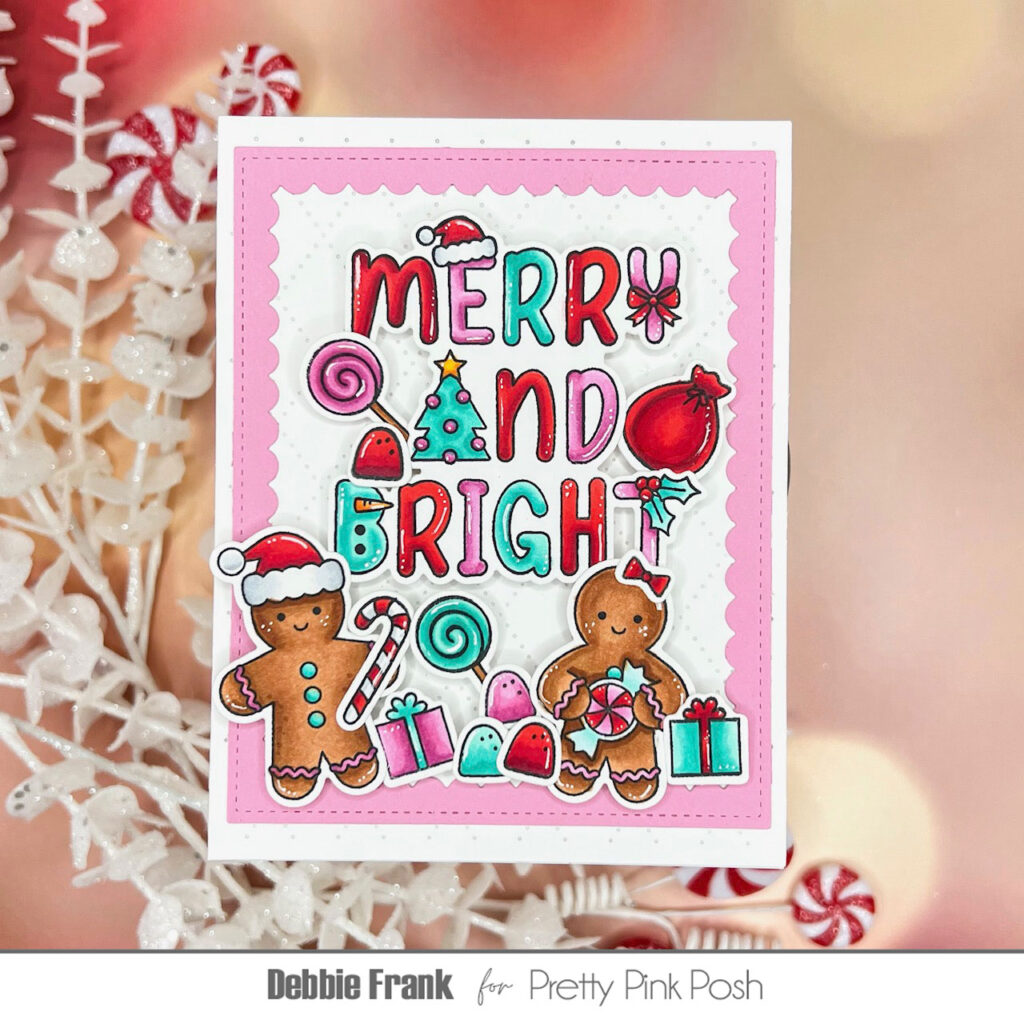
Hi Crafty friends, Debbie here with Pretty Pink Posh’s new Holiday Word Scenes and the adorable Gingerbread Friendsstamp setsfrom the Holiday Release. How cute are these sets together? I just can’t get enough of this release! It is packed with so much cuteness!
The Word Scene series debuted in the latest release, and I’m thrilled to now have the Holiday Word Scenes set as well.
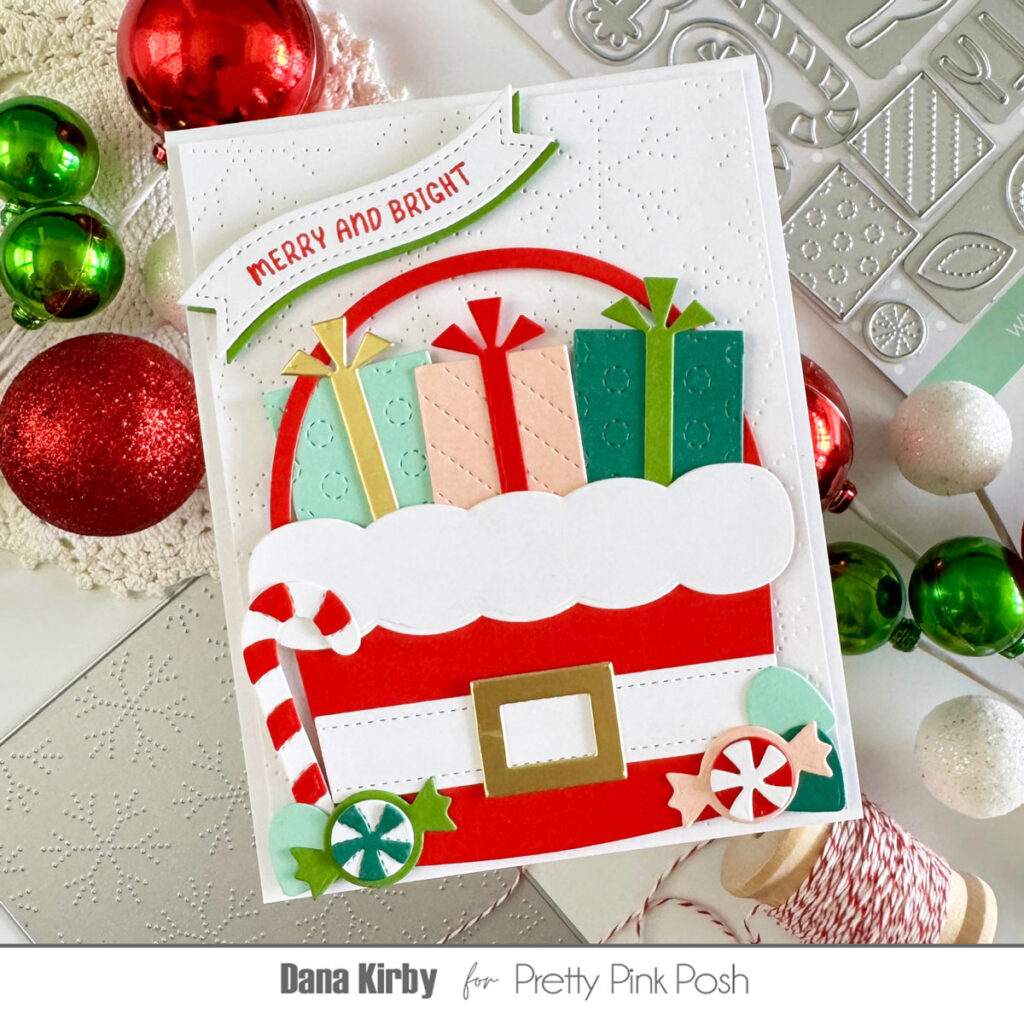
I started off by stamping and Copic coloring the “Merry and Bright” and the most of the Gingerbread Friends as well as a lot of the accessories in the set. I found myself going back and stamping and coloring more for the scene. So don’t be shy!
Once the coloring was done, I die-cut the images with the coordinating dies, adding foam squares to the back to pop them up.
Next, I used the new Argyle Pierced Plate, and ran it through my die cutting machine with a white standard A2 panel. But before I started to adhere it all together I wanted to frame it with the Scallop Frames Diein a bubblegum pink card stock.
I have been obsessed with this red, pink, and teal holiday color combination! And with the brown from the Gingerbread Friends! LOVE! What’s your go to color combo for the holidays? Let me know in the comments!
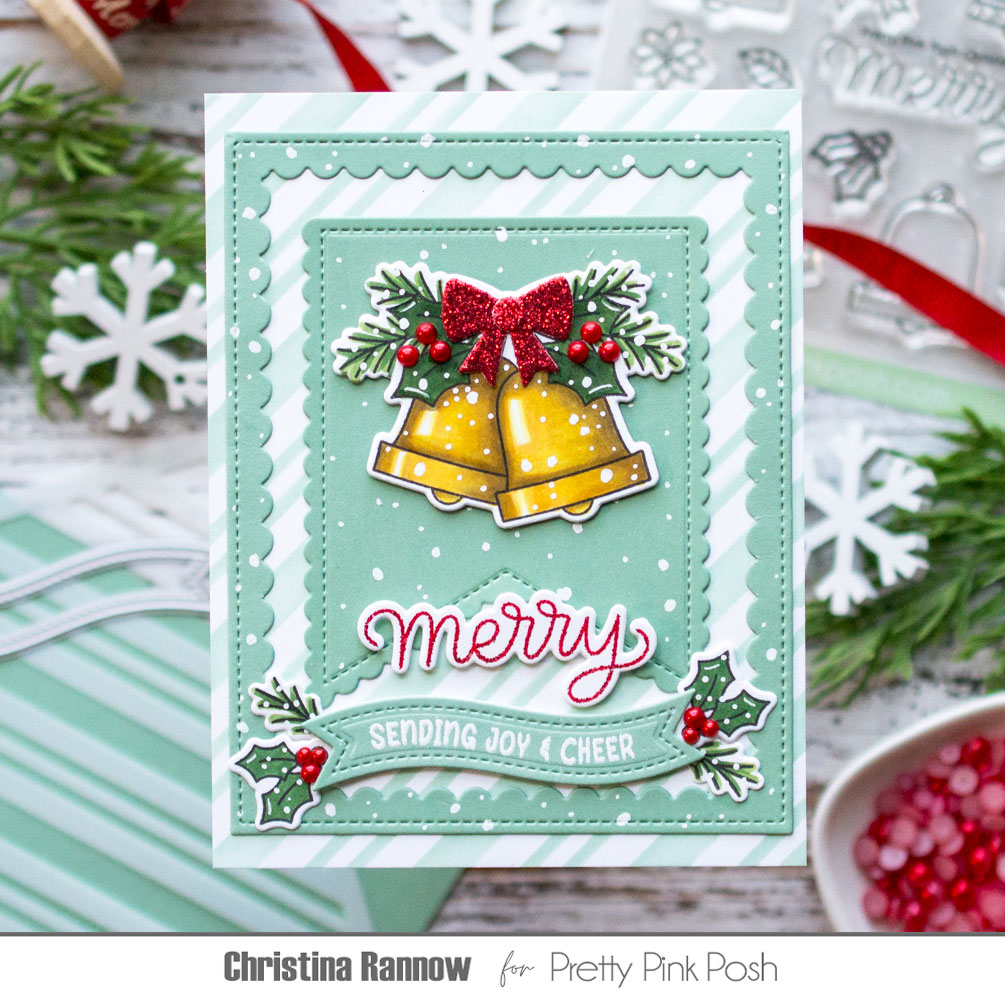
Hello! Christina here to share an elegant holiday card with you featuring the beautiful new stamp set, Christmas Bells. The images in this set are perfect for any holiday card or even for making a set of tags. I added some festive embellishments to my card design for a little extra sparkle and added a new Christmas Banner Greetings to complete this joyful card design. Let’s get started!
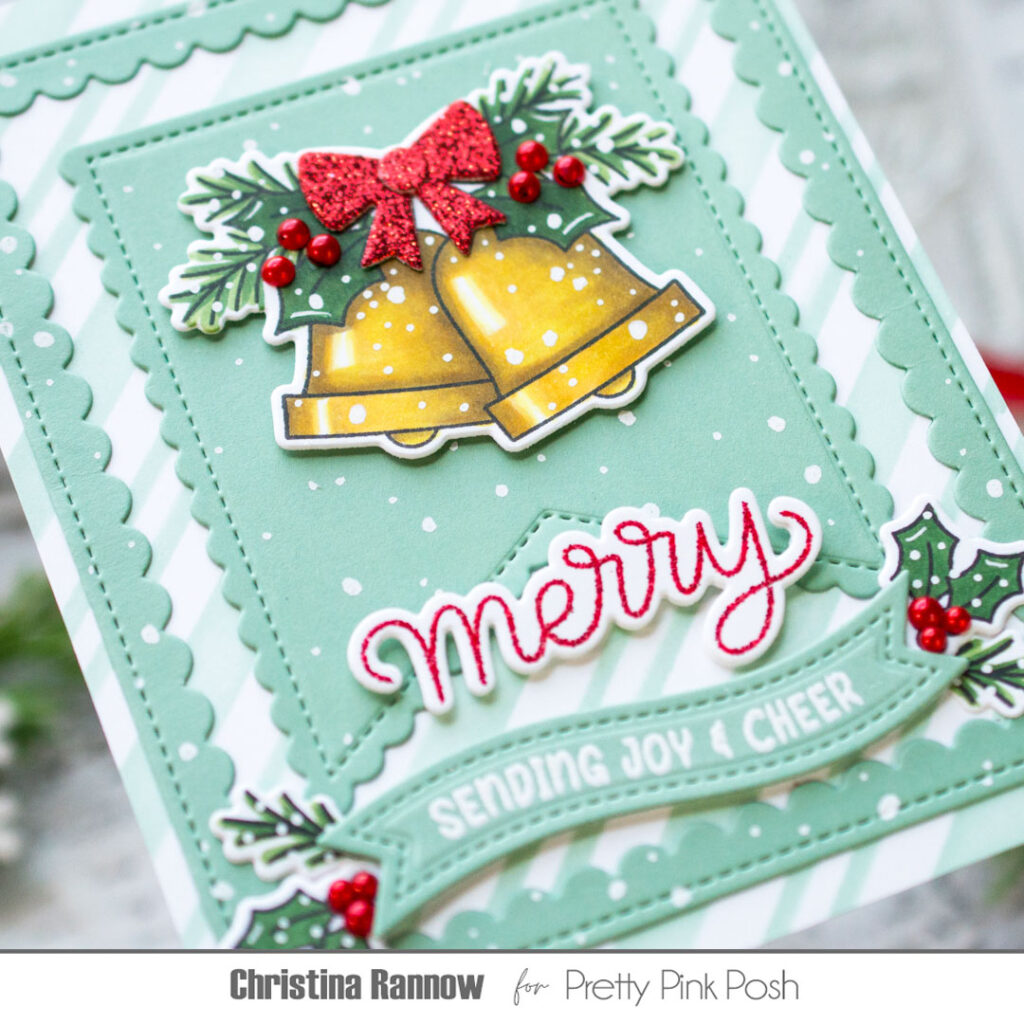
I started by stamping the images for my design with an alcohol ink-friendly black ink on white cardstock. I chose the bigger bell image with lots of greenery and some of the smaller holly leaves and pine sprigs. To color the images, I used Copic markers. Here is the coloring guide:
After coloring, I die-cut the images with the coordinating dies and set them aside while I worked on the remaining elements.
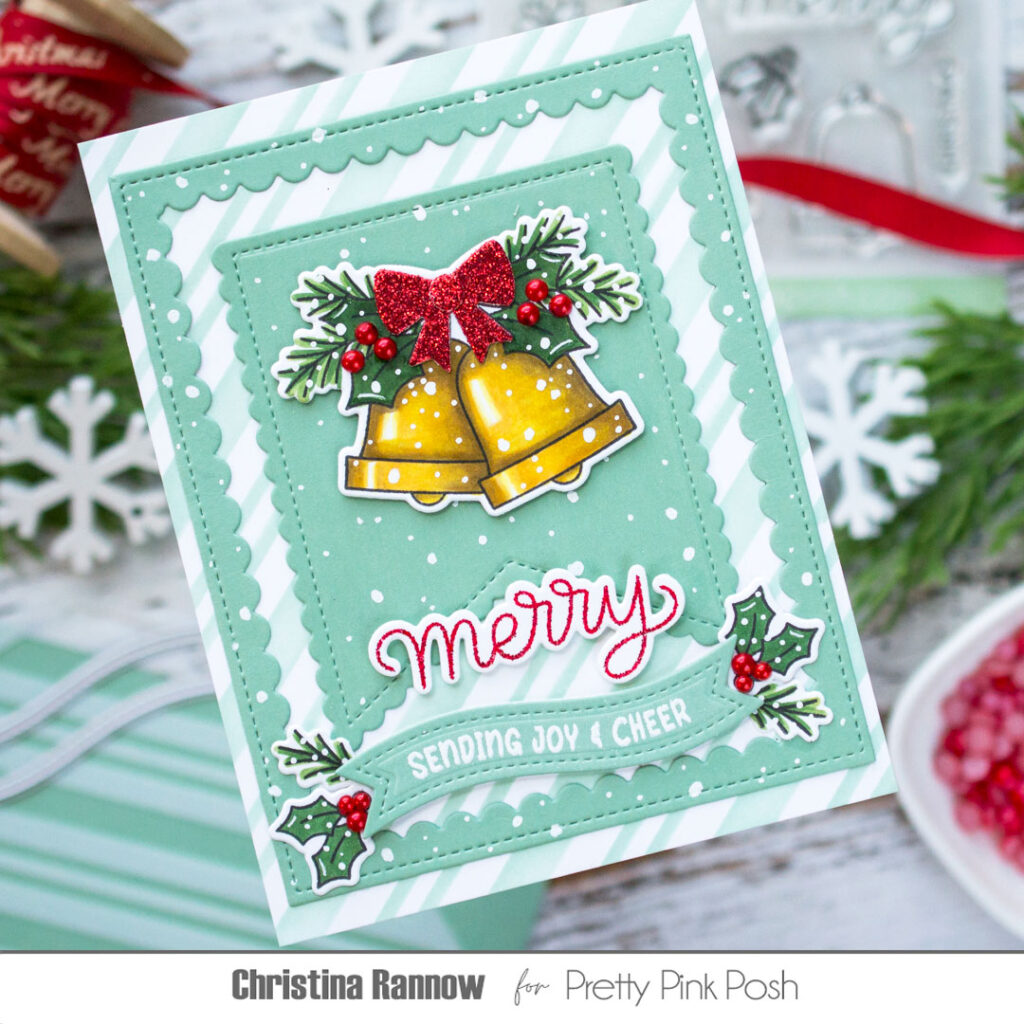
First I created the background panel by stenciling the Candy Cane Stripes with a sage green ink on white cardstock. Then I layered on a Scallop Frameand a Scallop Flag Tagsin a coordinating cardstock color. The Scallop Flag provided the perfect place for the focal point of this design, the stamped and colored bell image. I centered the image and attached it with foam squares.
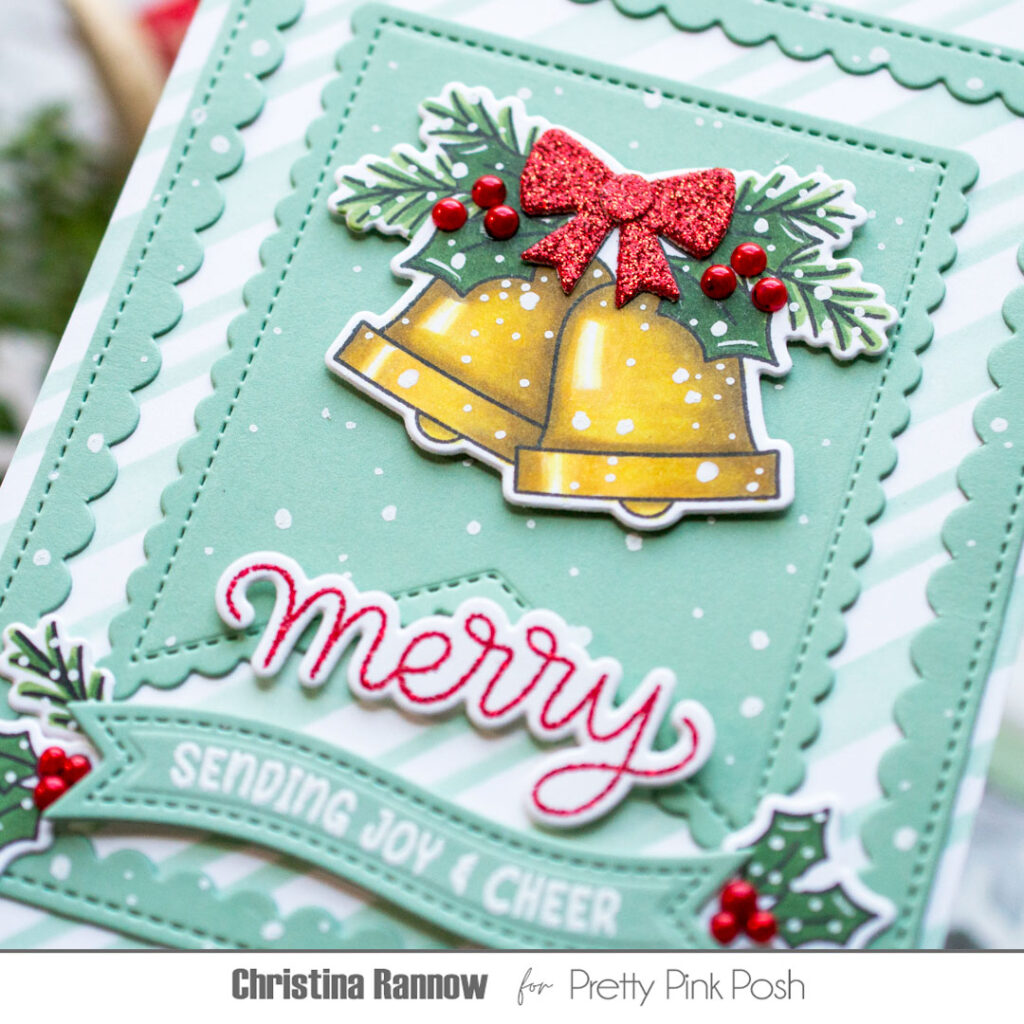
Next I stamped and heat embossed both the word “Merry,” included in the Christmas Bells stamp set, and the banner sentiment. I used a glittery red embossing powder for the “Merry” and die-cut it with the coordinating die. For theChristmasBanner Greetings, I used white embossing powder on more of the sage green cardstock and die-cut it with one of the coordinating dies. I attached both with foam squares and then tucked in some greenery around the banner.
For a frosty winter look, I used a white paint pen to add snowfall across the design, including on the stamped and colored images. For a little dimension and sparkle, I die-cut a bow from glitter cardstock and placed it over the stamped bow and added Cherry Red Pearls over the holly berries.
Thanks so much for reading about my elegant holiday card featuring the beautiful Christmas Bells stamp set! See you again soon!
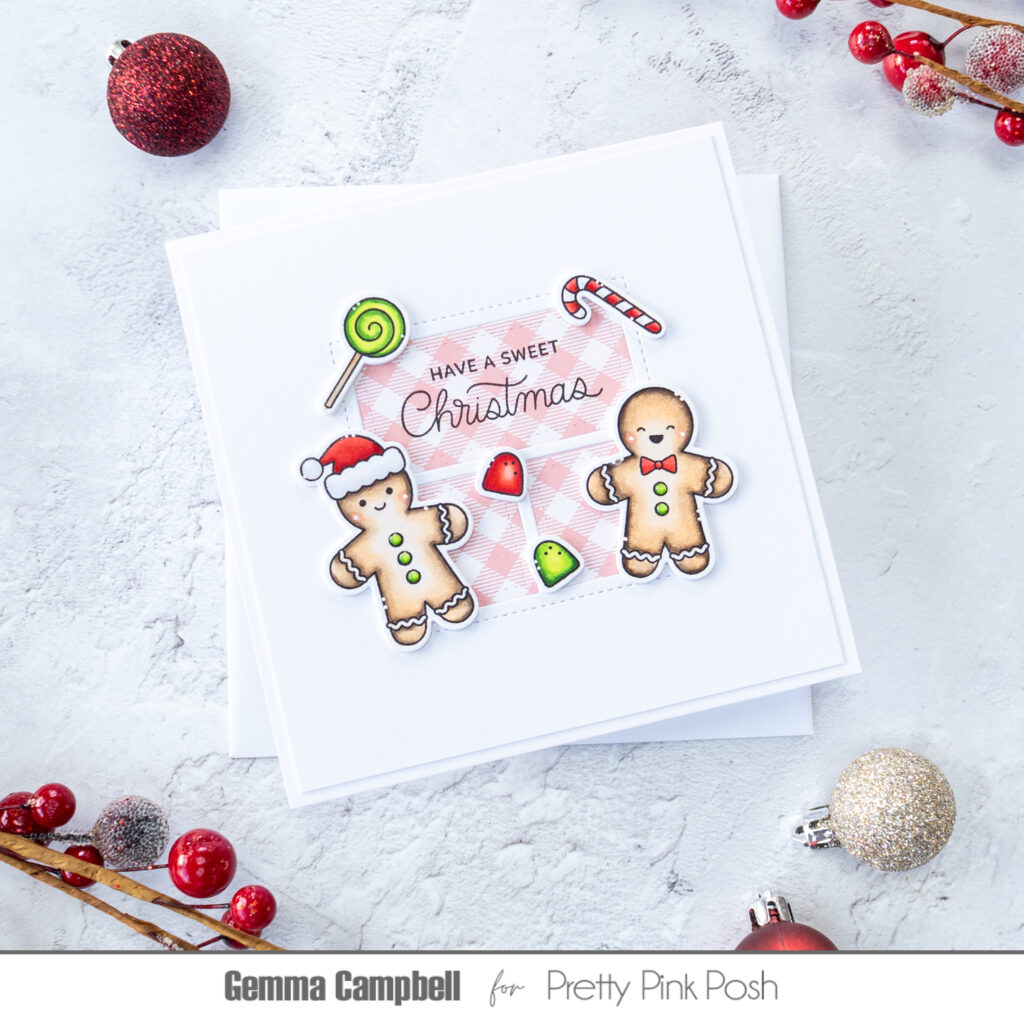
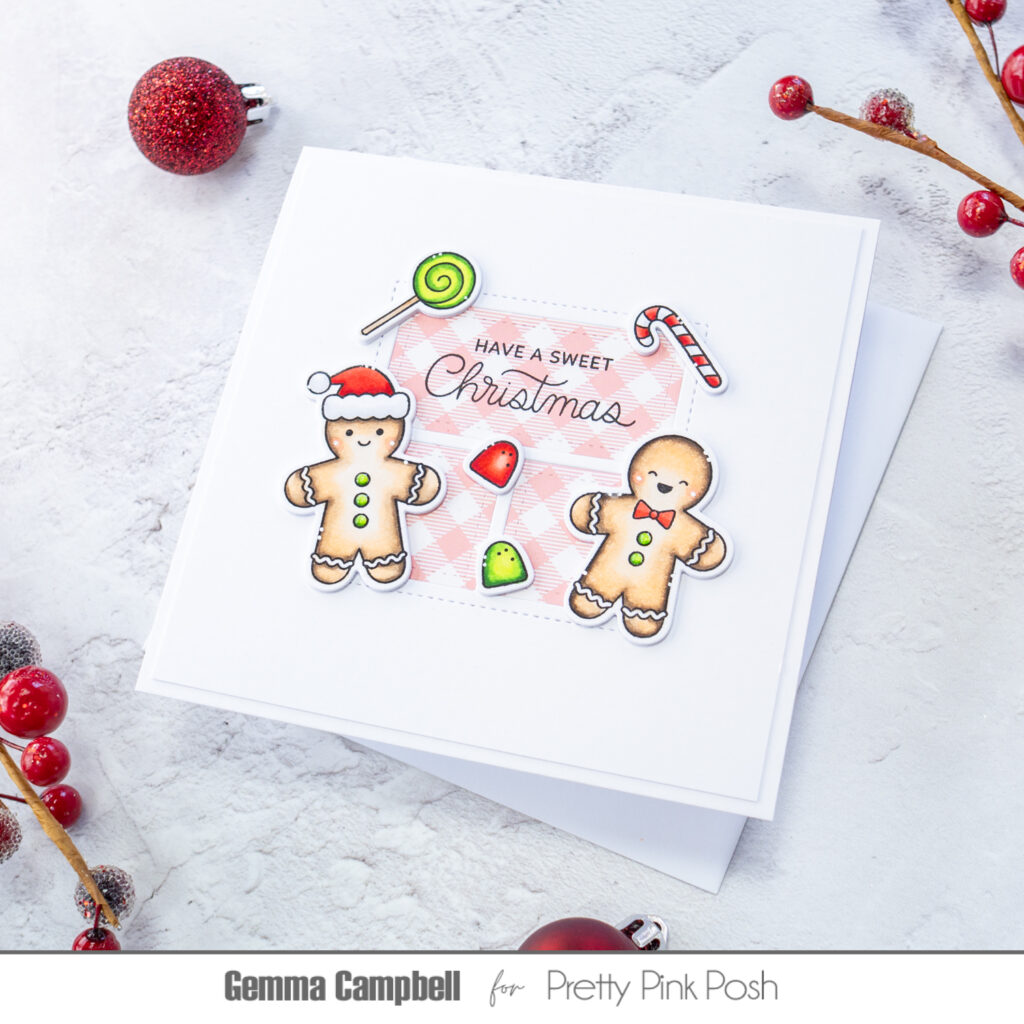
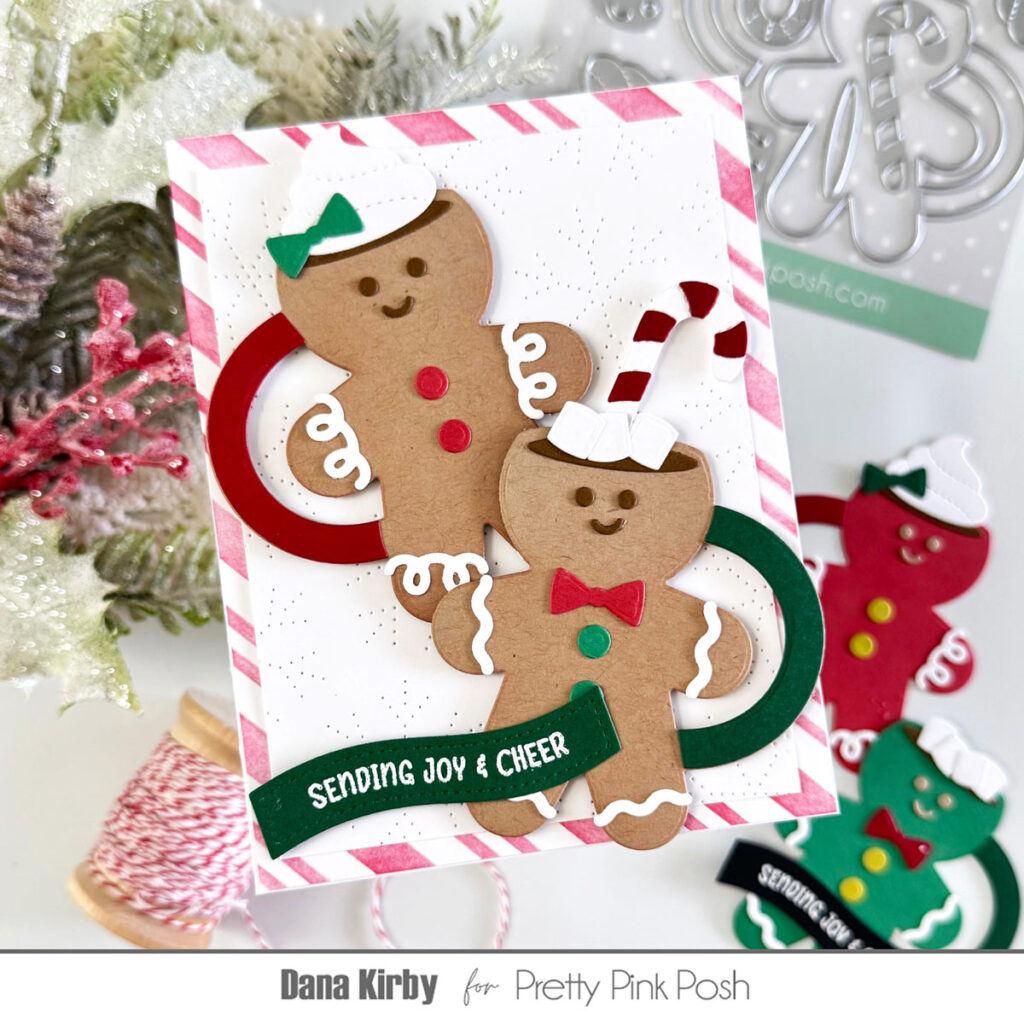
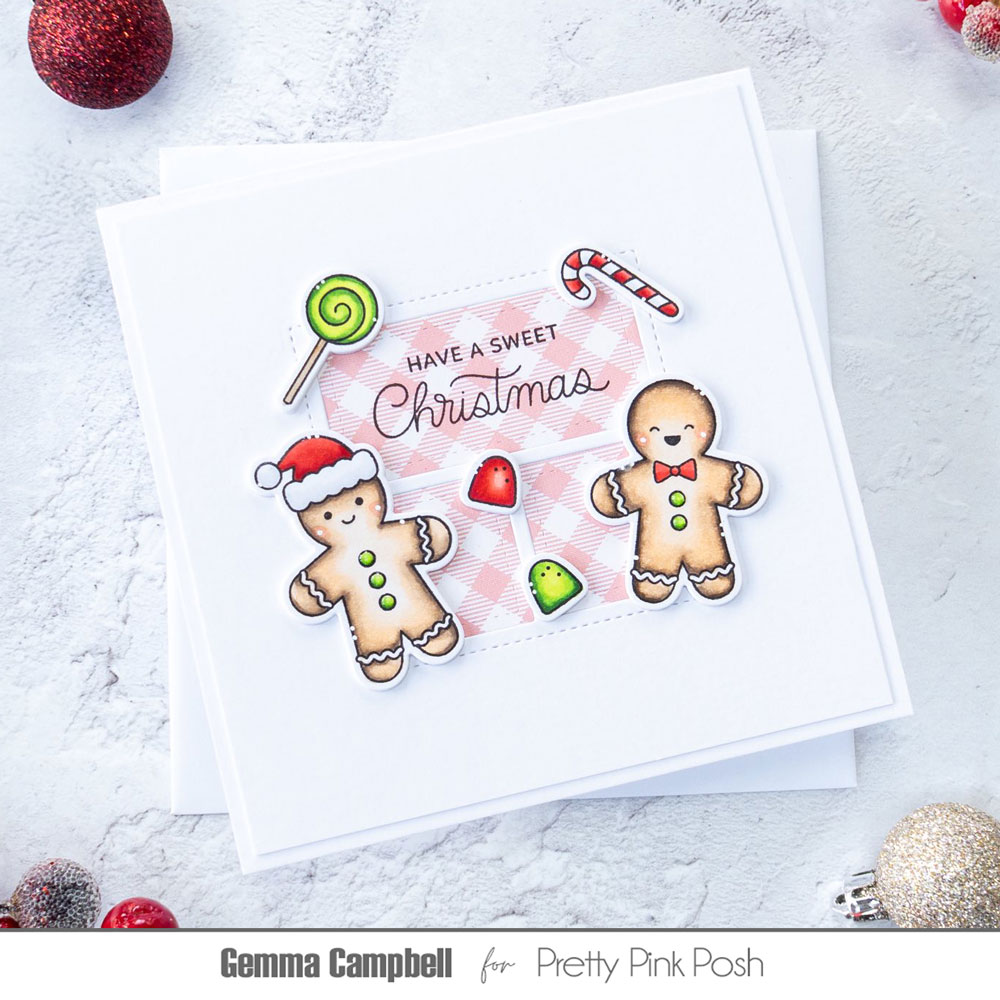
I began by stamping out images from the Gingerbread Friends stamp set and colouring them with copic markers. I then cut them out with the coordinating dies. I added a couple of plain die cut layers behind each image for dimension.
Copic marker colours
Gingerbread: E50-51 E43-44 R20 R30
Reds: R22-27
Greens: YG01 YG05 G07
Greys: N0-1
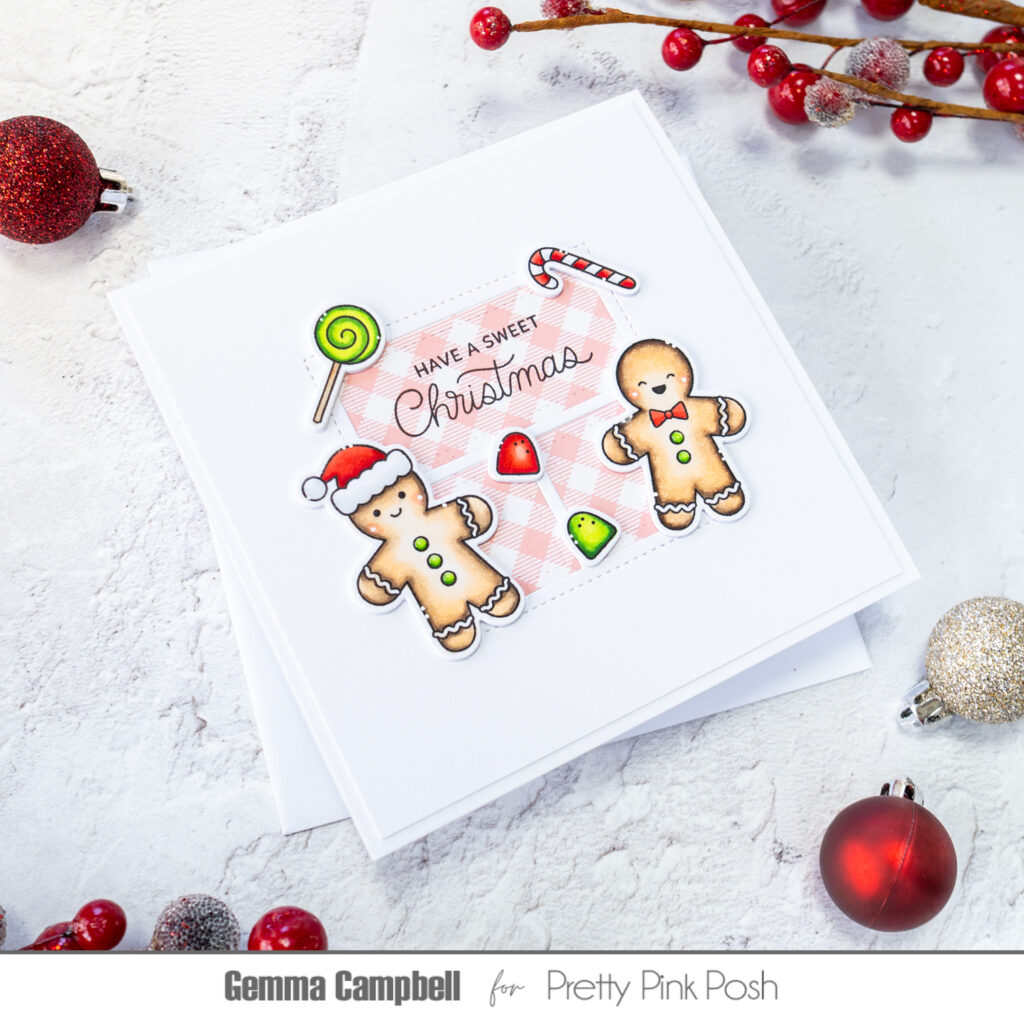
Next, I used the older Mini Storybook 1 die to cut some spaces from a square card panel. This is a great die to create a background focal space for your images. I used the die again to cut some patterned paper inserts. On the larger panel. I stamped a sentiment from the Gingerbread Friends stamp set.
I adhered the white card panel onto a 5.25” square card base, then added the patterned paper inserts. Finally, I added the Gingerbread Friendsimages to finish.
Thank you for stopping by. I hope this card inspired you and if you haven’t already, be sure to check out the brand new holiday release!
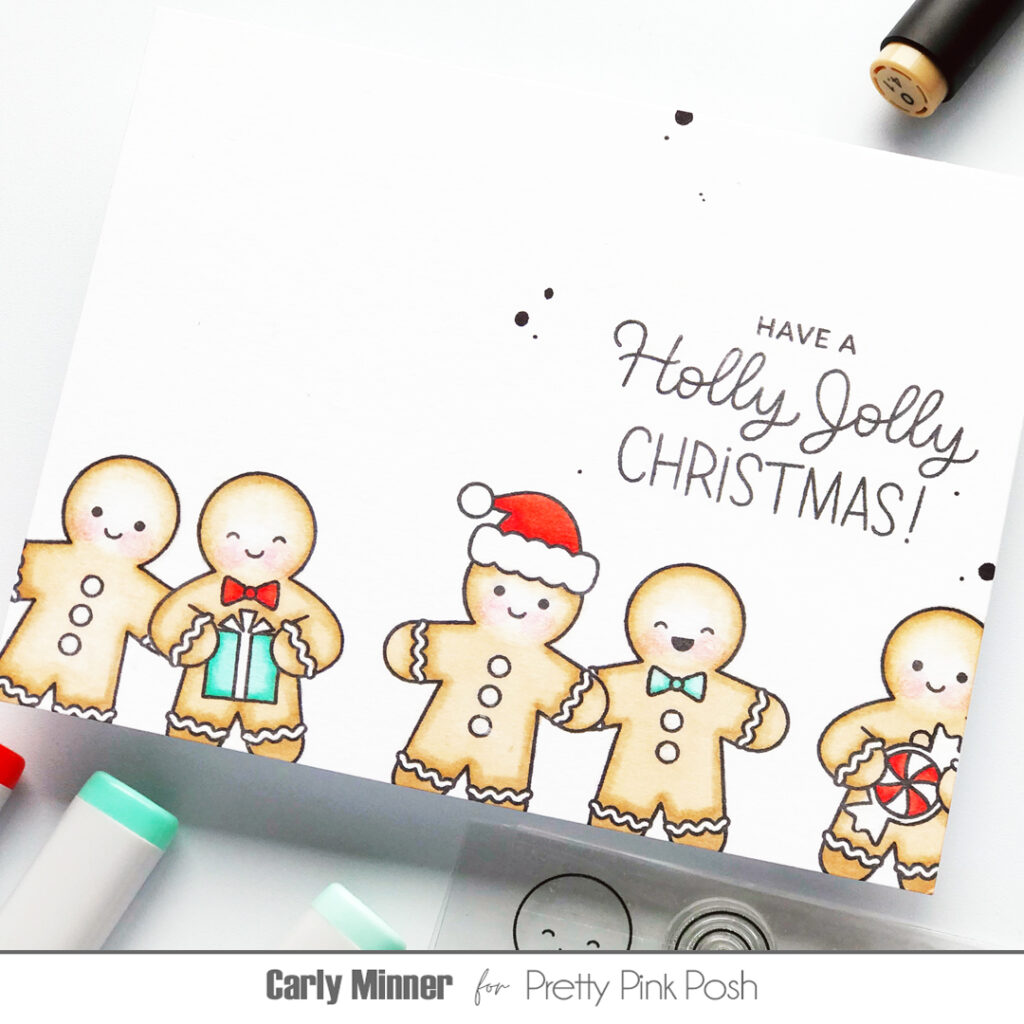
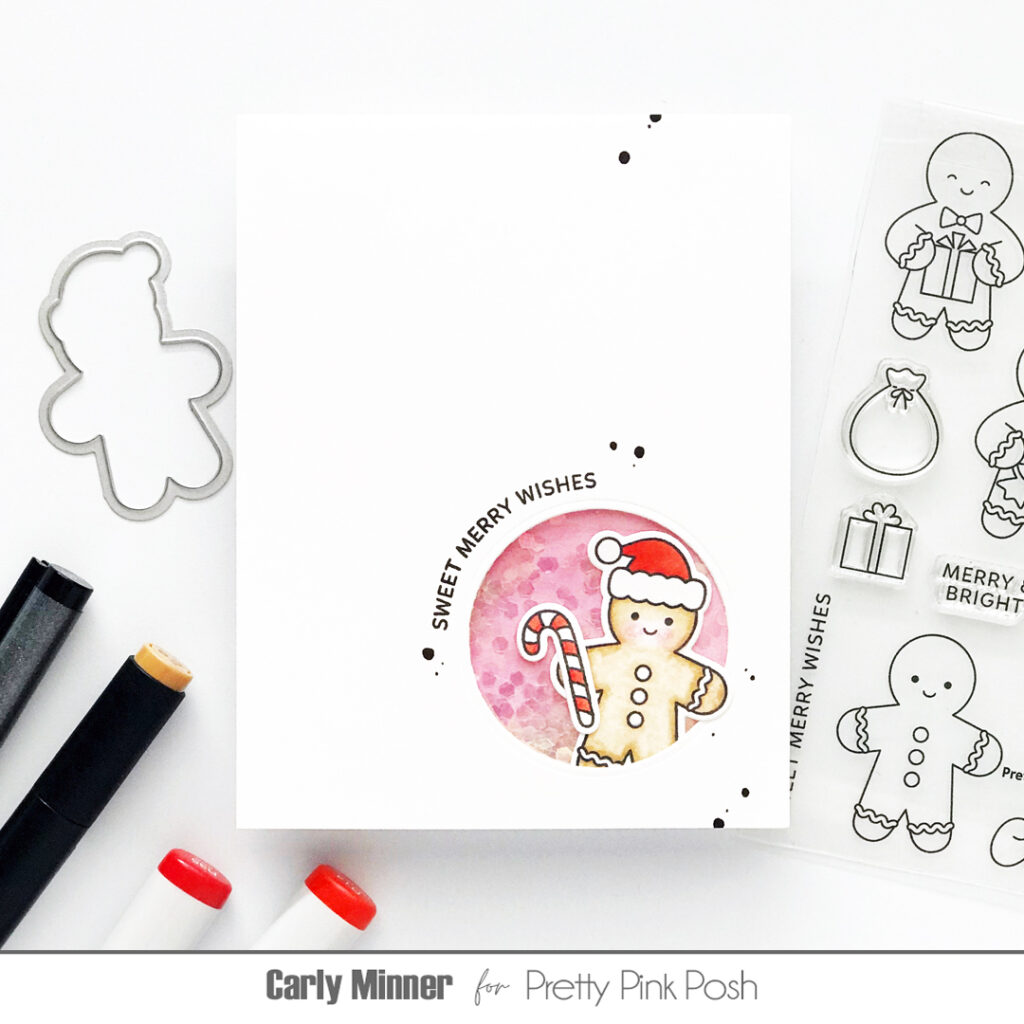
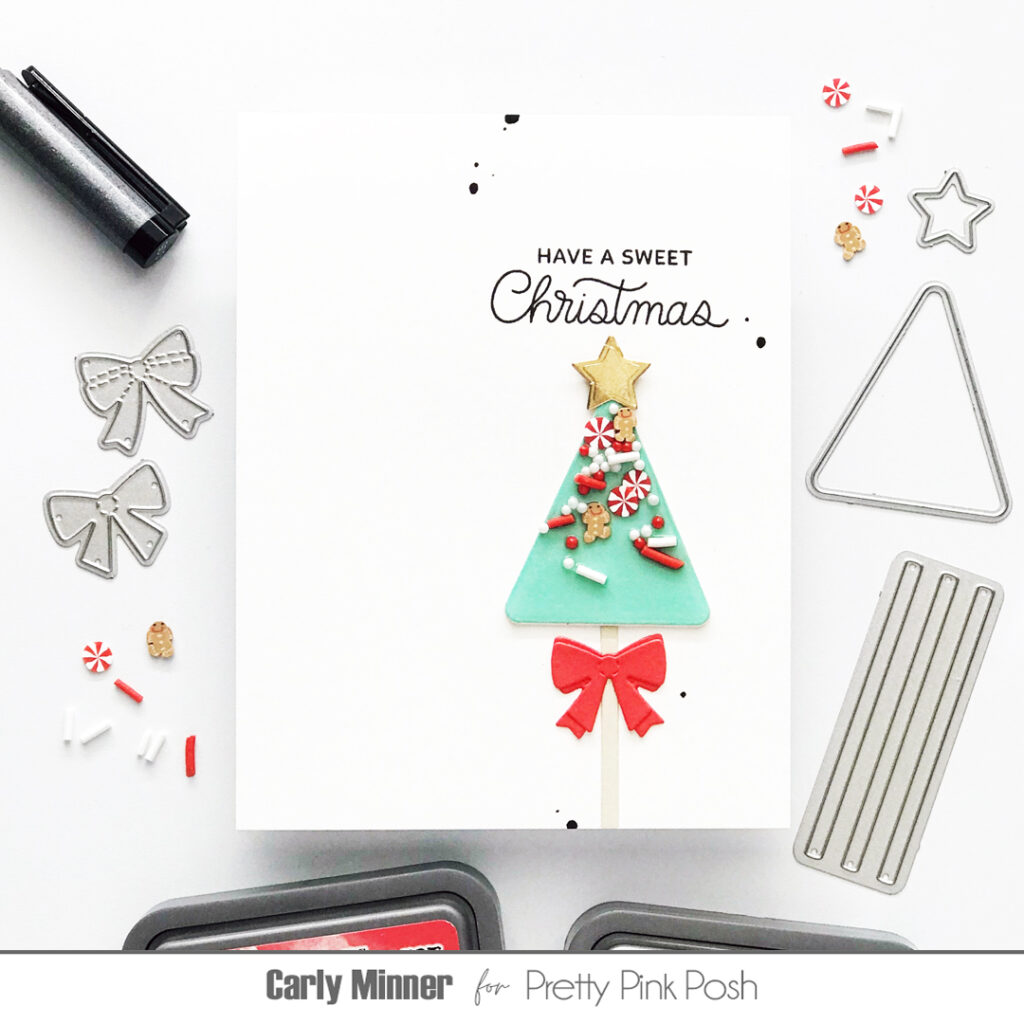
Hi friends, it’s Carly! I’m excited to share a project using the brand new holiday release.
This project is part of our September Video Hop! Check the description in the video for links to the next stop so you can keep hopping along for tons of holiday inspiration.
Do you have a favorite stamping technique? Simple masking is one of my favorites and it is so easy! It’s one of the first stamping techniques I learned and I still love it for creating clean & simple one layer cards!
If you haven’t tried masking yet, basically it is a technique that allows you to layer images by stamping one and then covering it with a temporary mask before you stamp the next image.
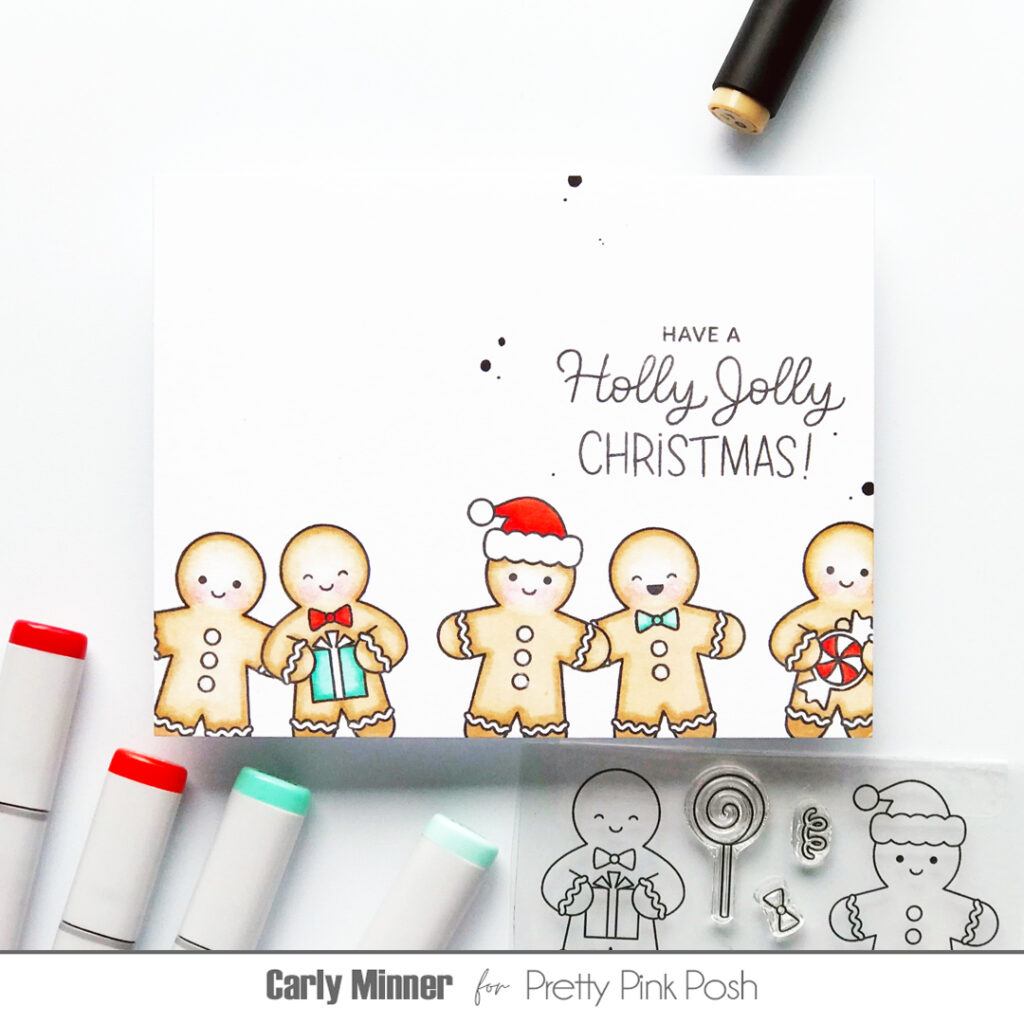
For this sweet Gingerbread Friendscard I did a little simple masking so that the gingeys could be standing together.
Here are my top masking tips…
make a plan before stamping…which images should look like they are “in front” because they will need to be stamped first. A sketch can help in the planning or even stamping it all first without masking.
start with post-its…there are lots of options for low-tack, stamp-able masking paper but try it with a Post-It first. Then if you love the technique of masking you can invest in more supplies.
stamp masks in permanent ink…using a waterproof/permanent ink for stamping the masks will keep ink from transferring from the masks to your project while you are using them.
to make the mask…just stamp on the Post-It, fussy cut the image out aiming for the middle of the stamped line and then it’s a little temporary masking sticker! And make masks last longer by putting a piece of clear packing tape on top before cutting out.
have a black pen handy…a black pen can help “fix” any of the stamped lines that might have been missed because of a mask. I’m not great with fussy cutting so often my masks aren’t perfect but I can fix it with a pen. I like to use Copic Multiliners when I know I’m going to color with alcohol markers
have a white gel pen handy…it makes a great “eraser” for any little bits you didn’t mean to stamp or any coloring that went outside of the lines.
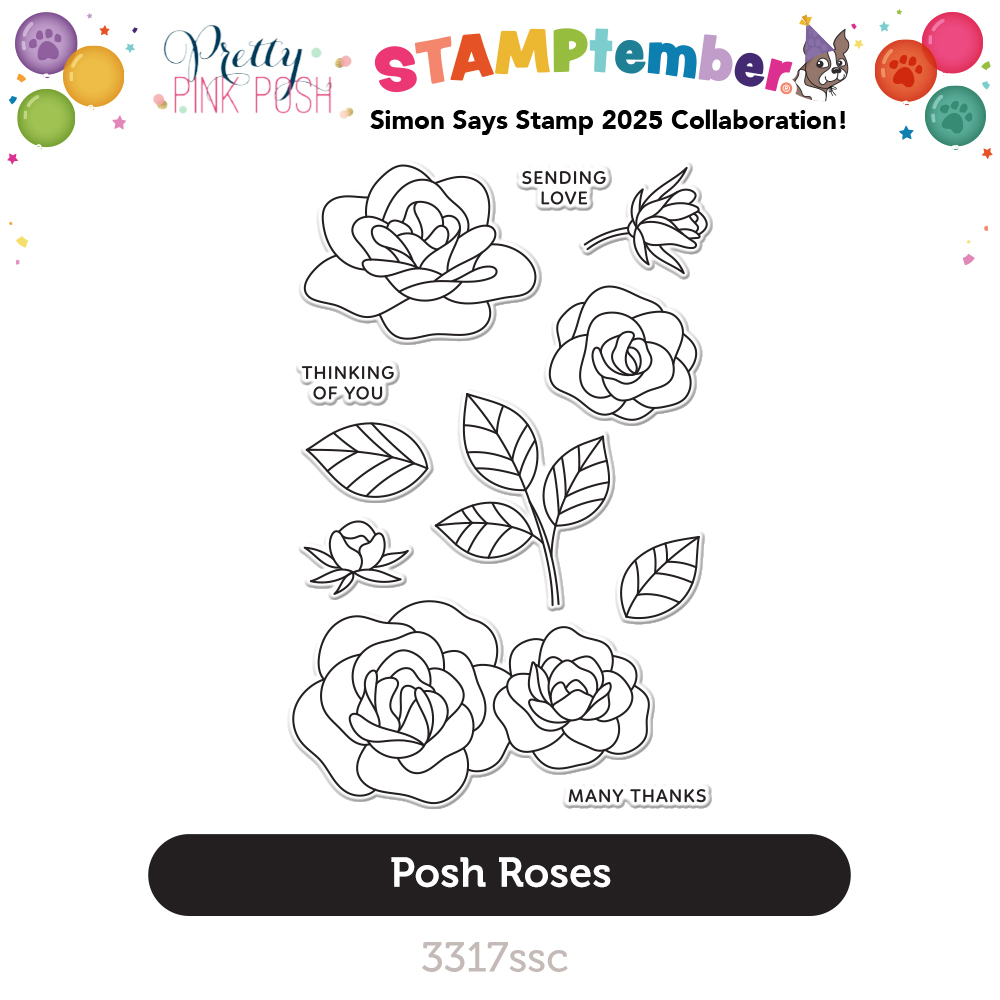
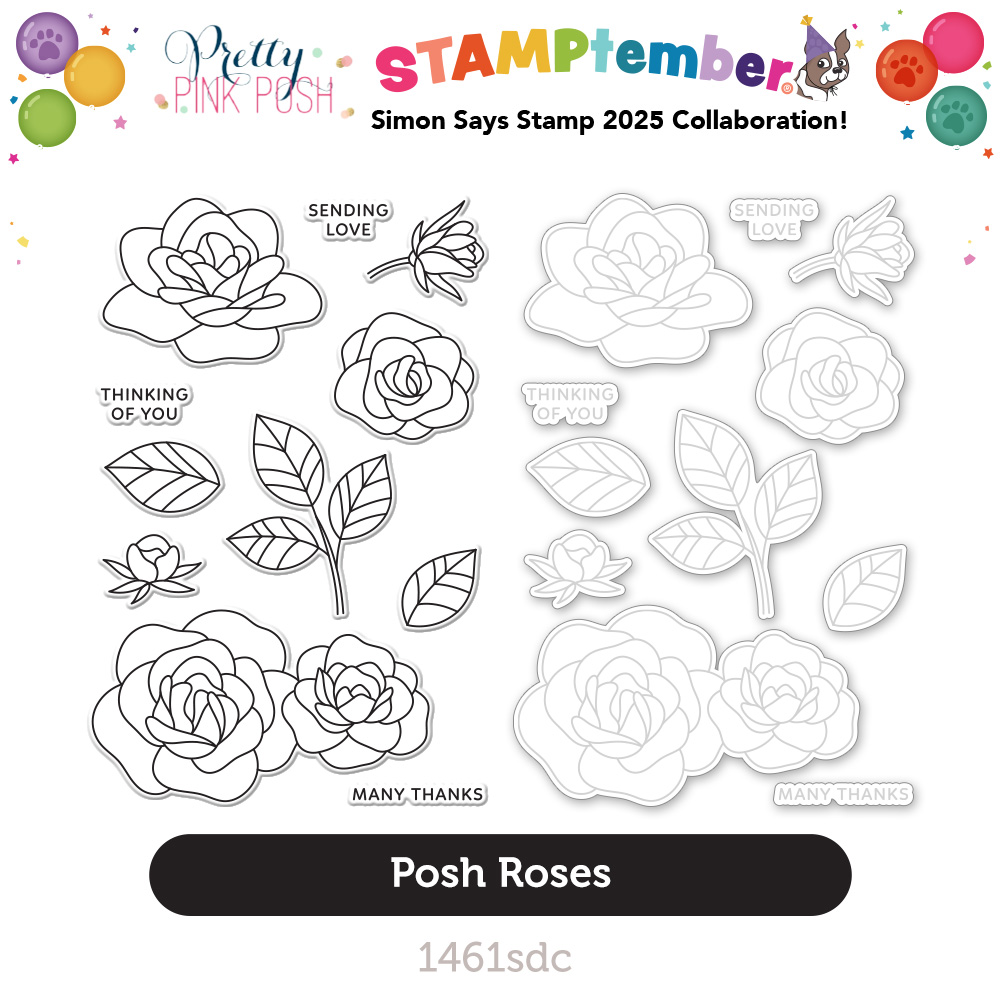
Don’t forget: once this set sells out, it’s gone for good! Get this set, which won’t be released again, while you can!
Affiliate links may be used at no additional cost to you.
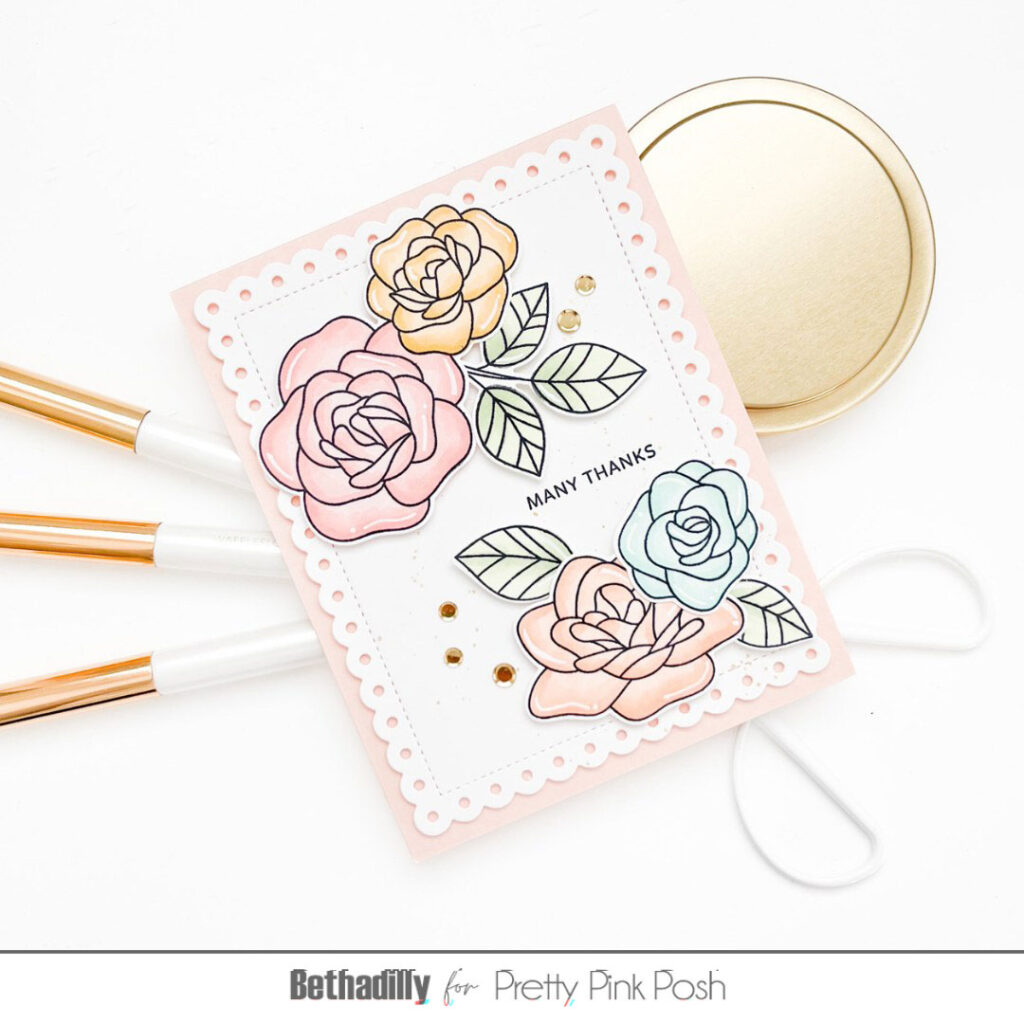
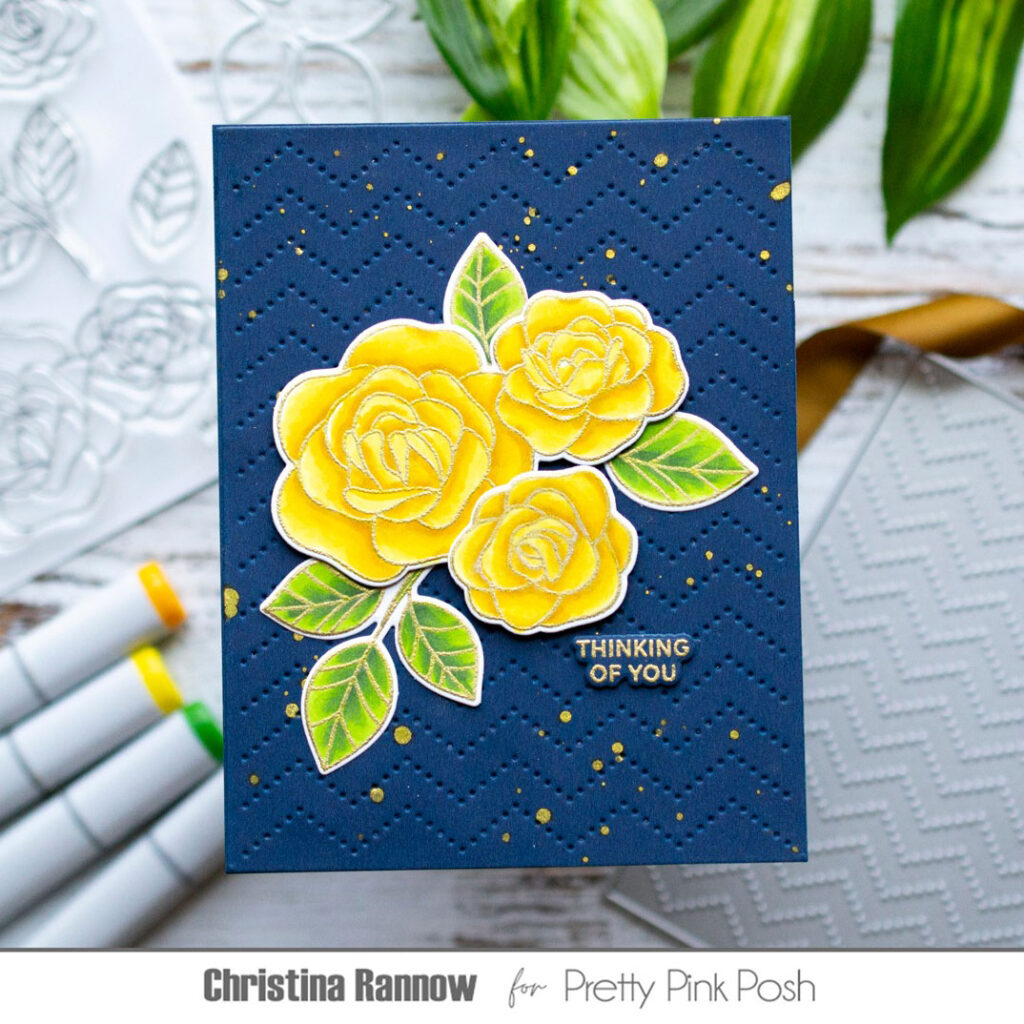
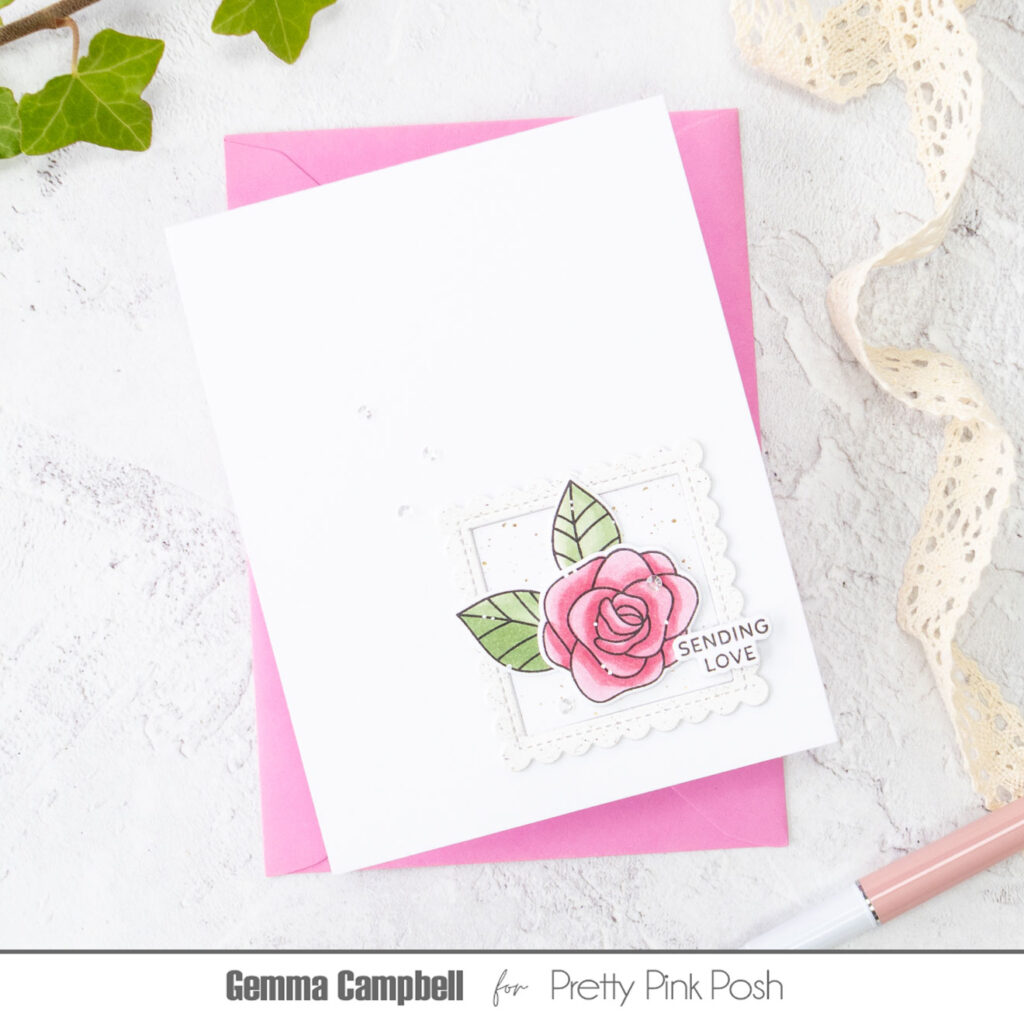
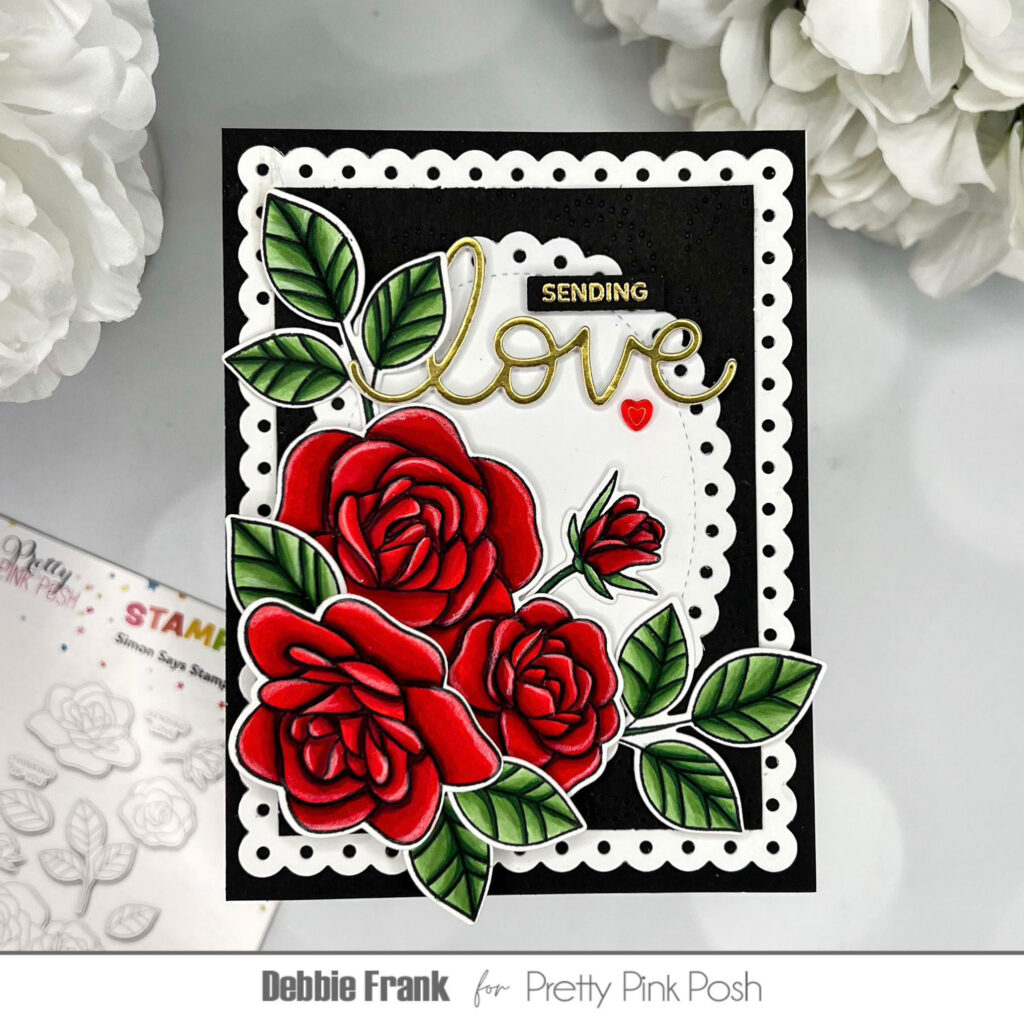
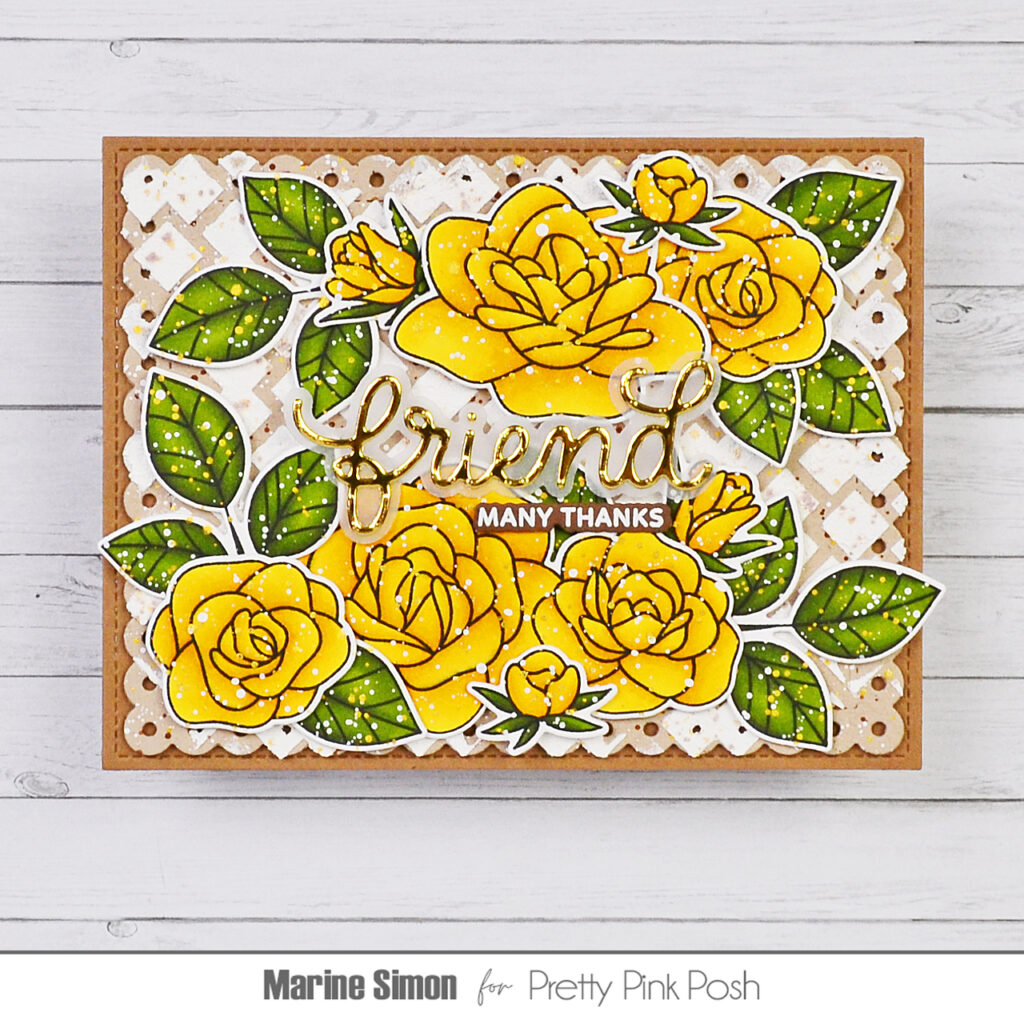
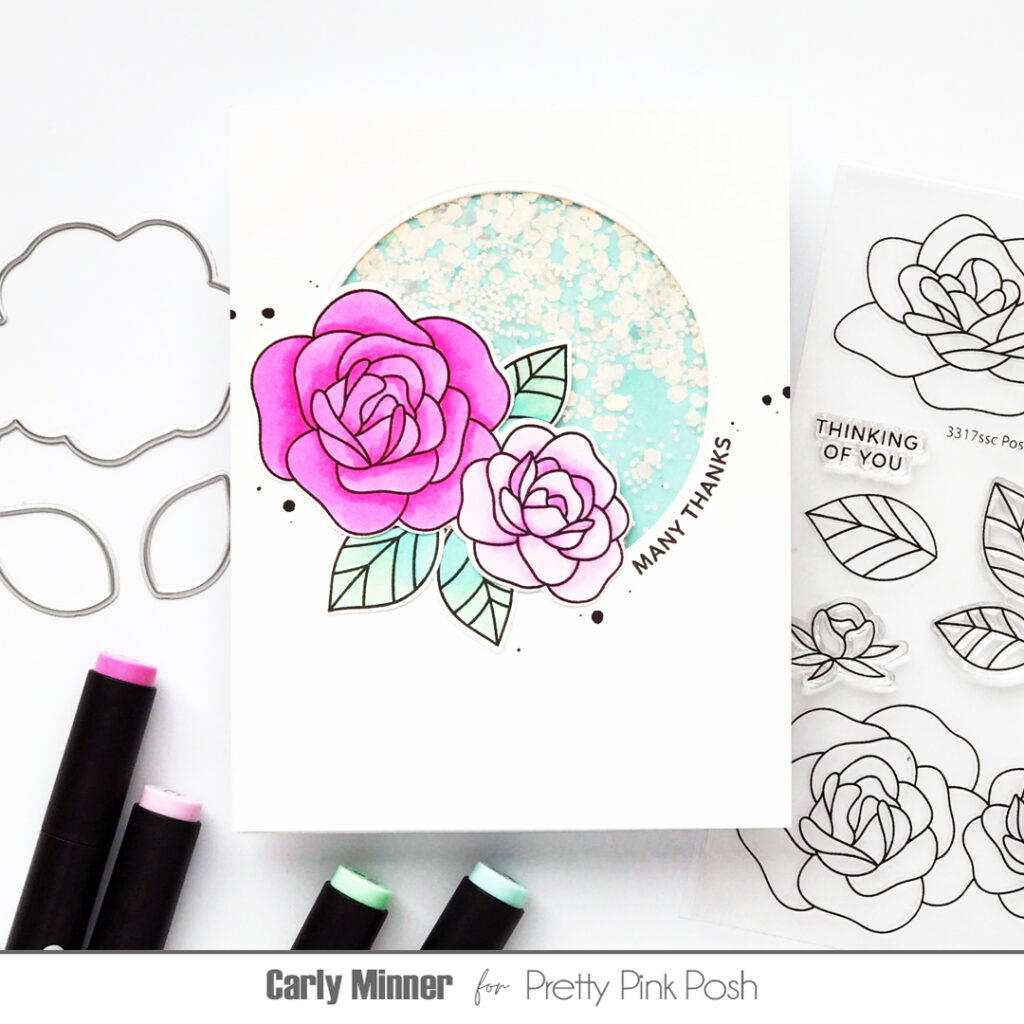
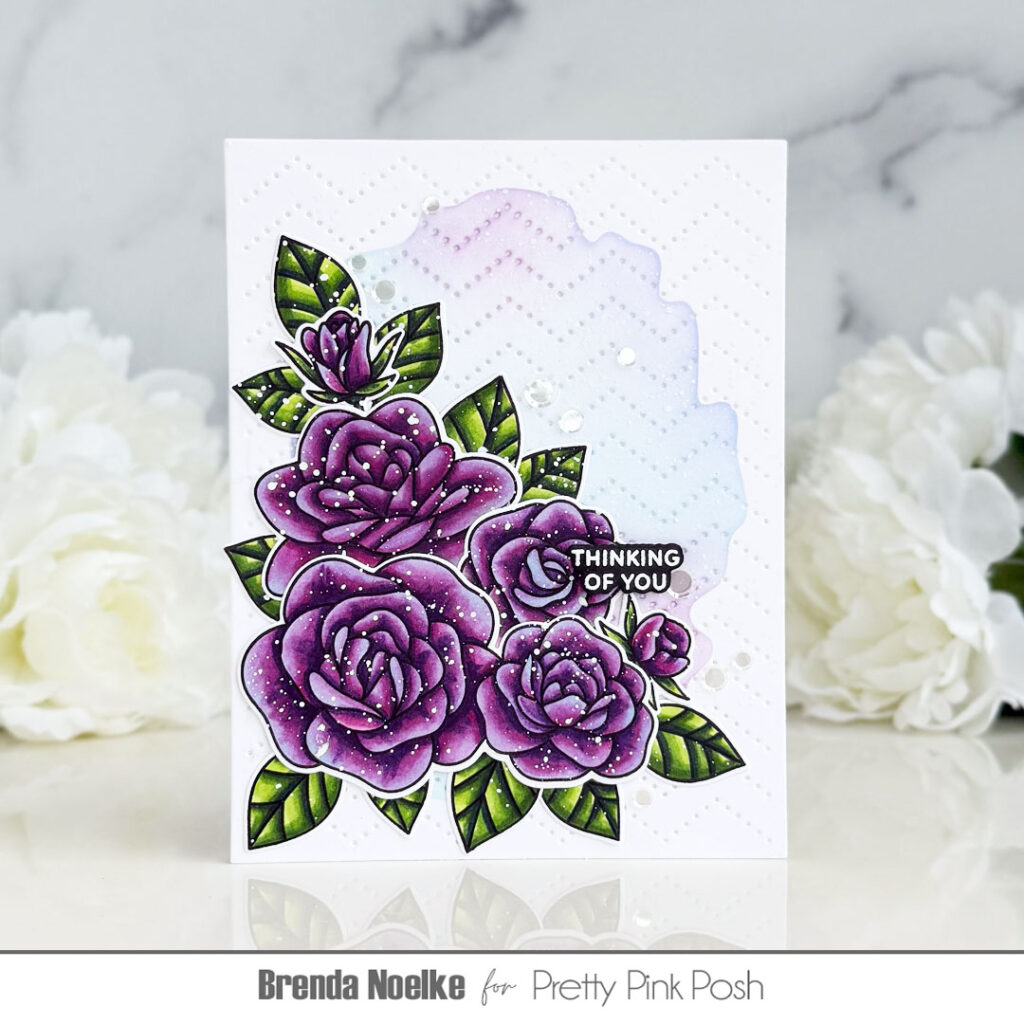
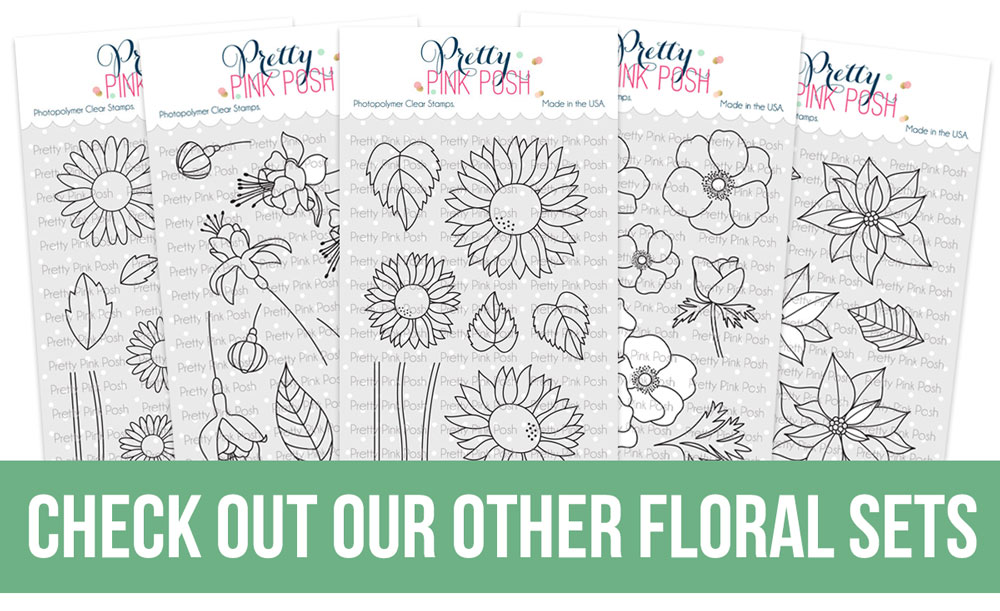
If you have our other signature floral stamps, this is the perfect addition to your collection. With the only USA die manufacturer closing, we had to switch all of our dies to another manufacturer while means a lot of our older die sets won’t be restocked. If you have had your eye on some of these floral sets, get yours soon!
I hope that you all love this stamp set and are inspired by the samples the design team created. A giant thank you to Simon Says Stamp for letting us be part of STAMPtember®.
Welcome to the last day of sneak peeks of our September 18th release. Today we’ll be taking a look at the new stamps sets, along with the Gingerbread Mugs die set.
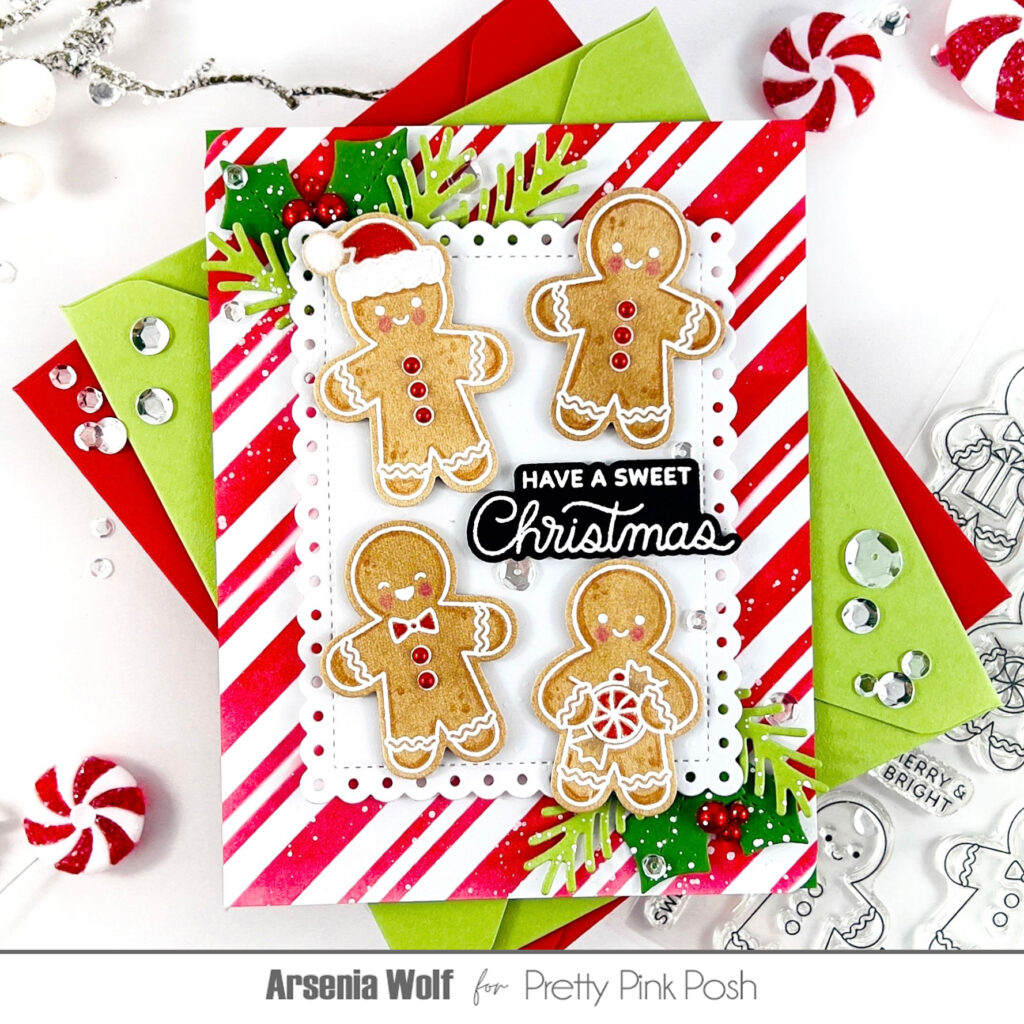
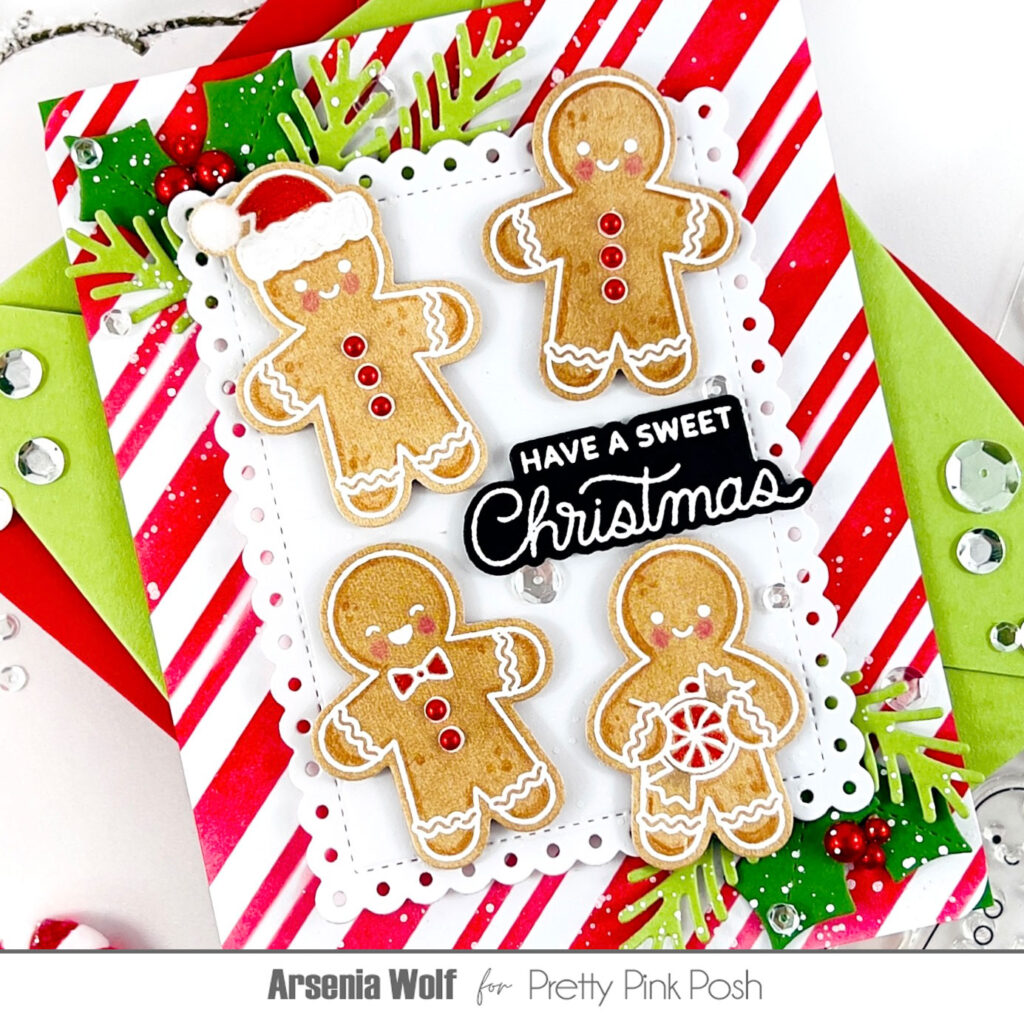
Hello crafty friends! Arsenia here with Day 4 of our September Holiday Sneak Peeks!
Today is extra sweet because we’re diving into the most adorable stamp sets (with coordinating dies, of course!) and the must-have Gingerbread Mugs Die Set! Trust me, these goodies are packed with festive charm and whimsy—perfect for holiday crafting magic.
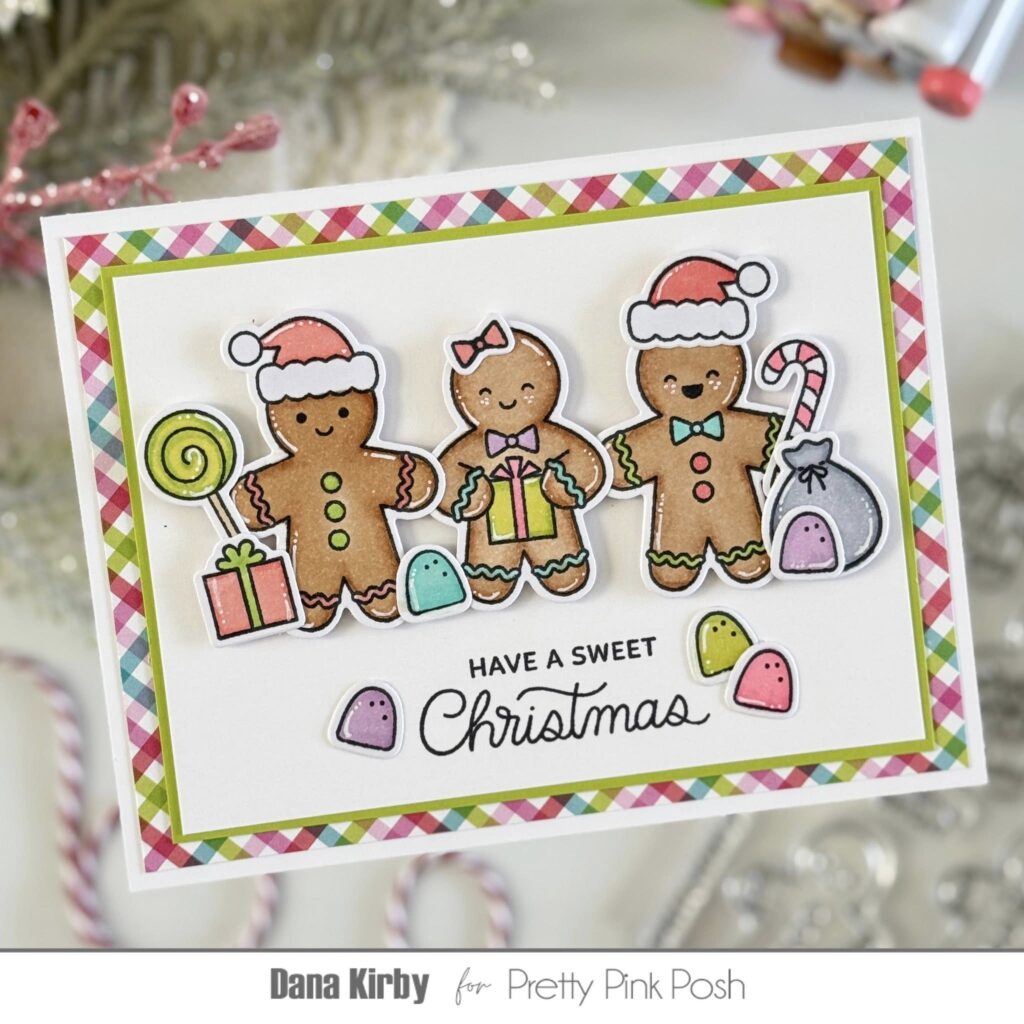
For my card today, I reached for the brand-new Gingerbread Friends stamp set and oh my gumdrops—they are the cutest little cookie crew you’ve ever seen! I’m saving the Gingerbread Mugs Die Set sneak peek for my fellow design team elves, so make sure to keep scrolling and see all the amazing creations from the team!
I kept the background clean and cheerful by stenciling the new Candy Cane Stripes stencil in a vibrant cherry red—classic holiday vibes, right? Then came the stars of the show: the adorable gingerbread peeps!
To get that classic white icing detail, I heat-embossed white powder onto some patterned paper from my stash—voilà, instant sweetness. After die-cutting my gingerbread cuties, I brought them to life with a bit of coloring magic using Castle Art colored pencils (Cinnamon, Rose Pink, Scarlet Red, Davy’s Grey, and Titanium White).
And because no gingerbread is complete without a little flair, I added:
A white pompom to the gingerbread friend wearing a Santa hat
A cozy neutral base using the Eyelet Rectangle Dies, with festive corners from the new Christmas Bell Shaker Die Set
For the finishing touch, I heat-embossed a sweet sentiment from the new Gingerbread Friends stamp set in white on black cardstock. A touch of white splatter, and ta-da—my card is complete and full of holiday cheer!
Keep scrolling to find even more sneak peek inspiration from the team!
I’m absolutely smitten with how it turned out—cute, cozy, and perfect for the season. I hope it brings a little extra holiday spirit your way!
Welcome to the Day 3 of sneak peeks of our September 18th release. Today we’ll be taking a look at the Christmas Bucket Additions, Christmas Cake Pops and Argyle Pierced Plate die sets.
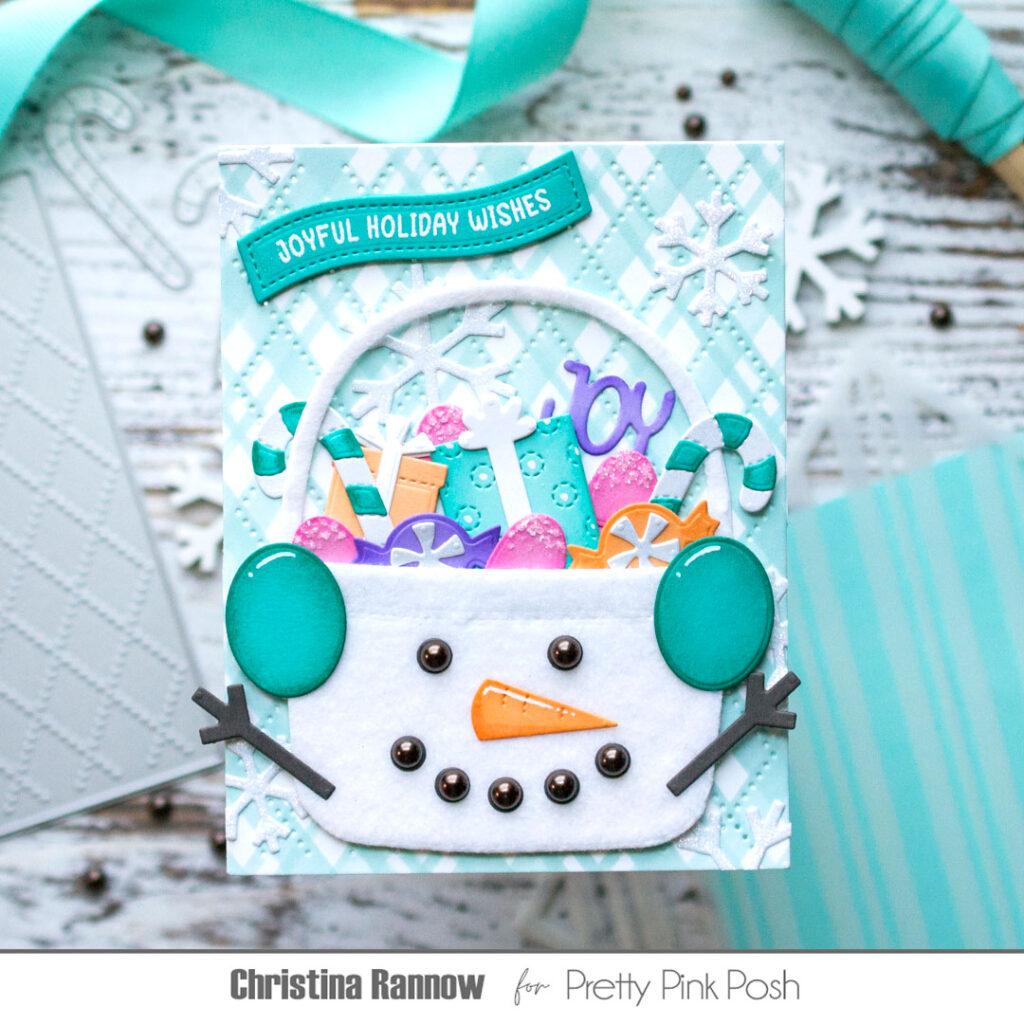
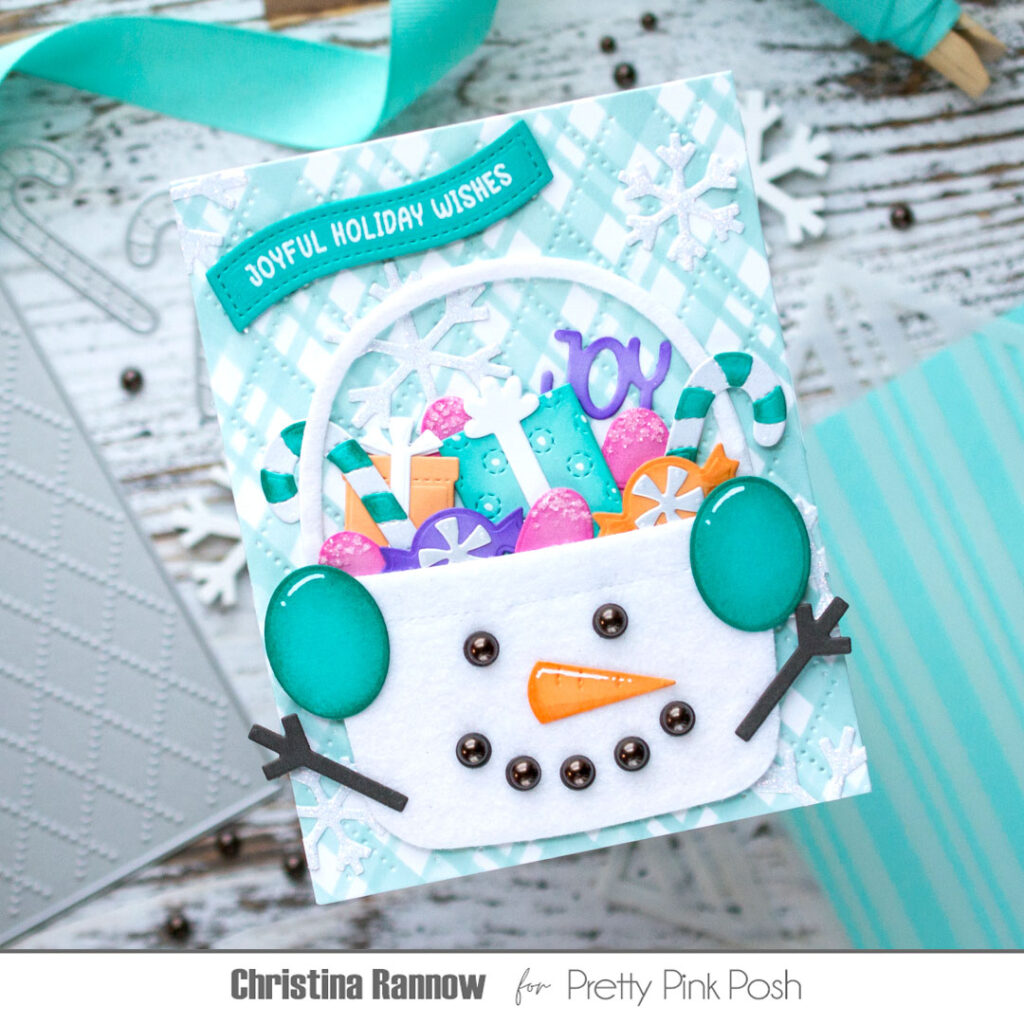
Hello, friends! Christina here to share a couple of sneak peek projects showcasing some of the new frosty and festive die sets from the upcoming holiday release! My cards today feature the Christmas Bucket Addition dies that coordinate with the original Candy Bucketdies, the adorable Christmas Cake Pops, and a new must-have basic for your stash, the Argyle Pierced Plate. Let’s jump into these snowy holiday cards!
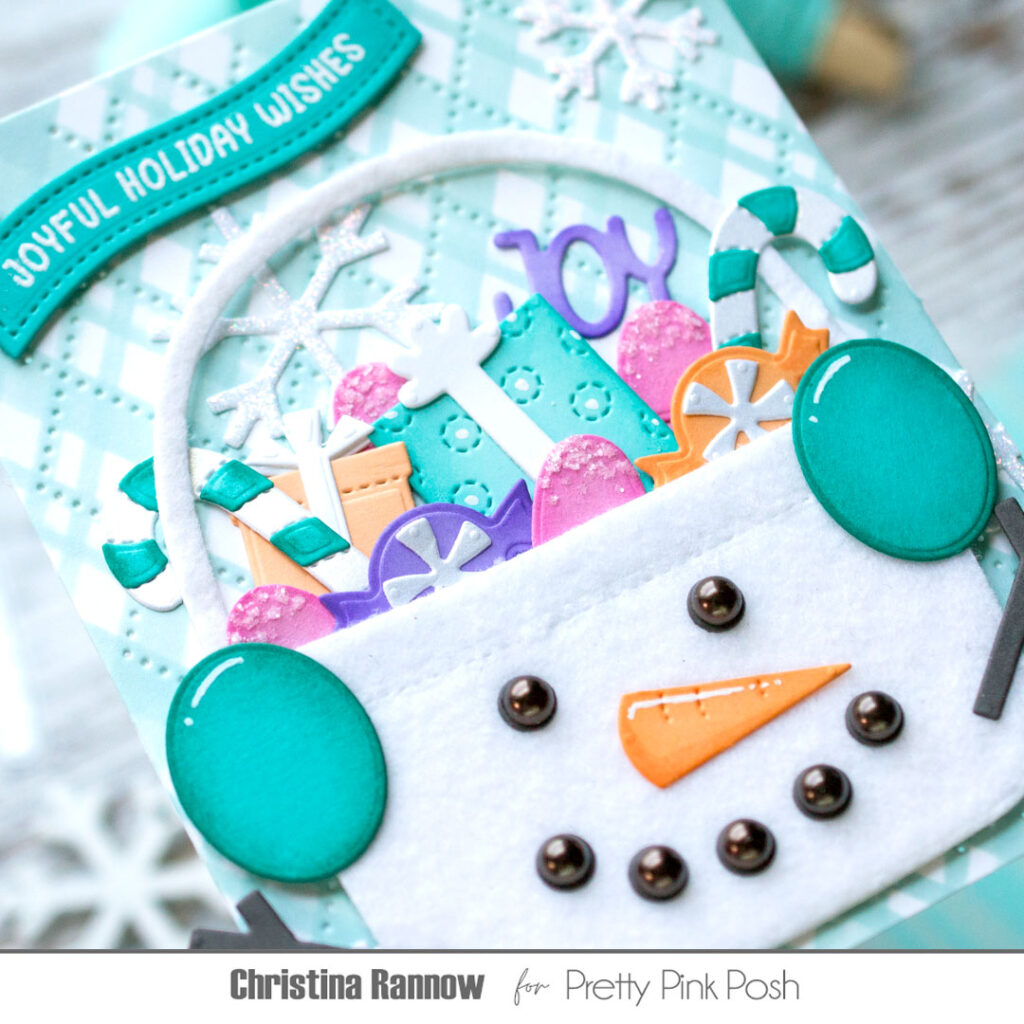
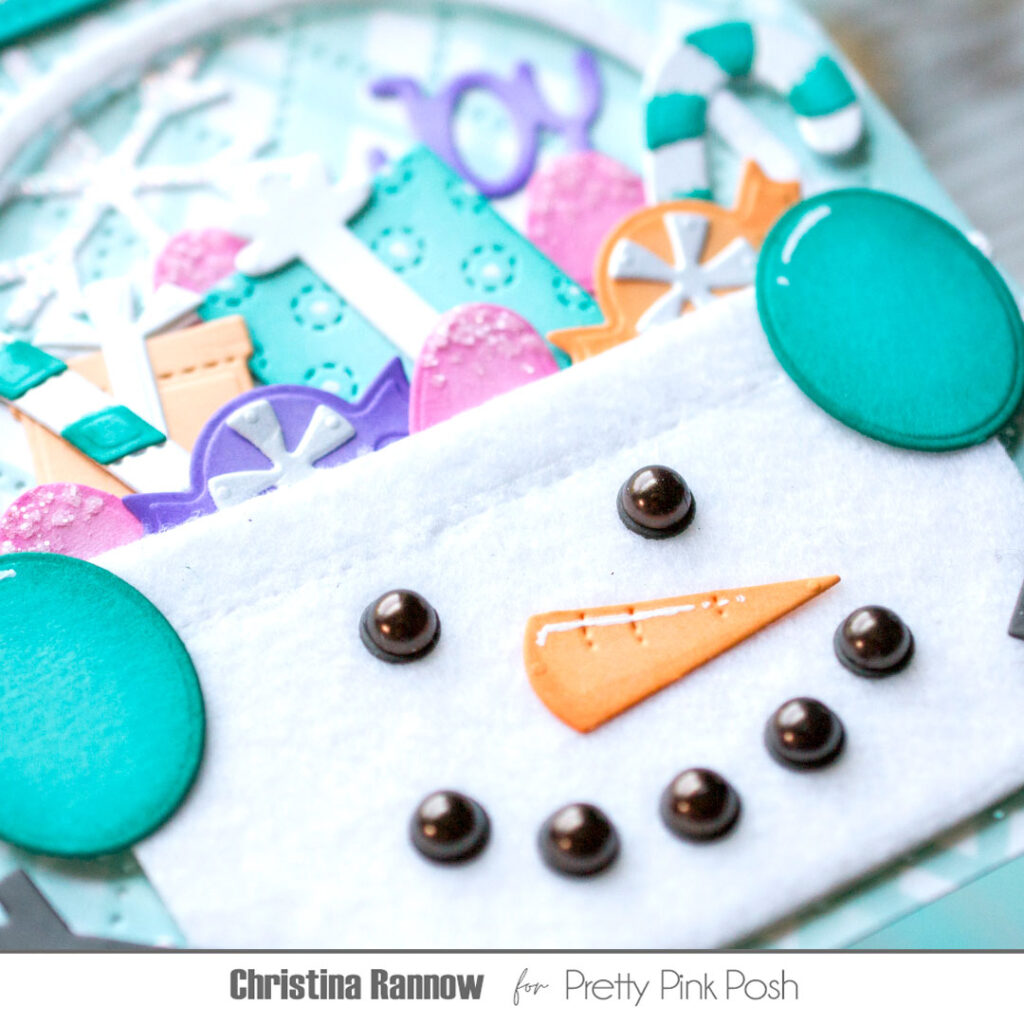
For my first card, I created a wintery snowman Candy Bucket full of sweet holiday treats using the Christmas Bucket Additionsset. I die-cut the bucket from white felt for a snowy look and created earmuffs for our cool friend using the oval die from the Christmas Bucket Additions set that lets you turn your bucket into a sweet reindeer if you want. For a little dimension to the snowman’s face, I usedEspresso Pearlsfor his eyes and mouth.
Using pink, lavender, apricot, and teal cardstock, I die-cut candy canes, gumdrops, and gifts to fill the snowman bucket. I added subtle shading to the diecuts with coordinating inks and gave the gumdrops a sugary coating using just a touch of glue and a sprinkle of sparkling glitter.
To create the plaid background for my snowman bucket, I started by die-cutting the Argyle Pierced Plate from white cardstock and then stenciling the new Candy Cane Stripes across the panel, going one direction, and then rotating the stencil to create stripes going the other direction. So easy! Attach this to a card base, and we’re almost done!
I finished up my card design with snowflakes die-cut from glitter cardstock for a little more sparkle and a heat-embossed sentiment from the new Christmas Banner Greetings Stamp setthat works with the awesome new Banner Greetings 1 die set.
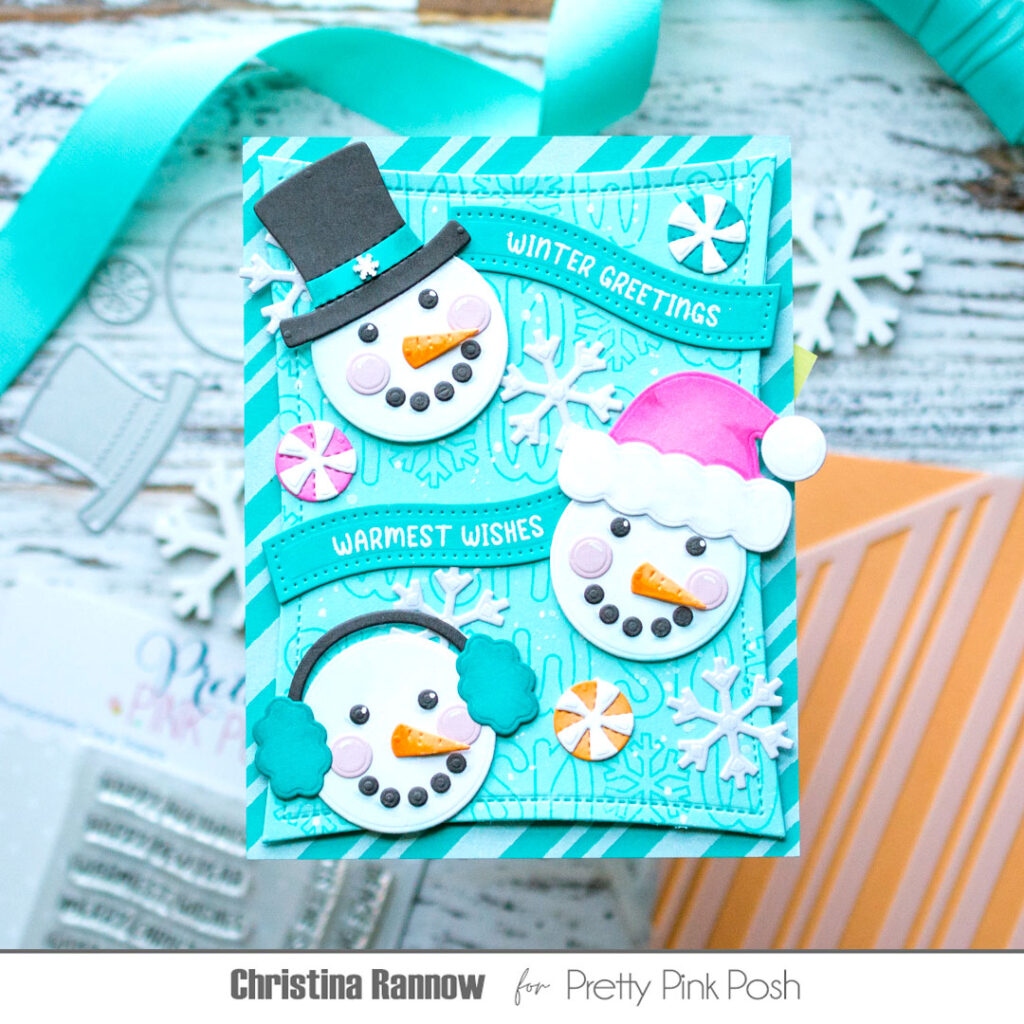
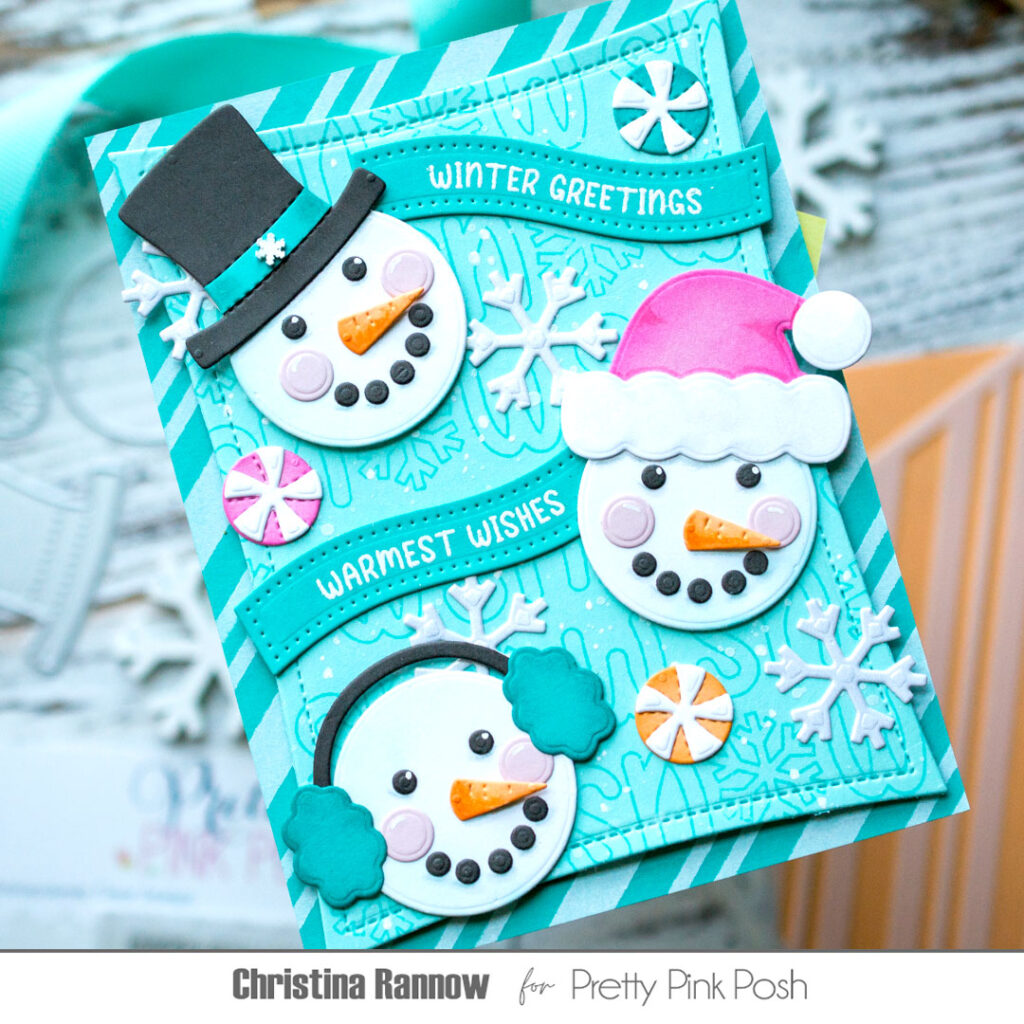
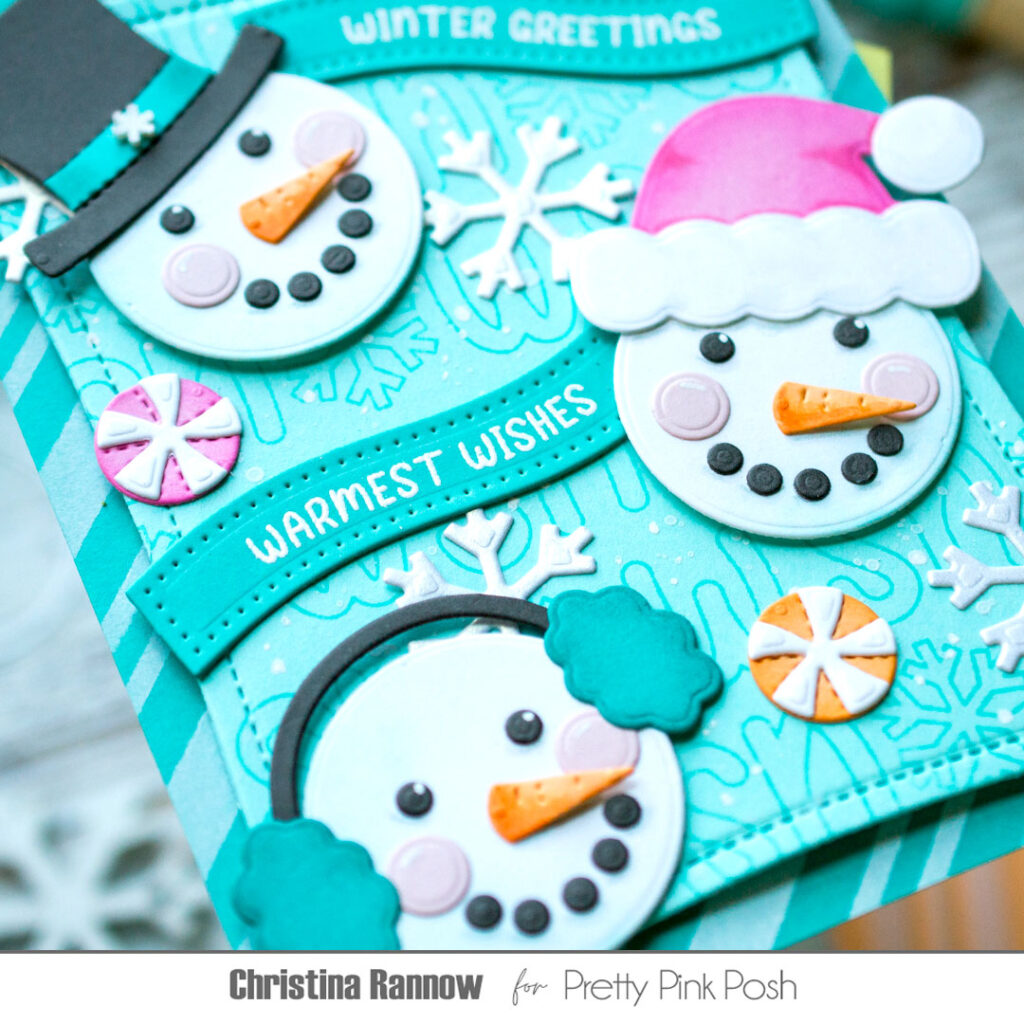
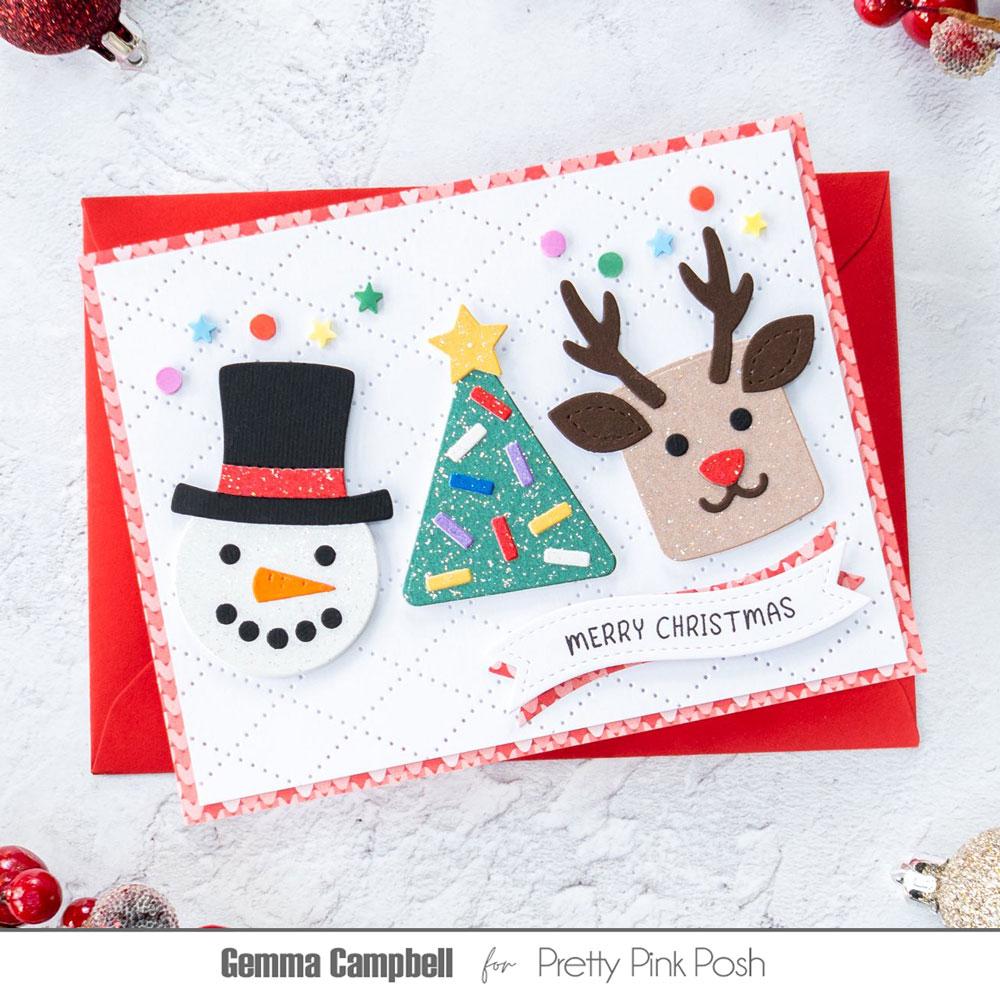
My second card features the adorable new Christmas Cake Pops die set. You can create four different holiday-themed cake pops with this set, but I chose to use just the snowman for my card design and added accessories not only from the Christmas Cake Pops set but also from the new Christmas Holder Additions die set (be sure to check out yesterday’s sneak peeks for more Christmas Holder inspiration!).
To create the background for these frosty friends, I started with a lighter teal cardstock panel and stamped one of the new Holiday Word Scenes in a darker teal ink repeatedly across the panel. Then I die-cut it with a Wonky Stitched Rectangleand attached it with foam tape to a darker teal cardstock panel that I stenciled using the new Candy Cane Stripe and white pigment ink.
I finished things up with a couple of sentiments from the new Christmas Banner Greetings Stamp set, heat-embossing them with white embossing powder and die-cutting them with those awesome new Banner Greetings1 dies. A few frosty snowflakes and some sweet peppermint candies were the finishing touches to this winter-themed sneak peek!
Here’s some more inspiration from the team using these fun die sets!
Thank you so much for checking out day 3 of sneak peeks for the upcoming holiday release available on September 18th. Be sure to stop back tomorrow for one more day of sneak peek inspiration!