Author: PPP Designer

|

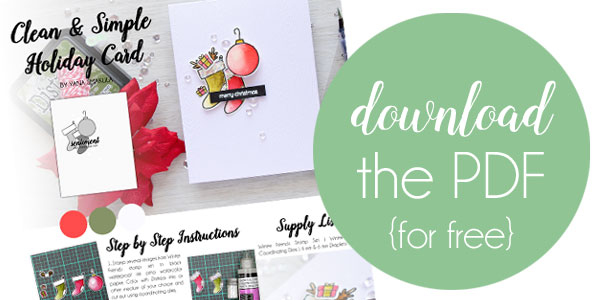
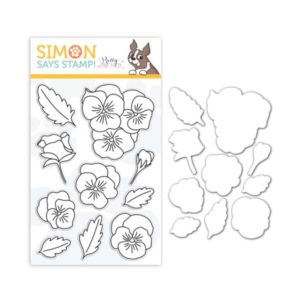
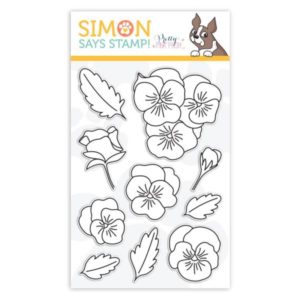
Pretty Pink Posh STAMPtember 2018 Exclusive Set

Hi, Friends! This is Caly and I’m here today to share a project using the new, limited edition stamp set by Pretty Pink Posh for Stamptember!  We are so excited about this set and hope that it will inspire you to create wonderful projects! Paulina asked me to make something bold for today and here’s my take on that!

Don’t forget: once this set sells out, it’s gone for good! Get this floral set, which won’t be released again, while you can!

I stamped and colored these blue pansies using Copic markers.  The colors used are Y13, Y17 (flower centers), B21, B24, B26, B29 (pansies), and YG07, YG09 (leaves).  Once I was done coloring, I fussy-cut the images and added white gel highlights using my Sakura Gelly Roll pen.  I also added Nuvo glitter drops in Honey Gold in the center of the flowers for added interest.

For the pack panel, I ink blended Worn Lipstick Distress Oxide ink, concentrating from the center and blended out for a softer edge.  To give it more interest, I added some water splatters to remove color and give the panel some texture. I stamped and heat-embossed the sentiment in white, over black cardstock, using a sentiment from the Birdie Friends stamp set.  To complete the look, I added Pearl White Jewels to give the card a more elegant and refined look.

The other designers have been creating with this stamp set and will be sharing them in blog posts and/ or on social media.

Caly Person
Alix Davis
Melody Rupple
Marge Crafts
Suzy Plantamura
 

These pansies were so fun for me to color because it really challenged me to shade in different areas to make it look more realistic.  In another life, I would love to be a florist – I have a weakness for flowers and am so excited that this year’s Stamptember set is a floral set!  Thanks for joining me today and I hope you enjoyed this project!

|

Valentine Theme Week- Day 1

Hello everyone, Gemma here. It’s great to be on the Pretty Pink Posh blog today to share a card with you all.

I’ve always loved the look of shape dies with words within, so was thrilled to see the new Love Shaker die is the latest release. It made me think of the Love Heart sweets that we have in the UK (my home country), so I thought it would be fun to create a card version. It was a quick and simple card to make.

First, I ran a standard size card base through my die cutting machine with a circle die. By placing the circle die just off the top of the folded edge, it retains that edge and makes a circle card base. I then die cut a second circle, the same size, from a separate piece of white card and adhered it to the card base. This gives the card an uninterrupted circle shape at the front.

Next, I die cut two Love Shaker hearts from pink cardstock, and layered them together on the card base for some dimension. I couldn’t resist adding some iridescent heart confetti to finish this card. I think circle cards are such fun! They stand up very well and, if you make it from a standard size card base, it will fit in a standard envelope too.

Thanks for joining me. Have a fabulous day.

Gemma

| |

Spring Shaker Card + Cutting Stamps Apart

Hello everyone! Eloise here and today I have a video showcasing a couple of older products. I’m going to be using the Storybook 4 die to make a shaker card along with the Winter Wonderland stamp set, to alter a sentiment.

To begin my card today I used the Storybook 4 die and cut it out of some Neenah Solar White cardstock., making sure it was even on all sides, since I knew I would be using  the negative piece. Once I die cut it out, I used some thin 1/8” Scor Tape and added adhesive on all of the lines connecting the frames together and then added a piece of acetate on top. Once I added the acetate I cut thin strips of 3M Foam Adhesive and added that behind the lines too, so it would create little cavities. I then filled each of the sections with a different colour of sequin. I used 4mm Lemon Meringue, 4mm Tangerine, 4mm Lime Sorbet and 4mm Aquamarine and then 6mm Pink Peonies. Once I filled all the sections I used another piece of acetate to cover the back. I really love how all the colours mix well together, but yet they’re separated. It’s super fun.

Once the shaker was complete I chose a coloured cardstock for my card base and adhered it together. At this point I didn’t want the purple to show through so I added a white piece of cardstock behind the shaker panel and that looked much better.

Cutting Stamps Apart

Once I adhered my card together it was time to work on the sentiment. I first die cut a banner out of some grey cardstock and I then took the ‘There’s Snow One Like You’ sentiment from the Winter Wonderland stamp set and cut it apart., leaving out the ‘snow’. I could have masked it, but it’s easier if it’s cut I find. I then stamped down the ‘There’s’ part onto my banner first, then I masked off the ‘One Like You’ part – just leaving the ‘On’ section clear masking. I inked it up, removed the masking tape and turned the stamp around so I could stamp ‘No’. Once I stamped that down, I turned the stamp back around, and stamped the additional ‘One Like You’ like normal. Now my sentiment reads ‘There’s No One Like You’ and that worked much better, since I wasn’t doing a winter card. I adhered the banner with foam tape onto the centre of my shaker panel and the card was complete.

Here’s a video to show how I created my card from the start to finish.

Watch the video above   I Watch the video in HD on YouTube

I hope you enjoyed my card and tutorial today. I wanted to make a simple yet effective shaker card today and I love doing this with the Storybook dies, they’re so versatile and fun to work with. Also, altering stamp sets is a fun way to stretch them for more life!

Thanks for stopping by! – Eloise

|

Wishing You Sunny Days

Today we have a sweet and cheery card by Jeanne. I have a feeling this card will bring some welcome smiles and giggles!

Pretty Pink Posh: Wishing You Sunny Days

I don’t know about you, but I’m in serious need of some sunshine and blue skies!  These little bears from Halloween Friends are just the ticket.

Pretty Pink Posh: Wishing You Sunny Days

I know this little bear is dressed up for Halloween, but he makes me smile every time I see him.  I think he is the sweetest butterfly ever!

Pretty Pink Posh: Wishing You Sunny Days

I stamped the little bears with Memento ink and colored them up with Copic Markers.  Next I cut them with the coordinating die cuts and added some accents with a white gel pen.

Pretty Pink Posh: Wishing You Sunny Days

The cloudy sky was easy to create.  I made a template from a piece of cardstock cut with the scallop border die.  Next I rubbed in distress ink moving in a circular motion from the template on to my card stock panel.   Move the cloud template every inch or so and re apply ink.

Pretty Pink Posh: Wishing You Sunny Days

Pretty Pink Posh: Halloween Candy Wreath

Pretty Pink Posh: Die Cut Rainbow BackgroundblendingtoolCopic Markers

Seriously aren’t these guys the cutest?  They’ve got me dreaming of Spring!  And yes.. I’m smiling too!

Wishing you sunny days too my friends!

| |

Hello Butterfly Watercolor

Good morning Pretty Pink Posh friends! Heather dropping by with a couple cards and a tutorial for you after a long winter break! So excited to be back sharing tutorials and inspiration – and I really can’t wait for you to see the new spring release coming soon! And speaking of spring…despite the cold weather we seem to be having in the Pacific Northwest – I have definitely got spring on my mind, and decided to make a pair of cards to celebrate that!

I started off by stamping a couple of butterflies from the tiny but mighty set, Blissful Butterflies, in clear embossing ink on colored cardstock, heat embossing in white, then cutting with the coordinating Blissful Butterflies dies. I then used some tone on tone Copic markers to add a bit of depth and interest to the images.

 
I die cut a couple Scallop Ovals from black cardstock, and planned my layout of the sentiment and butterfly trail, then picked up the stamp images with the arm of my MISTI, removed the frame and butterfly, and stamped and heat embossed with clear powder on watercolor paper.

I used those stamped images as an emboss resist by adding a bit of messy watercolor over the top and some ink splatters. The embossing “resists” the watercolors, so those areas stay white.

I then adhered the scallop frame on with thin strips of foam adhesive, added the butterflies, and embellished with a few coordinating sequins in Pansy Purple and Lime Sorbet. Finished off with a bit of jute twine tied in a bow around the card fronts.

It is hard to see in the photos – but there is also a super secret peek at one of the new dies coming next month with the new release! Can you spot it? The first picture at the top shows it a tiny bit better! :)
butterflies
ink2kuretake

Thanks so much for stopping by today! Hope you are having a wonderful day!!!

|

Birdie Christmas Stocking

Pretty Pink Posh: Birdie Christmas Stocking

Hello friends!! Amy L. here today to share another holiday card. I have been enjoying drawing lately and I want to incorporate it onto my card. I drew a big Christmas stocking and stuffed it with some birdies. Wouldn’t you go AWWW if you see these birdies in your stocking?!

Pretty Pink Posh: Birdie Christmas Stocking

More details on my card:

  1. Sketch out the stocking with pencil, finish the line art with black Copic Multiliners. I used both a thick and thin one so the thickness of the line varies in the image. It makes the image more interesting
  2. Color the stocking with Copic markers. Add some dot details with white gel pen. Fussy cut out the image using a pair of small scissors leaving a white border
  3. Stamp the little birdies from Birdie Friends Stamp Set using Memento Tuxedo Black ink. Color with Copic markers, then die cut out with Birdie Friends Die Set
  4. For the background, blend Antique Linen and Tea Dye distress inks. Add white splatters and brown dots. The sentiment is from Holiday Greetings Stamp Set. Die cut the panel with MFT Die-namics Wonky Stitched Rectangle STAX
  5. Finish by mounting everything with foam tape

Pretty Pink Posh: Birdie Christmas Stocking

I hope you like my stocking! I sure feel very happy looking at this card! Thank you so much for stopping by! I hope you have a wonderful day!

| | |

Clean & Simple Watercolor Christmas + PDF Download

Pretty Pink Posh: Clean & Simple Watercolor Christmas

Hello, Pretty Pink Posh fans! This is Yana and I have a Clean & Simple Christmas card to share today.

Pretty Pink Posh: Clean & Simple Watercolor Christmas

Clean & Simple cards are sometimes the most difficult to make as each element needs to placed in its perfect spot and figuring out where that spot is can take a lot of time. If you’ve never created a Clean & Simple card I’m hoping you will be inspired by my project today and will give this style a try! If you do – be sure to share and tag us on social media so that we can take a look! We love seeing what you make!

Pretty Pink Posh: Clean & Simple Watercolor Christmas

To create this card begin by stamping several images from the Winter Friends stamp set in black waterproof ink onto watercolor paper. Color using your favorite watercolors (I used Distress Inks) and cut images out using coordinating dies.

Pretty Pink Posh: Clean & Simple Watercolor Christmas

Use glue and some chunky clear or white glitter to add little glittery touches to Christmas stockings. Also coat Christmas bauble with Glossy Accents to make it look more realistic. You can add a bit of shimmer with the help of Wink Of Stella glitter pen or a similar product or draw small details over watercolor using white gel pen to diversify your images if you’d like.

Pretty Pink Posh: Clean & Simple Watercolor Christmas

For Clean & Simple cards I prefer to use specialty cardstock with either some sort of impressed or printed texture for maximum impact. I went with white wood grain cardstock here and created an A2 top folding card base. If you don’t have cardstock like this you can either dry emboss your card base with the help of an embossing folder or texture plate or stamp a subtle design in very light gray ink.

Pretty Pink Posh: Clean & Simple Watercolor Christmas

Arrange your images on the card base and use a mix of double sided tape and foam adhesive to adhere them onto the card to create some dimension. Be sure to add a sentiment, too! I heat embossed Merry Christmas in white embossing powder onto black cardstock and trimmed it into a narrow strip. I used black cardstock here to compliment black stamped outlines of my images.

Pretty Pink Posh: Clean & Simple Watercolor Christmas

Once you have everything adhered it is time to add finishing touches. I went with 4mm Clear Droplets and 6mm Clear Droplets and adhered them around my cluster creating a visual triangle. I not only alternated the sizes of the drops I used, but also the number of drops I included for a more dynamic look

Pretty Pink Posh: Clean & Simple Watercolor Christmas

Pretty Pink Posh: Clean & Simple Watercolor Christmasborder

winterfriendswinterfriendsdies

4mmdroplets 6mmdropletsglossy

I hope you’ve enjoyed this card and idea sheet!

|

Advent Calendar Extravaganza with Taheerah Atchia

Good morning! Heather here excited to share a fun wintery shaker card with you today as part of the Advent Calendar ExtravaganzaAdvent Calendar Extravaganza with Taheerah Atchia

Advent Calendar Extravaganza is -the- festive event of the season! This ‘hop with a twist’ was dreamed up by Taheerah Atchia and features surprise destinations each day! Joining in the fun with Taheerah are ONE HUNDRED special guests – each serving up some fantastic Christmas inspiration! Just like an Advent Calendar, you’ll never know where you’re going to be visiting next until you ‘open the door’!

And that’s not all! With 25 *amazing* sponsors taking part as guests as well, your crafty wish list is bound to get a boost with a chance to win a prize EVERY SINGLE DAY!! Join in the fun every day at taheerah-atchia.com to see what special surprises await behind the door!

Advent Calendar Extravaganza with Taheerah Atchia

I used the Window Frames die set to create a shaker window for my card, backed with some pretty blue plaid paper from Lawn Fawn.

 Advent Calendar Extravaganza with Taheerah Atchia

I stamped a sled and several penguins from the Winter Wonderland set, colored with Copics, and die cut with the coordinating Winter Wonderland Dies.

 Advent Calendar Extravaganza with Taheerah Atchia
I created my shaker window, and filled it with Silver Shimmer Seed Beads, as well as a couple of loose penguins – I was planning on letting them shake free inside the card! They don’t move as much as I planned (should have added another layer of foam adhesive I’m afraid!) but I love where they ended up, and in hindsight would have probably just placed them there if I could plan it that way! :)

Advent Calendar Extravaganza with Taheerah Atchia

Finished off with my sentiment, also from the Winter Wonderland stamp set, a few sequins from Snowflake Sequin Mix, and a bit of shimmery silver ribbon tied in a bow at the bottom!

 Advent Calendar Extravaganza with Taheerah Atchia
Winter Wonderland stamp setwindowframes
paperpad2silvershimmerSnowflake Sequins

It’s not a party without a prize – and with prizes every day there are several chances to win! Today’s prize is generously supplied by Pretty Pink Posh so you’ll definitely want to win! Simply leave a comment on this post – then head back to taheerah-atchia.com and leave a comment there too! You must leave a comment on Taheerah’s blog as well as here in order to be eligible to win! Don’t forget to grab the other surprise destinations from Taheerah’s blog and head over to them to leave comments there as well to improve your odds even more! You have until 23:59 EST on 31st December 2016 to enter.

Don’t forget Advent Calendar Extravaganza runs from 1st-25th December inclusive so make sure you visit taheerah-atchia.com every day for fabulous inspiration and amazing prizes every single time!

Thank you for joining us today!

|

Watercolor Warm Holiday Wishes

Pretty Pink Posh: Watercolor Warm Holiday Wishes

Happy Monday! It’s Jeanne here and today I’m playing with the Christmas Friends Stamp set. Creating scenes with these stamps and coordinated dies couldn’t be easier!

Pretty Pink Posh: Watercolor Warm Holiday Wishes

I started with the Stitched Pieces die cut from a panel of card stock.  Next I stamped a sentiment  along the bottom of the panel.

Pretty Pink Posh: Watercolor Warm Holiday Wishes

I tucked a panel of water colored paper that I created with distress ink behind the Stitched Pieces panel. I kept the bottom edge of the watercolor panel uncolored to look like snow for the die cut characters to stand in. I splashed white ink over the water color panel to look like snow.

Pretty Pink Posh: Watercolor Warm Holiday Wishes

The little boy, girl and bird were colored with Copic markers and really easy to cut out using the coordinating Christmas Friends die set.

Pretty Pink Posh: Watercolor Warm Holiday Wishes

I stamped lots of the images all at one time and colored them each a little differently.  I spent about an hour coloring and it was very relaxing!  Now I have several images cut and colored ready to work with!

Pretty Pink Posh: Watercolor Warm Holiday Wishes

I hope you enjoyed today’s post. Warm holiday wishes to you!

Christmas Friends stamp setstitchedpieces

christmasfriendsdiesCopic Markers

| | |

Christmas Theme & Giveaway Week- Day 7

Christmas Theme & Giveaway Week- Day 7

Good morning Pretty Pink Posh friends! Heather dropping by with a couple cards and a tutorial sharing a way to use some of the adorable Pretty Pink Posh images that doesn’t require any coloring! I love coloring, but sometimes it’s fun to do things a little differently and unexpectedly!

 Christmas Theme & Giveaway Week- Day 7
These are also super flat cards, and therefore very easy to mail – and yet they still have lots of the appearance of dimension, just without the bulk.
 Christmas Theme & Giveaway Week- Day 7

I started off by stamping my very simple scene directly on my cardbase using Christmas Friends Stamp Set. For this technique, I really love Simon Says Stamp 120lb cardstock – it is super smooth and seems to work beautifully for ink blending, and it is nice and sturdy so it holds up well as a cardbase.

 Christmas Theme & Giveaway Week- Day 7
Next, I stamped the images again on Simon Says Stamp masking paper, and carefully fussy cut them out and adhered over the top of the original image – then added a strip of masking tape along the bottom to give the illusion of a ground for them to stand on. Try to slightly cover the bottom of the girl/boy feet – that way it looks like they are standing on the “snow” – not floating above it.
 Christmas Theme & Giveaway Week- Day 7

Grab some distress inks and blending foam, and blend out a background! I picked two slightly unexpected colors – instead of just going with wintery blue – and started at the bottom and blended out. That way the deepest color is around the stamped images and bottom of the card.

 Christmas Theme & Giveaway Week- Day 7

Add some white paint splatters (I just mixed some white acrylic paint with water in a Mini Mister until I was happy with the consistency) and quickly and carefully remove the masks – always my favorites part of this technique!

Christmas Theme & Giveaway Week- Day 7

Once the paint dries, stamp your sentiment, and embellish with a few snowflakes from Snowflake Sequins Mix! Here is a closer look at each card:

Christmas Theme & Giveaway Week- Day 7

Christmas Theme & Giveaway Week- Day 7

Christmas Friends stamp setSSS Cardstock

Snowflake SequinsMini Mister SprayBlending Tool

Ready for our last giveaway of the week? We are giving away a mega craft pack filled with items valued at over $200! All you have to do is leave a comment sharing what you would like to see from Pretty Pink Posh in 2017. You can list posts or videos you would like, products, ideas from stamp sets…

a Rafflecopter giveaway
 

Thanks so much for stopping by today! Hope you are having a wonderful weekend!