
Ink Distressed Hummingbirds
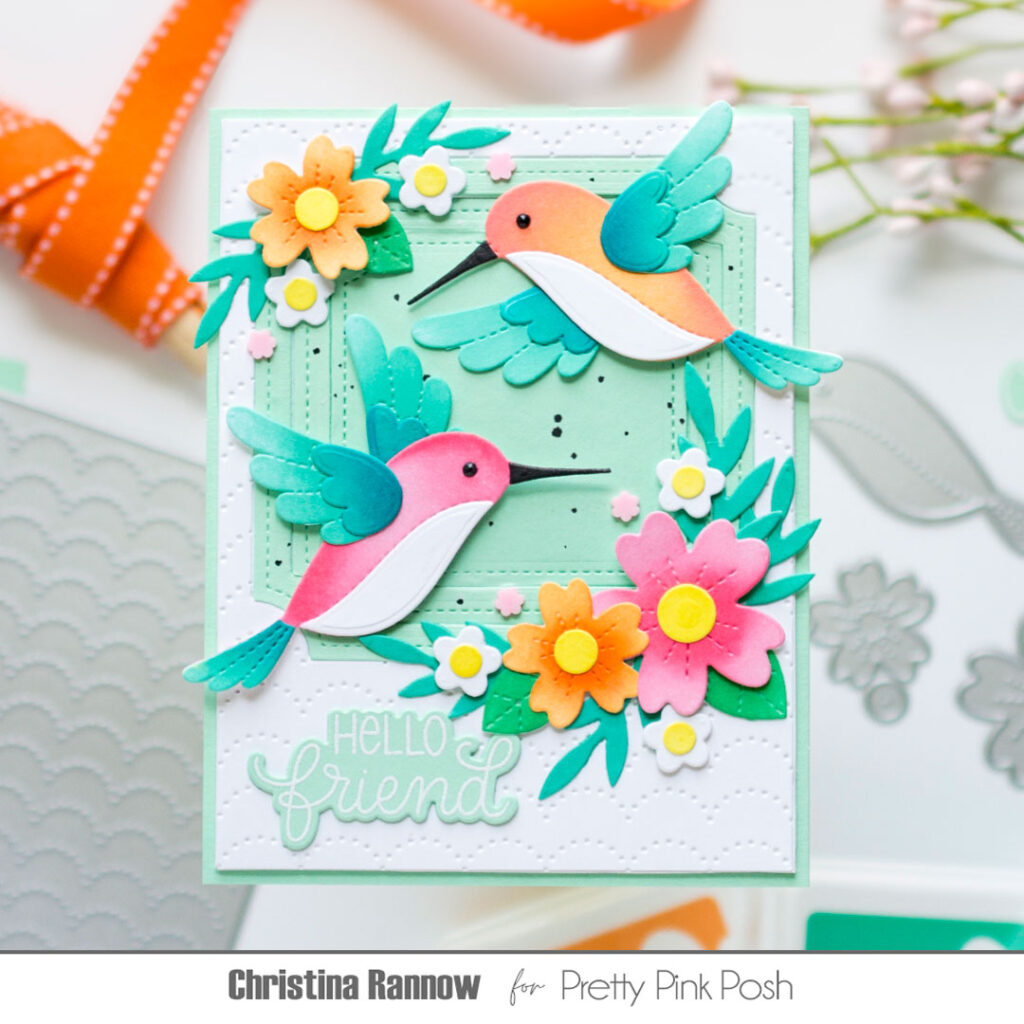
Hi, friends! Christina here to share a card showcasing many of the beautiful new products from the latest release. The Stitched Hummingbirds are the main attraction in this design, and I combined them with some gorgeous new florals, all ink blended in pretty tropical colors to create just a little bit of paradise on my card front. I also used two new must-have die sets, the Scallops Pierced Plate and the Notched Squares. These are some basic essential dies that you’ll definitely want in your stash!
Below you’ll find a supply list and then all the details about how I used those supplies to create this tropical-inspired card design showcasing some of the lovely things from the May release. Let’s get started!
Stitched Hummingbird Dies
Floral Wreath Builder Dies
Notched Squares Dies
Scallops Pierced Plate
Friend Greetings Stamp Set
Friend Greetings Coordinating Dies
Enchanted Garden Clay Confetti
Onyx Pearls
For this card, I started with die cutting all the elements for the hummingbirds and the florals from white cardstock. I used a combination of Distress Inks and Pawsitively Saturated Inks to color the die cuts, choosing two to three shades of each color so I could build up the color and add shading for dimension. I assembled the die cuts, securing them with glue, and set them aside while I worked on the background panel.
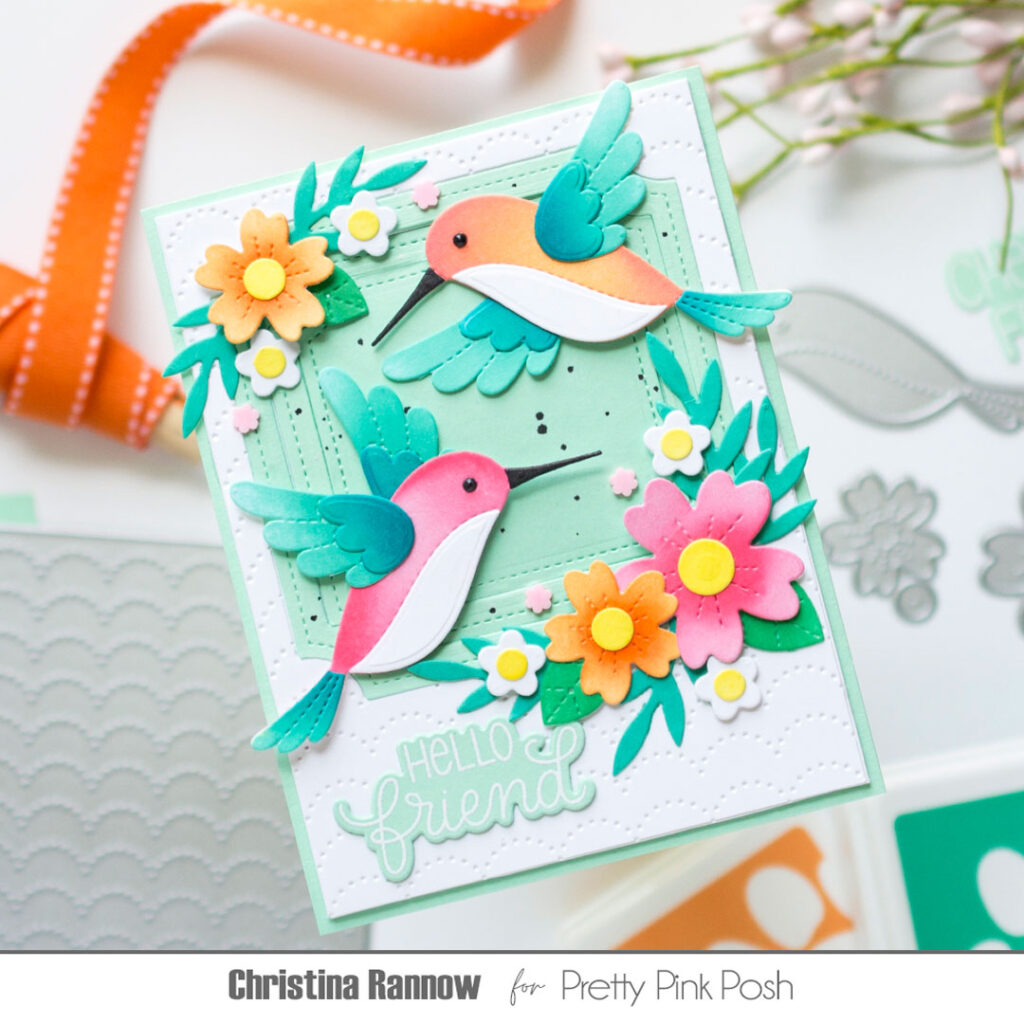
First, I die cut the scallops pierced plate from white cardstock and trimmed it to 4 x 5 ¼ inches before die cutting the second-largest notched square from the top half of the panel. I wanted some dimension to this panel, so I die cut it again to double it up before attaching it to an A2 mint green cardstock panel. In the notched square opening, I inlaid two notched square frames that I die cut from mint green cardstock and a notched square in the very center. I doubled up the largest notched square frame to be even with the background panel. To finish up the background panel, I masked just the pierced scallops area and then splattered the mint green notched squares with Spellbinders Onyx Silk.
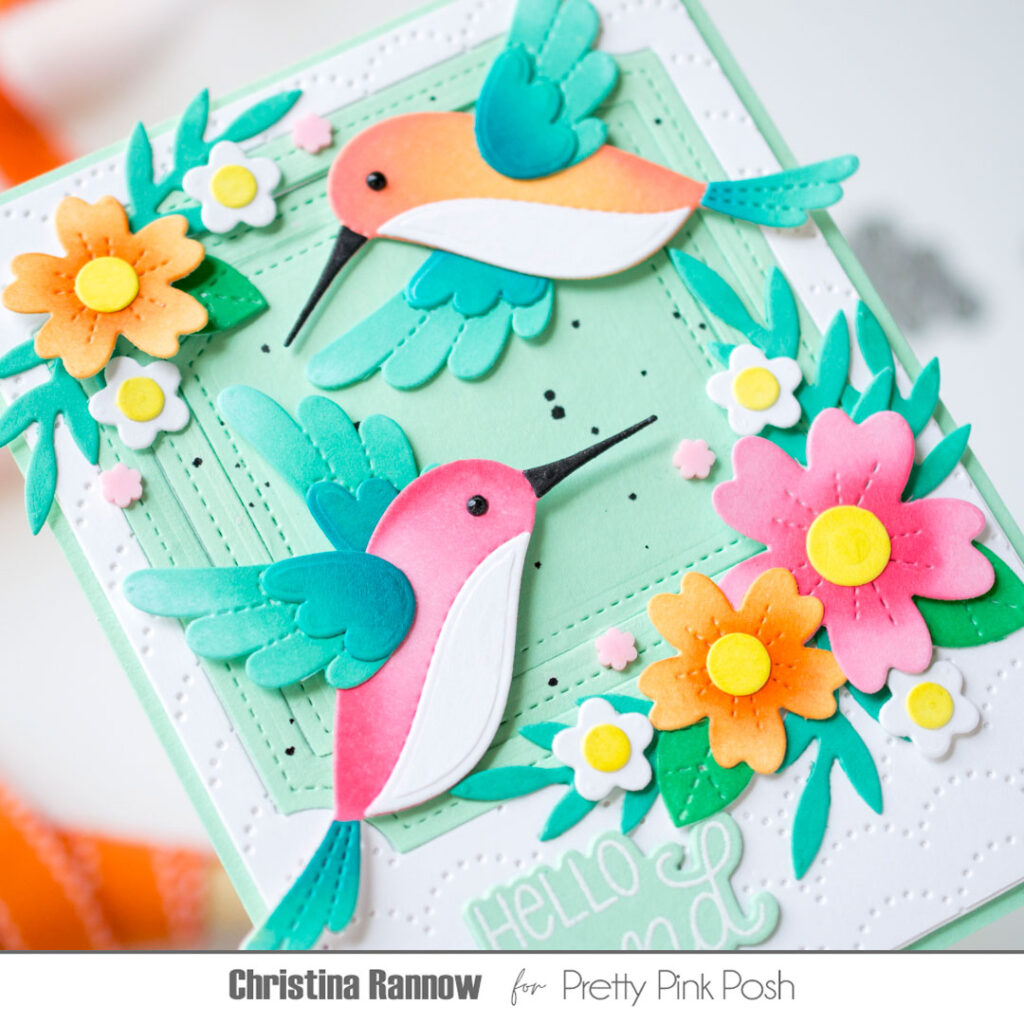
With all the components done, my next step was to assemble the card front. I attached the florals around the notched squares with either glue or foam squares and then secured the hummingbirds with foam squares to the center. Next I heat embossed a greeting with white embossing powder on mint green cardstock and die cut it with the coordinating die before attaching it to my card front. For the finishing details, I added a few pink clay flowers and black pearls to the hummingbird’s eyes before attaching everything to an A2 card base.
Thanks so much for reading all about this tropical-inspired hummingbird card showcasing the May release from Pretty Pink Posh! See you again soon!
LOVELY!
Saw this card on insta! Love the ink blending and layout 😍😍
The hummingbirds are gorgeous!