
Sneak Peek: Fruit Borders + Fruit Salad
Hi, friends! It’s Lauren and I am so excited to be sharing a little peek at two new sets: Fruit Borders stamp set with coordinating dies and Fruit Salad stamp set with coordinating dies. These new 4×6 stamp sets have adorable fruits and sentiments perfect for a summer barbeque! Let’s make a card featuring these sets along with a few other new items from the upcoming release.
New release will be available June 7th
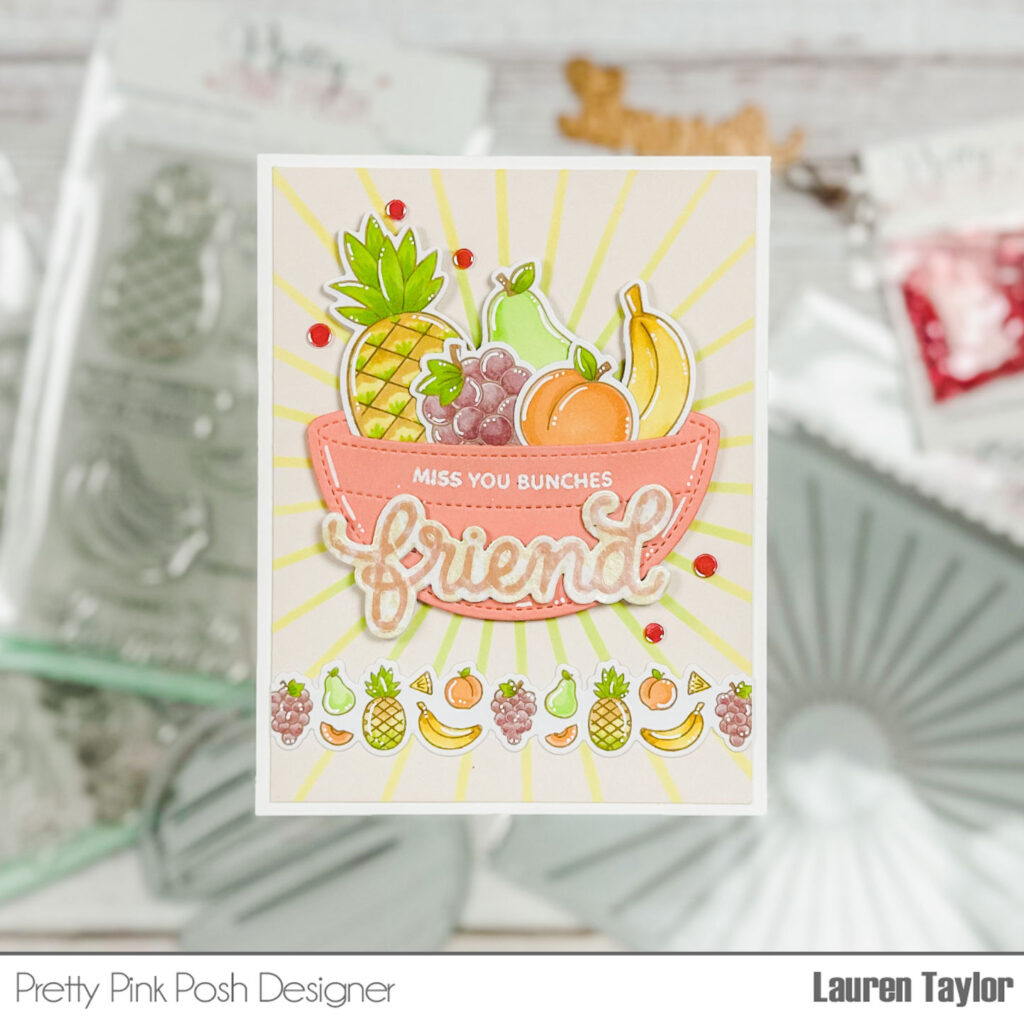
I started with stenciling the new Starburst Stencil with Twisted Citron and Squeezed Lemonade Distress Oxides onto a piece of pale pink cardstock that is cut to 4×5-1/4″ in size. My sunburst is not quite centered because I raised the stencil up as I knew my basket of fruit was going to be a little higher than the center of the card.
While I warmed up my Glimmer Hot Foil System, I cut the Fruit Bowl Dies out of a pink cardstock, but just the solid bowl image. I also cut out the shadow of the Friend Shadow Dies twice out of white cardstock. Once my system was ready, I hot foiled the Friend Script Hot Foil Plate with a matte pink foil onto a piece of colored vellum cardstock. I also cut it out with the Friend Shadow Dies.
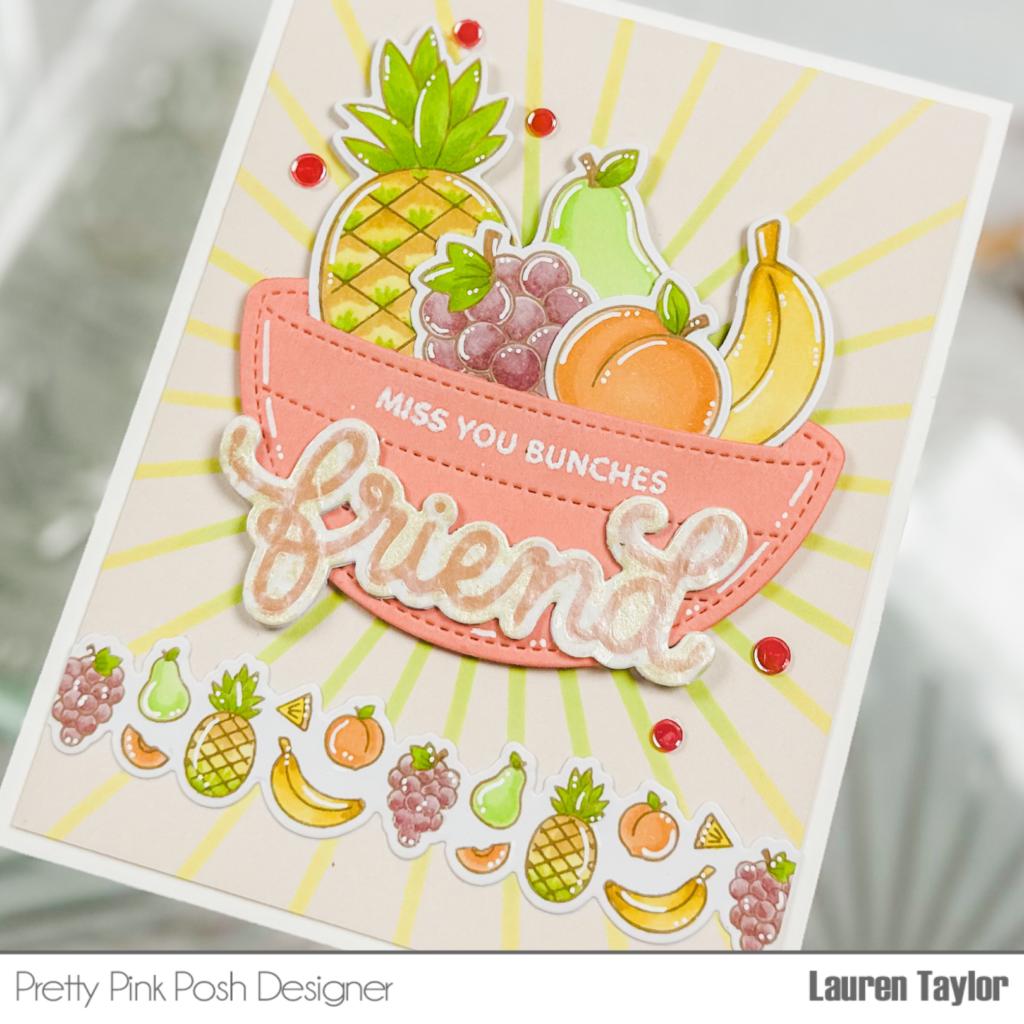
Next I stamped the border stamp with the banana, peach, pear, pineapple and grapes from the Fruit Borders stamp set as well the same fruits from the Fruit Salad stamp set in an alcohol marker friendly brown ink. I colored them in with alcohol markers – I used Ohuhu Art Honolulu B Markers. After adding some white highlights with a gel pen, I used their Coordinating Dies to cut them out.
After adding highlights to the pink Fruit Bowl, I also embossed the “miss you bunches” sentiment from the Fruit Salad stamp set in white embossing powder. I arranged the fruits inside the bowl and glued them inside. I also glued the friend layers together to create a sturdy sentiment. Now it’s time to assemble the card!
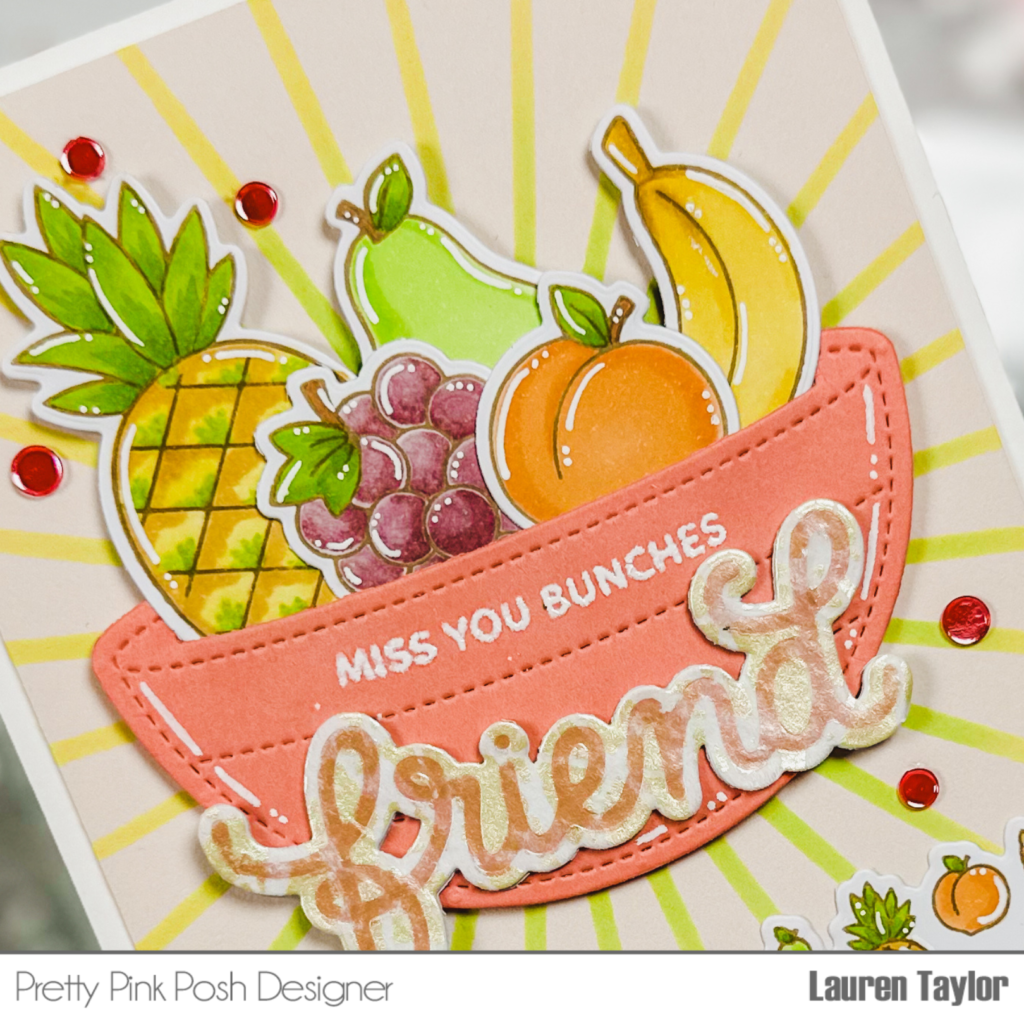
Using a tape runner, I glued the Fruit Border towards the bottom of the stenciled background, about a 1/2″ from the bottom. The border will hang off the edges a little and I trimmed them down before gluing to an A2 card base. I added foam adhesive to the back of the assembled fruit bowl and glued it so the sunburst is coming from the center of the assembled bowl. Next I adhered the Friend Script sentiment onto the bowl.
Finally, I glued down a few Strawberry Shimmer Mix in a couple different sizes around my fruit bowl for some extra shine. I hope you enjoyed this sneak peek; you’re absolutely going to love the rest of the June 7th release!
I LOVE the fruit borders!!!!!!