
Sneak Peek: Wish
Hi friends! It’s Zsofi here today and I am sharing a sneak peek of the Wish stamp set. It is an incredibly versatile set full of small images besides the big sentiment and it comes with a coordinating die set. I made several cards to show you how many different ways you can use this set.
New release will be available February 8th.
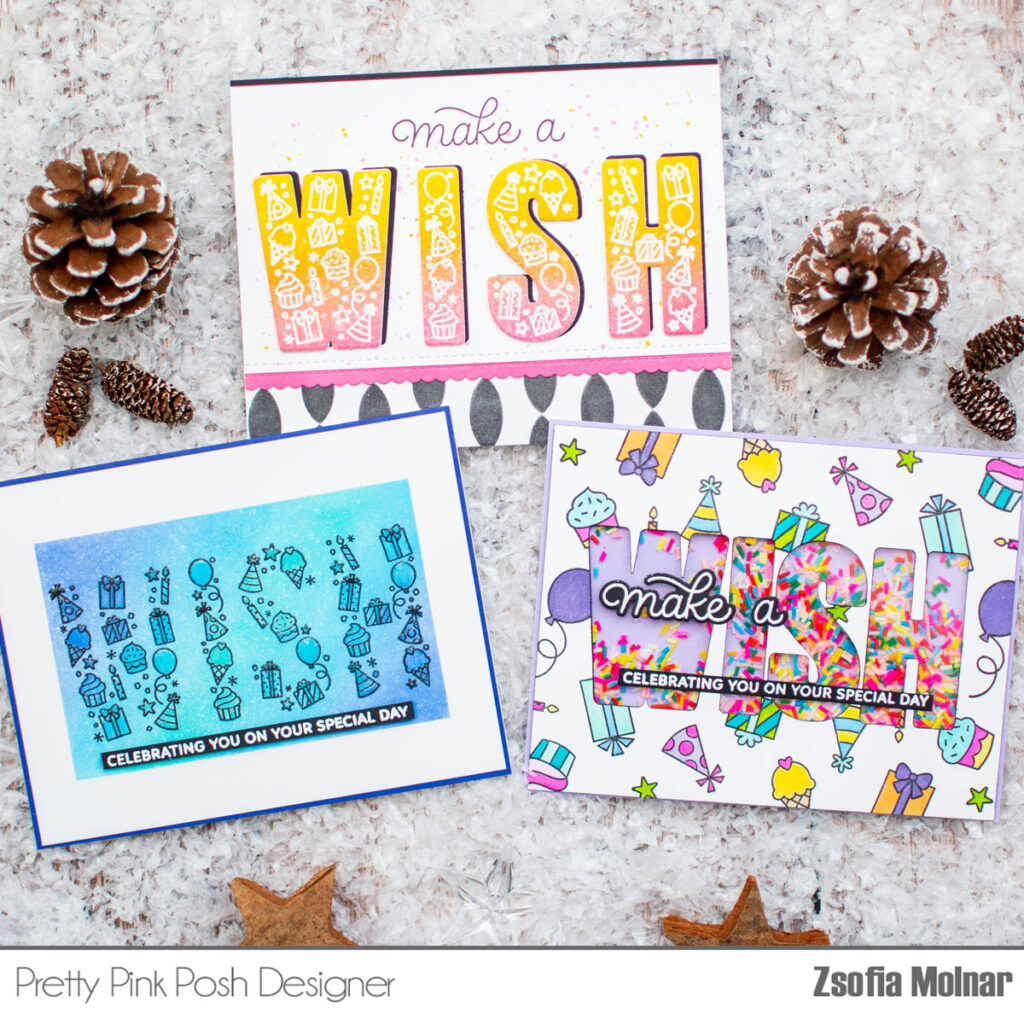
For my first card I stamped the big Wish sentiment with Versafine Onyx Black ink in the middle of Bristol Smooth cardstock which measures 4.25 x 5.5 inches. I heat embossed it with clear embossing powder. I love the raised edges and in this way I can be sure that I will not smear the ink while doing some ink blending.
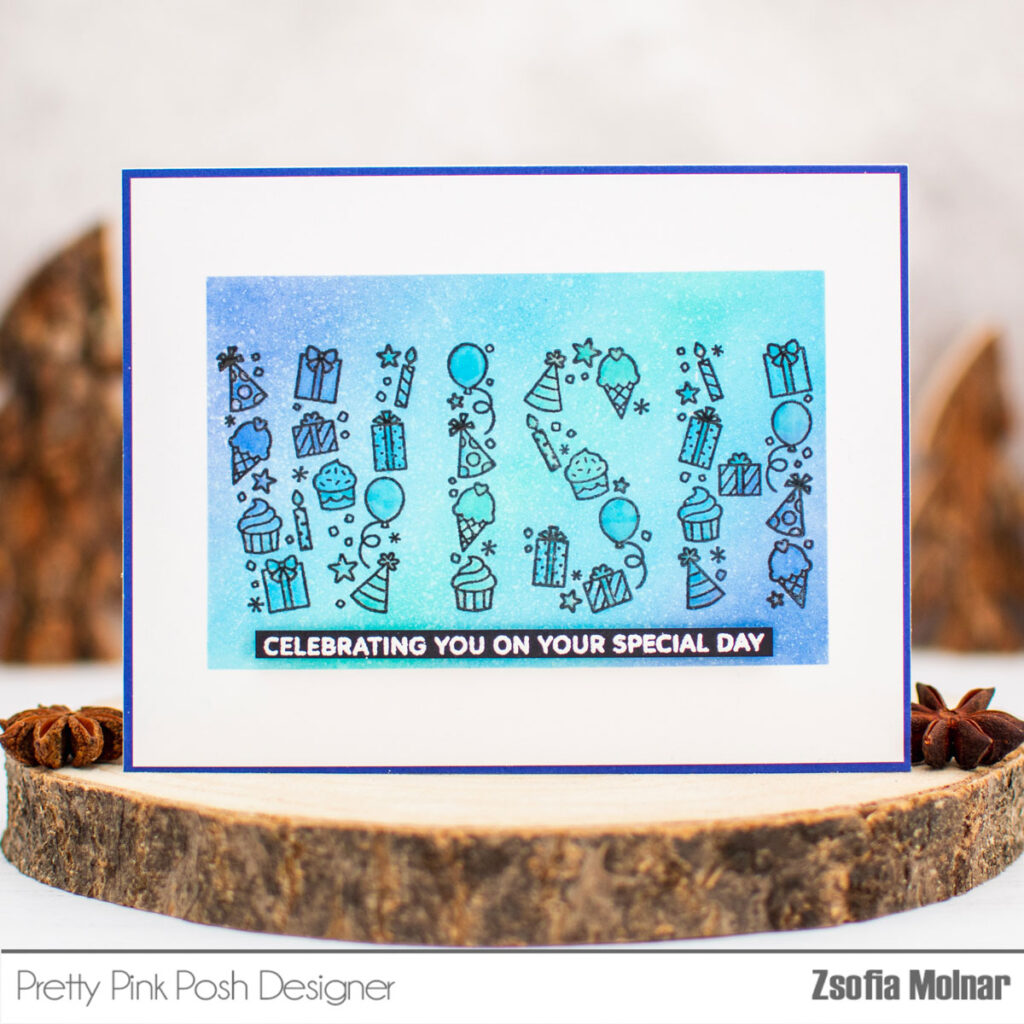
I masked off the sides of the cardstock with masking tape and used Distress Oxide inks with a blending brush to give it some colour: Blueprint Sketch, Mermaid Lagoon and Peacock Feathers. Then I squeezed some ink on my glass mat and painted the images using a clear shimmer pen as a paintbrush. It gives a tone-on-tone sparkly look, I love it!
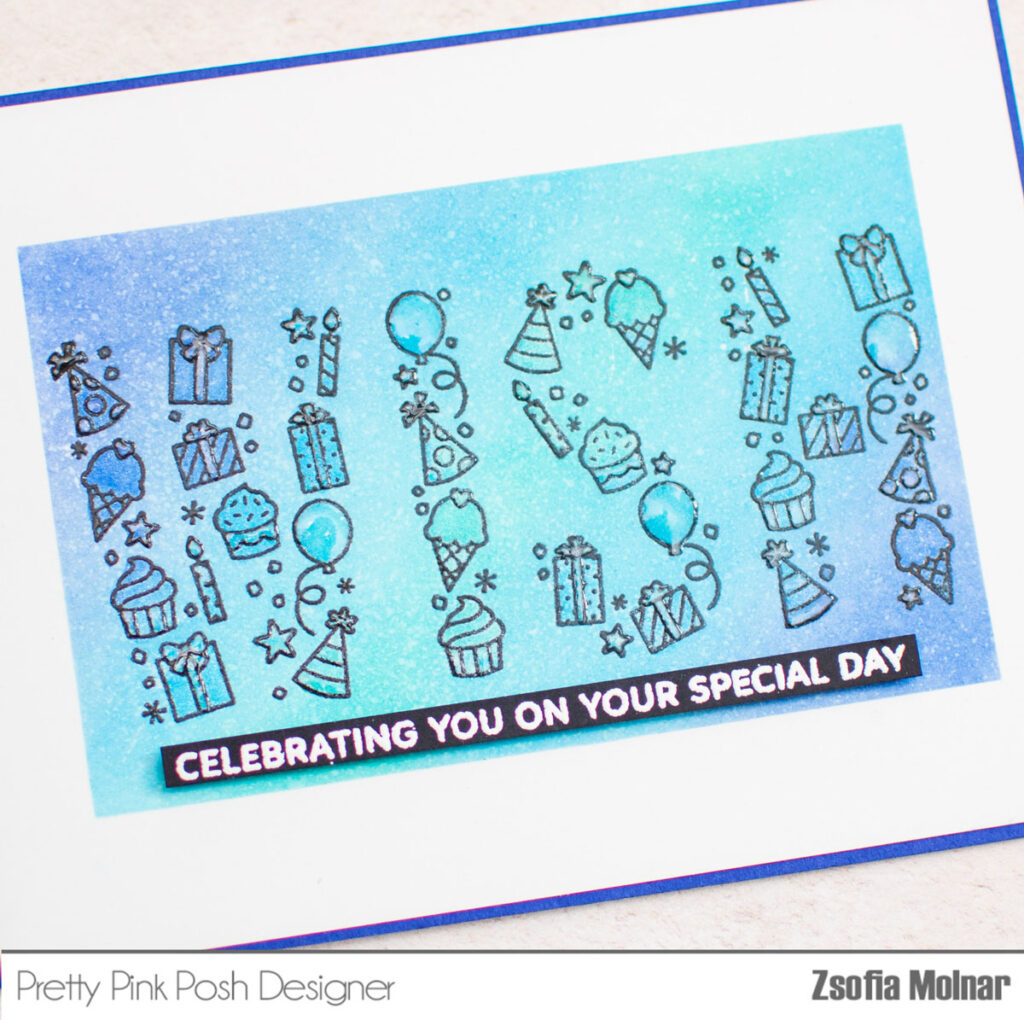
I cut down the panel tiny and gave it a blue violet mat. I also white heat embossed a sentiment on black cardstock and cut it down to be a thin strip. I used 3D foam squares to pop it up. I finished the card by adding glossy accents to emphasize some details.
CARD #2
For my second card I white heat embossed the big Wish sentiment on Bristol Smooth cardstock and did a quick ink blending with Distress Oxide inks: Picked Raspberry, Spiced Marmalade and Mustard Seed. I used the coordinating die to cut it out and I also cut it from black cardstock to create a shadow for the sentiment. I simply adhered the black letters tiny offset behind the inked ones.
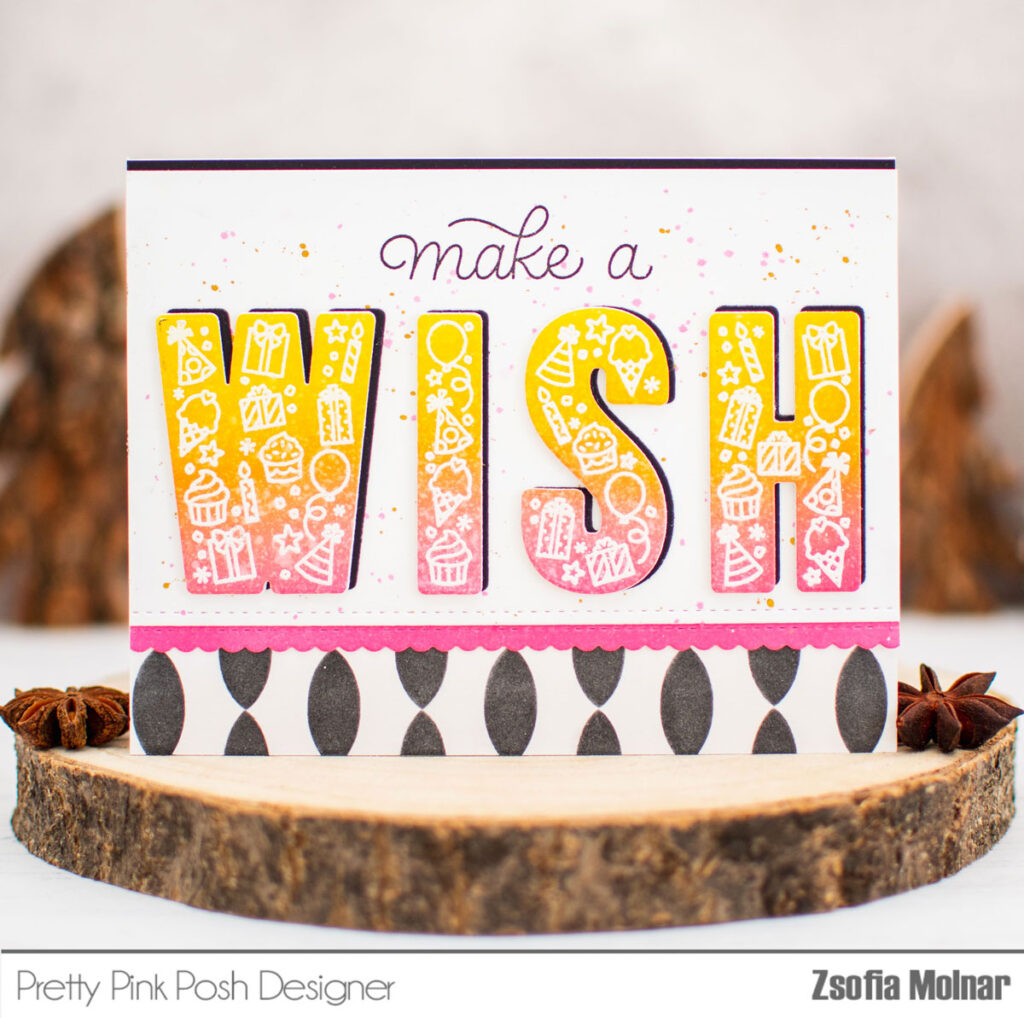
I used the Scallop Borders die set to cut down a piece of white cardstock, I love the stitching detail. I used another die from the same set to cut the scalloped border and blended it with Picked Raspberry ink. This way it surely matches the sentiment in colour. I added some diluted ink and gold splatters to the white background, stamped a sentiment on the top from the Wish stamp set and adhered the letters.
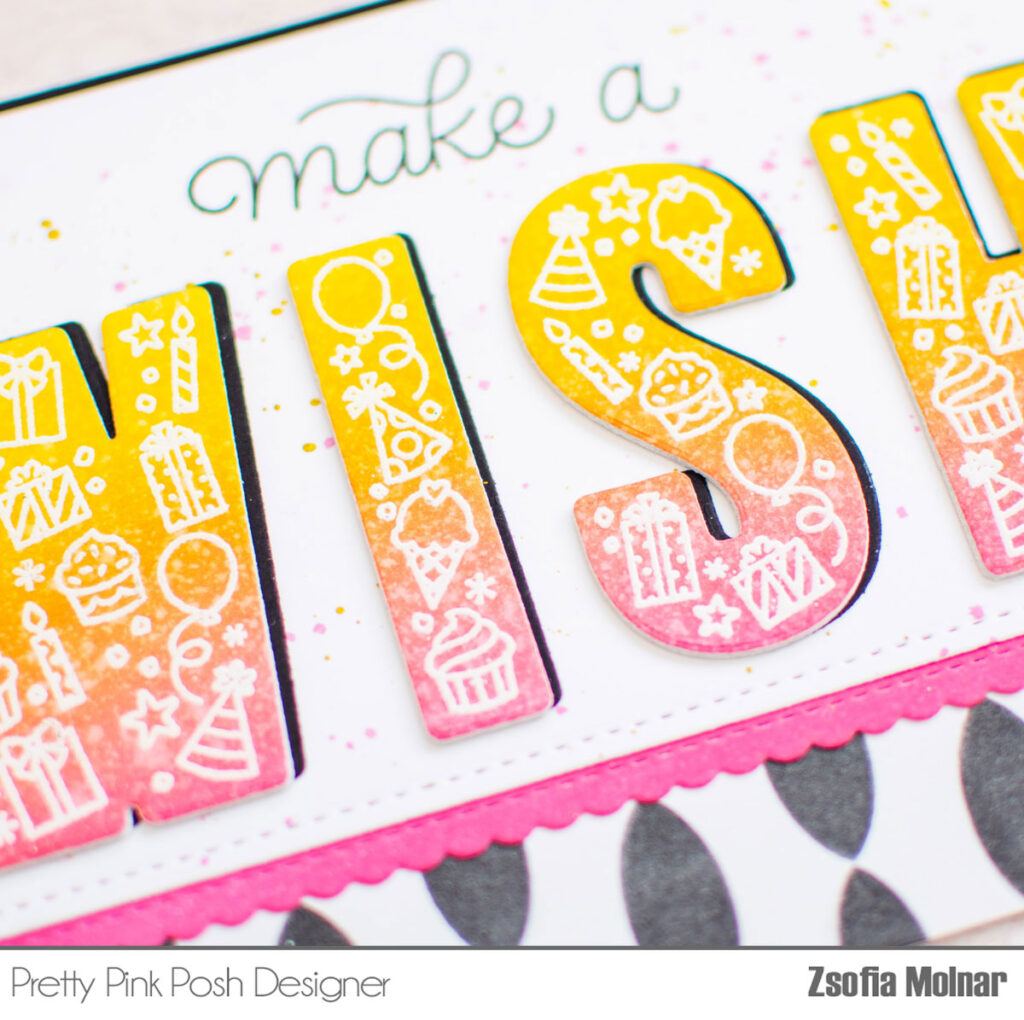
I used the new Streamer stencils to add a fun black pattern to the card base before popping up the focal panel.
CARD #3
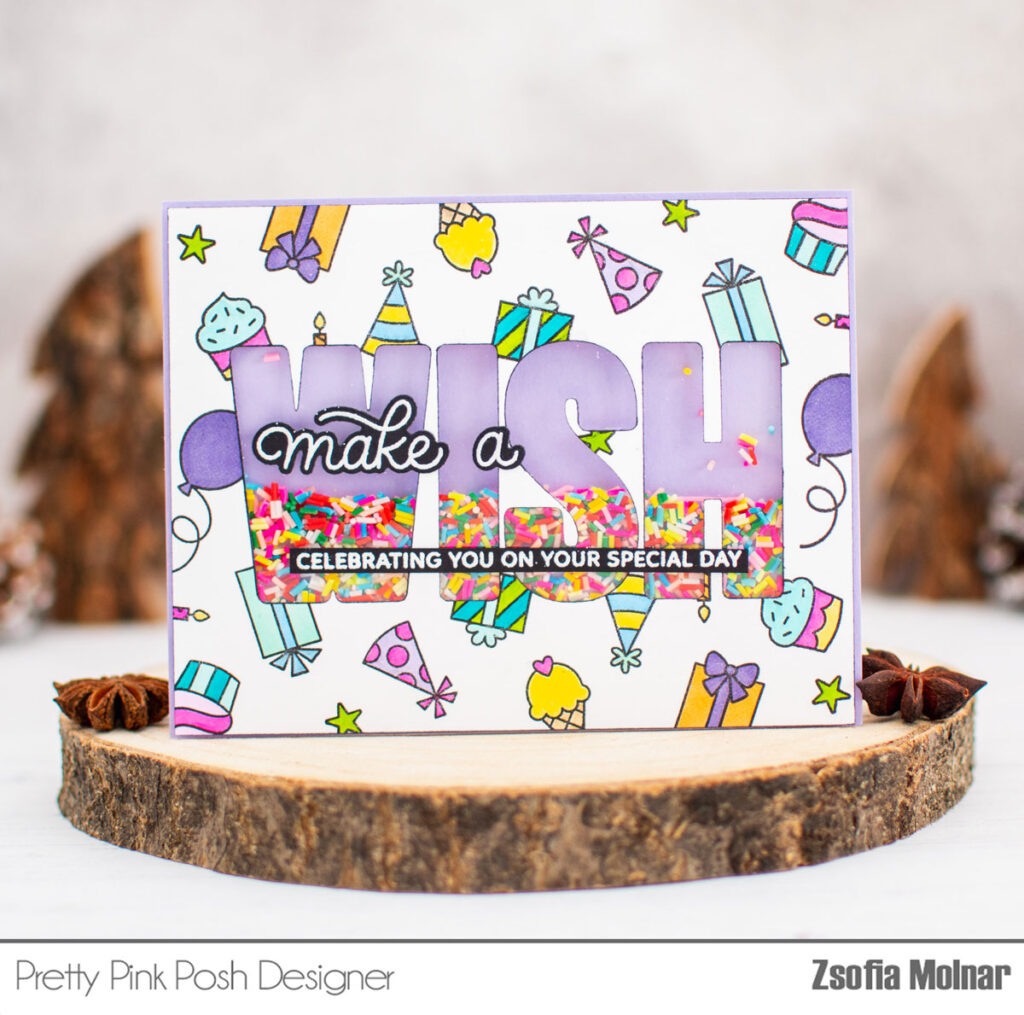
As the Wish stamp set has a lot of small images, I wanted to create a fun shaker card using those: I cut the coordinating Wish die in the middle of a piece of white cardstock and stamped the small images around. Using a stamp positioner makes this process super-fast. I quickly coloured them with Spectrum Noir Illustrator markers but without shading, just very simple colouring. When I was done, I used a black Memento marker on the die cut edges, I gives it a very thin border.
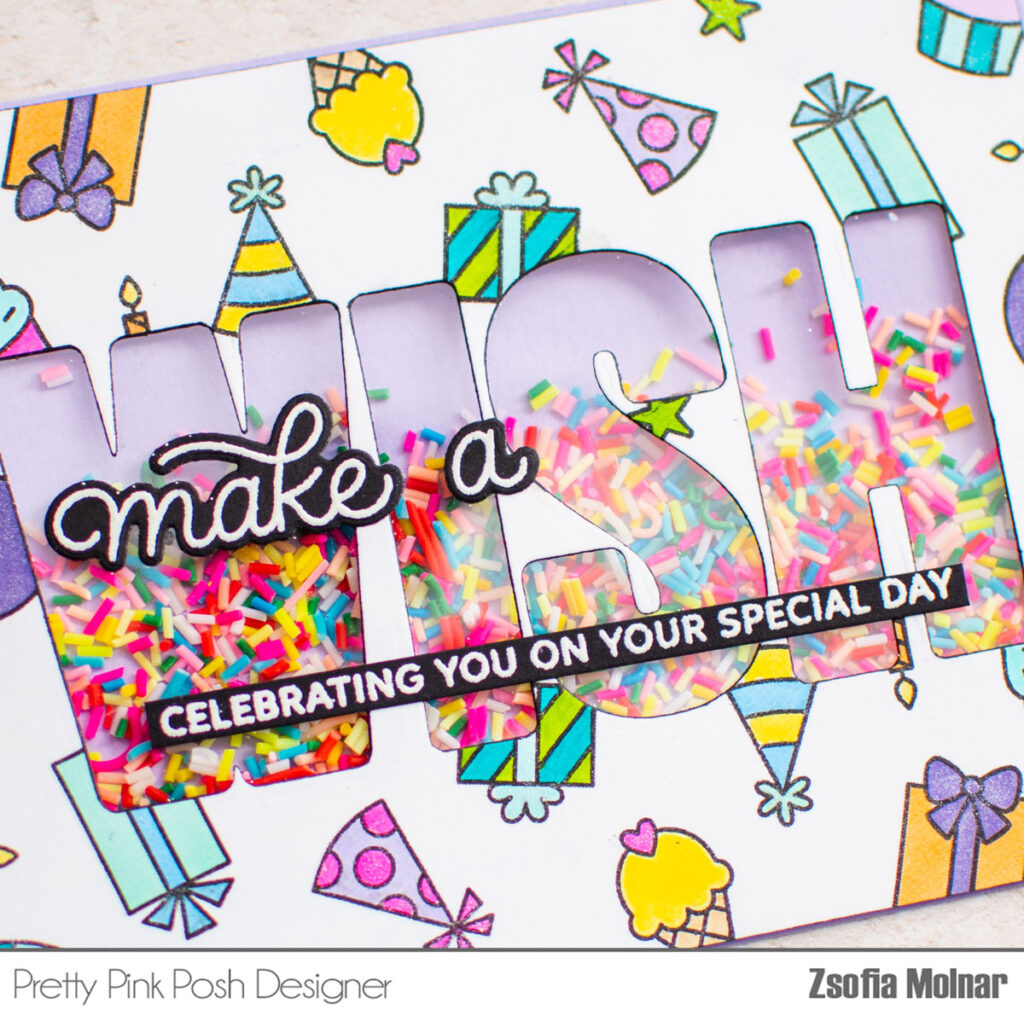
I adhered a piece of acetate to the back of the coloured panel and added 3D foam tape around the window. I used a light purple card base and poured some Funfetti Mix to the middle and assembled the shaker.
I white heat embossed the sentiments on black cardstock. I used the coordinating die for one of them – I love die cutting stamped sentiments! The other one I cut down to be a thin strip and adhered both to the window.
As a finishing touch I used a clear shimmer pen to make some elements sparkly.
Make sure you come back in the coming days to see all the amazing inspiration and product reveals from the design team. Thank you for stopping by, I hope you were inspired!
They’re all cute but the shaker card 😍😍😍
The Wish stamp set, and coordinating dies, look like a must have! I love all the cards made with them. I’m partial to shaker cards, so that one is my favorite! Great use of the stamps and dies.
Adorable cards!
Thanks for sharing.
such a cute set of images! Beautiful cards Zsofia!! you are so creative!!