
Spooky Sky + Video
Hey friends! It’s Mindy with you today to share how I created this Spooky Sky for my little ghost friends.
Watch the video above I Watch the video in HD on YouTube
When I think of spooky, I think of bats and the Spooky Sky stencil is perfect to set my scene.
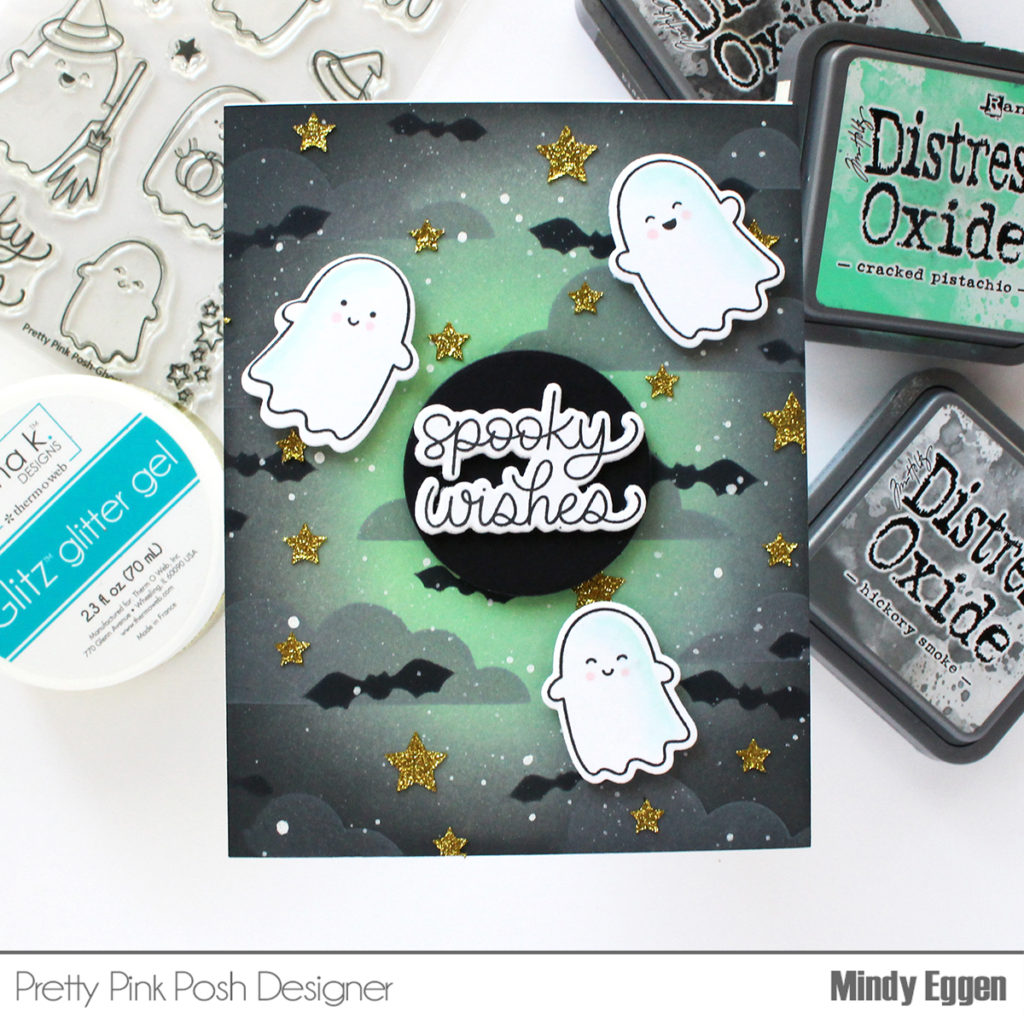
I start by ink blending Cracked Pistachio distress oxide ink to the center of the card front. Then I went around the edges with Hickory Smoke and Black Soot.
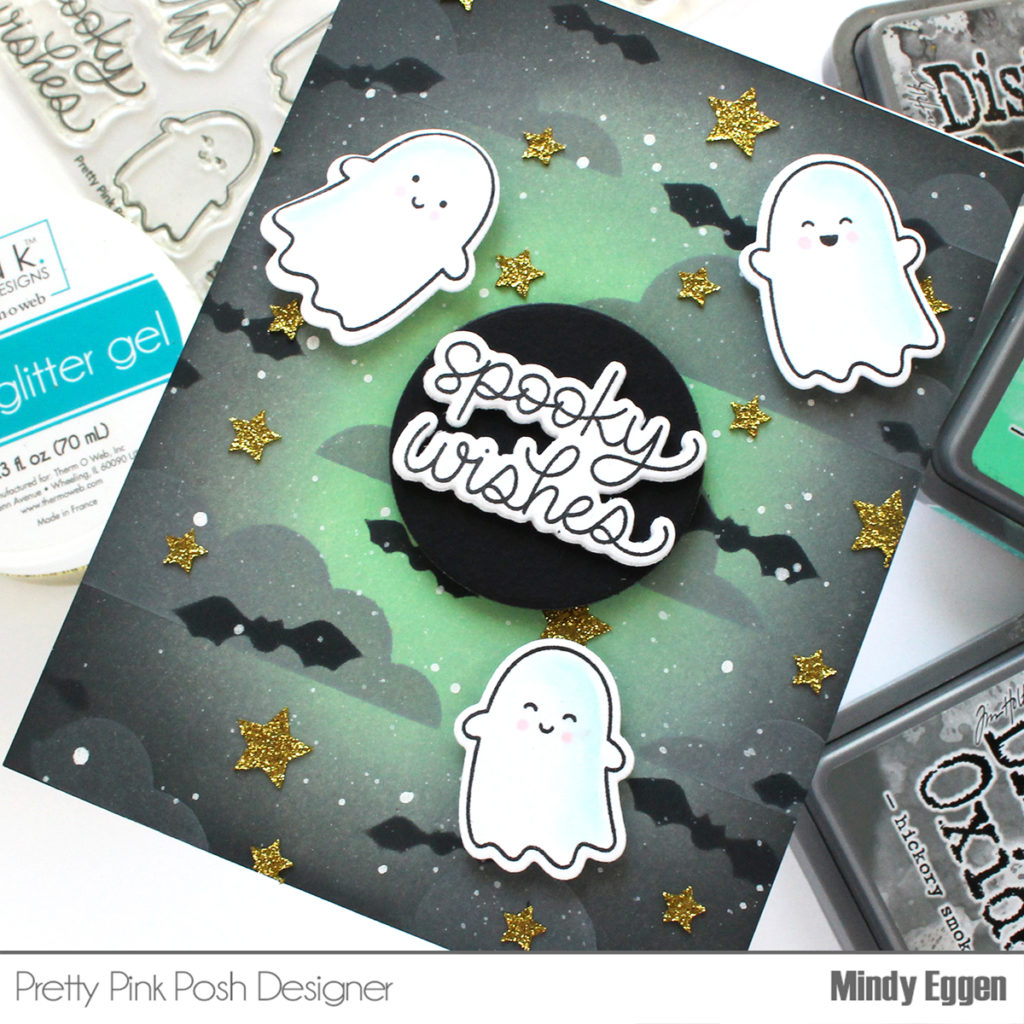
To start creating the scene, I’m using the clouds layer and ink blending on Hickory Smoke. For the bats layer, I’m adding a heavy amount of Black Soot.
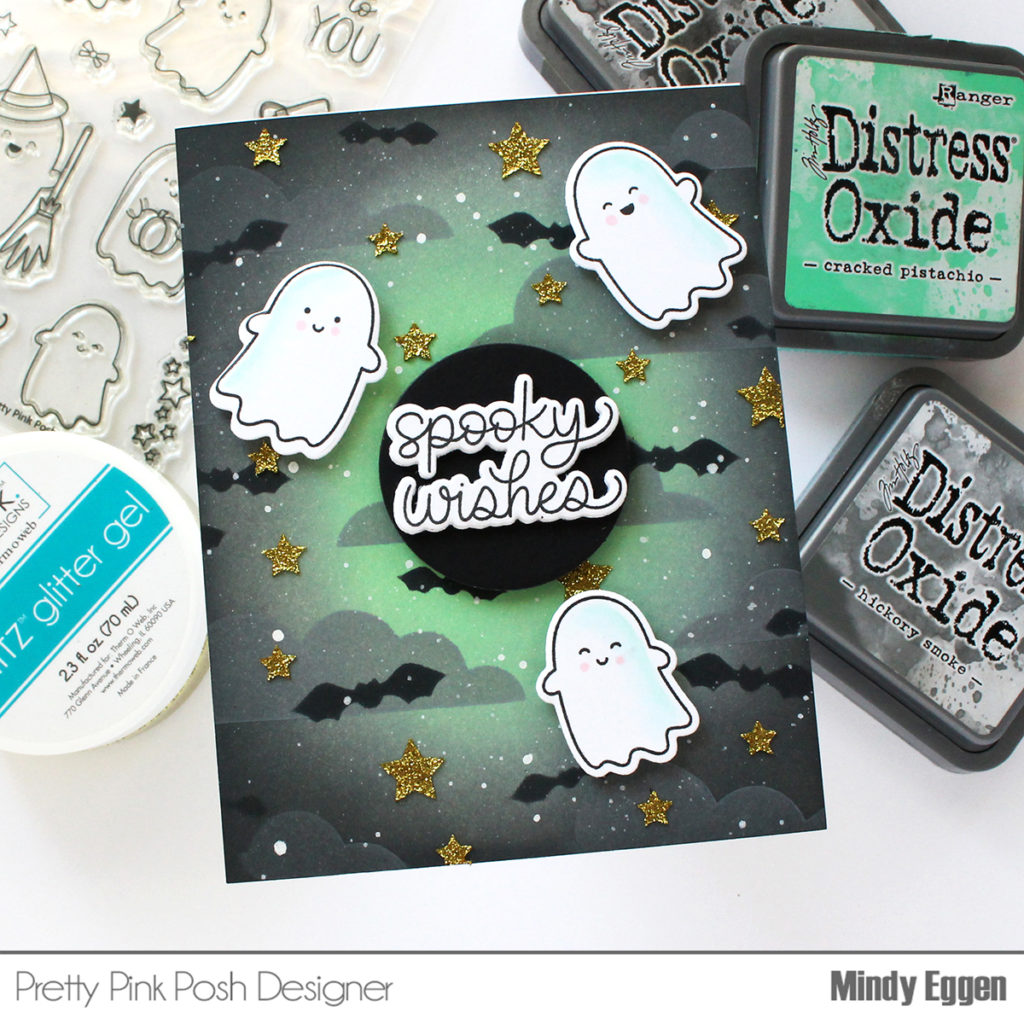
Before I add the third layer of the stencil, I’m going to splatter on some copic white using a paint brush. Then I’ll hit that with my heat tool to speed up the drying process.
Now to add my stars, I’m using Gold Glitz Glitter Gel which has a ton of sparkle!
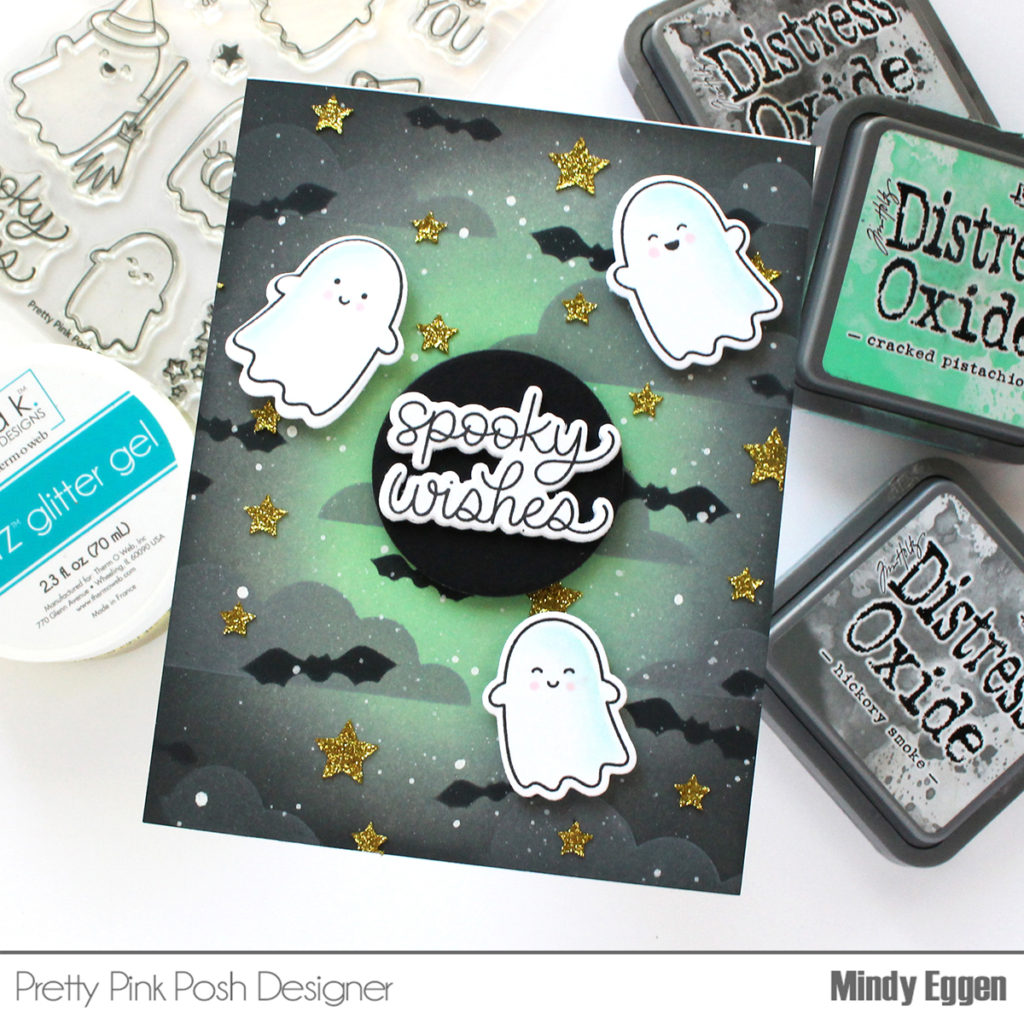
I’m using a sentiment from the Ghost Friends stamp set which I stamped in black ink onto white cardstock. I’m going to add this to a circle I die cut from Black cardstock using the Halloween Circles die. This grounds my sentiment a little bit.
I can then add the sentiment and circle to the center of the card and arrange my ghosts around that. The light ink blending I did previously will help draw your eye into the center of the card.
I hope you enjoyed today’s spooky card! Thanks for spending time with me today.
Great blending colors for a spooky card, love those little ghosts! 👻