
Slimline Birthday Scene + Video
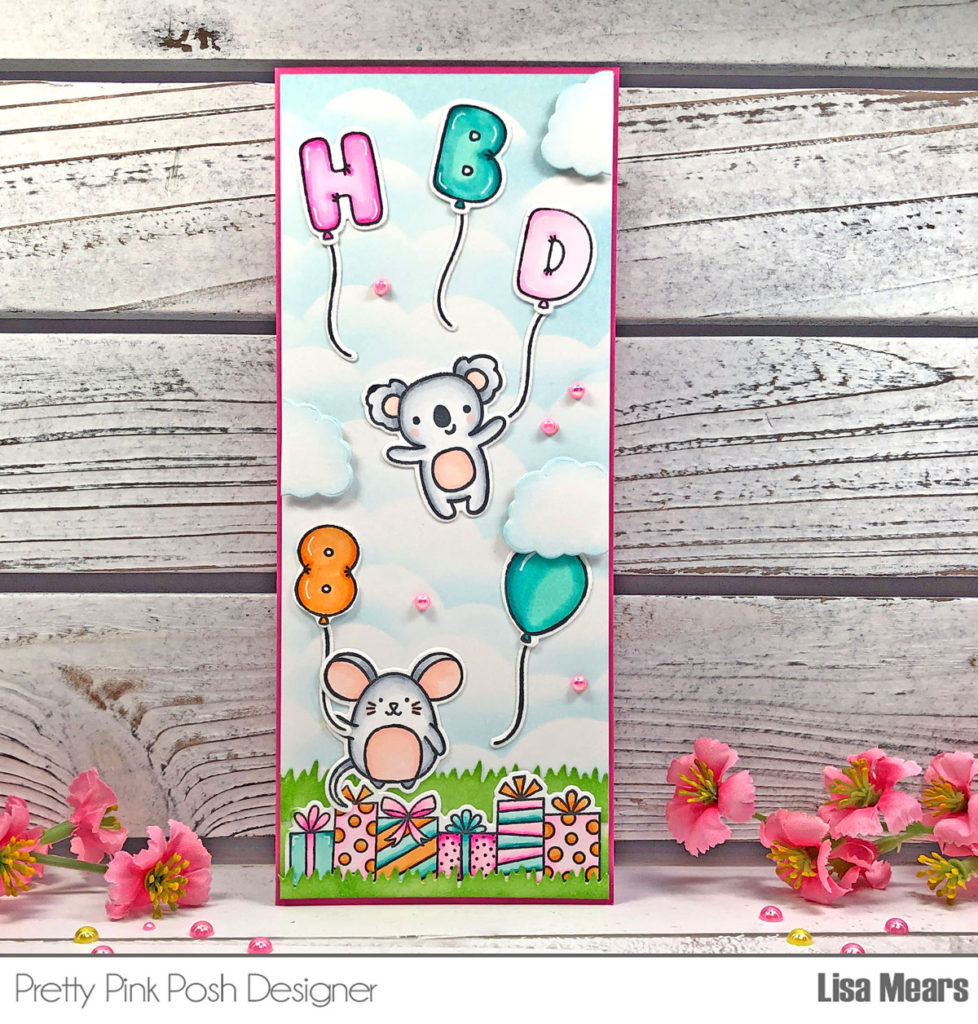
Hello crafty friends. It’s Lisa Mears here. Scene cards are some of my favorite cards to make and there are so many fun products in the Pretty Pink Posh February release that I just couldn’t help myself to make a fun slimline scene birthday card.
Since Pretty Pink Posh is turning eight years old this month, I decided to make a birthday card to celebrate the occasion.
Watch the video above I Watch the video in HD on YouTube
I started off by stamping the images from the Balloon Alphabet stamp set, Balloon Numbers stamp set, Birthday Borders stamp set, and the Crafty Critters Stamp set. (Note: The Crafty Critters stamp set was a promotional stamp set which has sold out. Stay tuned for when it’ll be released for purchase later this year!)
Copic colors used:
H Balloon – RV02, RV04, RV06
B Balloon – BG11, BG13, BG15, BG49
D Balloon – RV000, RV00, RV02
8 Balloon – YR12, YR14, YR16
Presents – YR12, YR16/RV00, RV02, RV04, RV06/BG11, BG13, BG49/RV00, RV02, RV04/BG11, BG13, BG49
Mouse and Koala – Blender, C0, C1, C3, C4/R01, R11
After coloring my images, I die cut them with the coordinating dies.
Next, I die cut the Nature Essential Dies from plain white cardstock and set aside the cloud border and grass borders from this set.
To create the cloud background, I started by cutting a piece of Bristol Smooth cardstock to 3 3/8” x 8 3/8”. Next, I used the cloud border that I die cut from the Nature Essential Dies along with Tumbled Glass Distress Oxide ink to create a cloud background for my card. I also applied Mowed Lawn Distress ink to the two grass border die cuts from the Nature Essential Dies.
Next, I began to assemble my card. I cut the Birthday Borders in half so that only the first six presents were showing. I added one of the grass borders behind the presents at the top of the border. I added the smaller grass border in front of the presents at the bottom of the border. I added some Mowed Lawn Distress ink to the bottom portion of the card panel and then adhered the Birthday Borders to the bottom of the slimline card panel. Next, I added the remaining stamped images to the card panel.
To add dimension to the clouds, I used the Build-A-Cupcake Die Set and die cut two of the frosting dies that resemble a cloud shape from white cardstock. I added Tumbled Glass Distress Oxide ink to the clouds and then cut the cloud die cut in half. I added foam tape to the back of the cloud die cuts and added them to my card. I love how the clouds add dimension to the card.
Finally, I added the card panel to a pink slimline card base that measures 3 1/2” x 8 1/2” and added the Flamingo Pearls to the card front.
Thank you so much for stopping by today. Be sure to check out all of the fun new products in Pretty Pink Posh’s February birthday release.
Have a wonderful day!
Lisa Mears