
Sneak Peek: Love Balloons + Love Borders
Hi friends, it’s Elaine from Pink Peppermint Cards. I am absolutely delighted to be back to share a sneak peek of some of the products in the new Valentine’s Day release!
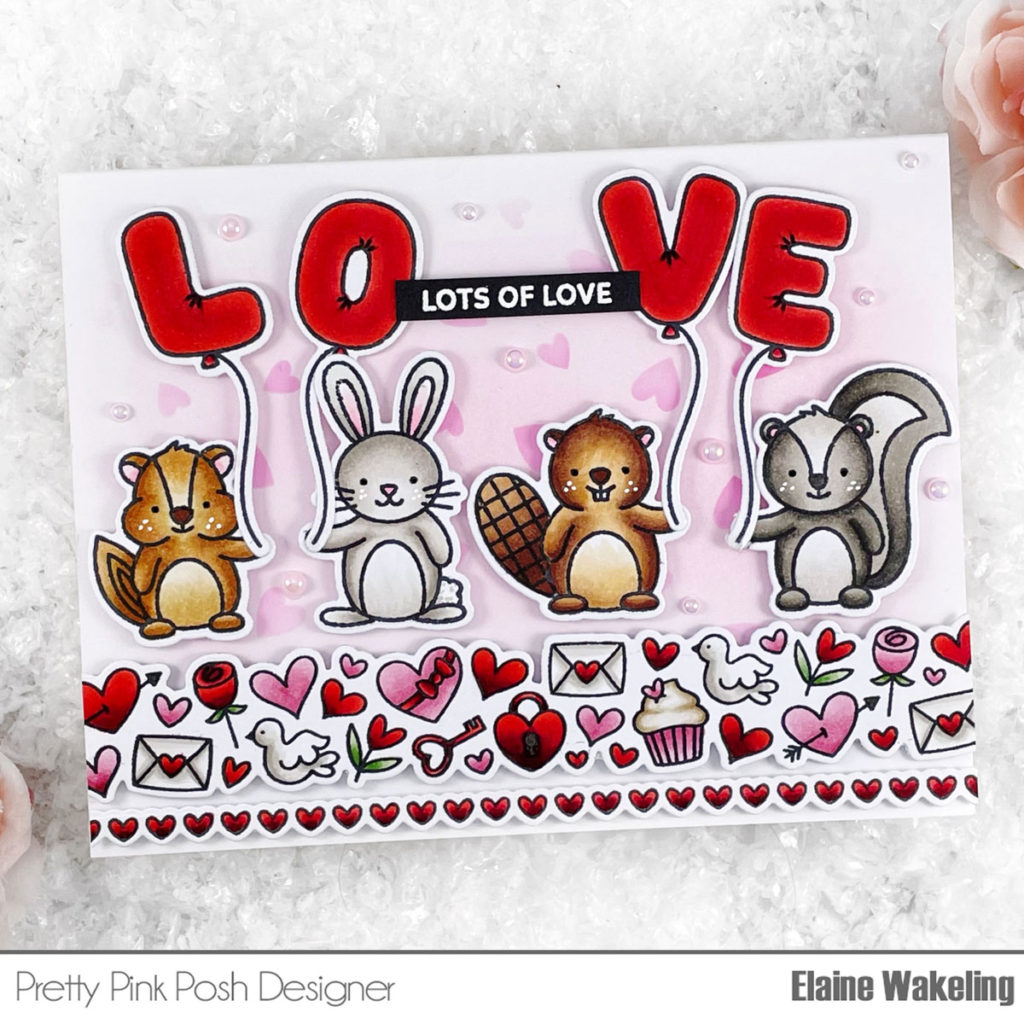
To start my project I stamped all the images from the new Love Balloons stamp set along with previously released Love Borders (we’re releasing coordinating dies for this set in this release!) with a black dye ink on to copic friendly card stock. I used copic markers to color all my images, the colors I used were:
Balloons: R29, R27, R24
Pink: R85, R83, R81
Hearts: R59, R39, R29
Rabbit: W3, W1, W0, RV11
Beaver: E27, E25, E23, E21, RV11
Racoon: W8, W6, W4, W2, RV11
Chipmunk: E37, E34, E33, E31, RV11
Once the coloring was done I cut out all the images with the Love Borders coordinating die and Love Balloons coordinating die. I set all the die cut pieces aside while I worked on the background.
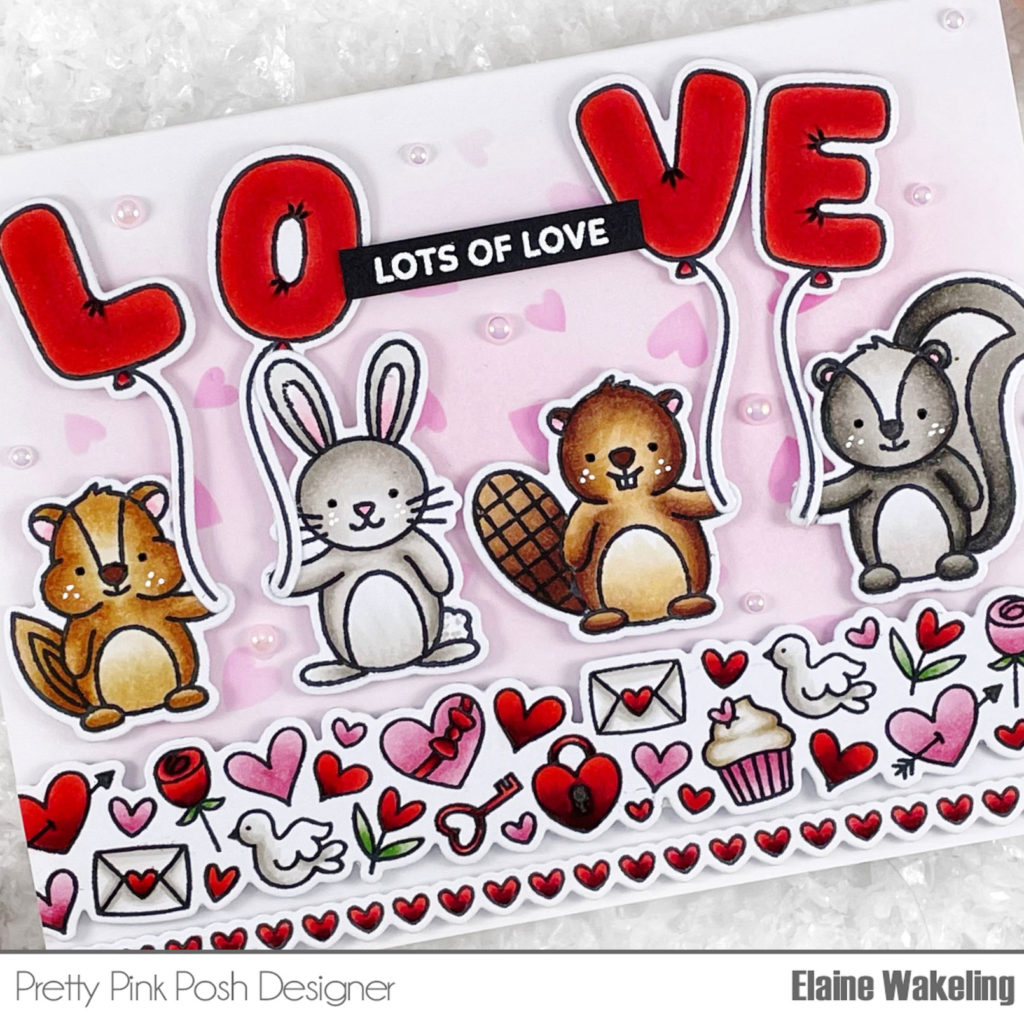
For the background I cut a piece of heavyweight smooth white card stock to 5.5” x 4.25”. Laying down my panel horizontally I used blending brush to lightly blend on some Picked Raspberry Distress Ink on to the panel. I started in the middle of the card stock and used circular motions to apply the ink, using a lighter hand the further out I pulled the ink. I laid the new Scattered Hearts stencil over the top of my card panel and applied more ink through the heart openings, being careful not to use a heavy hand. I avoided stencilling any hearts towards the bottom of the panel as knew I wanted to lay the love borders towards the bottom.
Setting the stencilled panel aside to dry, I applied foam adhesive to the back of all the die cut images. I love the dimension the foam tape gives. Bringing back the card panel, I first laid the row of hearts along the bottom and laid a wider image from the Love Borders above it.
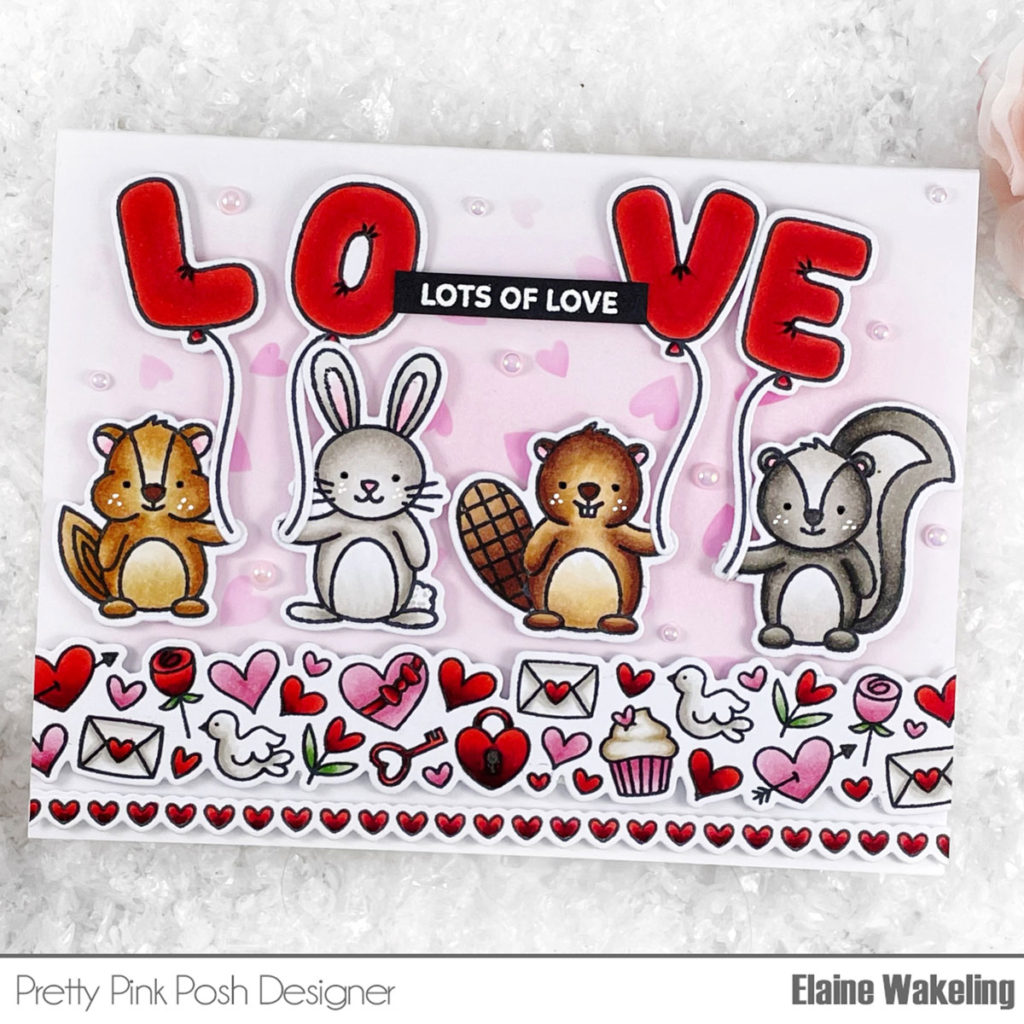
I spent quite a while arranging the critter images and balloons on to the card front. Once I was happy with the placement, I took a photo of them on my phone for reference then then carefully secured the critters to the card, then the balloons. The ends of the balloon strings were adhered to the paws of the critters with a tiny dab of liquid adhesive.
To create the sentiment, I treated a piece of black card stock with my antistatic powder tool and used the ‘Lots of Love’ sentiment stamp from the new Love Balloons stamp set and stamped it with a sticky clear embossing ink and coated with a fine white embossing powder. I used my heat gun to melt the embossing powder until it was smooth and glossy, then trimmed into a thin strip. I added a thin strip of foam tape on the back and adhered to the centre of the card. The whole panel was then secured to a white A2 sized card base.
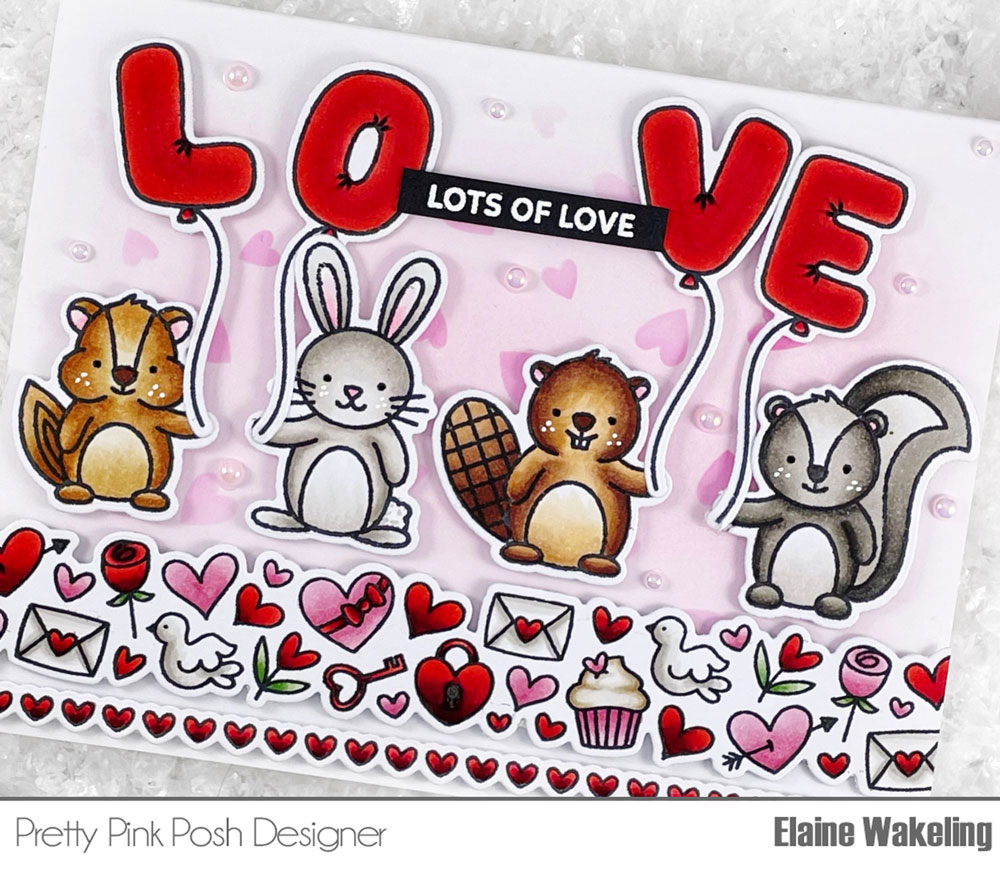
As a final embellishment to the card I added some shimmer to some of the colored elements with a clear sparkle pen and added some new Pink Blush pearls in various sizes all over the background of the card.
Thank you so much for joining me today! I hope you enjoyed taking a quick sneak at some of the new products releasing this month. Stop by tomorrow for another sneak peek!
Crafty hugs, Elaine xxx
OMG! These critters are darling!!!!!!!!!!!
Sweet card, the critters are darling and such a pretty border!
Such a sweet card.
Adorable card! Love the critters! and the awesome border!
This is too cute for words! I’m so excited for these adorable critters!
Adorable card! Thanks for sharing.