
Winter Snowman
Hello crafty friends! It’s Leica here today with a Christmas card featuring the cutest snowman die from Pretty Pink Posh’s new release. This is a standalone die called Snowman Shaker.
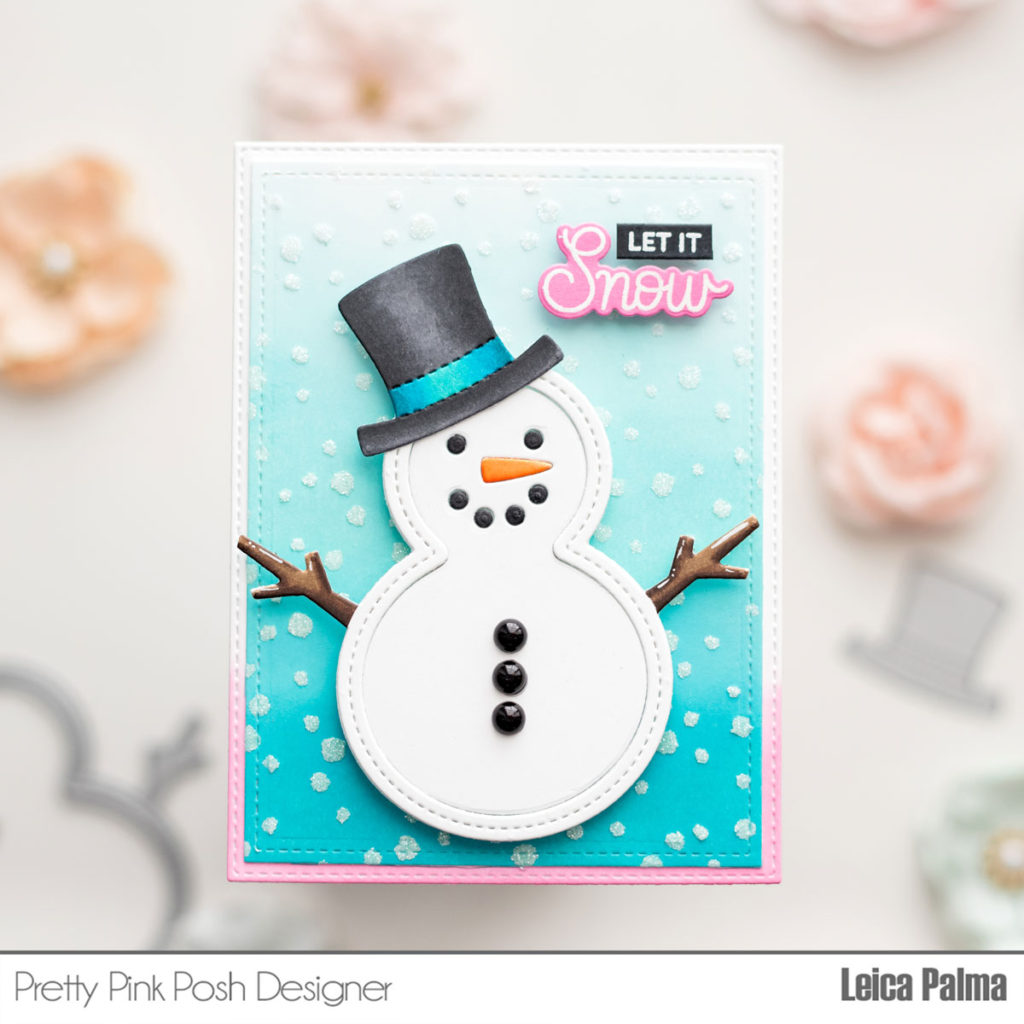
To begin, I cut a 3.75″ x 5″ white cardstock using the Stitched Notes Die. I ink blended the bottom portion with Kitsch Flamingo Distress Oxide Ink. I also cut a smaller panel and ink blended the bottom area with Peacock Feathers and Salvaged Patina Distress Oxide Inks. I added snow using Glitz Glitter Gel in white through the Snowfall Stencil.

Next, I cut the snowman and top hat in 110lb white cardstock. I colored the hat with Copic Sketch markers – BG09/05/13 and N9/7/5. I then colored the eyes and mouth with N9, nose with YR07/04, and arms with E47/44. To easily piece the snowman together, I turned it over and taped the edge of the border to the larger die. I also added tape behind the eyes, nose, and mouth. I then glued the eyes, nose, and mouth down to the tape.
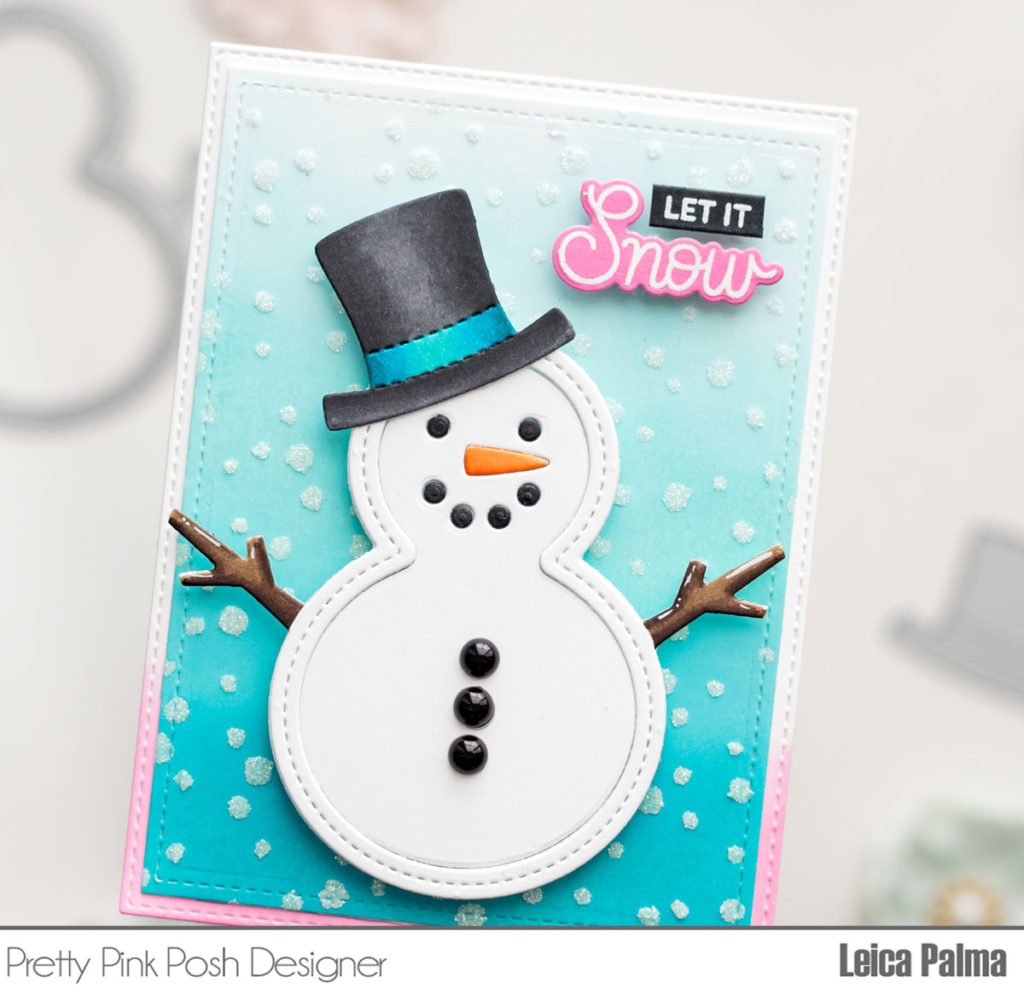
I foam mounted the snowman and hat onto the panel for dimension. Next, I white heat embossed “Let it” on a strip of black cardstock. I also white heat embossed “Snow” on pink cardstock and cut with its coordinating die. I foam mounted the sentiment onto the card panel. Lastly, I adhered the panel onto a card base – 5″ x 7.5″ scored at the 3.75″ mark.
Thanks so much for stopping by today! I hope you enjoyed this Christmas card.
So adorable!💗