
Easter Theme Week- Day 6
Hi friends! It’s Jane here sharing some inspiration for Easter theme week! Be sure to shop the Easter section for 15% off items in this category all week!
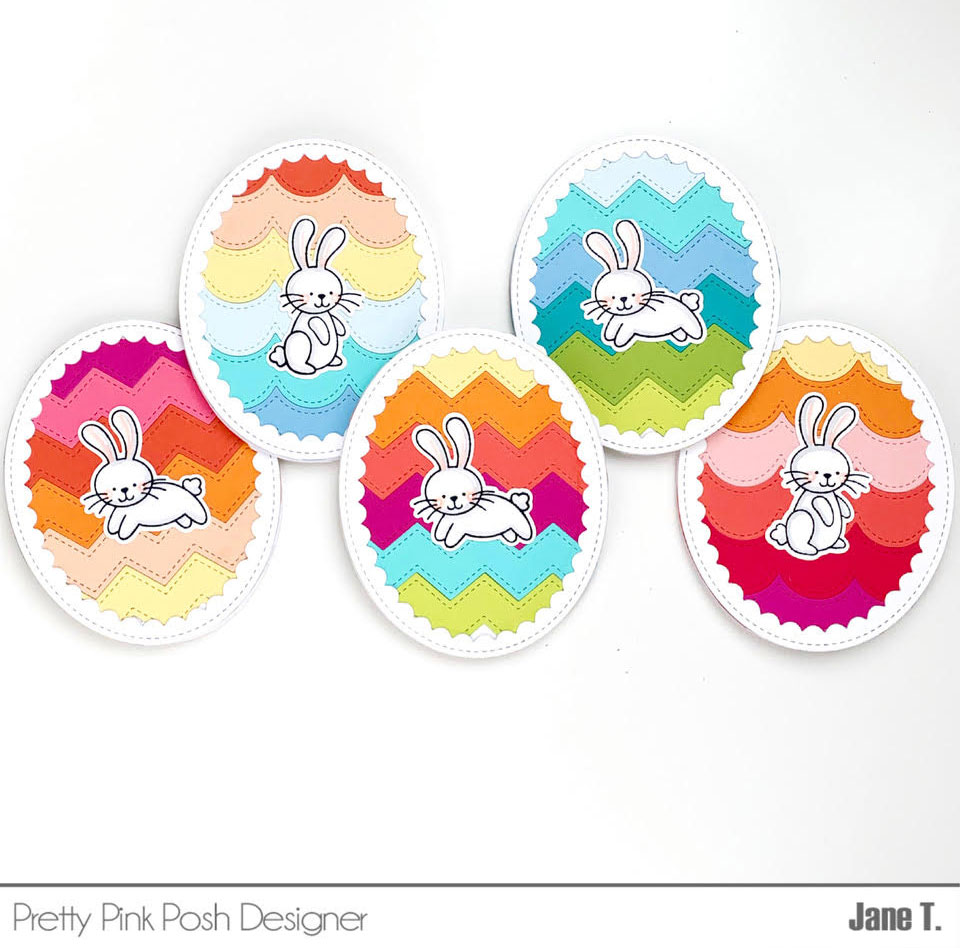
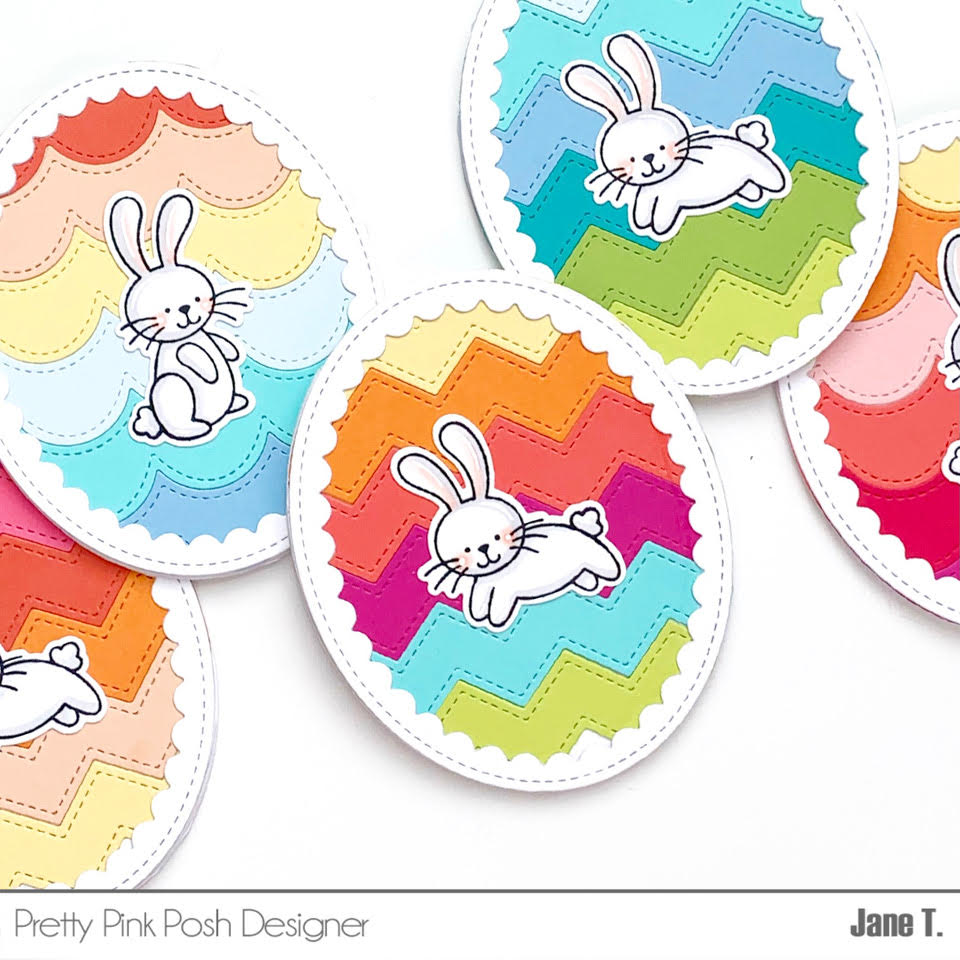
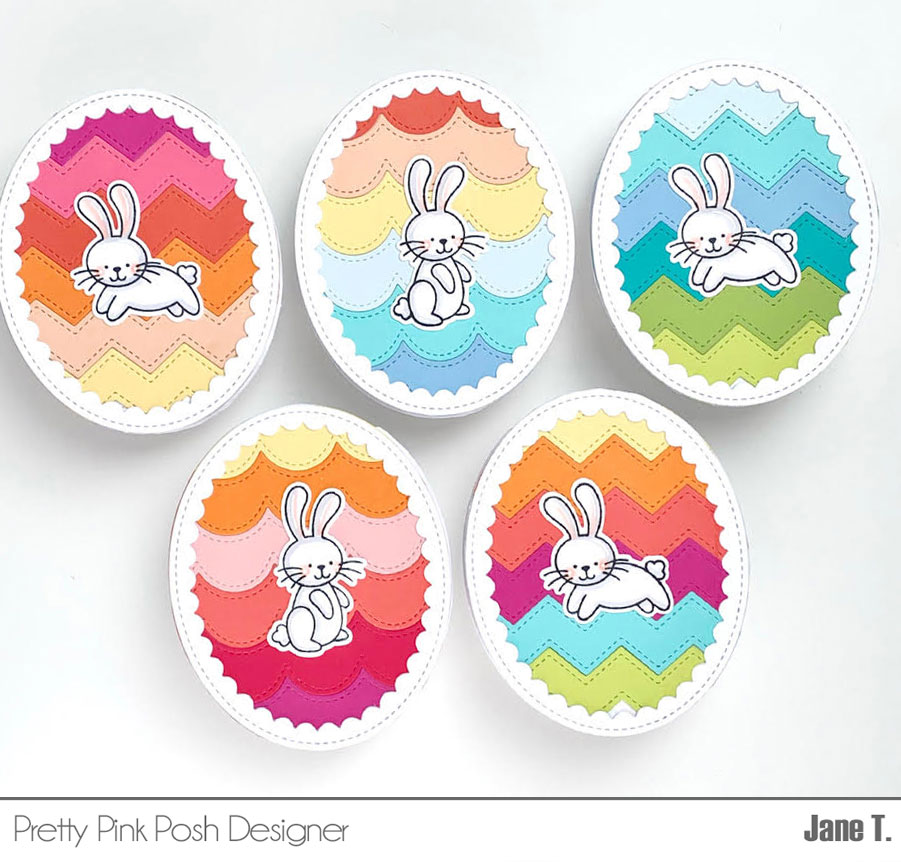
Today, I’ve created a bunch of colorful egg shaped Easter cards using Pretty Pink Posh products!
To create these cards, you’ll need various colored cardstock (scraps work well too!) and a few Pretty Pink Posh dies! The egg shape was created using the Scallop Ovals die set which was cut from white cardstock. For the inner pieces, I used the Stacked Edges 1 die set in the zig-zag pattern and scallop pattern.
Moving from left to right I’ll mention all the various scraps of cardstock I used to create these colorful eggs.
Card on the far left moving top to bottom: fuchsia (Stamp Market), hibiscus burst (Papertrey Ink), coral reef (Stamp Market), fake tan, apricot and sticky note (all Lawn Fawn).
Next card (2nd over from left) moving top to bottom: coral reef (Stamp Market), apricot, sticky note (Lawn Fawn), icy mint (Bazzill), mermaid and moonstone (Lawn Fawn).
Middle card (top to bottom): sticky note, fake tan (Lawn Fawn), berry sorbet (Papertrey Ink), fuchsia Stamp Market), mermaid (Lawn Fawn), juicy pear (Bazzill).
Next card from top to bottom: icy mint (Bazzill), mermaid, moonstone (Lawn Fawn), candy necklace, easter grass, juicy pear (all Bazzill)
Last card (farthest on the right) from top to bottom: sticky note, fake tan (Lawn Fawn), cotton candy (Stamp Market), berry sorbet (Papertrey Ink), raspberry and fuchsia (Stamp Market).
After all the pieces were cut, I adhered them to a piece of light weight cardstock (printer paper also works) in various color combinations. Then, I adhered the white frame to the top of the patterns and cut the edges using scissors. This creates the front of the card.
Next, I used the same scallop oval die to cut a folded piece of cardstock leaving the top edge off my cutting plate. The pressure from the die cutting machine will cut the frame out of the top portion of the card but will leave an indentation on the inner portion. To remedy this, I just added another die cut white frame to the inside. I also added a piece of white cardstock (cut with scissors) to the back of the front flap of the card. You can see the image below. Don’t worry about the front of the card, the colorful frame will cover it up when you adhere it to the front of the card.
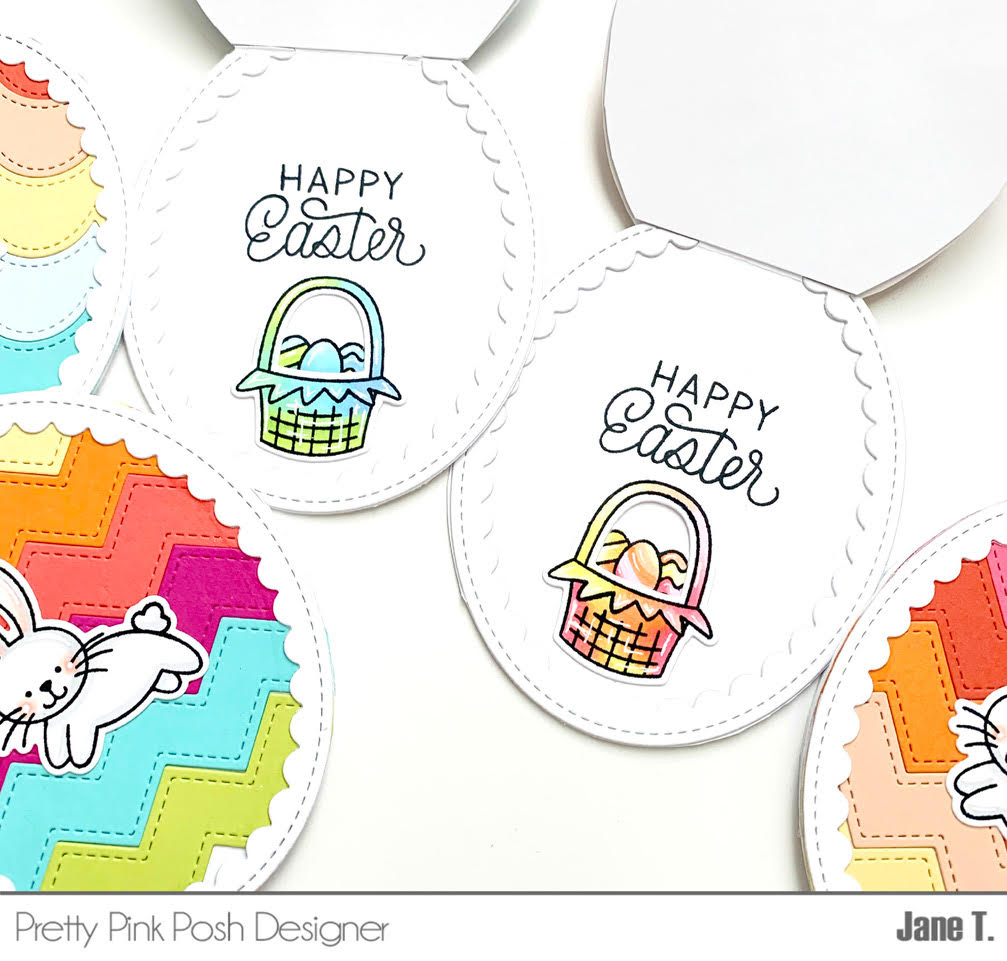
To create the bunnies, I used the new Easter Bunnies stamp set to stamp the images in copic friendly black ink and colored them using copic markers. I also stamped and colored the easter baskets and eggs to add inside my cards. The sentiment “happy easter” is also from the new Easter Bunnies stamp set and I stamped it on the inside of each egg shaped card using black ink.
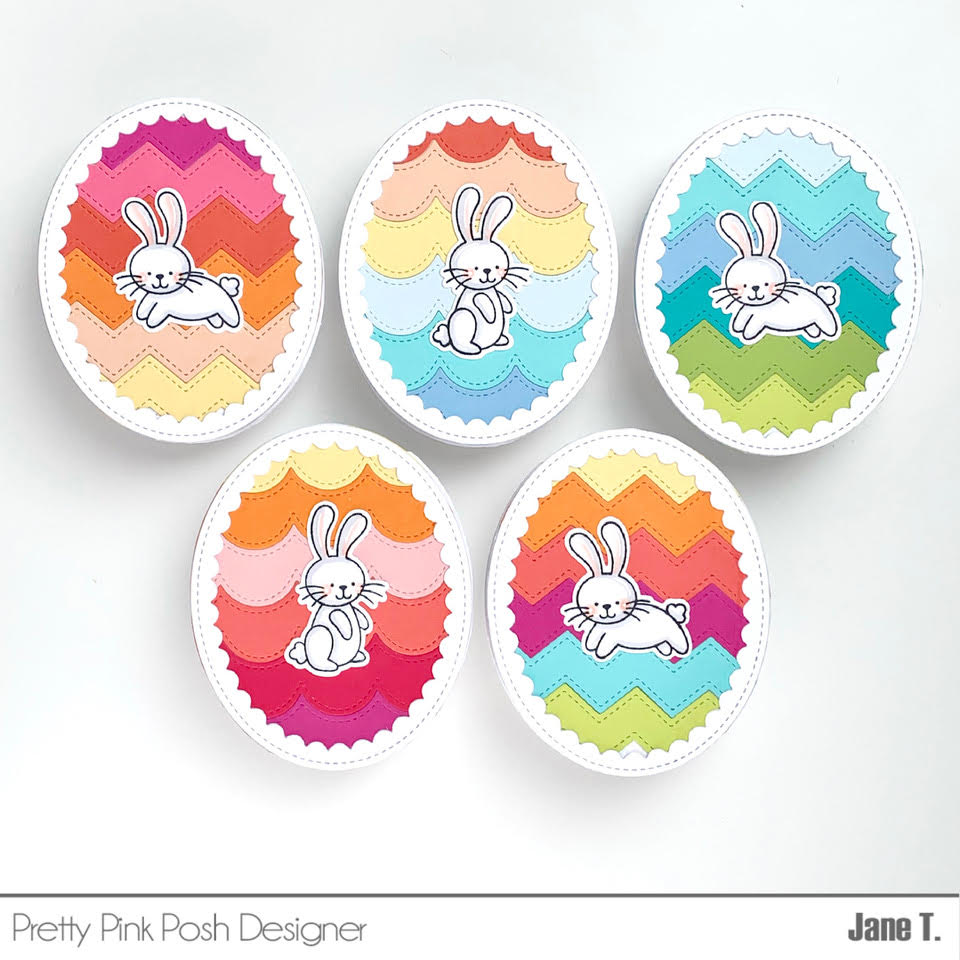
White gel pen was used to highlight the images and the images were cut using the coordinating dies and adhered using liquid glue.
Thanks so much for stopping by today! I hope you enjoyed this fun Easter project using Pretty Pink Posh products! Be sure to stop by the store and save 15% off all Easter section products this week!
Adorable egg shaped cards! So creative…
Thanks for sharing.
Love all you little eggs. Just the cutest things. Thanks for your detailed instructions.
These look SO CUTE!! What a great idea you came up with. I would love to make some of these, and hang them from a decorative tree as decorations. Great idea.