
Easter Theme Week- Day 4
Good Morning Friends! It is Dana here today, and I am excited to be sharing some inspiration for Easter Theme Week with you all. I love how some of the older products can be mixed and matched and coordinate so well with the new release. Let’s get started, shall we?
Don’t forget: ALL items in the Easter section are 15% off this week!
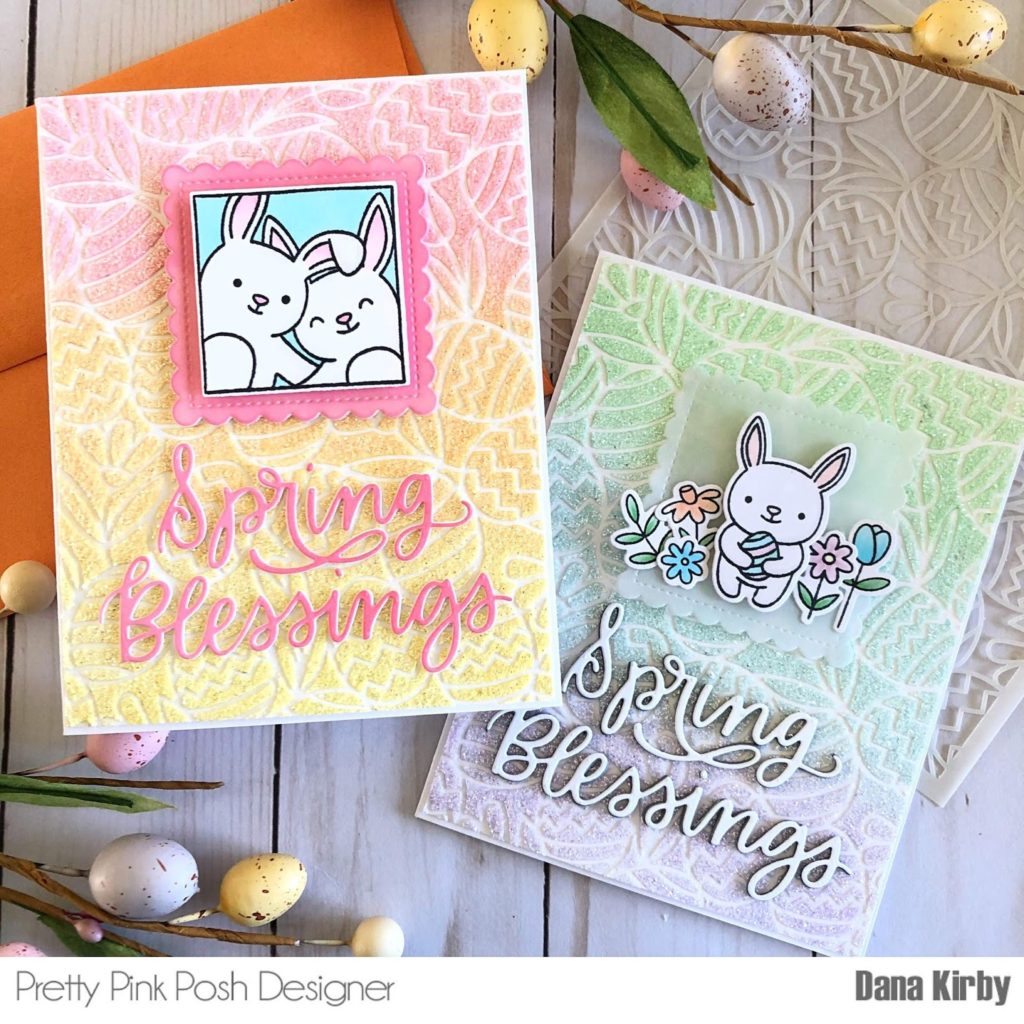
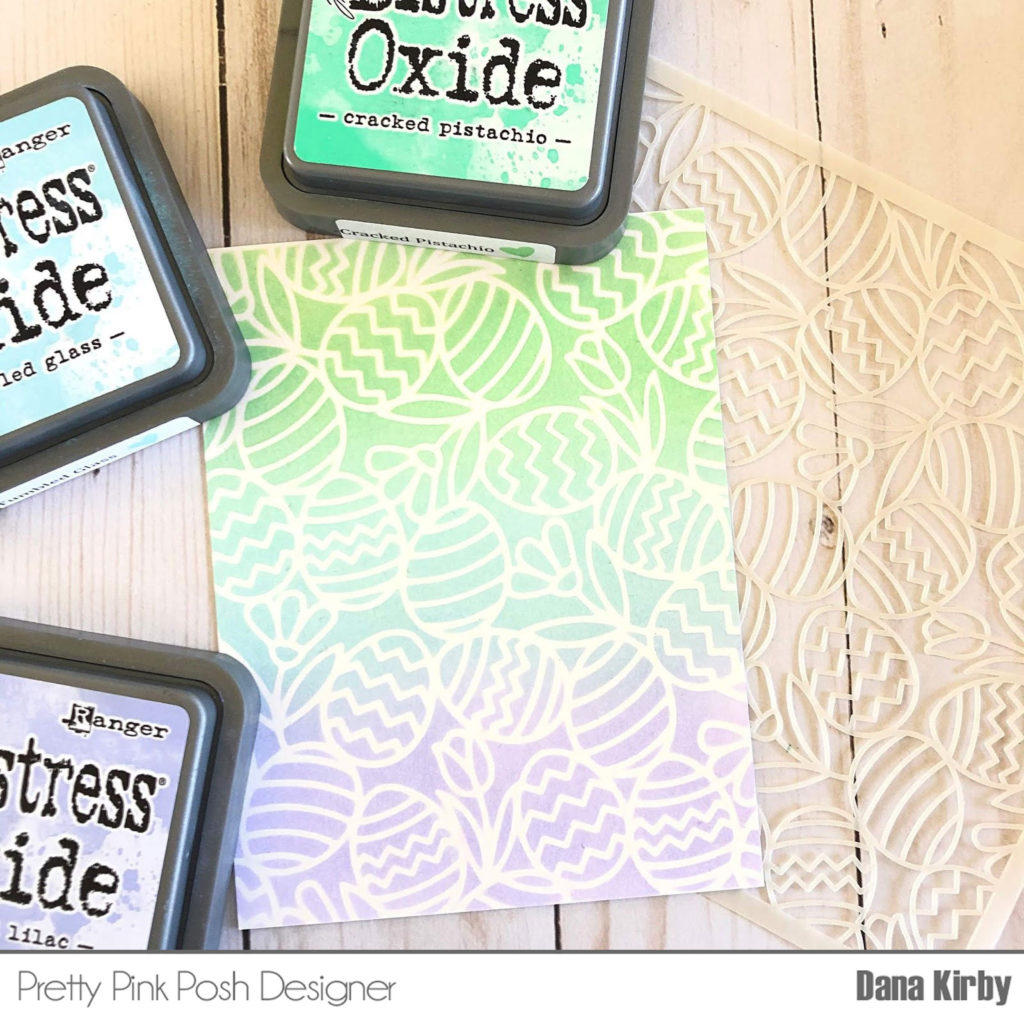
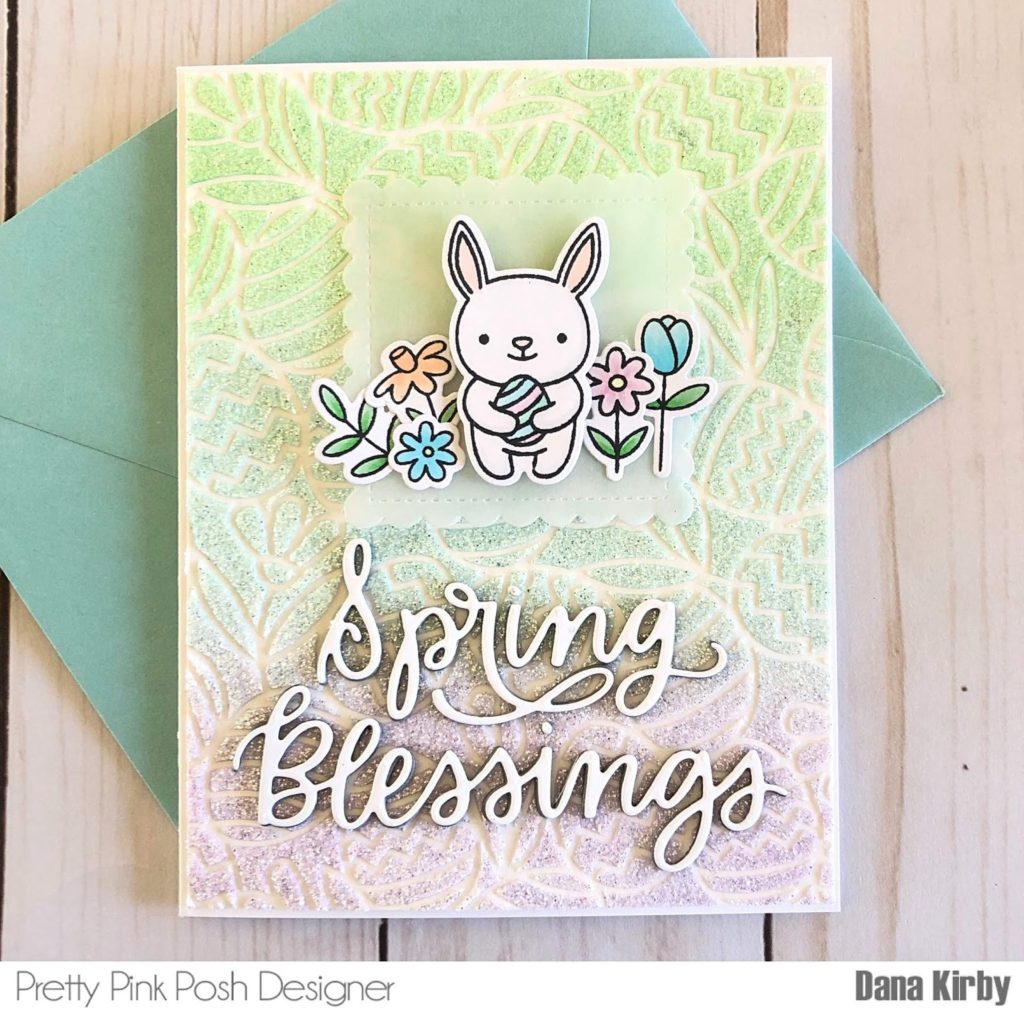
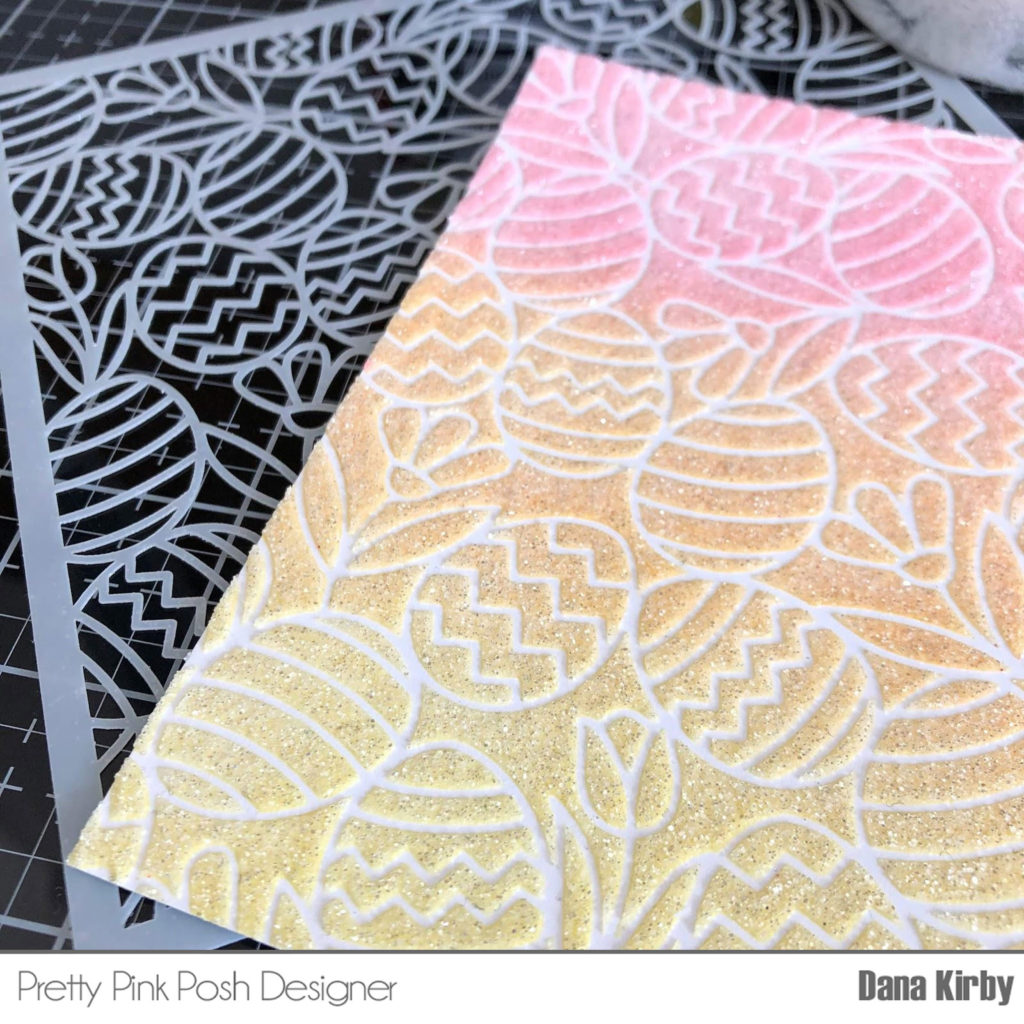
For my first card, I began by creating my background. I sprayed the back of the Easter Background Stencil with Pixie Spray to hold the stencil in place. I then attached the stencil to a piece of Bristol smooth cardstock and ink blended Distress Oxide Ink onto my panel. The colors I used were: Cracked Pistachio, Tumbled Glass and Shaded Lilac.
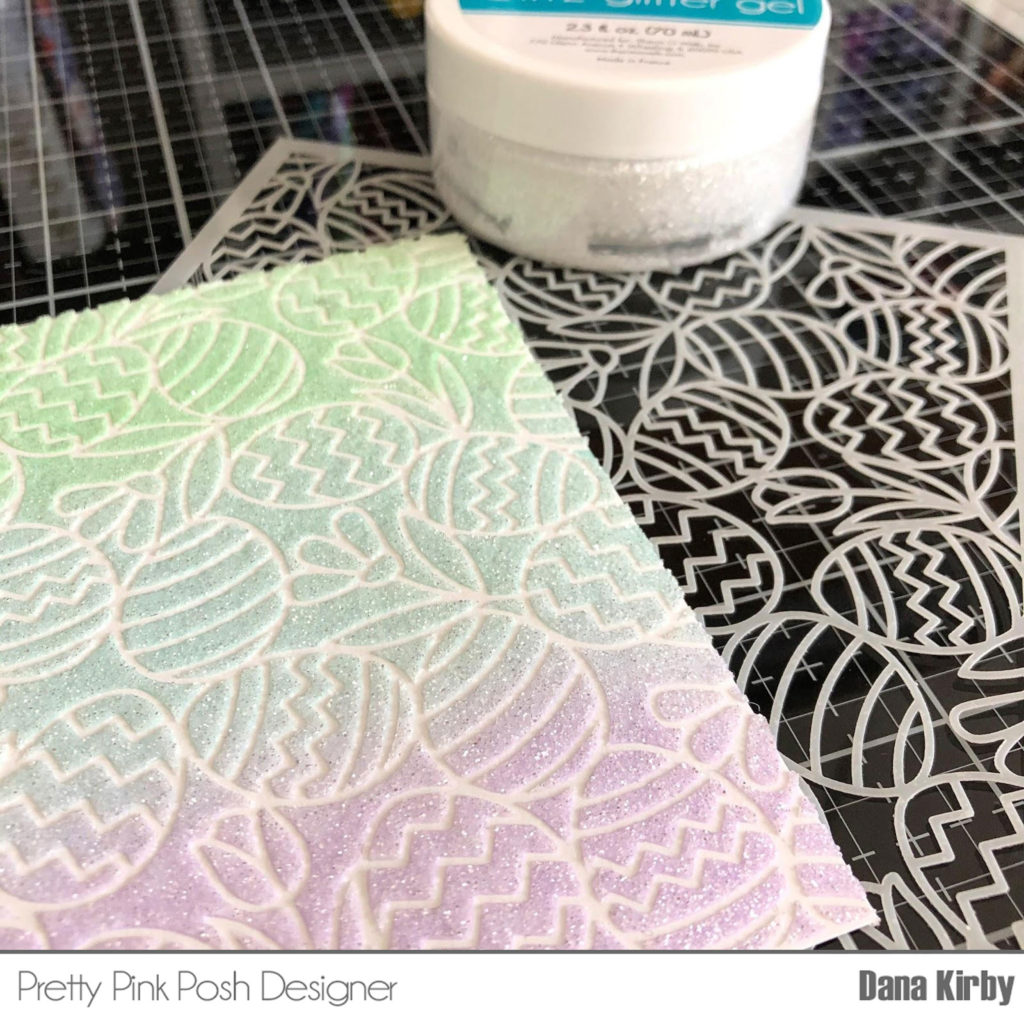
Next, I applied Glitz Glitter Gel in White over my background and stencil.
*I only picked up the stencil to take my photo…for this step you want to apply the Glitz Gltter Gel without moving the stencil. The Glitz Glitter Gel creates such a gorgeous sparkly background!
I set my background aside to dry and began working on the rest of my card. I stamped the adorable bunny and flowers from the Bunny Friends stamp set. I colored my images with Copic markers and used the coordinating dies to cut them out.
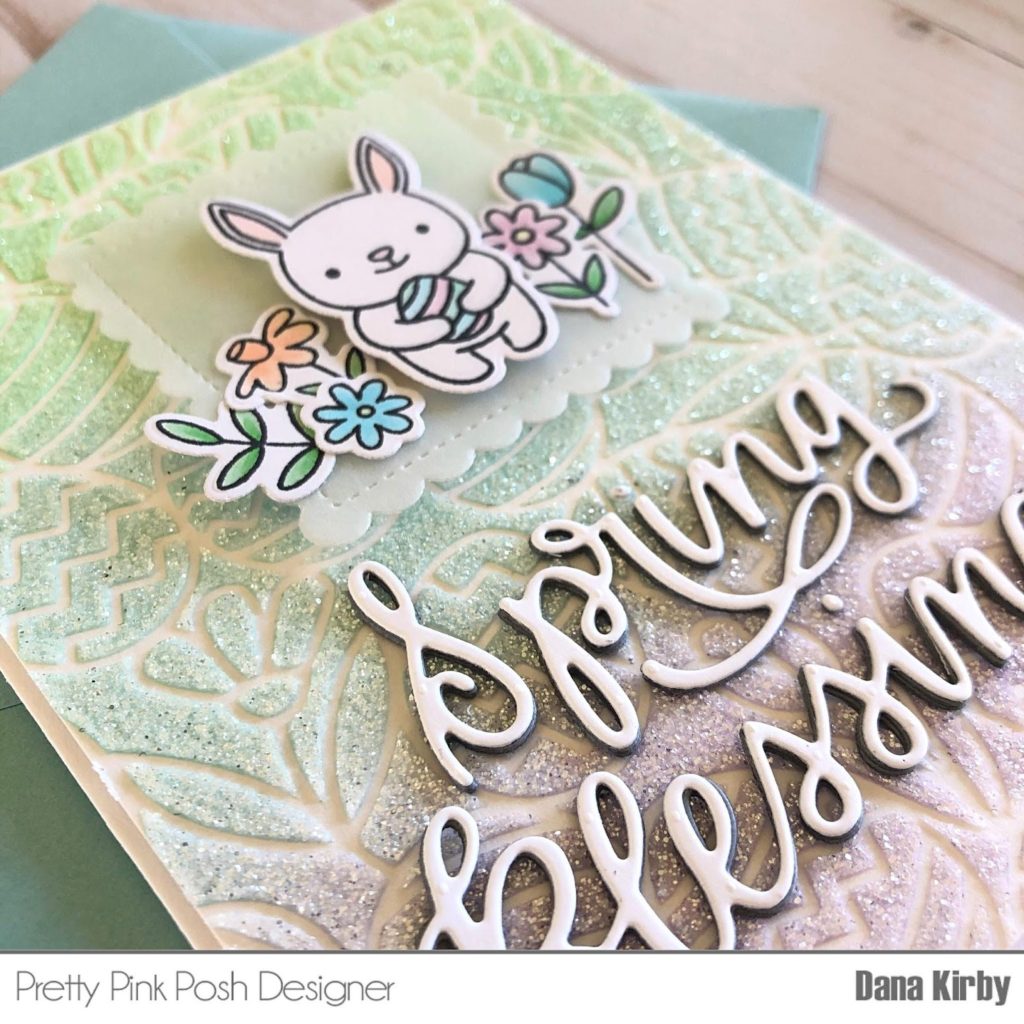
I attached my bunny and flowers to a vellum scalloped square, die cut with the Spring Days Die Set. Lastly, I used the Spring Blessings Script Die to die cut my sentiment. I attached this to my card panel with a little liquid glue to finish my card.
For my next card, I once again began by creating my background. I used Distress Oxide Ink in Worn Lipstick, Spiced Marmalade and Squeezed Lemonade along with the Easter Background Stencil. Once I had applied my ink, I added Glitz Glitter Gel in White to my background…creating another sparkly card panel!
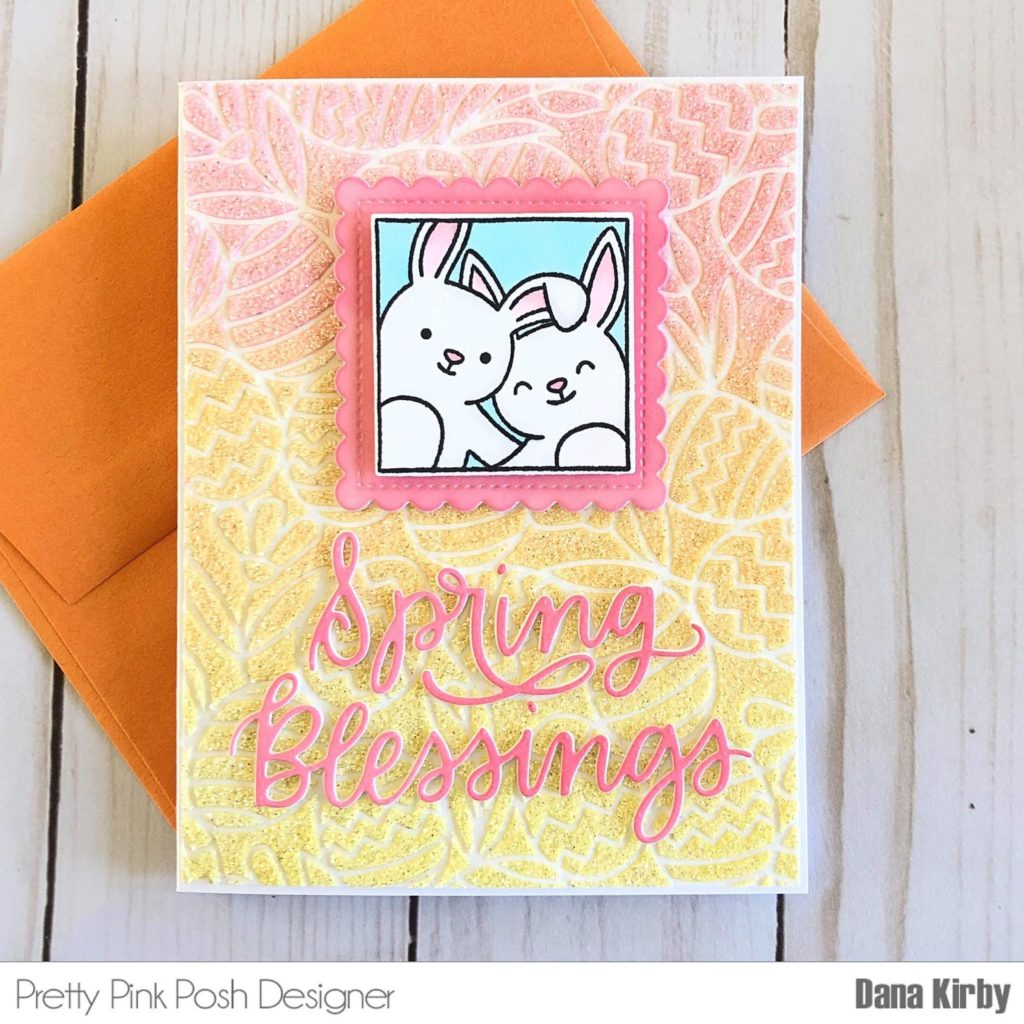
I stamped the bunny friends from the Spring Days stamp set and colored them with Copic Markers. I then used the Spring Days die set to die cut my square and scalloped frame.
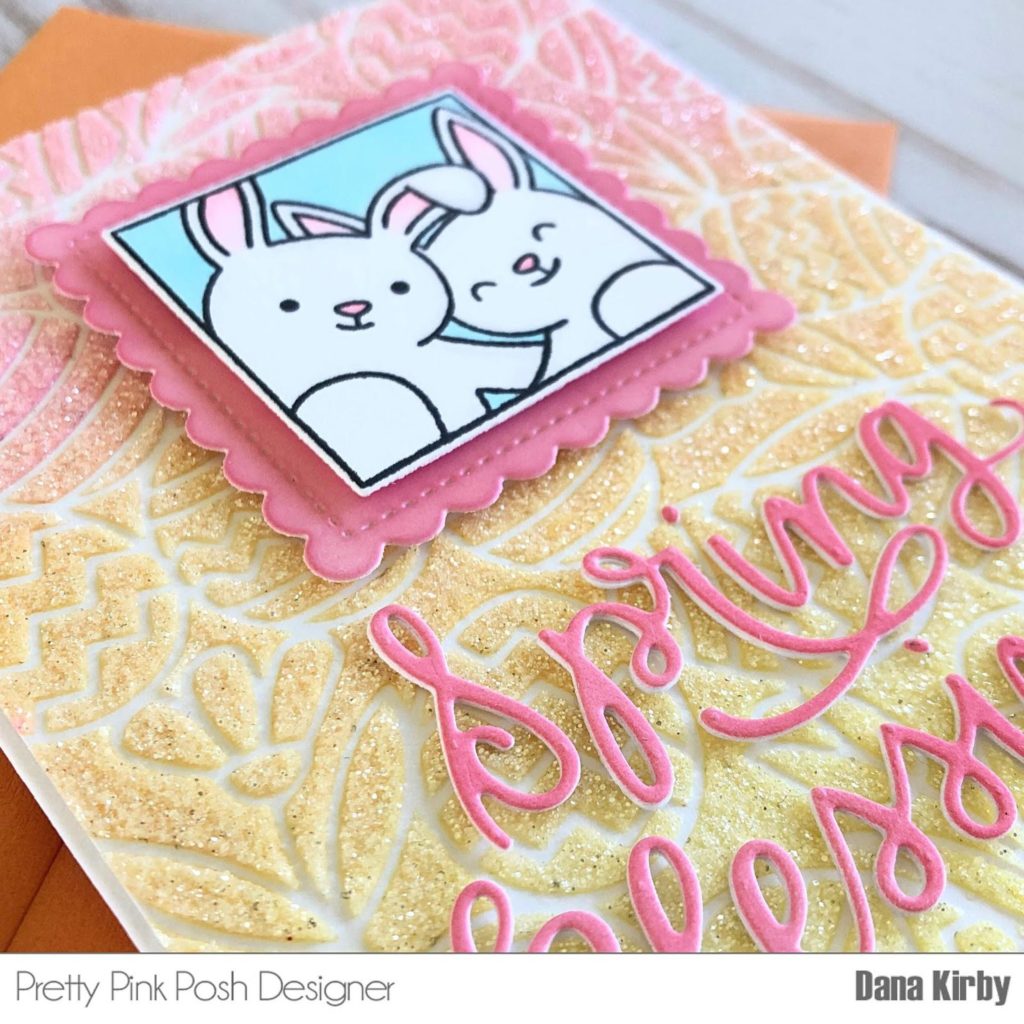
To finish my card, I once again used the Spring Blessings Script Die for my sentiment. As you can see, I die cut my sentiment a few times and stacked them. This helps add a little dimension and stability to the sentiment.
Thanks for joining me today and I hope you enjoyed my cards! I hope to be back soon to share another project with you all.
Also, remember that all of the products in the Easter Category are 15% off this week only. Happy Shopping!
Your cards are adorable.
Super cute card!
How do you clean your stencils after using the glitter paste/gel? Mine never look the same and typically don’t work as well, especially on such fine details.