
Sneak Peek: Love
Hi friends, this is Angelica, and I’m sharing sneak peaks of the new Love stamp set, which is in the upcoming January 9th release.
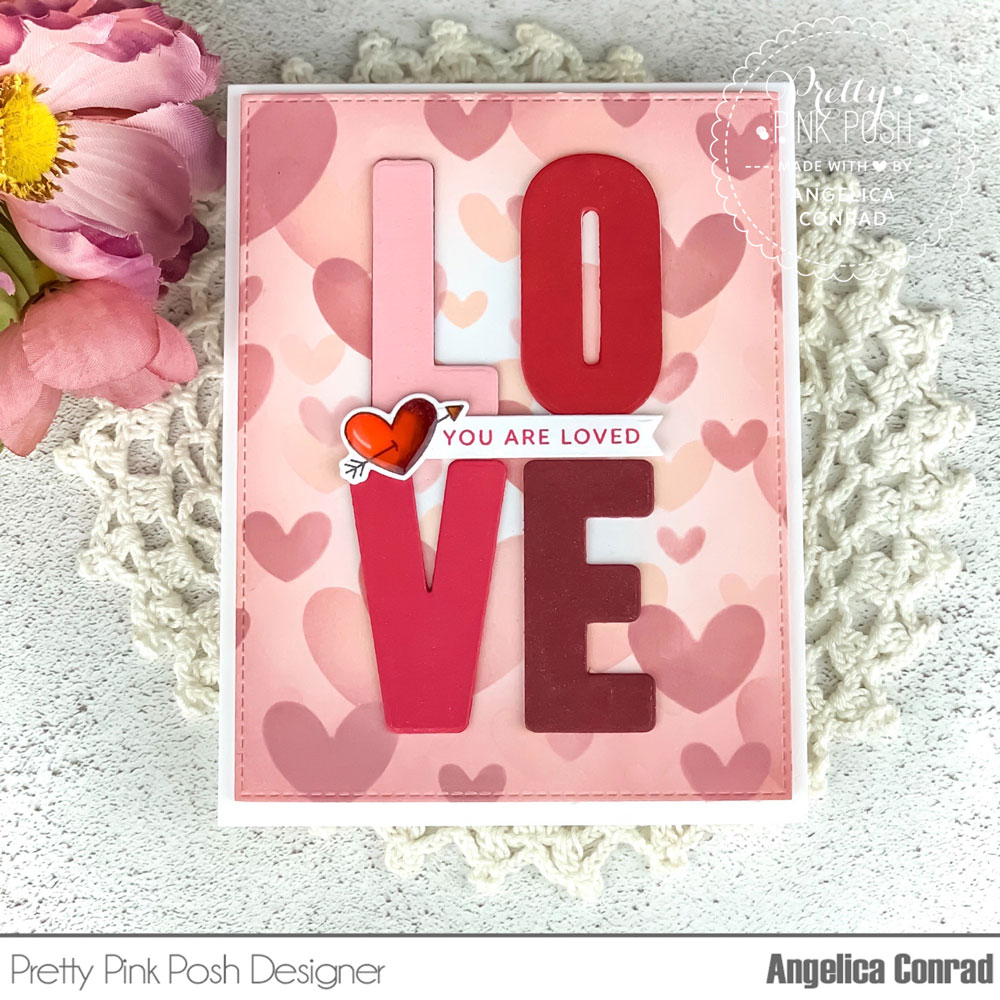
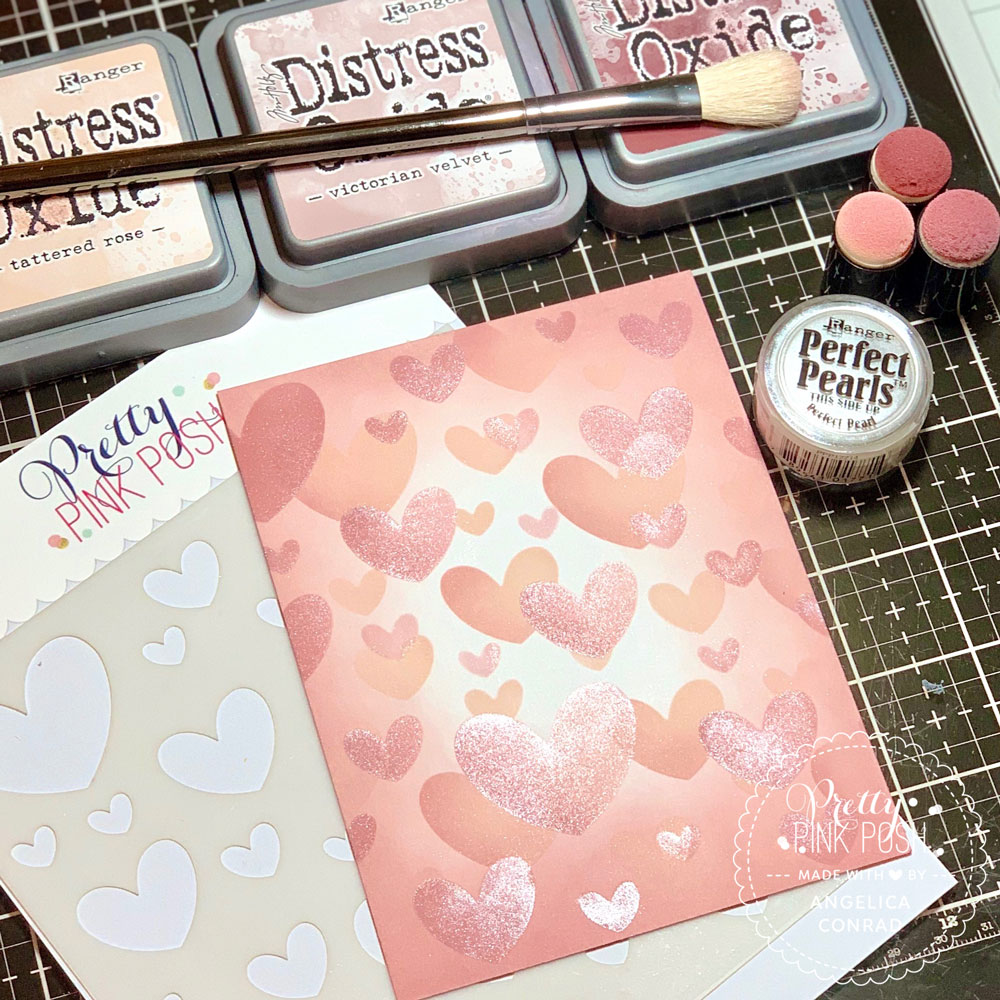
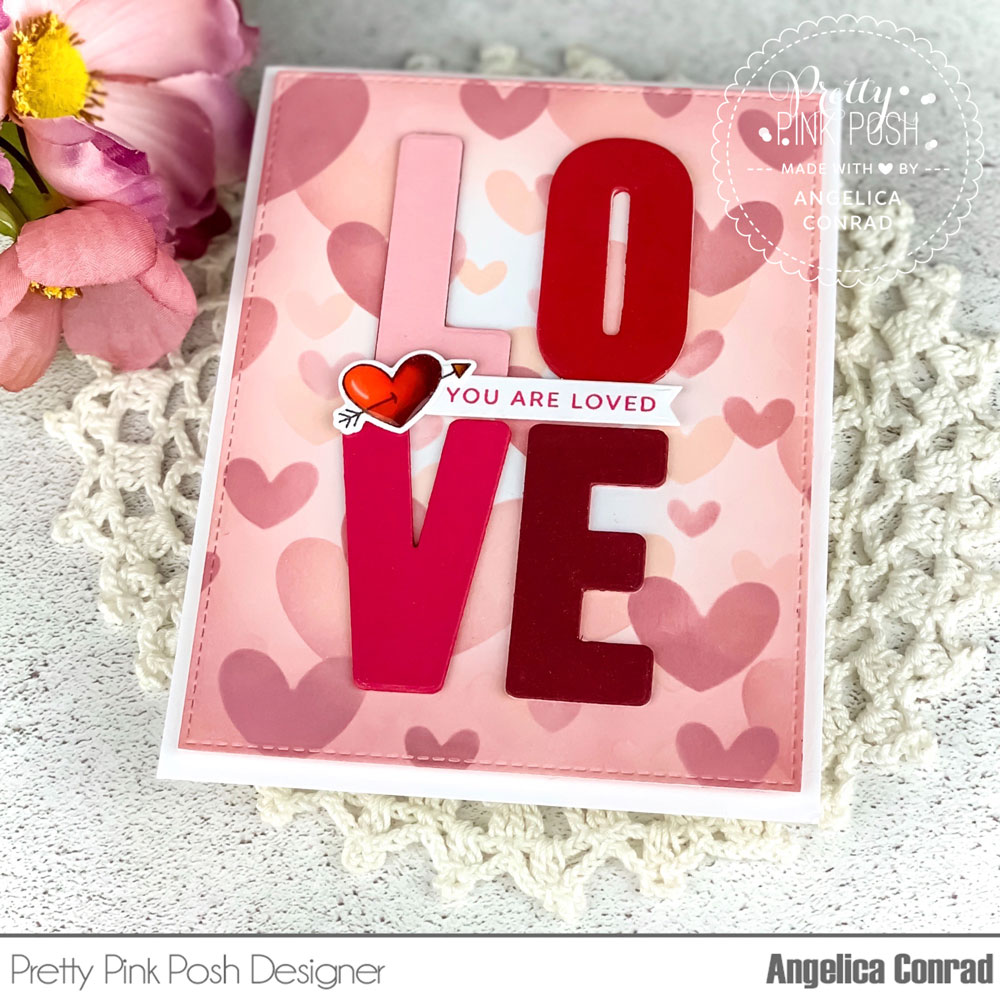
For my first card, I started with my background. I used the new Layered Hearts stencils and the following Distress Oxide Inks: Aged Mahogany, Victorian Velvet, and Tattered Rose. I blended Victorian Velvet and a touch of Aged Mahogany around the edges, then used the stencils to ink-blend on the hearts. Before removing Layer B stencil, I brushed the hearts with Ranger Perfect Pearl powder for shimmer.
I used the new Love coordinating dies to die-cut four different pink/red tone card stock. I stacked and glued the letters together, then attached them to the heart panel. I added the panel to a card base with foam adhesive, and added a stamped sentiment and colored heart from the new Love stamp set. I brushed the letters and colored heart with a shimmer pen for extra sparkle, and added shimmer and added Crystal Glaze to the heart to finish the card.
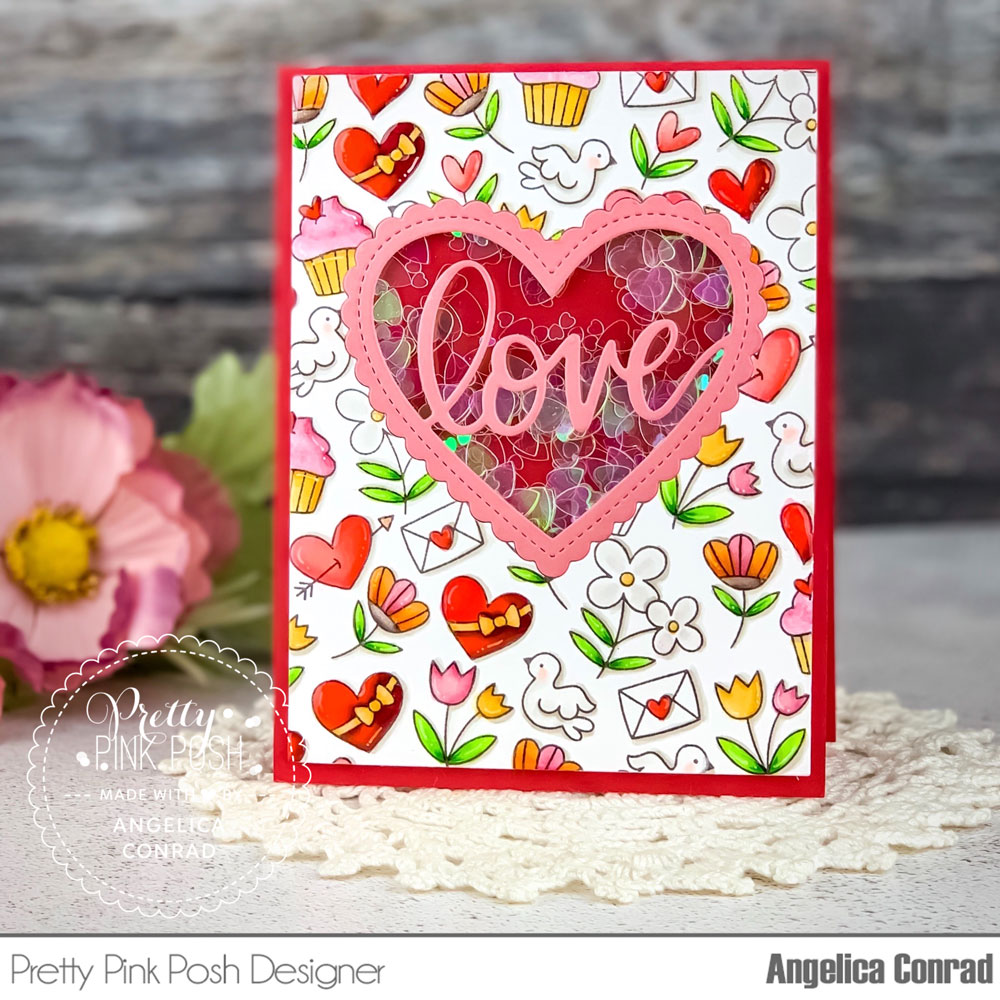
My second card I am sharing today is a bright shaker card.
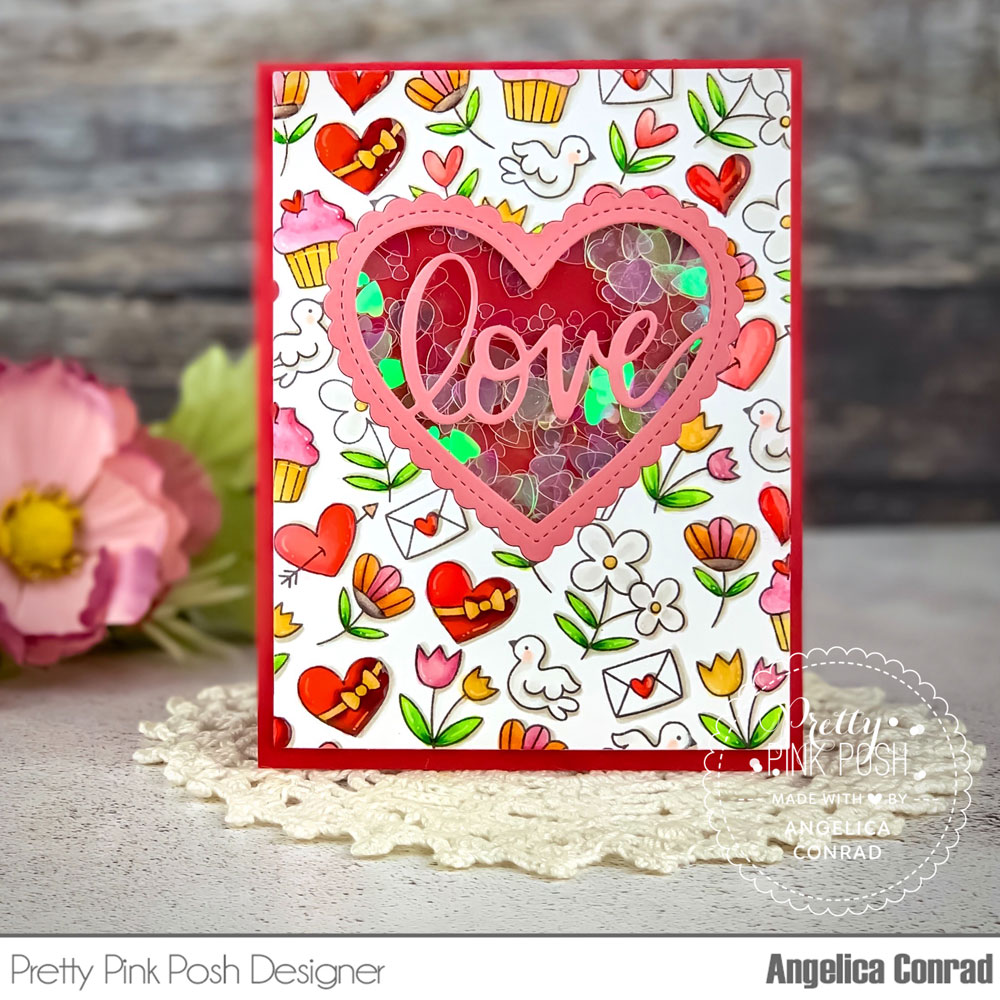
I used the small accessory stamps from the stamp set to make my own background. This is one of my favorite card making techniques to do. I stamped all of the images onto white card stock, then trimmed the panel. I used Love Shaker die die-cut a window. (I did this before coloring so I didn’t color more than what was necessary.) Before coloring the images with Copic markers, I added a drop shadow to each image with W3 and W1 markers.
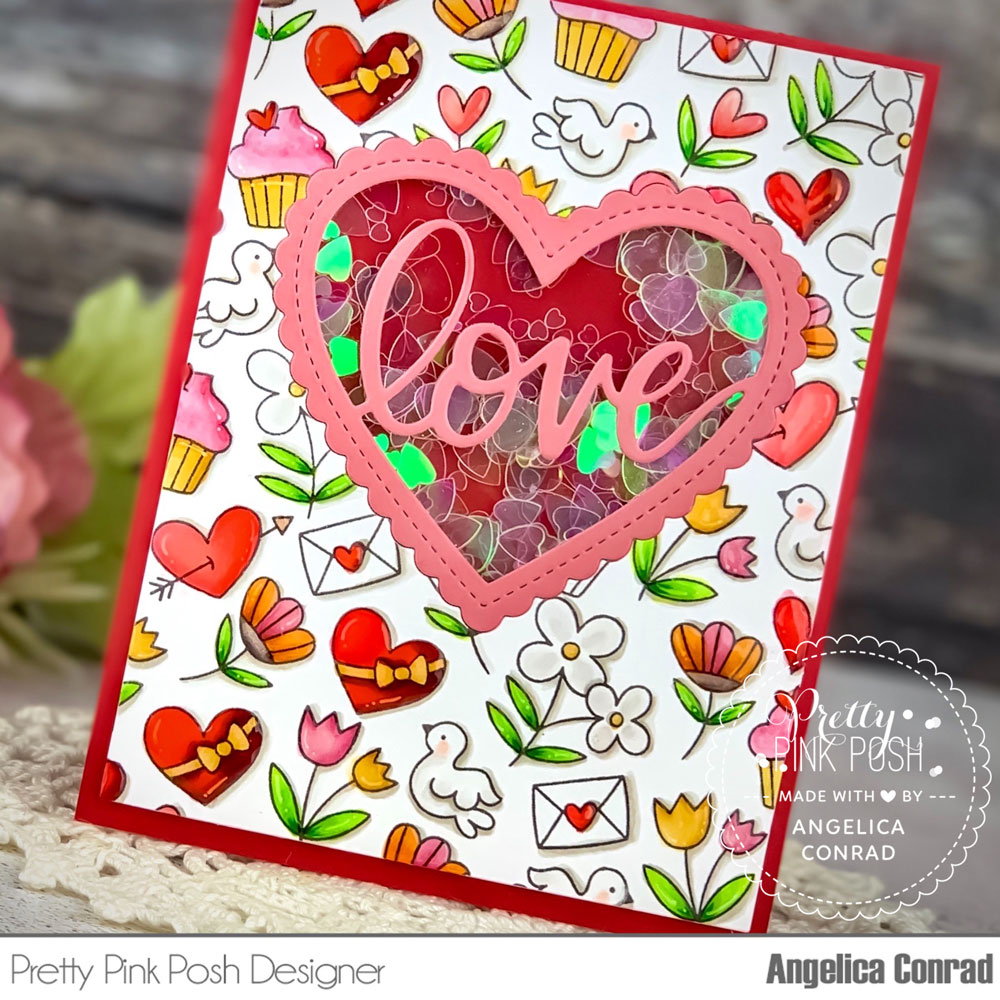
To make the shaker element, I added 1/8″ Scor tape around the backside of the die-cut window. I attached a piece of acetate onto the adhesive to close the window. I turned the panel around and added the Love shaker die cut to the front. I turned the panel back around and added thin foam adhesive strips around the window.. I filled the window with Iridescent Heart Confetti, and closed the window with a another piece of acetate. I added foam adhesive all over the back of the panel, and attached it to a red card base. I used a shimmer pen and Crystal Glaze to add sparkle and shine to finish the card.
Stop by tomorrow for a brand new sneak peek of the new release!
Lovely backgrounds on both cards, thanks for sharing the inspiration.
Ooooo love that stencil!
Wow, both of these cards are STUNNING!!!!!!!!!
The small accessory stamps are ADORABLE!!!!!!!! I love the background you made….
OH my!! I TRULY luv this set!!! The papers..The dies.. & stamps!!! And..OHHH!! The shaker element!!! Ahhh I LUV shaker cards!!! This is so cool!!! ❤️❤️❤️❤️
That background on the last card is stunning. Can’t wait to see the whole release!!!!
Beautiful card
This is so cute!! I LOVE the fun stencil and the large letter!! The background you created on the second card is spectacular!!
These cards are wonderful, especially love the backgrounds! Thanks for sharing!
Gorgeous color scheme and cards😀
Two exquisite backgrounds on these gorgeous cards!!
Beautiful background and I have to get your new layering stencil!
Love the drop shadow technique on the second card! Great tip! Plus both cards are stunning! I like seeing the peeks on Instagram! Hee hee hee hee, so fun to see!
Love the layering hearts stencil and the small accessories stamps!