Cards

|

Valentine Theme Week- Day 4

valentinethemeweek

Hello friends!

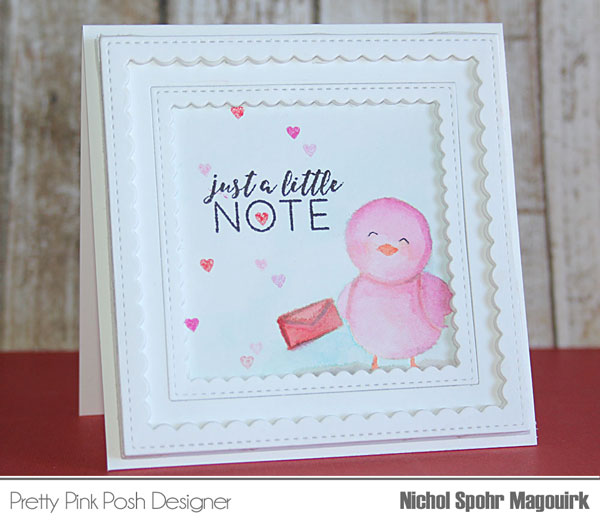
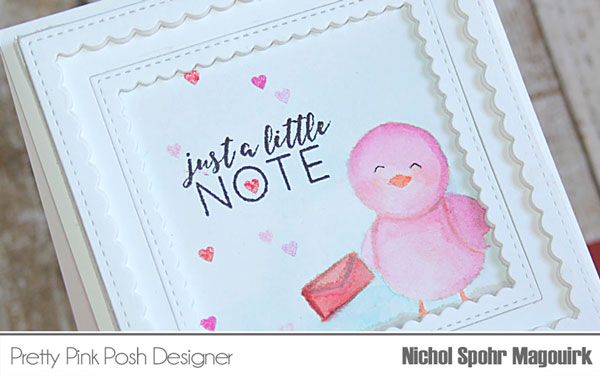
Nichol here and today I’m sharing a Valentine themed card (that could actually be used anytime) showcasing Pretty Pink Posh stamps and dies. I used the adorable PPP Just A Note Mini Stamp with my favorite Scallop Squares Dies to “frame up” the super cute pink chick!
PPP_ValentineWeekJustANote1

To create my card I die cut a piece of watercolor cardstock using the largest Lawn Fawn Small Stitched Stackable Die. I love this die because it’s exactly the same size as the Scallop Square Die so it makes the perfect backing if you’re building up frames with dimension. I stamped the chick and envelope from the PPP Just A Note Mini Stamp Set using Antique Linen Distress Ink and then I watercolored the images using the following Distress Markers and a paintbrush dipped in water:

[ DISTRESS MARKERS COLORS: Spun Sugar, Picked Raspberry, Candied Apple, Ripe Persimmon ]
PPP_ValentineWeekJustANote2

Once the images were watercolored, I drew in the eyes with a black marker. I added “sky” with the Tumbled Glass Distress Marker and Peacock Feathers Distress Marker. I added a bit of shadow or ground with the Pumice Stone Distress Marker. When the panel was completely dry (I hit it with a heat tool to dry it quickly) I stamped the greeting from the PPP Just A Note Mini Stamp Set using Lawn Fawn Black Licorice Ink and then I stamped a scattering of hearts using Spun Sugar, Picked Raspberry, and Candied Apple Distress Inks.

I die cut frames from smooth white cardstock usign the PPP Scallop Squares Dies and Lawn Fawn Small Stitched Squares Stackables Dies. I die cut these again from Fun Foam and layered the frames on the watercolored panel to give the image the look of being “framed up”. Lastly, I attached the frame to a square 4.25″ card.border

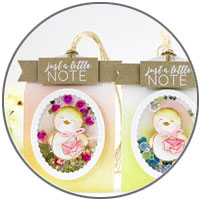
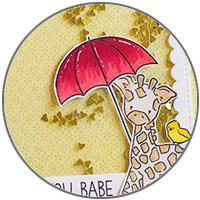
If you have missed any of the previous posts, click on the photos below to see the post from that day. There’s so much gorgeous and LOVE-ly talent by the team!

Also, if you missed yesterday’s post, I shared that very soon I’ll have a challenge where YOU can share your Valentine creations. Stay tuned!
valentine1valentine2 valentine3
I hope to see you tomorrow for the last day of Valentine week.

|

Valentine Theme Week- Day 3

valentinethemeweek

Hello, friends!

Today we have Liz joining us for a post full of Valentine inspiration. She always creates the most darling cards and lately, she has been a storm of Valentine goodness to share with you all.

DSC_0190 bunny blog

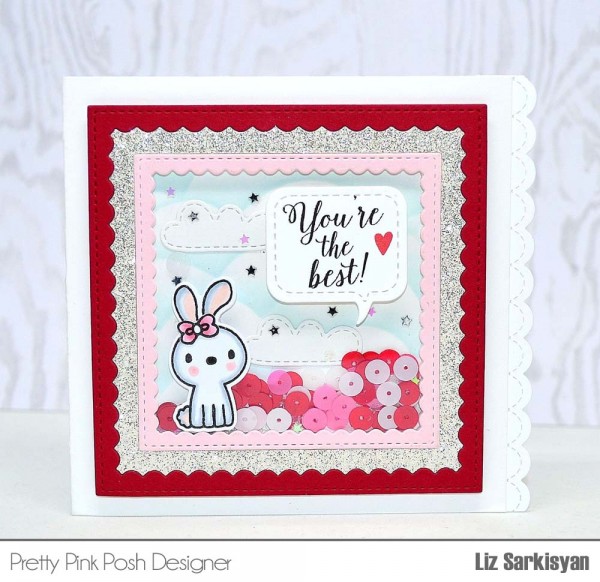
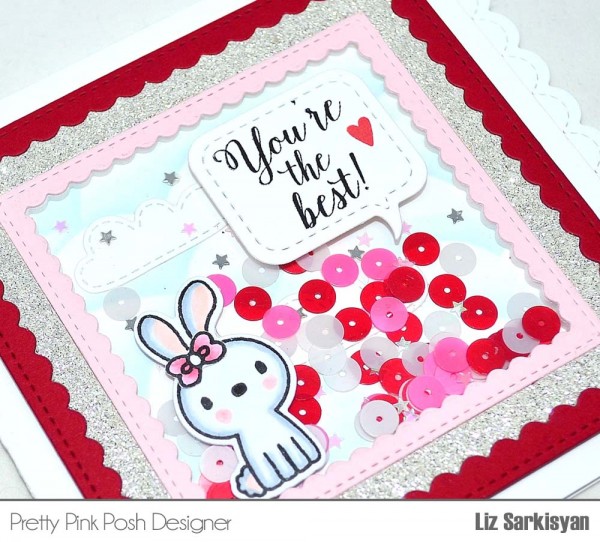
I can’t get enough of these new Scallop Square Frames, so I kept the dies together and ran it through the die cutting machine using 2 different colors along with a silver glitter card stock. It’s a great way to interchange different color combinations and fits like a perfect puzzle. 

Next, I cut an acetate square size (3 7/8″) to use as my base to adhere the frames together and proceeded to create a shaker using these wonderful 6mm Flat Sweetheart sequin mix and new Mini Star Confetti sequins in Silver and Iridescent color. Afterwards, I pulled out this cute adorable little bunny from the Holiday Pals set along with the tiny bow.

DSC_0198 bunny close up blog

Since I’m in love with these stitched scallops as well from the Stitched Borders 1 collection, I couldn’t resist but to add it to this card. Last but not least, I used this cute little Stitched Speech Bubble to add a sentiment saying “You’re the best”.

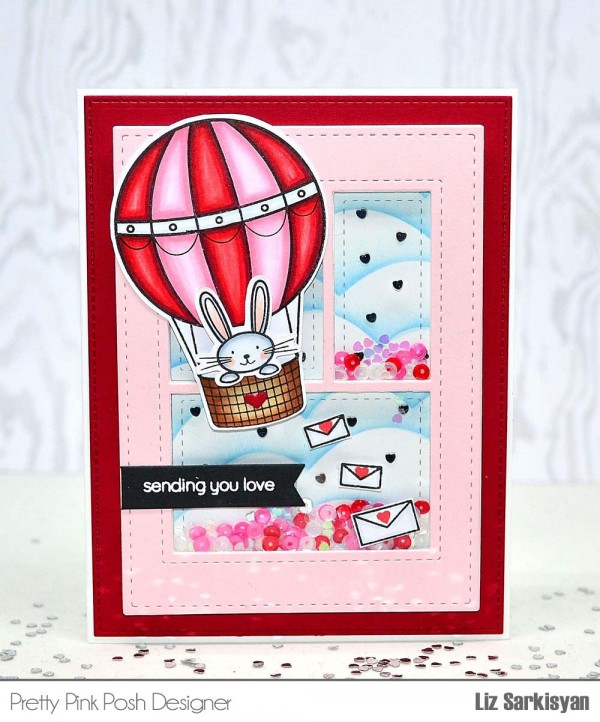
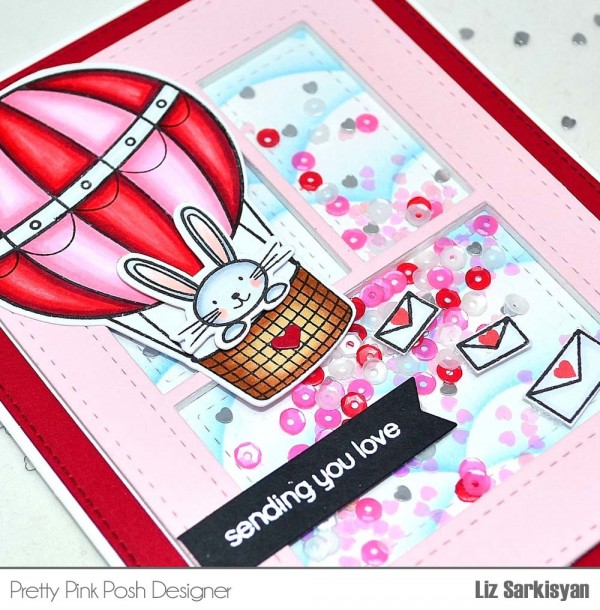
I must admit this is one of my favorite sets: Darling Friends with this big balloon and adorable little bunny so I decided to make another shaker card using the Storybook 1 die and create a scene on the outside vs. on the inside. Also, if you notice that little tiny red heart on the basket, it’s from the Mini Tags die collection.

set1 set2

DSC_0190 Darling Friends blog

Here, I mixed in this fabulous 4mm Sweetheart mix along with some new little Mini Heart sequins in Silver and Iridescent. I can’t tell you how much I love these and thinking of all the ways to use, especially love their size and sparkles. Also, if your wondering where those tiny envelopes with the little red heart are from, it’s from the new Birdie Notes stamp set and boy let me tell you….it’s so darn cute.

DSC_0199 darling close up blog

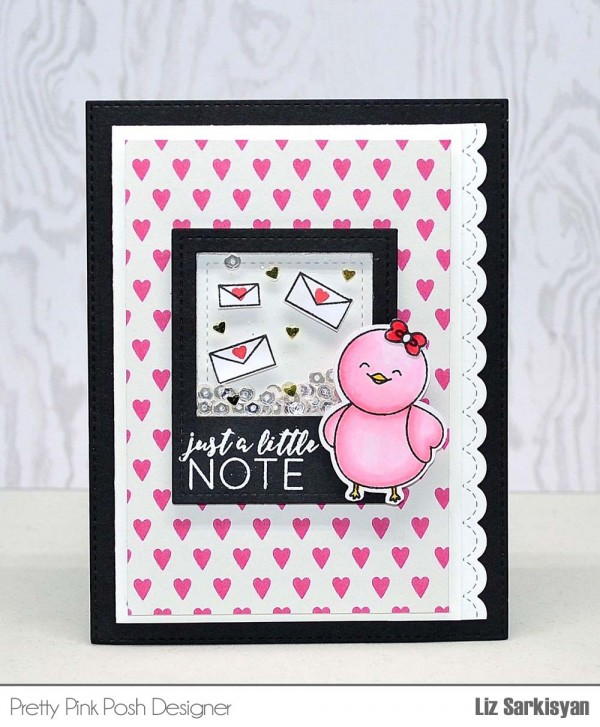
This brings me to my last card where I used the new Birdie Notes stamp set (the free gift in the recent birthday celebration) to create this Valentine card filled with hearts. Isn’t this birdie adorable? The sentiment is also from the same set and can be used all year round and the little tiny bow that I colored in red comes from the Holiday Pals set again.

DSC_0212 Birdie Notes blog

As you can tell, l used this cute little scallop again from the Stitched Borders 1 collection, but before that, I’ll share with you on how I created this little mini shaker where I used the Stitched Photo Frames. This one is the biggest size out of the three you get in the collection measuring approximately 2 1/4 ” wide by 2 3/4″ tall.

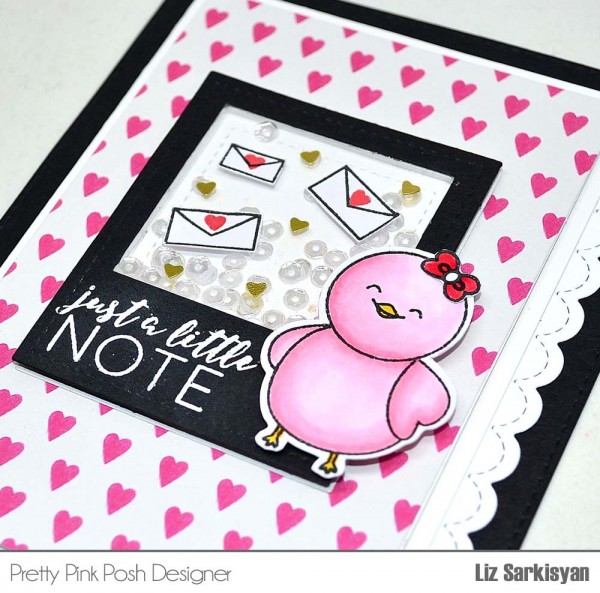
After I die cut the frame, I embossed the sentiment using white embossing powder and added a piece of acetate. Next, I added some fun foam to create the height needed for the shaker. Than comes the fun part which is adding in these wonderful 4mm sparkling clear sequins in the center.

DSC_0237 birdie close up two blog

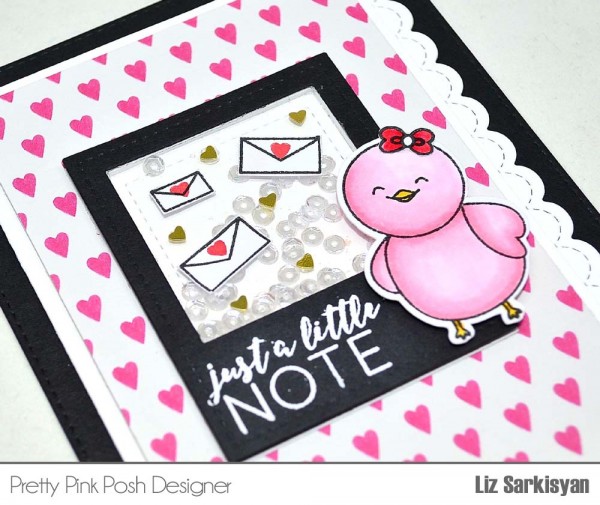
Once I pieced it all together, I added on top of the acetate, these cute new little Mini Hearts in Gold along with the tiny envelopes.  Last but not least, I added this adorable birdie that was colored in pink using foam mount tape to add some more dimension.

DSC_0239 birdie close up blogborder

If you create some fun Valentine’s Day projects with Pretty Pink Posh, be sure to hashtag #prettypinkposh. We cannot wait to see your projects for Valentine’s Day!

IG5

I don’t know about you, but now I’m inspired to create all sorts of cute Valentine projects. I hope you’ve been inspired with our theme week so far. We still have two more days of inspiration and I’m going to be posting a challenge for YOU to participate in!

See you tomorrow…

|

Valentine Theme Week- Day 2

valentinethemeweek

Good morning Pretty Pink Posh friends!

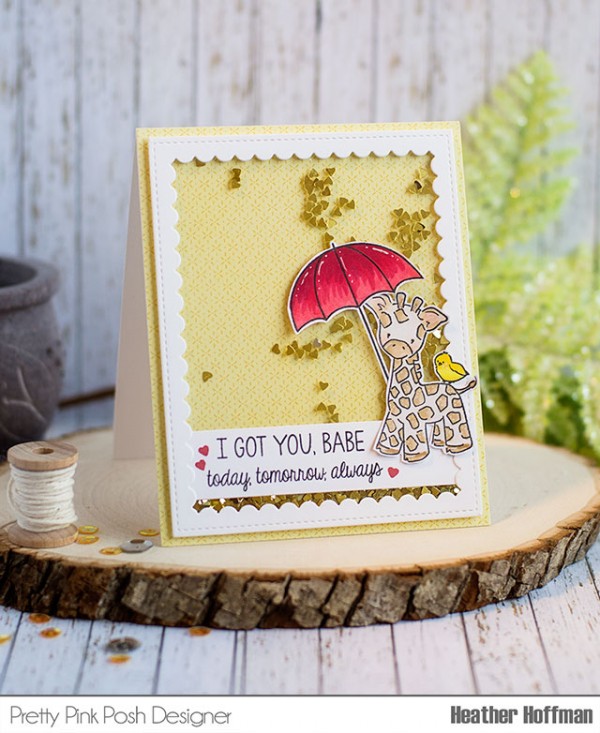
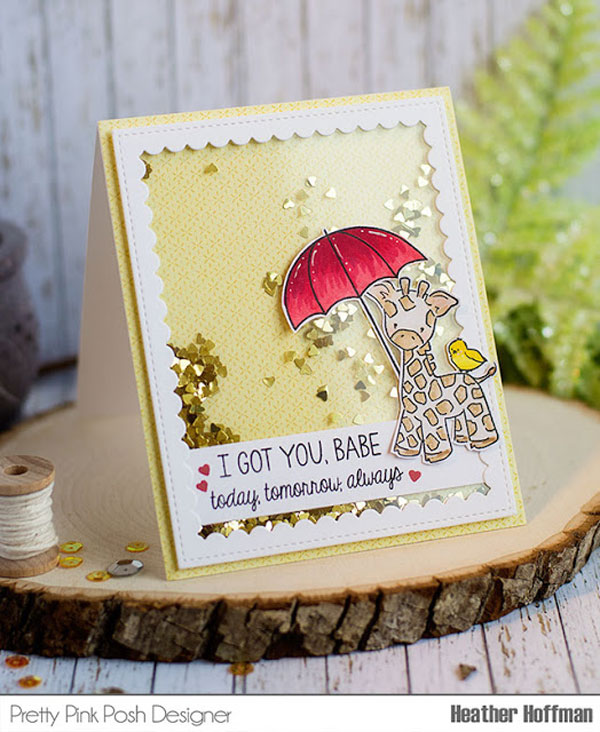
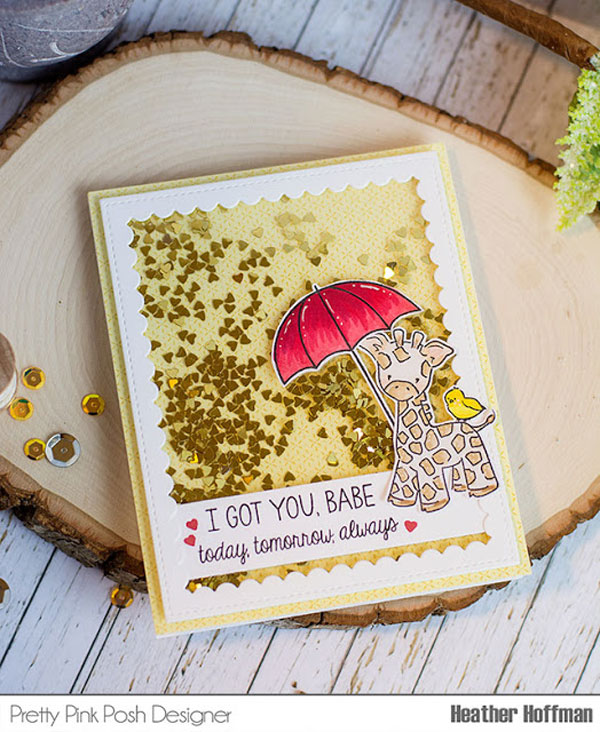
Heather here from Houses Built of Cards. I’m delighted to be sharing a sweet Valentine card with you today using the adorable new Mini Heart sequins that are releasing on February 1st! Eeeek! They are SOOO adorable! PERFECT for shaker cards too – so that is what I made!

 Cards-1-22-16-017

I used one of the umbrella’s from the Pretty Pink Posh Rainy Day’s Stamp set with a giraffe from Wplus9’s Party Animal stamp set – adding the little bird on the giraffe’s back, and fussy cutting them out together. My sentiment is from Mama Elephant’s True Friend stamp set – and those little hearts around the sentiment are from the adorable free stamp set from the PPP birthday celebration.

Cards-1-22-16-020

I used the Scallop Frames die set to create the frame for my shaker card, and added some pattern paper from Basic Grey for the background – then filled it with those Mini Stars in Gold. I love how tiny these are and how easy they shake – the move so freely inside the shaker!

Cards-1-22-16-021border

I hope that you’ve been enjoying theme week so far. We still have three more days of great posts- we’ll see you tomorrow!

| |

Throwback Thursday: Peek-A-Boo

Pretty Pink PoshHello!
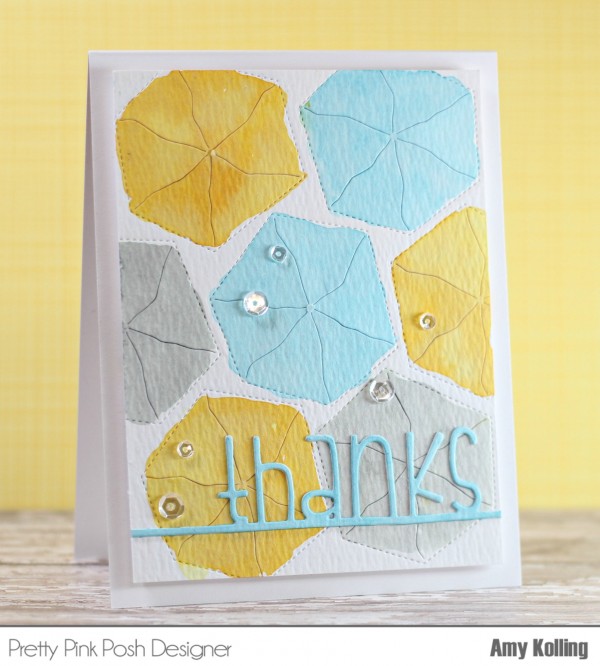
I’m excited to be on the PPP blog showcasing some of the fabulous Pretty Pink Posh dies.  I love to use my dies in unusual or unique ways and I’ll be stopping in once a month for a new feature called Throwback Thursday.  Today I’m using the Peek-a-Boo die that was released last year.

Pretty Pink Posh

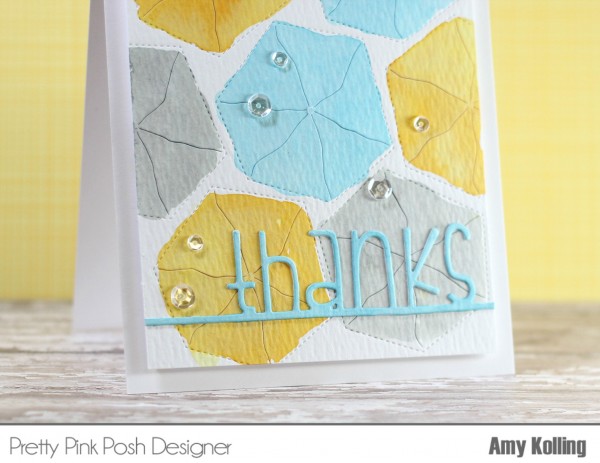
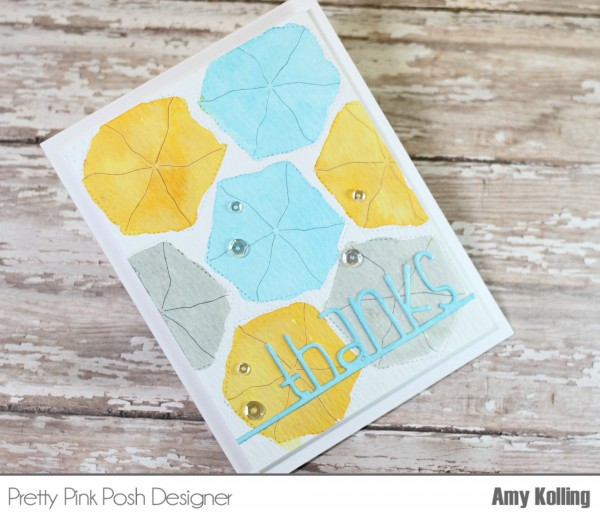
When I was coming up with a design using this die, I could not get the image of Morning Glories out of my mind.  (That’s ok if you don’t see it…..just go with it for me!)  So, I die cut the Peek-a-Boo die multiple times in a random pattern onto Tim Holtz watercolor cardstock.  Using the die image as a guide, I watercolored Wild Honey, Hickory Smoke, and Broken China Distress Inks over the top.  I used lots of water to blend out the color so they weren’t so vibrant.  Once this panel was completely dry, I adhered it with foam adhesive to a top folding notecard.

Pretty Pink Posh

For my sentiment, I used a “thanks” die from my stash diecutting it out of Broken China Distress Inked watercolor paper as well.  I love that the sentiment extends across my watercolor background!  As for those sequins?  I had to use my favorite Sparkling Clear sequins in 4mm and 6mm to finish this off!

Pretty Pink Posh
border

I’m so excited to have Amy bringing this new feature to the blog once a month. This is a great opportunity for us to showcase an older product, but one that still has so much creative uses!

Along with the great card that Amy has shared with us, I’ll be sharing some of my favorite cards from the design team and guests using the specific product we highlight. Click on the photos below to see the original post from the designers.

peekaboo4 peekaboo2 peekaboo1
That’s a wrap for this post. In my next post, I’ll announce the winners from the birthday celebration blog hop and the bonus giveaway winners.

Thanks for visiting the blog today!

| |

Pretty Pink Posh Birthday Celebration- Day 2

birthday1

Hello and welcome to Day 2 of the Pretty Pink Posh 2nd birthday celebration!

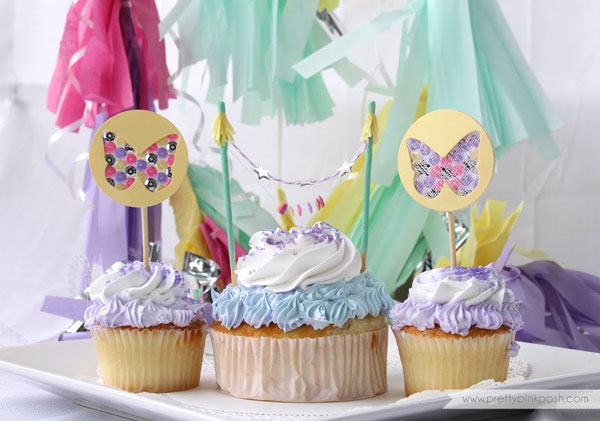
Today I wanted to share some photos from a creative session I did last year and it’s still one of my favorite posts to date. I’m a cardmaker at heart- I love being able to start and finish a project in one sitting- but every now and then, it’s fun to go outside the norm. These photos were from a session where we created birthday themed items and used sequins in non-traditional ways.

Pretty Pink Posh I Springtime Party

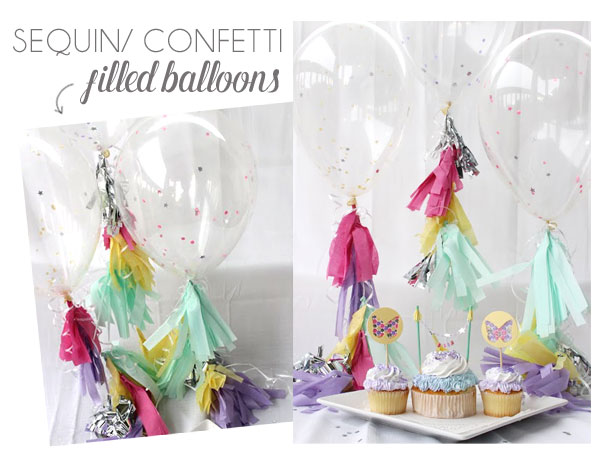
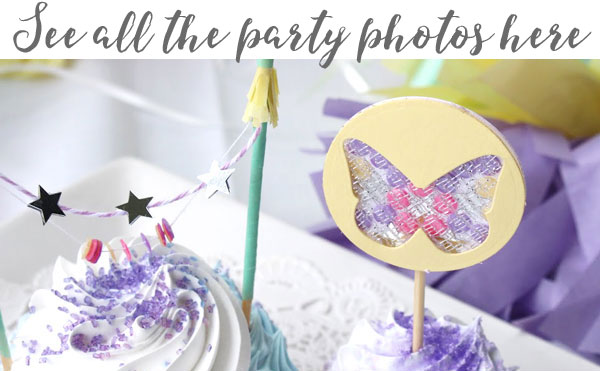
Balloons are always a must for a party and to make them extra special, we filled them with some confetti and sequins! It added a pop of color and really brought the whole theme of the party together.

Pretty Pink Posh I Springtime Party

This is just a small glimpse into the post that I created with these items. It was so much fun to create with the Pretty Pink Posh sequins on projects other than cards. Be sure to click the photo below so you see all the photos and products used.

party4

No party would be complete without guests, gifts and a party favor, right? During the celebration, save 10% off your order using the coupon code provided below. Also, if your order is over $60 (before taxes and shipping), you’ll get the not-yet-released Birdie Notes stamp set.

For the celebration, I brought along some very special guests to celebrate with me and I cannot wait for you to see what they made. Be sure to leave them lots of love- I’ll be giving away prizes to some comments left on their blogs!


PRIZES: I love giving back to you all, so I’ll be giving away 2 $50 gift certificates to random comments left on the different stops every day. Also, if you haven’t already, head over to the Day #1 post for a MISTI giveaway.

RULES: Please be kind and courteous in the comments. Comments must be left by January 19, 2016 at 11:59pm PST, to be eligible for prizes. Winners will be announced late next week on this blog.

a Rafflecopter giveaway

Thank you for celebrating with me today and for all the love! I’ll see you bright and early tomorrow for day #3 of the birthday celebration.
| |

Watercolor Friends Tutorial

Hello everyone, Joni here!

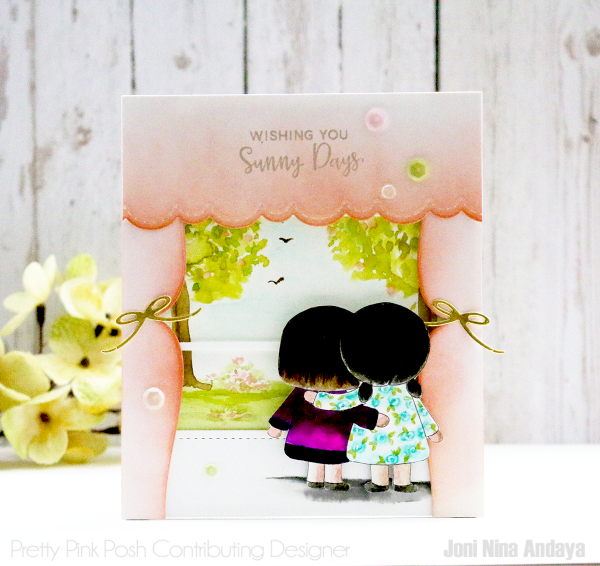
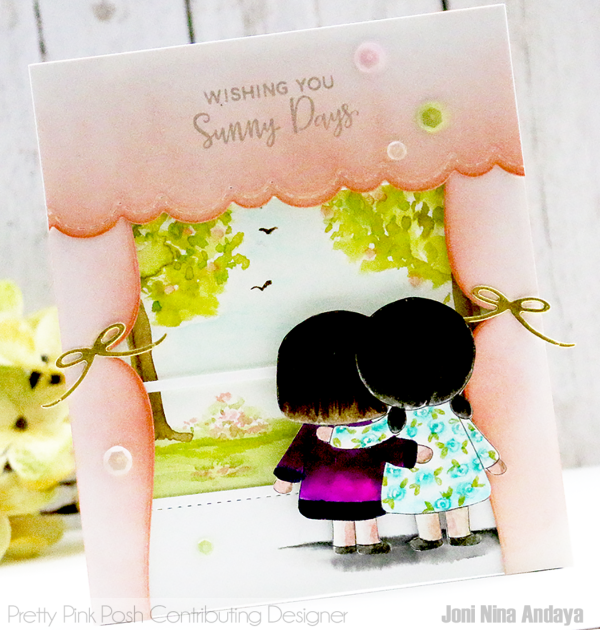
I have a new tutorial for you today using the new Storybook 3 die set to create a window scene. I also used the past released Stitched Border 3 die set for the window drapes.

Pretty Pink Posh

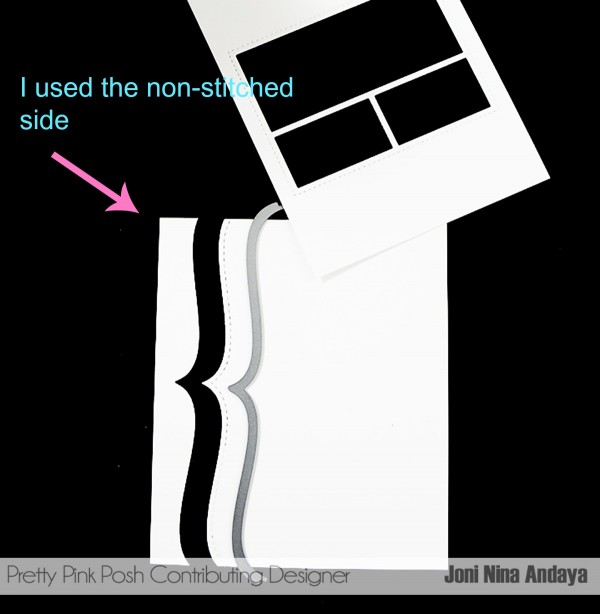
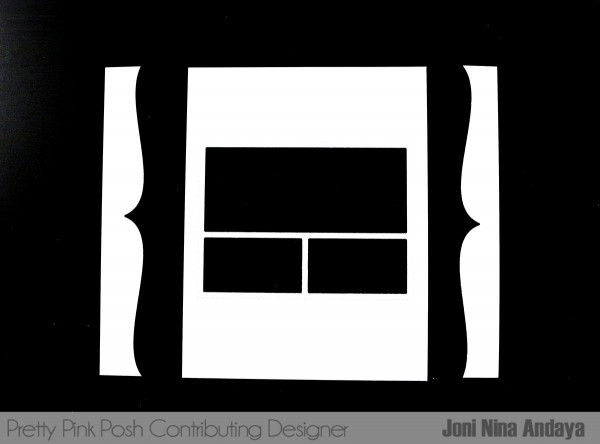
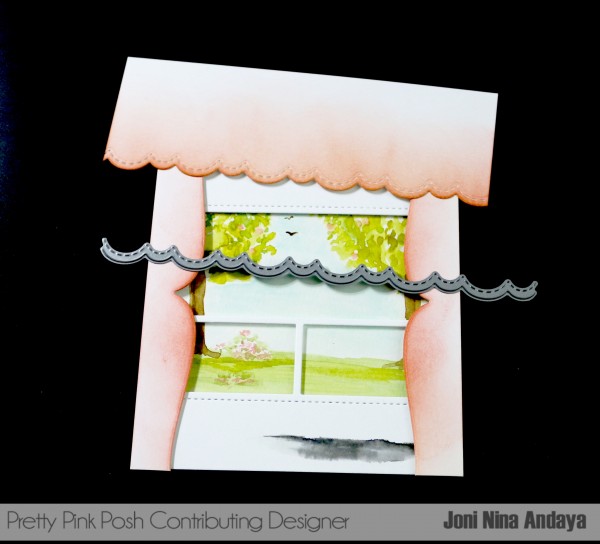
To begin, I first die-cut the white cardstocks using the Storybook 3 dies and one of the Stitched Border 3 dies for the curtains (see picture below). I used the non-stitched one for the curtains.

Pretty Pink Posh

Pretty Pink Posh

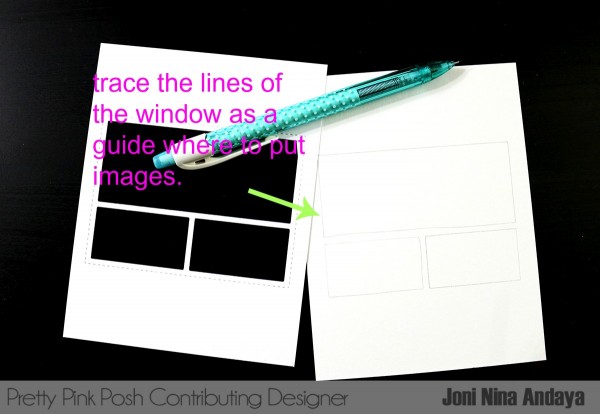
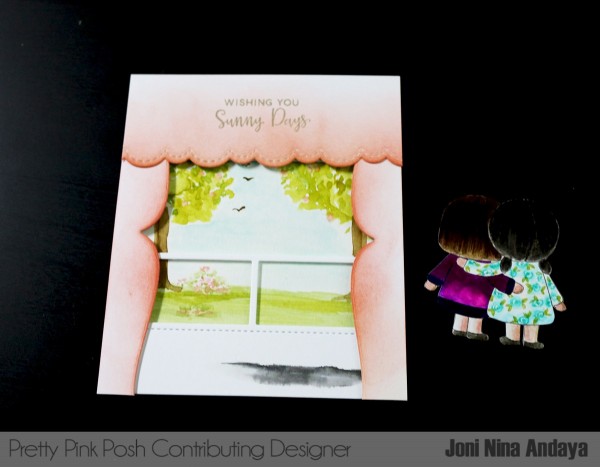
Next, I used the Storybook 3 dies die-cut as a guide to traced the lines on the watercolored paper, this will help as a guide on where to watercolor some images for the scene outside the window.

Pretty Pink Posh

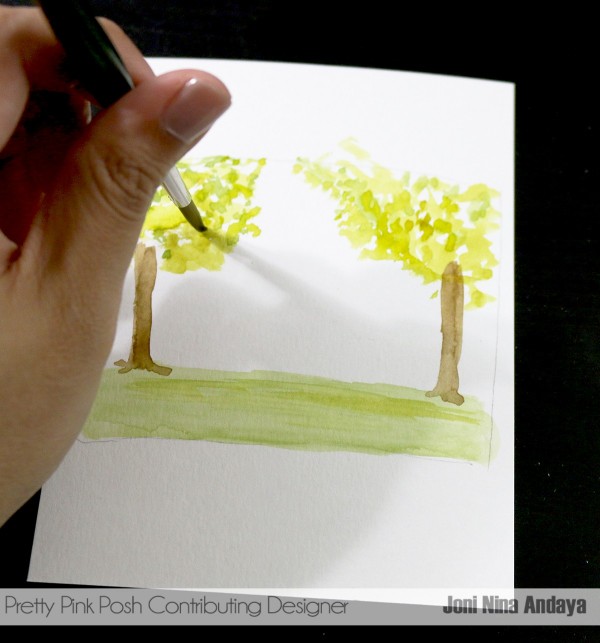
Next, I watercolored some grass and trees. To create the leaves for the trees, I just used the tip of the 6 round brush to create the leaves. This does not have to be perfect, it’s more like creating an imperfect round or oval.

Pretty Pink Posh

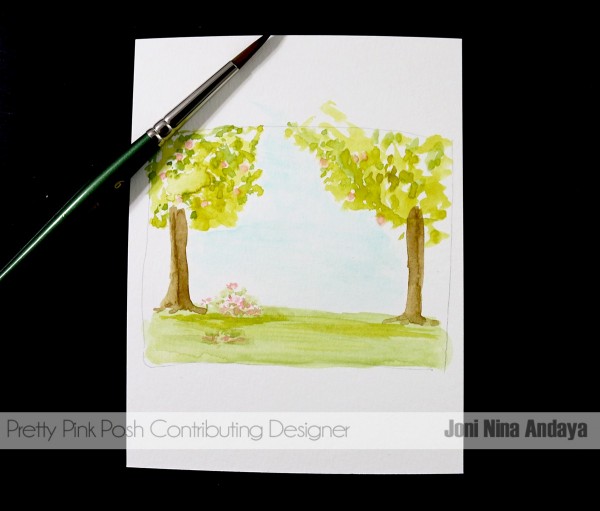
For the flowers and fruits for the trees, same concept is applied. I used the tip of the brush to create small circles for the flowers and fruits.

TIP: for easy application, use the tip of the ZIG Clean Color Real Brush for a much precise shape drawn image and just move the image with a wet tip watercolor brush.

Pretty Pink Posh

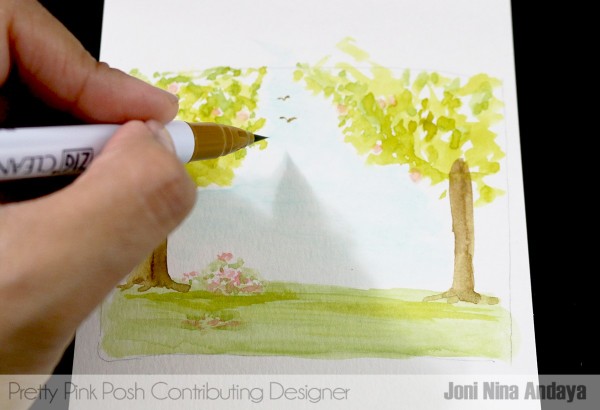
Using a ZIG Clean Color Real Brush in brown, I created the birds flying in the sky.

Pretty Pink Posh

Next, to cut the drape for the window, I die cut one of the stitched scallops from Stitched Border 3 dies and distressed it using a melon colored ink on the curtains and then adhered with foam tape.

Pretty Pink Posh

For the sentiment I used was from the Rainy Days stamp set. The two girls by the window is available on my blog at HERE.

Pretty Pink Posh

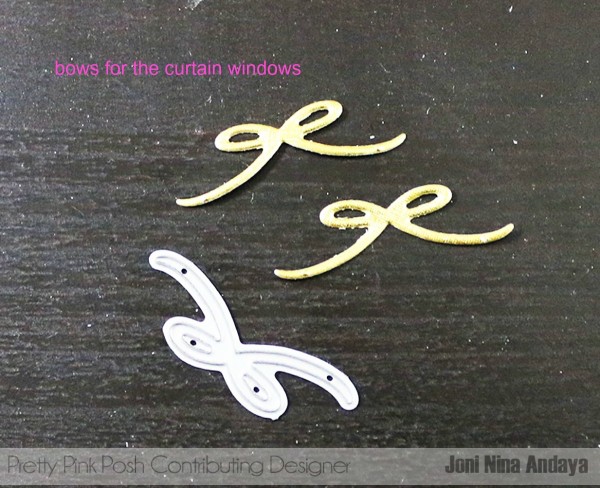
I also added the bows for the curtains using the Twine and Bows die.

Pretty Pink Posh

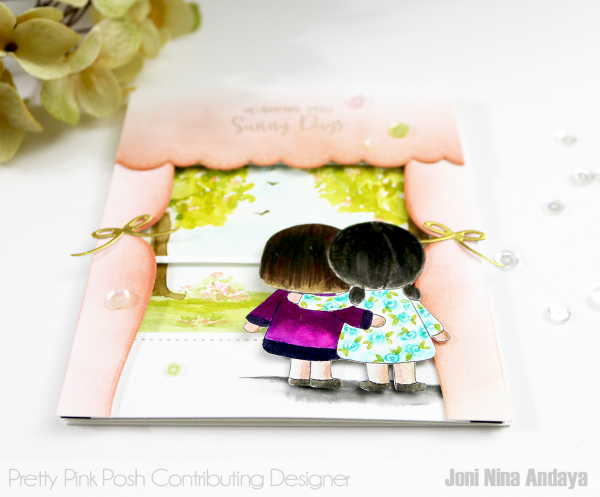
The curtains, drapes, girls, and the window were all adhered with foam tape. I also used some of the new Sweet Pea Mix sequins for added touch.

Pretty Pink Posh

Another look of the whole card.

Pretty Pink Posh

If you didn’t know, we’re celebrating Pretty Pink Posh turning 2 later this week and Paulina has a special event page on Facebook sharing sneak peeks and giveaways. Be sure to join us as there will be lots of guests and prizes.

birthday1
I hope you enjoyed today’s tutorial.

sig name

| | |

Tutorial: Watercolor “Flowers” + Giveaway

Hello, Joni here!

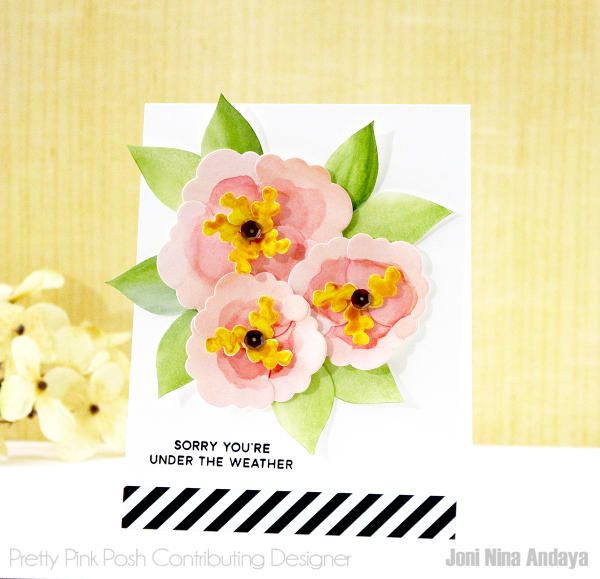
I hope everyone enjoyed their holiday. I am back with more inspiration using Pretty Pink Posh products. It is still cold here in California and I’m already wishing for spring. With that in mind, I created a project that you can design a watercolor flower card using Rainy Days Coordinating die set.

Pretty Pink Posh

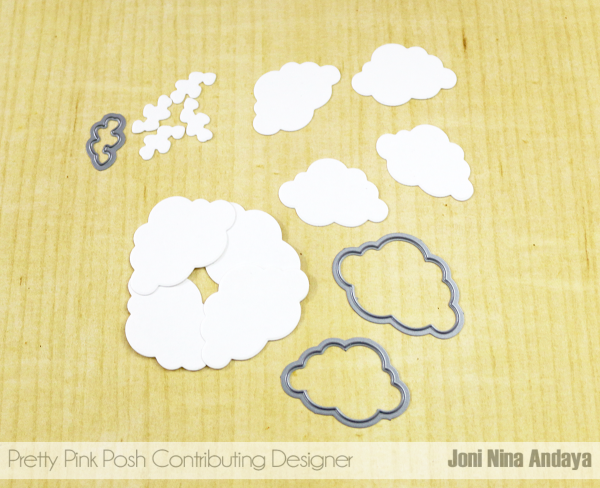
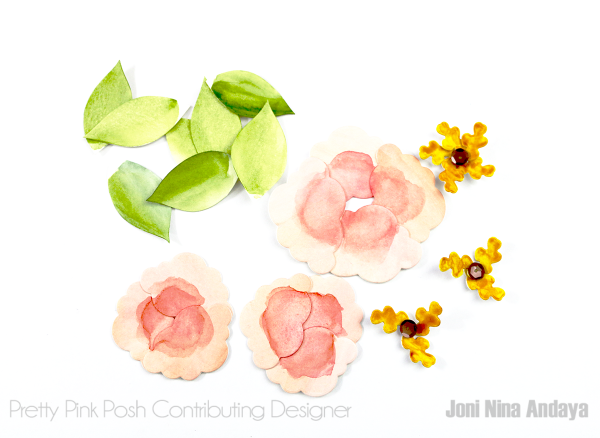
To begin, I die-cut some of the clouds (flowers) and hearts (flower center) from the using Rainy Days Coordinating die set. I used the Matte Multi Medium to adhered the flower petals then watercolored them using the Zig Clean Color Real Brush set.

Pretty Pink Posh

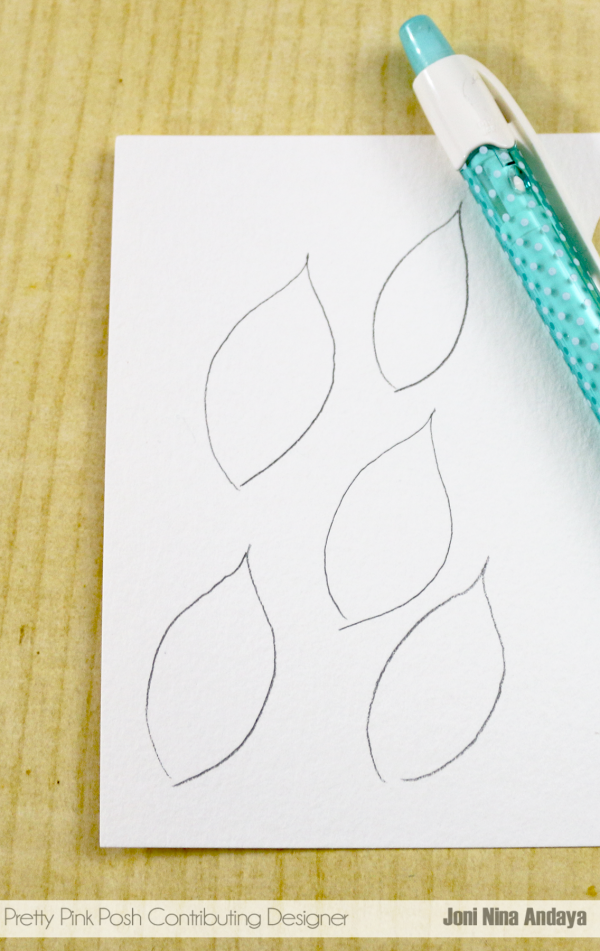
For the leaves for the flowers, I simply drew a leaves image on a watercolor paper then fussy cut each one and watercolored.

Pretty Pink Posh

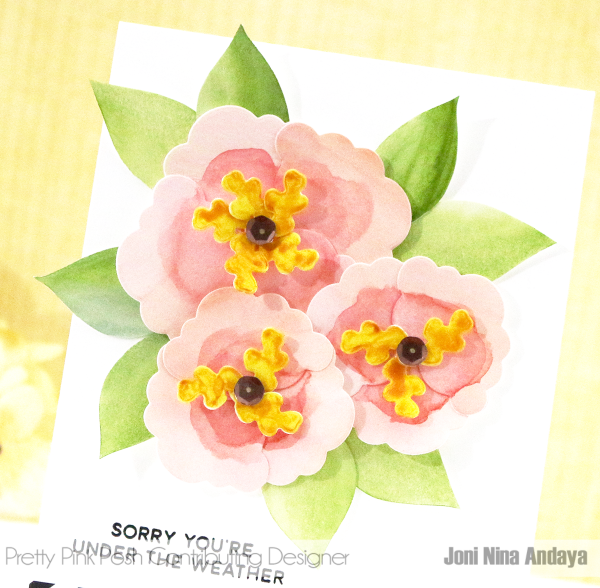
Here’s the finished look after the die-cuts have been watercolored. I also added a 6mm Espresso sequin to the center of the flowers for a little dimension and contrast.

Pretty Pink Posh

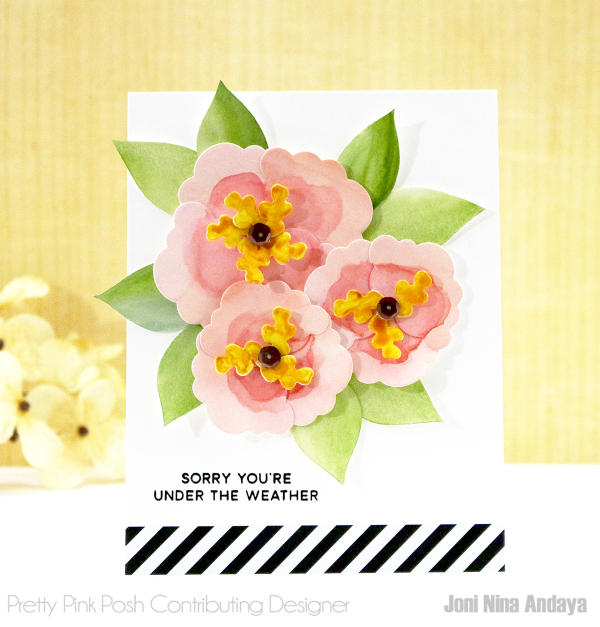
Next, I assembled the flowers on the white cardstock then adhered with foam tape, the leaves were adhered with Matte Multi Medium.

Pretty Pink Posh

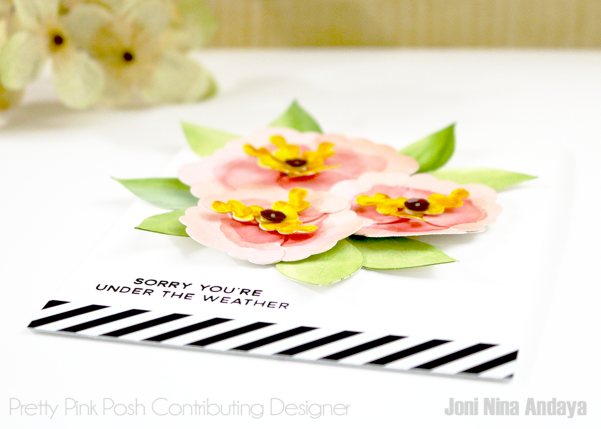
Then, I added a strip of an old white and black patterned paper at the bottom of the card and stamped the sentiment “sorry you’re under the weather” from Rainy Days stamp set to finish off the card.

Pretty Pink Posh

Here’s another look of the finished card.

Pretty Pink Posh

Paulina wants to give you the opportunity to win some of her favorite watercolor markers and brushes. All you have to do is enter below leaving a comment with your favorite color combination to use on your crafts!

a Rafflecopter giveaway
Thank you so much for stopping by. I hope I have inspired you to look at your dies in a different way. Have a wonderful week and good luck on the giveaway!

sig name

|

Merry Reindeer + Giveaway Winners

Hello, friends!

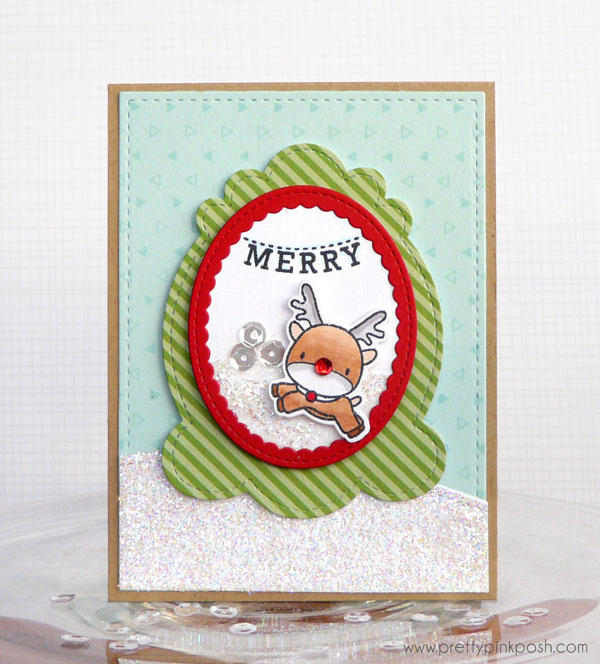
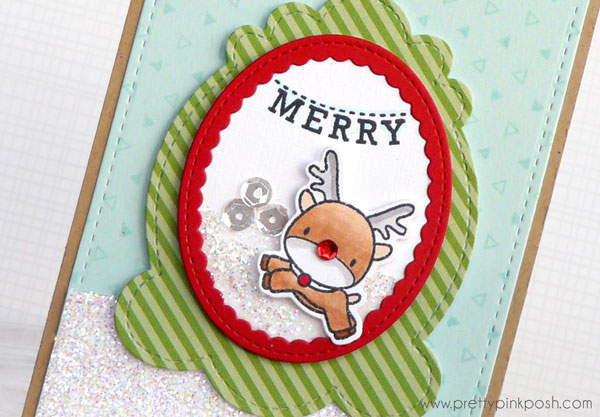
We’re just a couple days away from Christmas and I wanted to share a card I made this year. I didn’t get to send Christmas cards this year, but thanks to a couple guest spots, I did create a couple cards that I’ll be giving to some family members. I was so bummed that I didn’t have time to create cards for crafty friends and my designers this year, but it’s also a blessing, because I was so busy with orders.

This year there were several amazing Christmas sets that came out and while I didn’t get to create with many of them, I’m happy for the time I did get to play with some! This adorable one called Reindeer Games by Mama Elephant was such a fun one.
december2a

On this card, I used the Decorative Tag 1 die set for my focal point and the Mama Elephant stamps went along with it perfectly. I added just a few sequins- one for the nose and three for the “snowballs”.

december2b


As promised, I have the winners from the Christmas Gift Guide giveaways. It made me so very happy to read that the guides were helpful and some of you purchased items from them! While they were a lot of work, reading how much you appreciated them made it so worth it. I just may have to do this again next year!

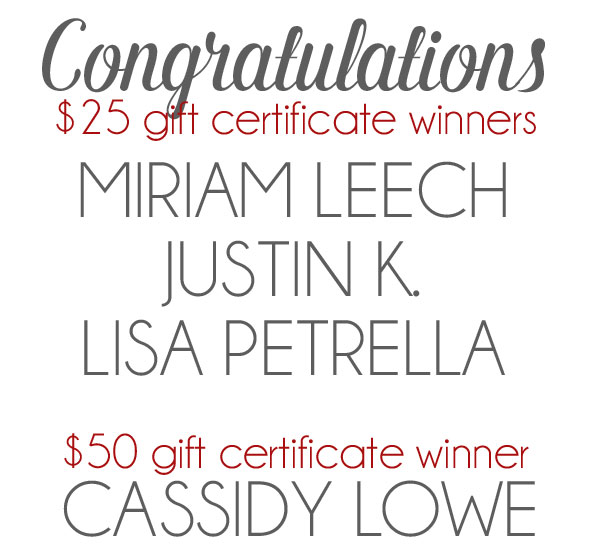
Without further ado, here are the winners. I have emailed the winners (using the email addresses given) so I can be sure to send the gift certificates to the right email addresses! winners3Thanks for spending some time with me today!

|

Warm Winter Wishes

Hello there!

It feels like it’s been ages since I wrote a post. I’m so happy to report that all Black Friday orders have shipped and I truly am grateful that this year has been such a busy one. It’s been almost exactly two years since I first opened the shop and never in the wildest dreams did I think I would be where I am now. I’ll be reflecting back via a post very soon…

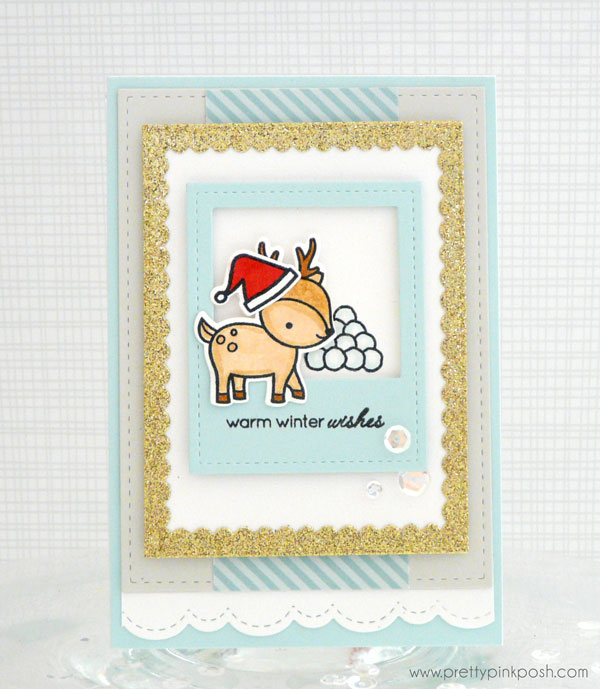
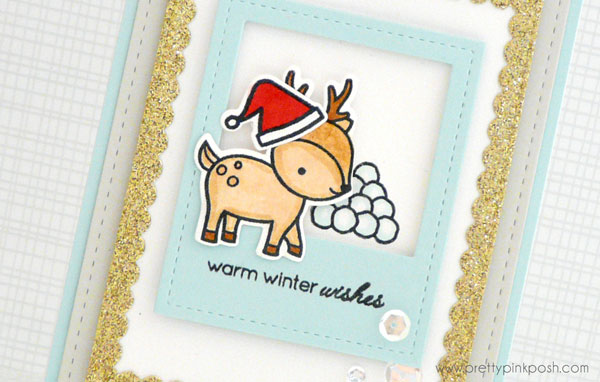
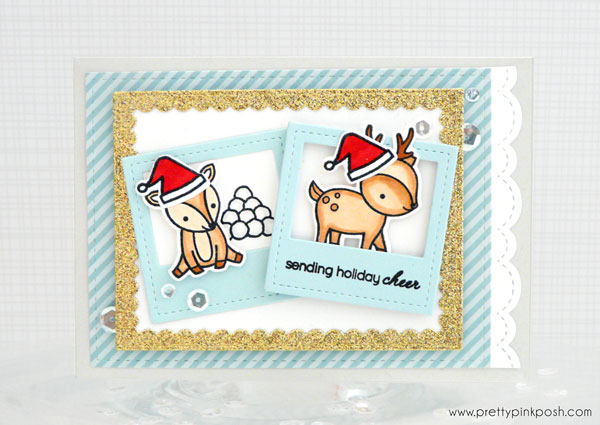
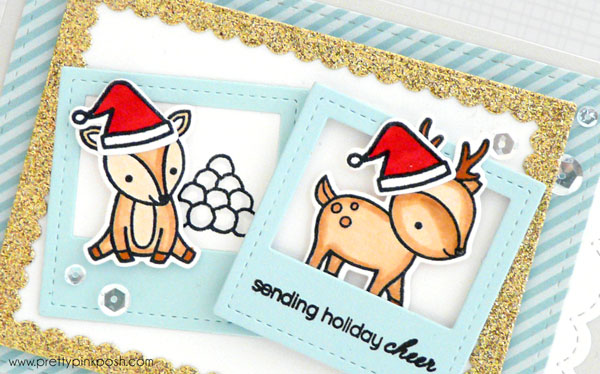
Today I wanted to share a card I made from the latest release. It shows the Scallop Frames and Stitched Photo Frames dies, along with the reindeer and snowballs from the Toboggan Together set by Lawn Fawn. I am so obsessed with this reindeer and I’m strongly considering making him the star of my Christmas cards this year.

december1a

I incorporated the adorable Santa hat and sentiment from the Winter Friends stamp set. The little hat looks so cute on this reindeer and I’m sure I’ll be able to find even more critters that’ll fit into this hat from my stash.

I mentioned in a previous post that I have been loving gold glittered cardstock. It is so sparkly in person and I love that it’s not messy! I’m going to need to invest in some silver as well- I’m sure it’ll be just as gorgeous and will work with some winter themed cards really well.

december1b

I hope that you enjoyed today’s card. Have a fabulous weekend!


|

November 2015 Release

Hello there, friends!

It’s an exciting day here in the Pretty Pink Posh studio- my big November release is now live in the shop! Whether you like sequins, seed beads, dies, or stamp sets, there’s sure to be a little something for everyone.

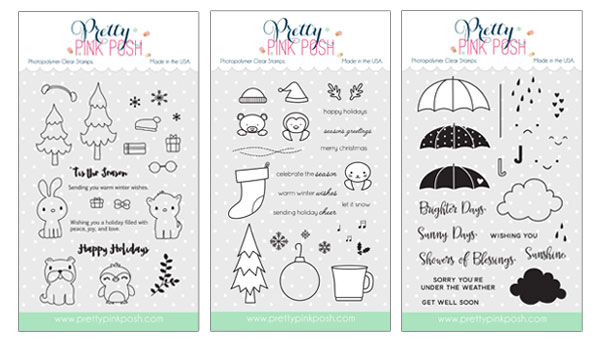
Stamp Sets // Coordinating Dies
Pretty Pink Posh

Die SetsPretty Pink Posh

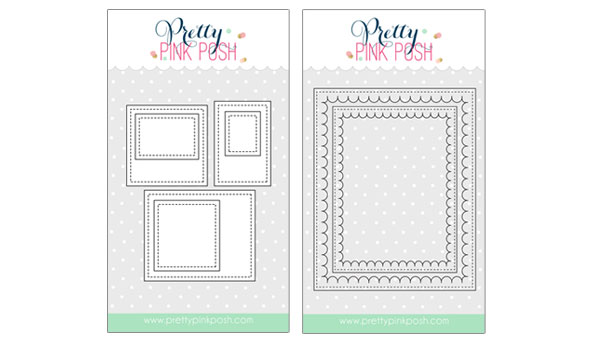
Today I wanted to share my favorite card that I created this week using the new products. I started off with the new Scallop Frames dies (which are exclusive in the shop) and die cut it in gold glitter cardstock. Thanks to Carissa, one of the PPP designers, I am obsessed with this stuff now. Next up I knew that I wanted to use the Stitched Photo Frames, so I die cut a bunch in a variety of colors and decided blue looked best on this card.

Pretty Pink Posh

Before I go on, I must say that the reindeer are by Lawn Fawn (because I’m a huge fan of theirs) and I wanted to show that my products work SO well with other brands.  However, I did incorporate the adorable Santa hat and sentiment from the Winter Friends stamp set.

To finish off the card I used some patterned paper to mat my elements and added a strip of white cardstock die cut with the scallops from the Stitched Borders 3 die set. Adhere a few Sparkling Clear sequins and your card is good to go!

Tip: run your dies through in a variety of colors to keep on hand. It’s a time saver when you need a quick card and helps when you visually need to see which color(s) look best!

Pretty Pink Posh

I wanted to make things super easy for you, so here are the direct links to all the new products in the Pretty Pink Posh Shop:

Scallop Frames die set
Stitched Photo Frames die set

Holiday Pals stamp set
Rainy Days stamp set
Winter Friends stamp set
Holiday Pals coordinating dies
Rainy Days coordinating dies
Winter Friends coordinating dies

Meadow seed beads
Woodlands seed beads

4mm Winter Snow Mix
4mm Holly Jolly Christmas Mix
6mm Holly Jolly Christmas Mix
4mm Whimsical Forest Mix
6mm Whimsical Forest Mix

borderThank you for your continued support, love and encouragement. Stay tuned- I’ll have videos, cards and a blog hop coming soon with these new products, along with many special guests.

Happy shopping!