Cards

|

Ombre Fancy Cake

Hello friends, it’s Leica here today. I am sharing a birthday card using the Fancy Cake Dies. This new die really is very fancy and can be decorated in many ways. I love the scallop piece and decided to make an ombre cake with it. Let’s get started!

Pretty Pink Posh: Ombre Fancy Cake

For the background, I cut a white cardstock down to 4.25” x 5.5” and ink through the Medium Polka Dots Stencil with Distress Oxide Inks. From top to bottom, I used Tattered Rose, Saltwater Taffy, Spun Sugar, Kitsch Flamingo, and Picked Raspberry. 

Pretty Pink Posh: Ombre Fancy Cake

Next, I worked on the cake, which I cut in white cardstock. I cut it again in gold and used that for the cake stand. I then cut 5 scallop pieces, ink blended them with the same inks used for the background, sprayed some water for an oxidized effect, and then I splattered some white ink. I cut the candles in glitter paper and used Copic markers for the candle. After gluing all the pieces together, I cut 3 more of the cake die and glued them together for dimension. Sometimes, I like doing this method for dimension better than using foam tape. It just looks cleaner and it’s also sturdy. At the end, I placed a sheet of vellum in between the stenciled panel and the cake to soften the background.

Lastly, I stamped the Birthday Sentiment inside the card.

Pretty Pink Posh: Ombre Fancy Cake

I hope you enjoyed today’s card share! Thanks for stopping by and have a wonderful day!

| | |

Two Projects, One Die Set

Hello crafty friends. It’s Lisa Mears here. Today I’m making two projects with the Gift Card Bag die set from the birthday release. I’ll use it to make a standalone gift bag as well as a gift card pocket that you can add to the front of a card. 

Pretty Pink Posh: Two Projects, One Die Set

If you would like to see how I made my projects, be sure to check out my video below.

Watch the video above  I  Watch the video in HD on YouTube

Give a gift card in style with the Gift Card Bag die set. The bag has a 1/4 inch opening and it is just the right size to hold a gift card, money, or a gift certificate. The die set also comes with two word dies. One of the word dies says “For You” and the other one says “Celebrate.”

When putting the bag together, you will need to die cut the gift card bag die two times, one for the front of the bag and one for the back of the bag. Then use glue or double-sided tape to adhere the flaps together. 

Pretty Pink Posh: Two Projects, One Die Set

You can add a sentiment to the front or add other dies and stamps to decorate the bag. I used the candle dies from the Birthday Mug Additions die set.

Pretty Pink Posh: Two Projects, One Die Set

The Gift Card Bag die set can also be used as a pocket on the front of a card. When using it as a pocket, you only need to die cut the bag one time and then glue the three flaps to the front of the card.

Tip: Make sure you don’t put glue on the entire back of the bag or else you will not be able to insert a gift card. 

Pretty Pink Posh: Two Projects, One Die Set

I decorated the front of the bag with a Scallop Circle die and added the alligator from the Birthday Signs stamp set. I also used the Streamers Stencil to add a pattern to the bag.

Pretty Pink Posh: Two Projects, One Die Set

I thought it would be fun to have balloons coming out of the bag so I added the balloons from the Birthday Balloons stamp set.

Thank you so much for stopping by today. Have a wonderful day!
Lisa Mears

|

Party Animal

Hi folks, Kavya here with another fun card using a bunch of products form the latest release! I love the new Birthday Signs. They pair so well with so many stamp sets and I can’t stop coming up with fun combinations!

Pretty Pink Posh: Party Animal

I started off by ink blending the edges of a Kraft cardstock with brown dye ink. Then, I splattered some paint and water to make it dramatic. Then, I stamped and colored a bunch of images from Birthday Signs, Wish, Build A Cupcake and Sweet Treats (the exclusive free gift for qualifying orders). I added a sentiment from the Large Celebrate Shadow die and arranged all the elements to finish off my card!

Pretty Pink Posh: Party Animal

It’s so fun to mix and match, love how this one turned out! I hope this card inspired you to play around with your stamp sets to come up with fun combinations!

Happy crafting, Kavya 

|

Happy Birthday Mug

Hello friends! It’s Leica here today with a fun birthday card using the latest stencils and dies from PPP. If you’re on Instagram, be sure to join us later this morning as we kick off a four day Instagram hop.

Pretty Pink Posh: Happy Birthday Mug

To start, I cut a 5” square in white cardstock and ink blended through the Streamers Stencils with Dried Marigold, Salvaged Patina, Spun Sugar, and  Worn Lipstick Distress Oxide Ink. I splattered some pink and white acrylic paint for added interest. Next, I cut a sheet of vellum to 4” square and used it to soften the background. 

Pretty Pink Posh: Happy Birthday Mug

I then cut the Winter Mug in cardstock that I painted with a cream acrylic paint. I cut the center with the “it’s your day” die and glued a pink glitter cardstock behind the script. I glued the negative pieces. Next, I ink blended scraps of white cardstock and ink blended them with the same Distress Oxide inks I used for the background. I cut the dies from the Birthday Mug Addition Dies and foam mounted all the elements onto the card base. Lastly, I glued some Creamsicle pearls  here and there for added interest and glued the card panel onto a 5” square card base.

Pretty Pink Posh: Happy Birthday Mug

That completes my card. If you have the Winter Mug Dies, this new Birthday Mug Addition Dies would be a great addition to your collection. Even if you do not have the Winter Mug Dies, you can still use the Birthday Mug Addition dies on their own and make birthday cards with it. 

Thanks for stopping by the PPP Blog! Enjoy your day! 

| |

Day 4: 9th Birthday Celebration Hop

Day 4: 9th Birthday Celebration Hop

Day 1 CLICK HERE //  Day 2 CLICK HERE // Day 3 CLICK HERE

Hello and welcome! It’s Leica here on the blog and today I’m sharing the cutest little bags using the new Gift Card Bag Dies. These are fun and easy to make, perfect for any occasion. 

Day 4: 9th Birthday Celebration Hop

To make the bag, you will need to cut 2 pieces in the cardstock of your choice. Take 1 piece and fold along the perforated line. Take the other piece and cut along the perforated line. Add glue on the tabs of one bag and adhere the other piece. 

Day 4: 9th Birthday Celebration Hop

For my projects, I used 3 different shades of pink cardstock (from the big box craft store). I then cut 3 of the scallop circles in glitter silver cardstock and 3 of the circles in white cardstock from the Valentine Circle Die. Next, I ink blended scraps of paper with Distress Oxide Inks and used them for the party hats die, which is from the Birthday Mug Addition Dies. I then cut 3 small tags, stamped birthday sentiments, and tied the tags onto the bag with twine. 

Day 4: 9th Birthday Celebration Hop

Super easy, right?! You can even use patterned paper or you can ink through any of the PPP stencils with the colors of your choice. I’ll definitely be making more of these as I like giving gift cards as gifts to my family and friends. 

Day 4: 9th Birthday Celebration Hop

We are having a special gift offer and discount code to celebrate our birthday!

Day 4: 9th Birthday Celebration Hop

PRIZES: be sure to leave comments on each stop. We are giving away 8 $25 gift certificates to eight random comments (2 winners each day) left before February 15, 2023 at 11:59 PM PST. I’ll be announcing the winners next week, so be sure to return and see if you are one of the winners!

Pretty Pink Posh blog << you are here
Tammy Stark
Wanda Guess
Jeanne Jachna
Rachel Alvarado
Jeannie Lieu

Thank you all so much for your order, comments, and excitement about this release. We are so thankful! Have a wonderful rest of your weekend!

| |

Day 3: 9th Birthday Celebration Hop

Day 3: 9th Birthday Celebration Hop

If you missed Day 1 CLICK HERE //  If you missed Day 2 CLICK HERE

Hi folks, Kavya here with another fun card using a bunch of products from the latest release! I love the new Birthday Signs. They pair so well with the previously released jungle and animal themed stamp sets. 

Day 3: 9th Birthday Celebration Hop

I started off by stamping and coloring a bunch of images from Jungle Friends, Birthday Signs and Wish. I then die cut the elements of the tree using cardstock and Nature Essentials Die.

Day 3: 9th Birthday Celebration Hop

For the trees, I ink blended the edges using coordinating dye ink and splattered some paint to make it more dimensional. Placed all of them on some blue cardstock and I was done!

Day 3: 9th Birthday Celebration Hop

We are having a special gift offer and discount code to celebrate our birthday!

Day 3: 9th Birthday Celebration Hop

PRIZES: be sure to leave comments on each stop. We are giving away 8 $25 gift certificates to eight random comments (2 winners each day) left before February 15, 2023 at 11:59 PM PST. I’ll be announcing the winners next week, so be sure to return and see if you are one of the winners!

Pretty Pink Posh blog << you are here
Cathy Zielske
Lauren Taylor
Lindsey Larsen
Stefanie Loh
Tina Smith
Zsofia Molnar

Thank you for celebrating with us today. We’ll see you tomorrow for the last day of our blog hop!

| |

Day 2: 9th Birthday Celebration Hop

Day 2: 9th Birthday Celebration Hop

If you missed Day 1 CLICK HERE

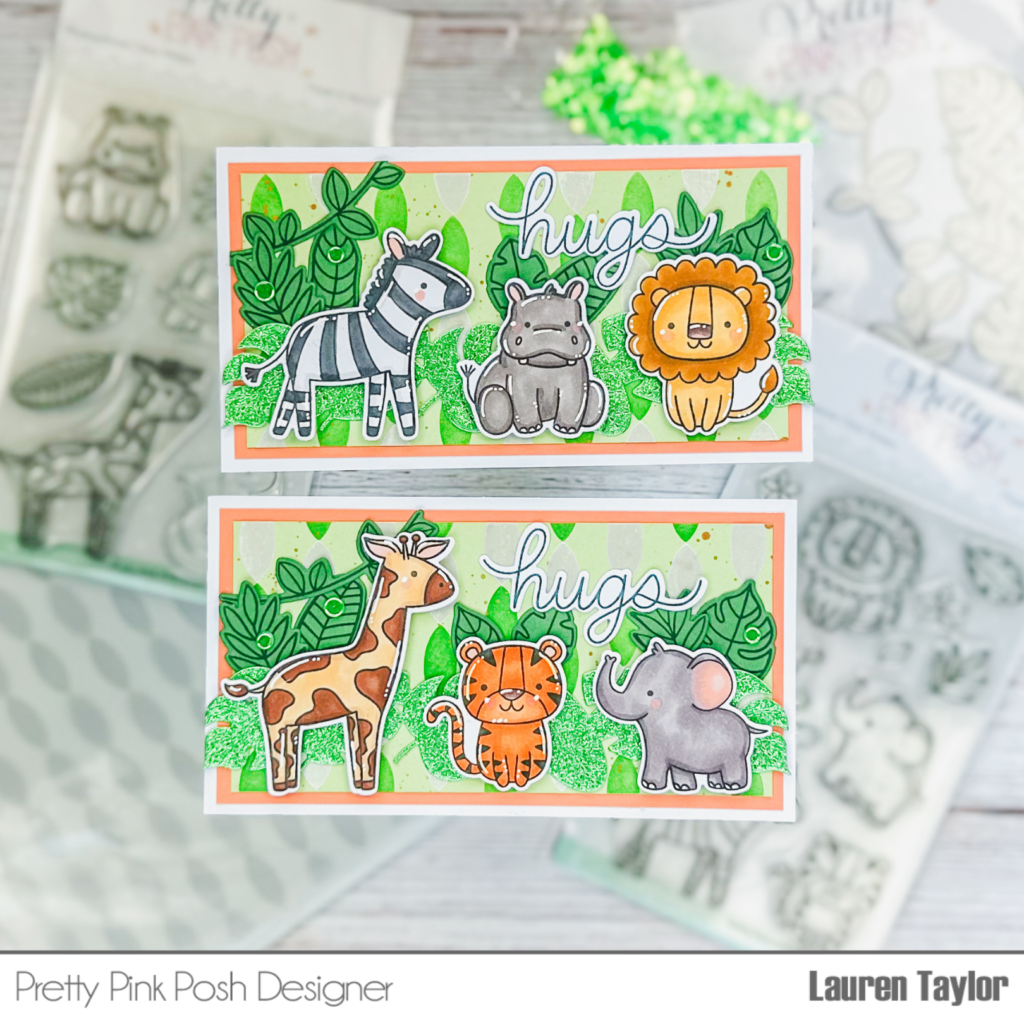
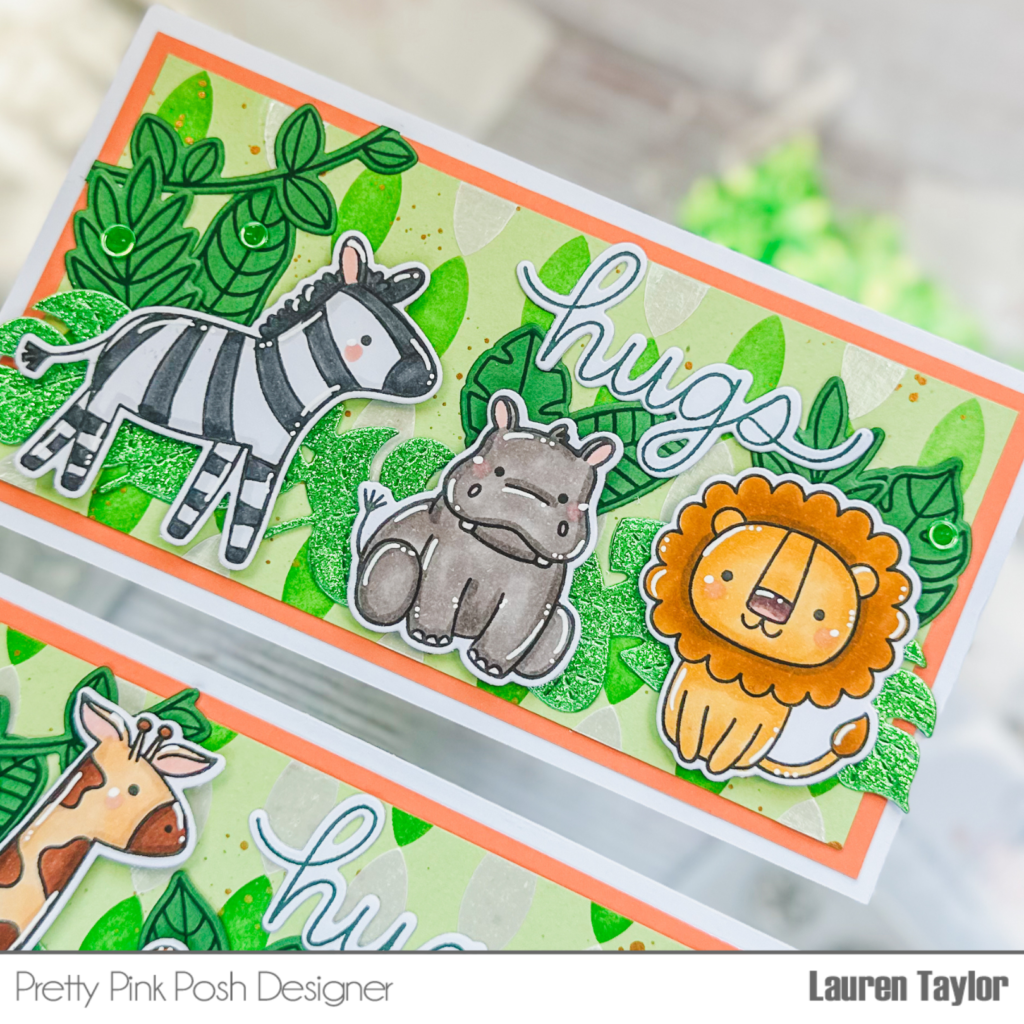
Hi, friends! It’s Lauren and I am so excited to be sharing a card with the new Birthday Mug Addition Dies! If you have the Winter Mug Dies and the Valentine Mug Addition Dies, you’re going to love these new add-ons. But, I also have some inspiration of how you can use these new dies without the mug!

Day 2: 9th Birthday Celebration Hop

I combined the Birthday Mug Addition Dies with the Build A Gift Dies to create a mini slimline card that does not have any stamping. All of the images were die cut from these two sets – I used different shades of blue and green cardstock and die cut the two gifts, party hat, balloon and birthday wand.

Day 2: 9th Birthday Celebration Hop

Each item has different pieces that are glued together to create the image and I used my Ohuhu Art Markers to add some color and dimension to each of the images. I also die cut out the sentiment from sparkly silver cardstock. I layered the images and sentiment on my mini slimline, white background and adhered them with wet adhesive as well as foam adhesive so some of the images have some dimension.

Day 2: 9th Birthday Celebration Hop

The white background was then glued to a blue piece of cardstock that was on my card base of 3×6” when folded. I cannot wait to see all of the birthday mugs with this release that you make but also other creative ways to use the Birthday Mug Addition Dies!


We are having a special gift offer and discount code to celebrate our birthday!

Day 2: 9th Birthday Celebration Hop

PRIZES: be sure to leave comments on each stop. We are giving away 8 $25 gift certificates to eight random comments (2 winners each day) left before February 15, 2023 at 11:59 PM PST. I’ll be announcing the winners next week, so be sure to return and see if you are one of the winners!

Pretty Pink Posh blog << you are here
Amy Rysavy
Nichol Spohr
Laura Bassen
Leica Palma
Kristie Marcotte
Lisa Mears

Thank you for celebrating with us today and for all the love! We hope to see you bright and early tomorrow for day three of the birthday celebration.

| |

Day 1: 9th Birthday Celebration Hop

The February 2023 Release is now available in the Pretty Pink Posh Shop and select retailers that carry our products. If you missed our post yesterday, we revealed all of the products in picture form, but if you would like to see them in a video, Mindy has that for you today!

Watch the video above  I  Watch the video in HD on YouTube


Hello hello! It’s Leica here today with a super sweet birthday shaker card. For my card, I’m using the latest products from the PPP birthday release. Happy 9th birthday, PPP!!!

I first cut a white cardstock down to 4.25” x 5.5” and ink blended the A layer of the Layered Ice Cream Cones Stencils with Gina K Amalgam Ink in Warm Glow. For the B layer, I used Spun Sugar, Tumbled Glass, and Altenew Buttercream ink. Next, I cut the frame from the Fancy Cake Dies in yellow cardstock, glued a sheet of acetate, and added foam tape to make a well for the shaker. Inside the shaker, I added some Funfetti Clay Confetti. I then cut the Large Celebrate Shadow Die in gold cardstock and the shadow outline die in white cardstock. I added white gel highlights. Lastly, I glued the card panel onto an A2 size card base. 

That’s all for my card. I love how easy it is to make a background with the Layered Ice Cream Stencils and the frame from the Fancy Cake Dies is my new favorite frame for shaker cards.


We are having a special gift offer and discount code to celebrate our birthday!

PRIZES: be sure to leave comments on each stop. We are giving away 8 $25 gift certificates to eight random comments (2 winners each day) left before February 15, 2023 at 11:59 PM PST. I’ll be announcing the winners next week, so be sure to return and see if you are one of the winners!

Pretty Pink Posh blog << you are here
Jennifer McGuire
Kristina Werner
Mindy Eggen
Caly Person
Gemma Campbell
Channin Pelletier

We hope that you get inspired by inspiration from the team and guests. Stop by tomorrow for another day filled with birthday inspiration!

| |

Sneak Peek: February 2023 Dies

Good morning! It’s Lindsey here and I’m excited to be giving you a sneak peek of several new dies releasing this month. Creating these projects truly felt like a party! 

New release will be available February 8th. 

Sneak Peek: February 2023 Dies

My first card uses the Birthday Mug Additions. It’s a fabulous set that compliments the Winter Mug Dies, but it can also stand on its own.  

Sneak Peek: February 2023 Dies

I love the look of mugs that have a different color on the handle and the inside, so I set out to create them on my card using the Winter Mug dies. I simply trimmed off the handle of the mug in a darker shade and adhered it on top of the lighter mug’s handle.  

Sneak Peek: February 2023 Dies

I filled the mugs with dies from the Birthday Mug Additions and added several on the card base as well.  These dies have lots of paper piecing options and cute stitched details. The tiny stars and rectangle details on the stitched stars and balloons are from the little confetti dies in the new Fancy Cake die set. I thought they paired perfectly together.  

Sneak Peek: February 2023 Dies

Finally, I added the sentiment onto the mugs using the new Wish Big Script Dies. This card is a little over the top, kind of like a party exploded on it, but it sure makes me smile.   

Sneak Peek: February 2023 Dies

Next up is a matching little gift bag.  

Sneak Peek: February 2023 Dies

The new Gift Card Bag die is so much fun! You can cut the die once and adhere it to a card base, or you can cut it twice and create a little bag that stands on its own as I did here.  A gift card tucks perfectly inside, but thin treats, jewelry, etc. could fit inside, too.  

Sneak Peek: February 2023 Dies

I chose to die cut the die in two different shades of blue, and adhered the tabs to each other to create a little bag. I decorated the front of the bag with the Spring Corner Frame die, trimming off the excess portion. Then I added a little piece of cake from the Birthday Mug Additions and one of the sentiments in the Gift Card Bag die set.  

Sneak Peek: February 2023 Dies

There were so many fun dies, so I made a second card/tag set.  

Sneak Peek: February 2023 Dies

I used the candle dies from the Birthday Mug Additions as the focal point on my card and paired them with the new Large Celebrate Shadow Dies.  

Sneak Peek: February 2023 Dies

Next I cut the little confetti/sprinkles dies in the Fancy Cake die set in 9 colors until I had a big pile. I added liquid glue across the bottom of my card then sprinkled the confetti all over it.  

Sneak Peek: February 2023 Dies

It reminded me of the sprinkle covered cakes, so I repeated the idea on a matching cake tag using the Fancy Cake dies. The “celebrate” sentiment is from the Gift Card Bag dies

Sneak Peek: February 2023 Dies

I die cut the cake from a folded piece of cardstock, so the the tag opens like a little shaped card. 

Sneak Peek: February 2023 Dies

Thanks so much for visiting today! These dies have boundless potential for creativity and are so much fun to use. Join us tomorrow as we reveal the products and the bundles go live!

| |

Sneak Peek: February 2023 Stencils

Hi friends! It’s Dana here today and I am excited to be back sharing a sneak peek of the new stencils coming to Pretty Pink Posh. This release is packed full of fun new birthday products and includes four new stencil sets! Today I will be using two of the sets- Layered Birthday Cakes and Layered Party Hats– let’s get started. 

New release will be available February 8th. 

Sneak Peek: February 2023 Stencils

My first card uses the Layered Birthday Cakes stencil set. This is a four pack of stencils that line up to create the sweetest cakes ever! I used dye ink for my blending and chose to use colors with a more “boyish” feel… though these cakes are adorable with any color palate! For my last layer (the candle flame) I used Glitz Glitter Gel in gold for a little extra sparkle. 

Sneak Peek: February 2023 Stencils

Next, I trimmed my panel down and attached a thin strip of gold glittered cardstock to the top. I then attached my panel to an A2 card base. Lastly, I used the new Large Celebrate Shadow die for my sentiment. 

Sneak Peek: February 2023 Stencils

My next card uses the new Layered Party Hats stencil set.

Sneak Peek: February 2023 Stencils

I started my card by using the Layered Party Hats stencil set to create my card panel. This is a set of four stencils that layer together to create a fun birthday panel. I once again used dye ink and finger daubers for all of my blending. On my final layer (the party hat toppers) I used Glitz Glitter Gel in gold again, to add a little sparkle. 

Sneak Peek: February 2023 Stencils

To finish my card, I trimmed my panel down and attached it to a bright pink card panel before attaching it to an A2 card base. I then used the new Birthday Mug Additions die to create a coordinating party hat. I attached the die cut hat to a Stitched Tag oval with foam adhesive. Lastly, I used the Simple Sentiments set for my sentiment. 

Sneak Peek: February 2023 Stencils

Thanks for joining me today! I know you will love these fun new products and I can’t wait to see what you create with them.

Enjoy your day, Dana