
Merry Christmas Teacup
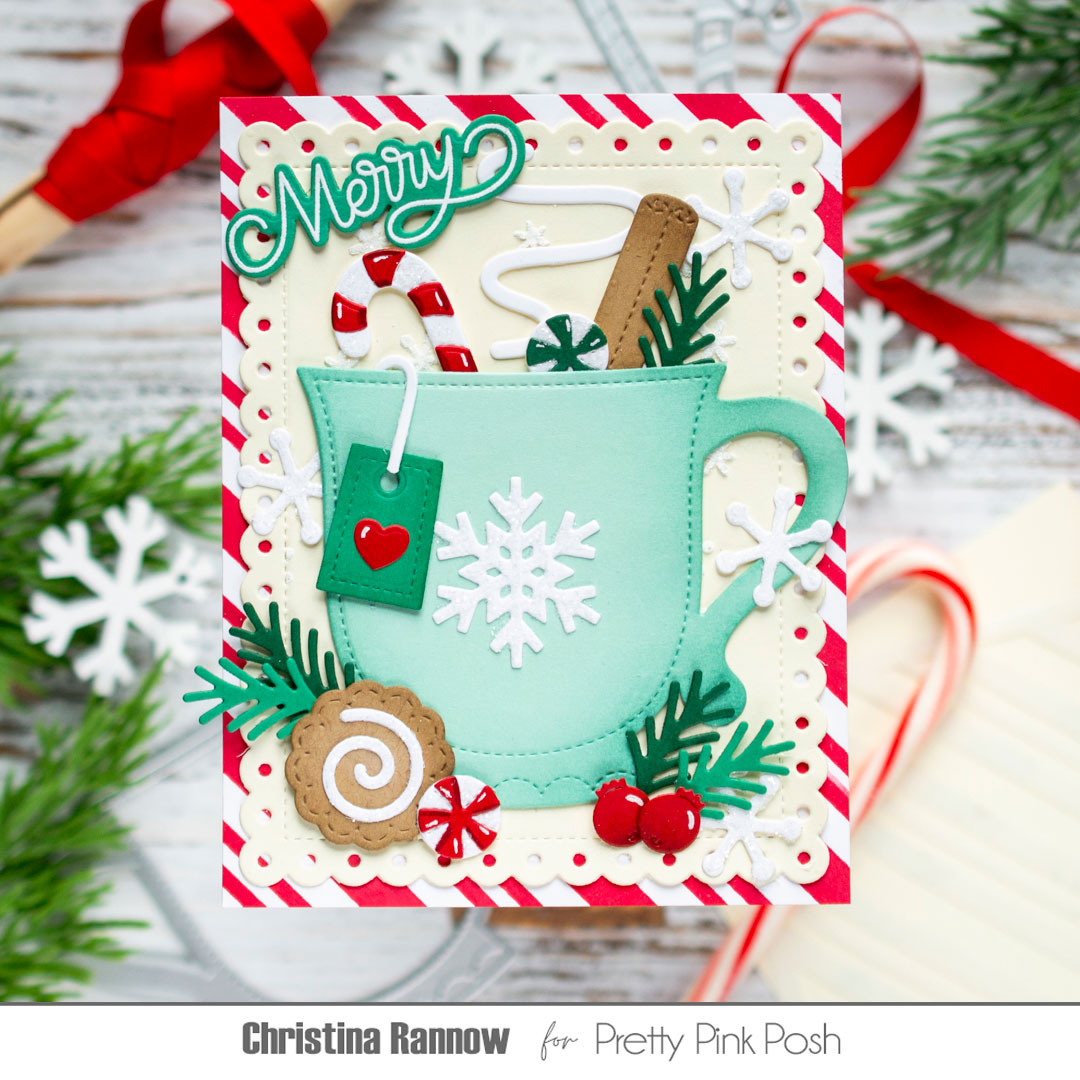
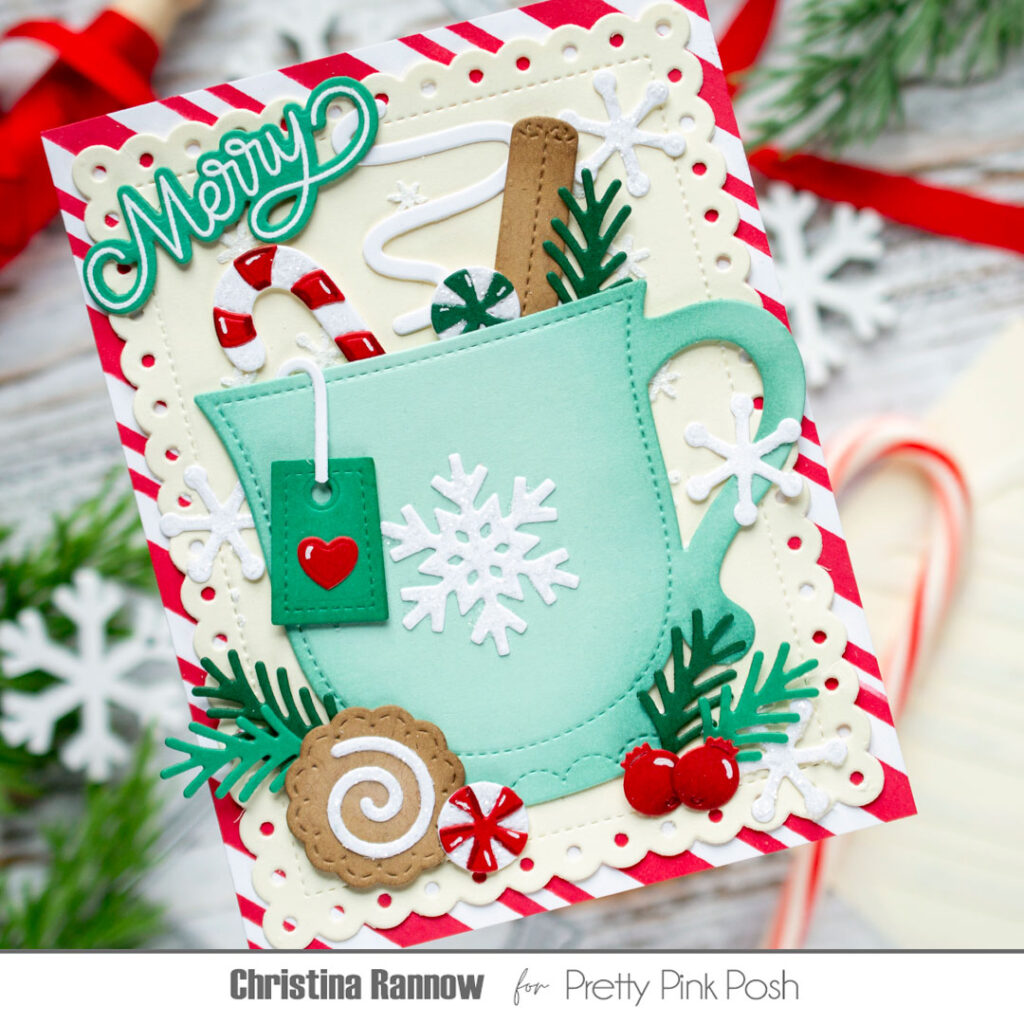
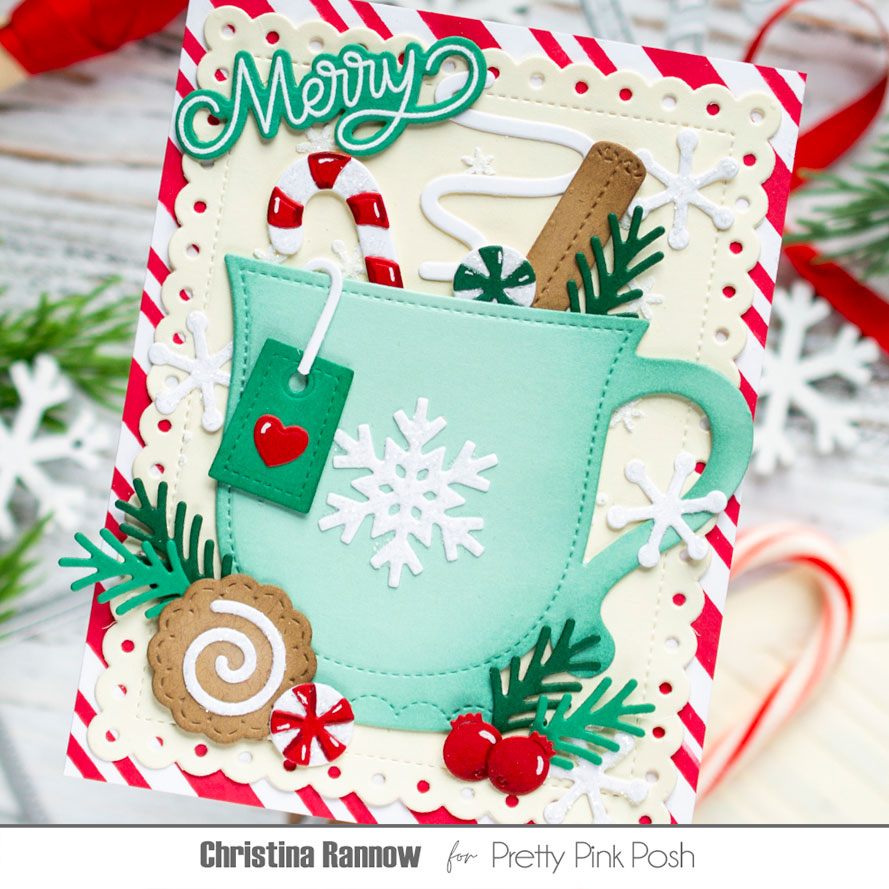
Hello! Christina here to share some Christmas tea with you! This merry and bright card features the Teacup Shaker embellished with all things Christmasy. I shopped my stash for snowflakes, greenery, and sweet treats and sprinkled almost everything with glitter for plenty of sparkle. An Eyelet Rectangle and the Candy Cane Stripes were the perfect pairing for this whimsical holiday card.
Teacup Shaker Dies
Eyelet Rectangle Dies
Big Celebration Cupcake Dies – “cranberries”
Christmas Holder Additions Dies – big snowflake
Christmas Bucket Additions Dies – candy cane and peppermints
Candy Treats Dies – cookie and heart
Christmas Cake Pops Dies – “steam”
Fall Mug Additions Dies – cinnamon stick
Holiday Wreath Builder Dies – greenery
Holiday Scripts Stamp Set
Holiday Scripts Coordinating Dies
Candy Cane Stripes Stencil
Layered Penguins Stencils
My first step was to create the stenciled background panels. For the Candy Cane Stripe, I used Lumberjack Plaid Distress Oxide Ink on white cardstock. For the ivory Eyelet Rectangle, I stenciled just the snowy layer from the Layered Penguins stencils with white stencil paste and quickly sprinkled it with glitter before the paste set. Then I layered these panels together and set them aside while I got to work die-cutting all the elements for the Christmas teacup.
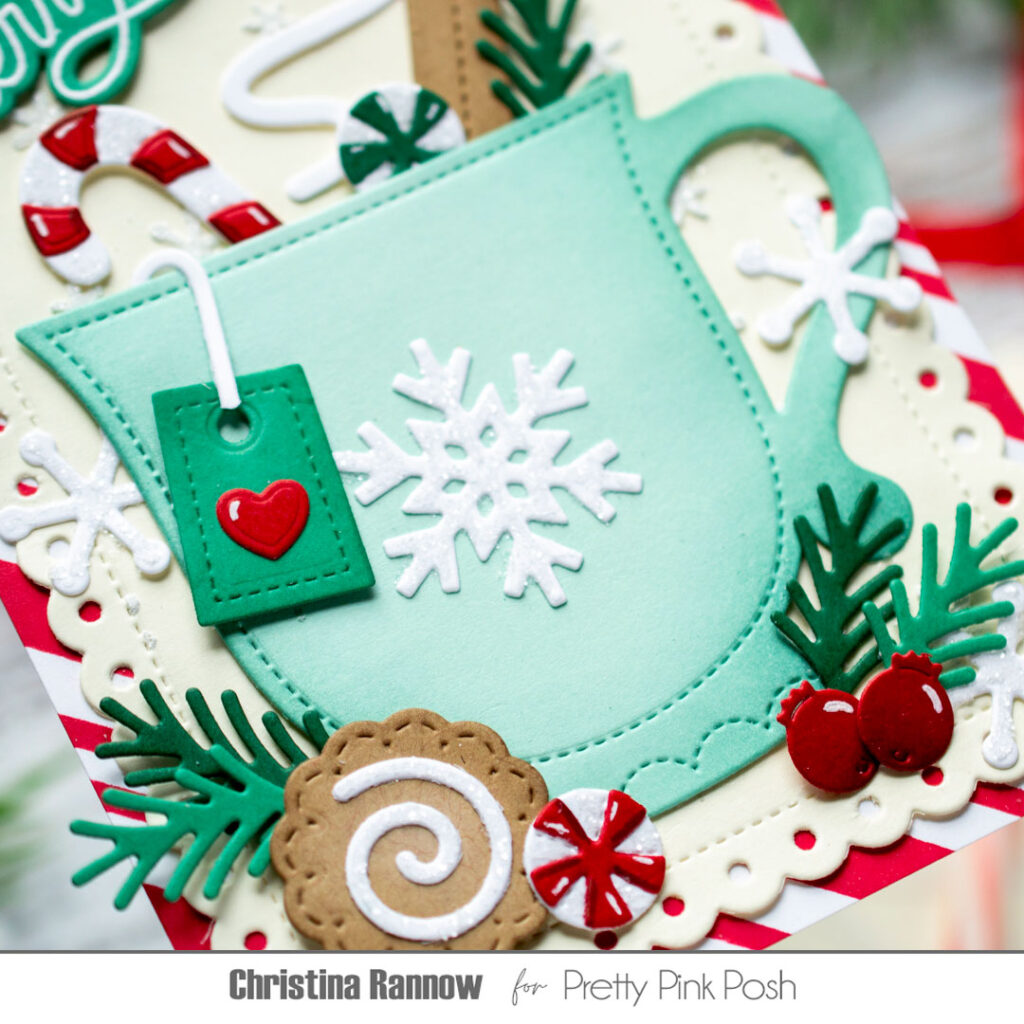
For my die-cutting, I chose a more traditional color palette of evergreen, classic red, and teal cardstock accented by a small amount of kraft cardstock. I added a little shading to most of the diecuts with coordinating ink colors and a small blending brush. I also added glitter to the snowflakes and the sweet treats by brushing on a thin layer of glue and then dipping the pieces into the glitter jar.
Next I arranged the diecuts on my background panel and attached them with either foam squares or glue. I attached the teacup first and then tucked the other elements in and around it. To finish things up, I added a scripty sentiment that I heat embossed with white embossing powder on evergreen cardstock and then die cut using the coordinating die. The finishing touch was to add a few highlights with a white gel pen.
Thank you so much for stopping by to have Christmas tea with me! I hope you’re inspired to create something merry and bright with your Pretty Pink Posh stash!
This is really pretty, Christina!
This is so pretty. Love the color combination. I need to add the tea cup to my wishlist!