
Monochromatic Penguin Card
Hello crafty friends, Marine here, I’m very happy to be back on the blog with this black & white winter themed card showcasing items from the November 2025 release: Penguin Holder and Winter Trees. I absolutely adore all the penguin products from this release, and those trees are sooo beautiful, I want to use them on all my cards now!
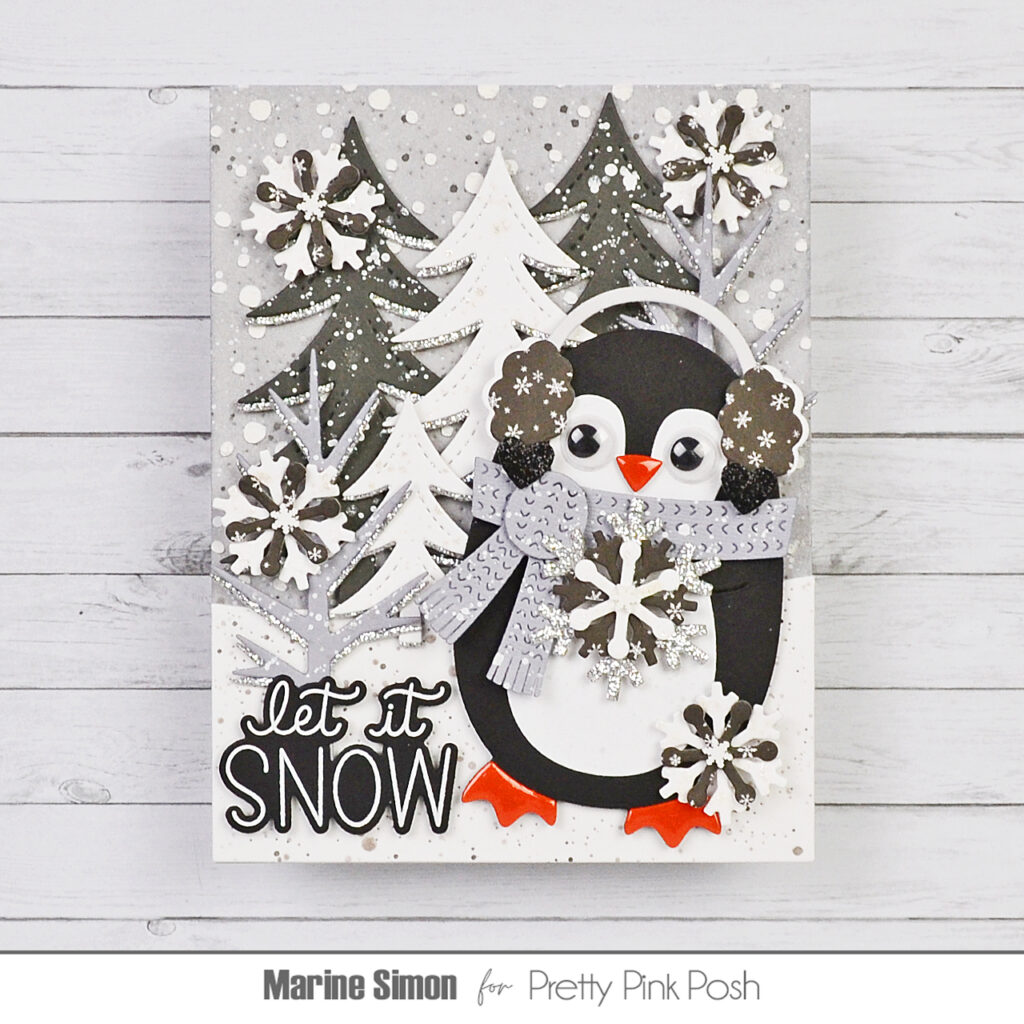
I started off with the background, cut a Pierced Snowflakes panel out of Strathmore bristol smooth cardstock, and covered it with hickory smoke oxide ink. I mixed copic opaque white ink with water and added white splatters all over my panel, I did the same with black soot oxide ink for contrast and the same again with brushed pewter mica spray for sparkles, and finally I turned this background into a snowy sky using the Snowfall stencil along with opaque white grit paste.
I cut another Pierced Snowflakes panel out of white cardstock, added the same details and texture as the ones I added to the snowy panel, and once dry, I used a Snowy Hill Border die to cut a wavy border out of my panel. I attached that border to my background panel using 1mm foam squares, and then moved on to the die cutting process.
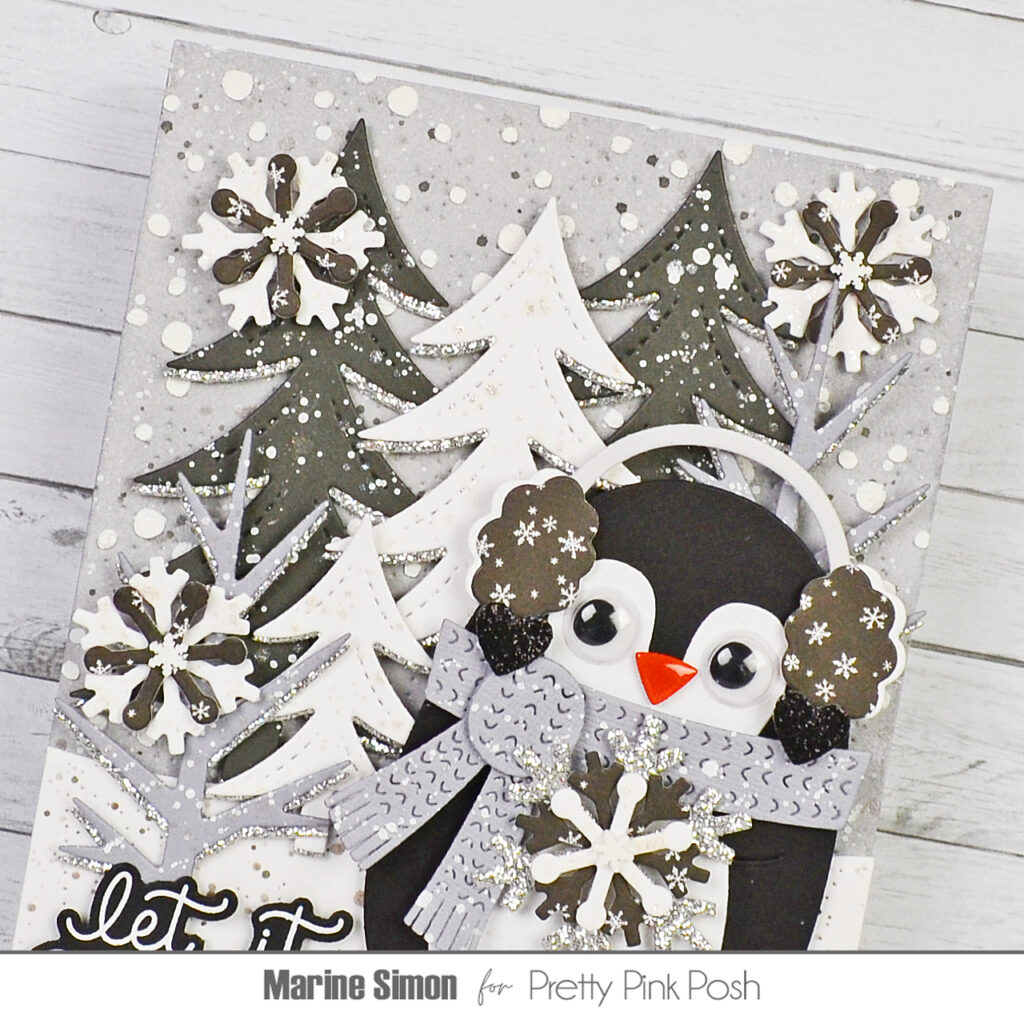
I cut all the bits and pieces out of dark grey, light grey, white, silver glitter, black glitter, orange cardstock, and a snowflake pattern paper. Here is a detailed list of the die sets I used: • Penguin Holder – penguin • Winter Trees – trees • Christmas Holder Additions – ear muffs, snowflakes • Christmas Bucket Additions – snowflakes • Valentine Bucket Additions – heart cheeks • Fall Mug Additions – scarf.
I added white splatters and liquid stardust splatters to the grey trees, liquid stardust to the white trees and snowflakes, and white splatters to the scarf.
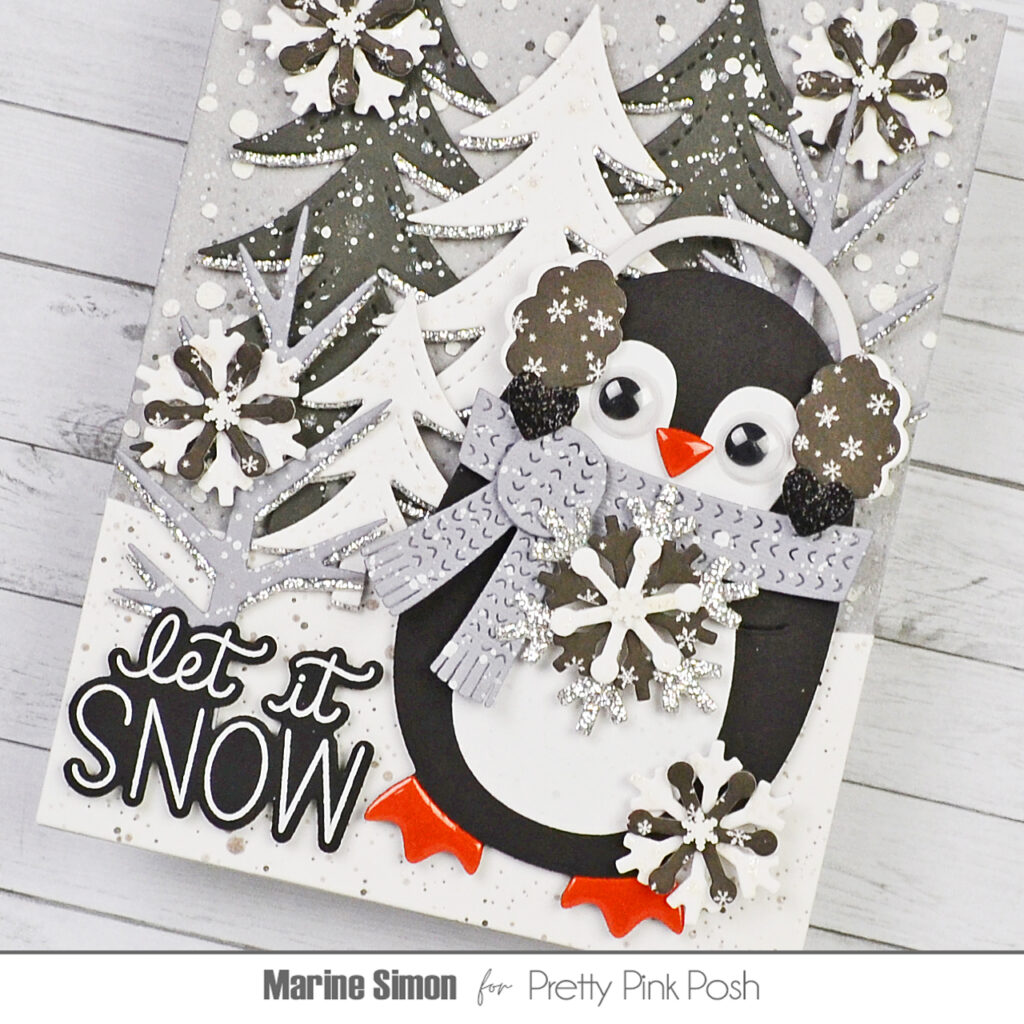
I let everything dry, and then assembled all my pieces starting with the trees. I purposely shifted them a little bit to get silver glitter borders under each branch. I assembled the snowflakes using tiny pieces of 1mm foam squares in the center to add dimension. I put my cute Penguin Holder elements together, gave him a scarf, ear muffs, a pair of googly eyes and two glittery heart cheeks, added glossy accents to his beak and feet, and placed a large snowflake in his flappy hands.
Next I attached everything to my card using 1mm and 2mm foam squares, starting with the trees in the back, next my Penguin Holder in the foreground, and then the snowflakes here and there.
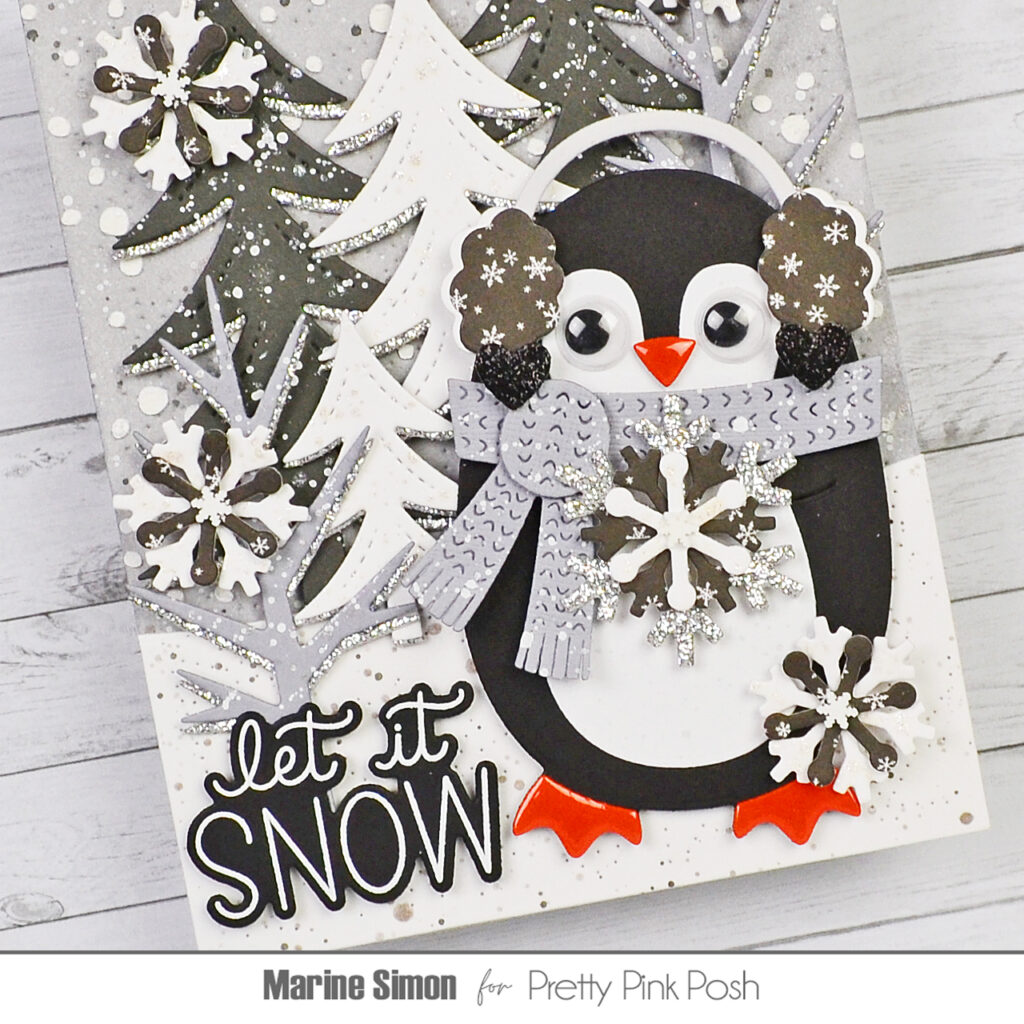
I white heat embossed “Let it snow” from Let It Snow on black cardstock, cut it with the matching die and then attached it in the bottom left hand corner of my panel using foam squares again. And for the final details, I picked some snowflake confetti from the Winter Wonderland mix and glued one in the center of each snowflake.
And that’s it! Thanks so much for stopping by, and see you next time!