
Sneak Peek: Holiday Ornaments
Hello friends, Arsenia here! I’m thrilled to be sharing this sneak peek with you using the Holiday Ornaments stamp set with coordinating dies. The ornaments are whimsical, beautiful, and have amazing details. I’m excited to share a quick but beautiful technique with you to create mass production with these beauties. Let’s get started.
New release will be available October 16th
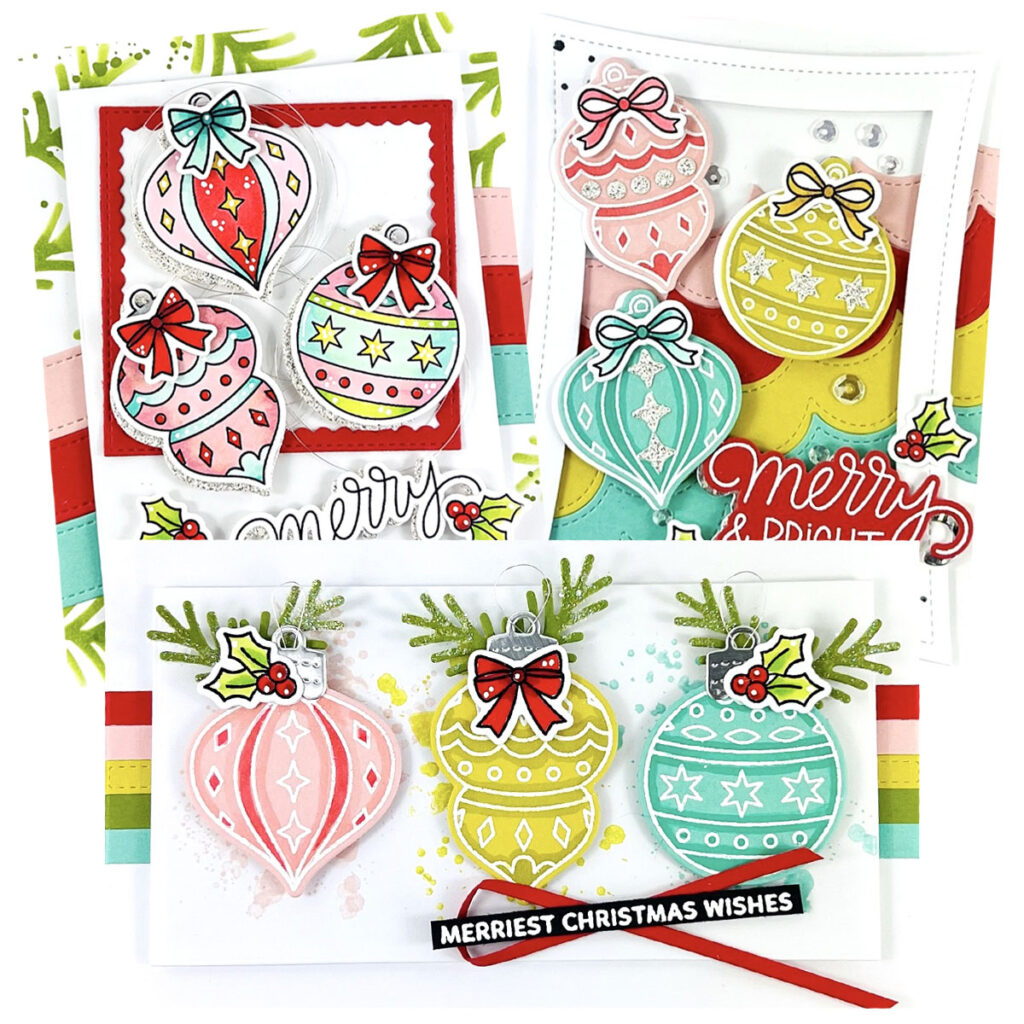
The first step to my mass production with these gorgeous ornaments is choosing five colors of cardstock and choosing coordinating alcohol markers. I did lots of heat embossing on the cardstock with white embossing powder with the Holiday Ornaments stamps. I took the coordinating alcohol markers and did some shading, this process goes quickly. Once I was done with the alcohol marker coloring I did some die cutting with the Holiday Ornaments dies and I was left with oodles of beautiful ornaments.
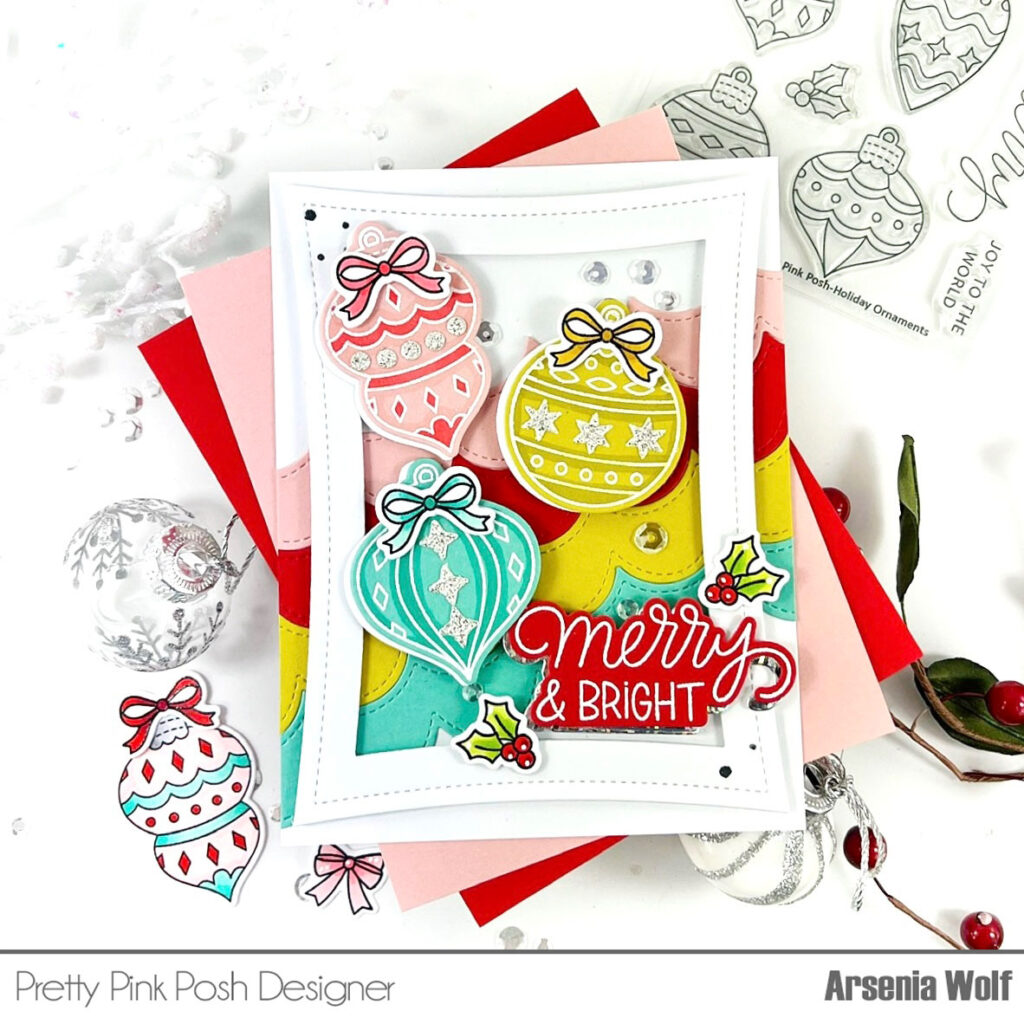
For my first card I used Stacked Edges 1 dies with coordination cardstock for my background, next I made a frame with the two largest Wonky Stitched Rectangles Dies. I adhered the frame onto the cardbase with foam tape. I went to my stash of ornaments and chose three of them, I decided I wanted to add some bling! Are you ready for another sneak peek, I used some of the dies from the new Build An Ornament Die Set to add some bling to the ornaments, this die set is amazing! To adorn the ornaments I stamped some bows from the Holiday Ornament stamp set and did some quick alcohol coloring. The bows are so cute!
Next I needed a sentiment, I used a sentiment from the new Winter Greetings Stamps with coordinating dies. Friends this is an absolute must have, the sentiments are so cute and whimsical. I stamped the sentiment onto coordination cardstock and heat embossed with white embossing powder. I added some of the adorable Holly and berries from the Holiday Ornaments with coordinating dies. To finish the card I added lots of Sparkling Clear Sequins. Ta-Da card done and I adore it!
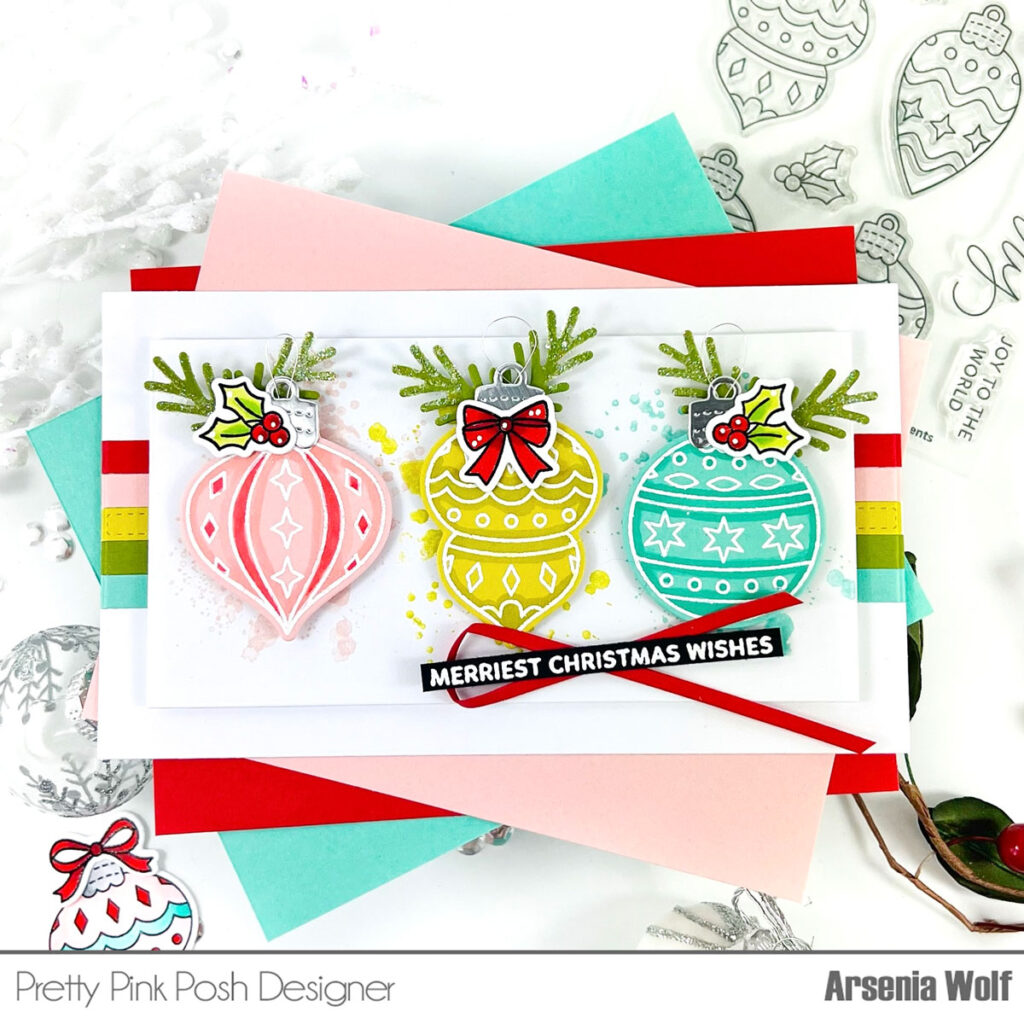
For my next card I decided to make a mini slimline. The card base is 6 x 3 1/2 and the panel is 5 1/4 x 2 3/4. For the card base I used Stitched Strips Dies and Simple Strips Dies with coordinating cardstock. Now to work on the card panel, I decided to add some faux splatter behind each of the ornaments in coordinating ink. I adhered the ornaments and it was time to embellish!
For the ornament toppers I used the new Build an Ornament Die Set and for some greenery I used the new Holiday Wreath Builder Die Set, oh friends you’re going to love this die set! I added texture paste and rock candy glitter mix to the greenery. I added some Images from the Holiday Ornament stamp set with coordinating dies. For my sentiment I used the Sentiment Strips: Christmas stamp set and Sentiment Strip Dies! I took a 1/8 inch of red cardstock and embellished the sentiment, card done! It’s super cute and beautiful, I love it!

I still had some ornaments left and decided to make some gift tags, I used the Eyelet Rectangles Dies and the Simple Strips Dies. The cute sentiments are from Winter Greetings Stamps with coordinating dies! The tags were quick and easy, having a stash of ornaments makes the creating process a breeze.

For my final card I stamped the images from the Holiday Ornaments Stamp set and my Olo markers to color the images. For my card base I used Layered Christmas Lights Stencils. I only used the greenery stencil, to add some more interest to the background I used Stacked Edges 1 Dies. I kept the card panel simple, I added a Scallop Square Die. I backed the ornaments and merry sentiment with some glitter cardstock. I added lots of 38 gauge silver wire to the card panel before I added all my images. To finish the card I used a sentiment from the Sentiment Strips: Christmas set!
The release is absolutely gorgeous and has lots to keep you busy for the holiday crafting. Thank you so much for stopping by and I hope you enjoyed this sneak peek. Have a fabulous day, friends!
These ornaments are gorgeous!
Love alllll of your projects 😍😍😍
Thanks for sharing!!