
Ghostly Greetings
Hello everyone, June here and I’m sharing my process for a spooky Halloween card using the Halloween release.
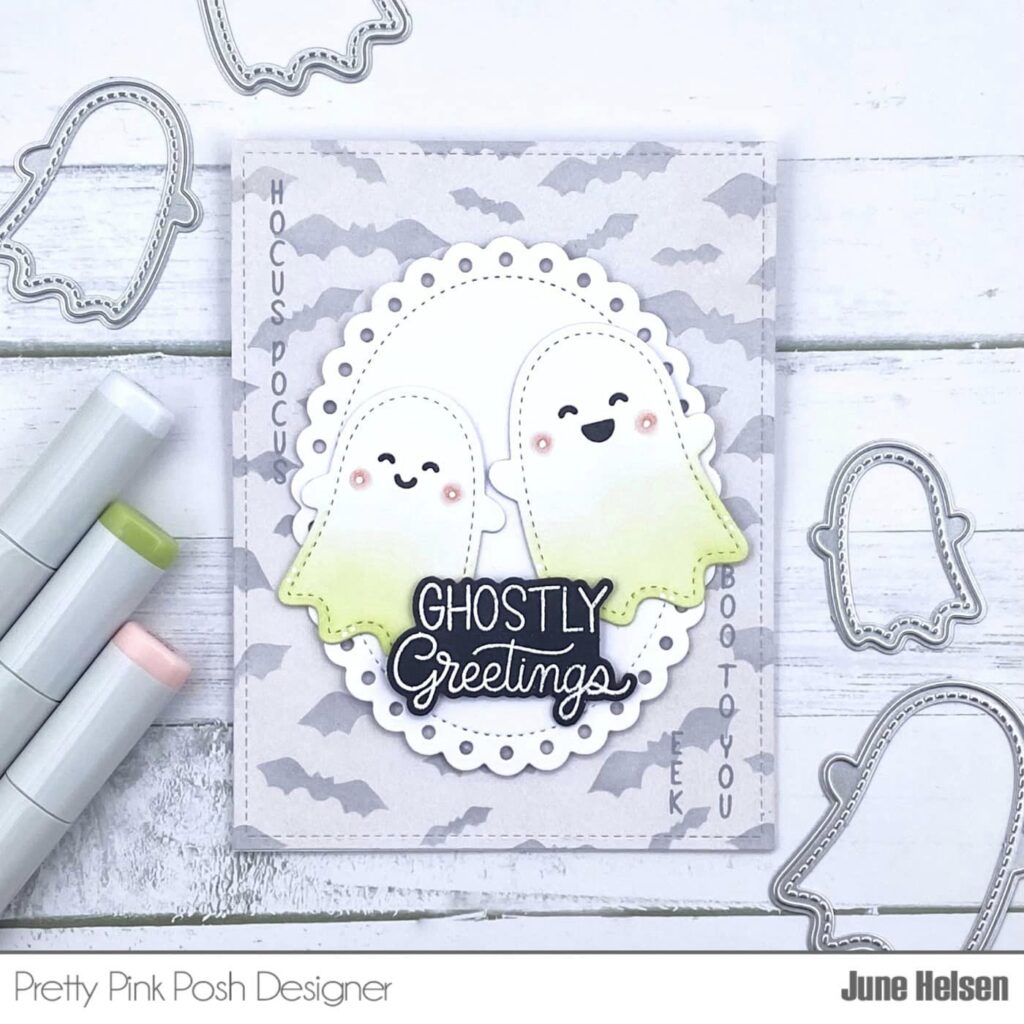
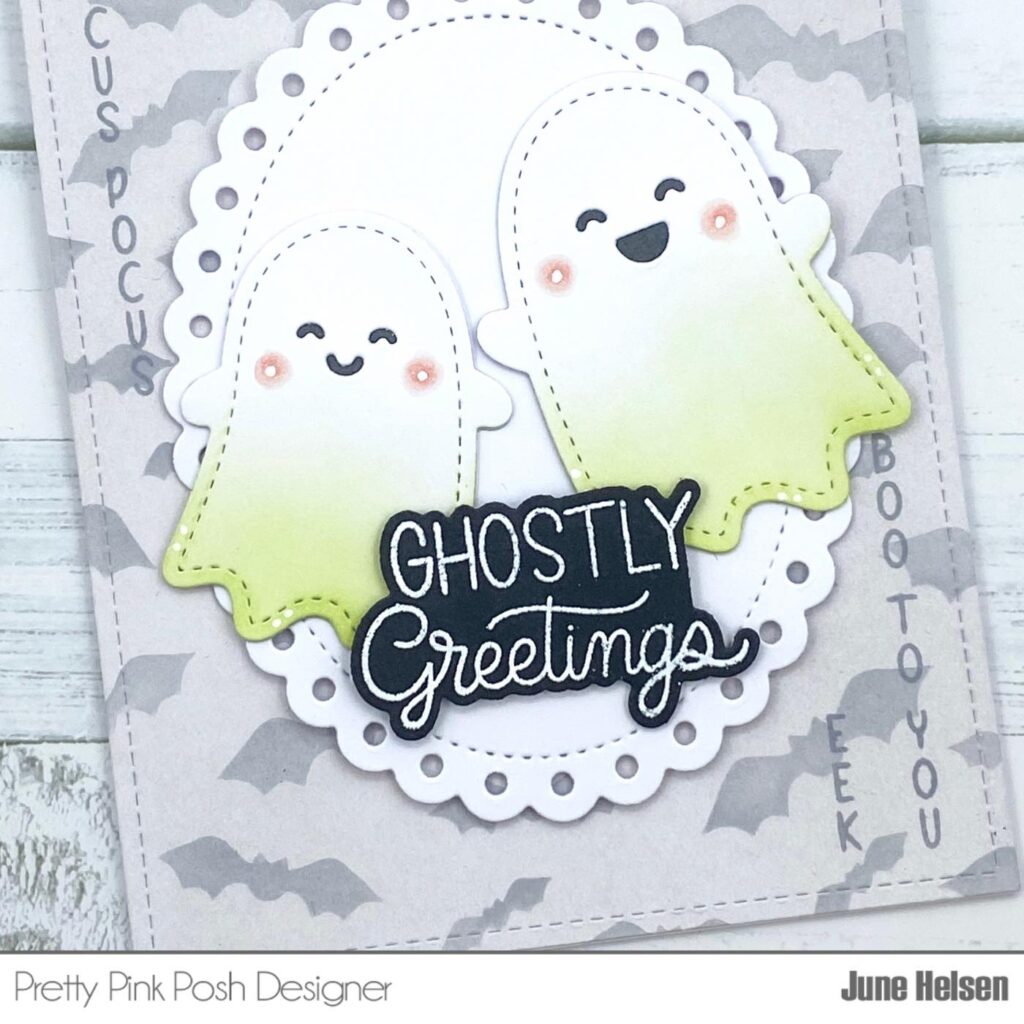
I started out by selecting 2 ghosts from the Stitched Ghosts Dies I wanted to use for my focal point. I love how you can mix and match the faces on them! I also decorated my ghosts by adding a subtle ombre look using Shabby Shutters Distress Oxide ink and adding some blush on their cheeks using Copic Markers and white gel pen. I backed the faces using a scrap piece of black cardstock to make them pop.
For my background I blended a solid panel of Lost Shadow Distress Oxide and used the Scattered Bats Stencil and Hickory Smoke to add a cute bat pattern. I used a very light hand for this and even went back to Lost Shadow to make sure the bats weren’t too dark.
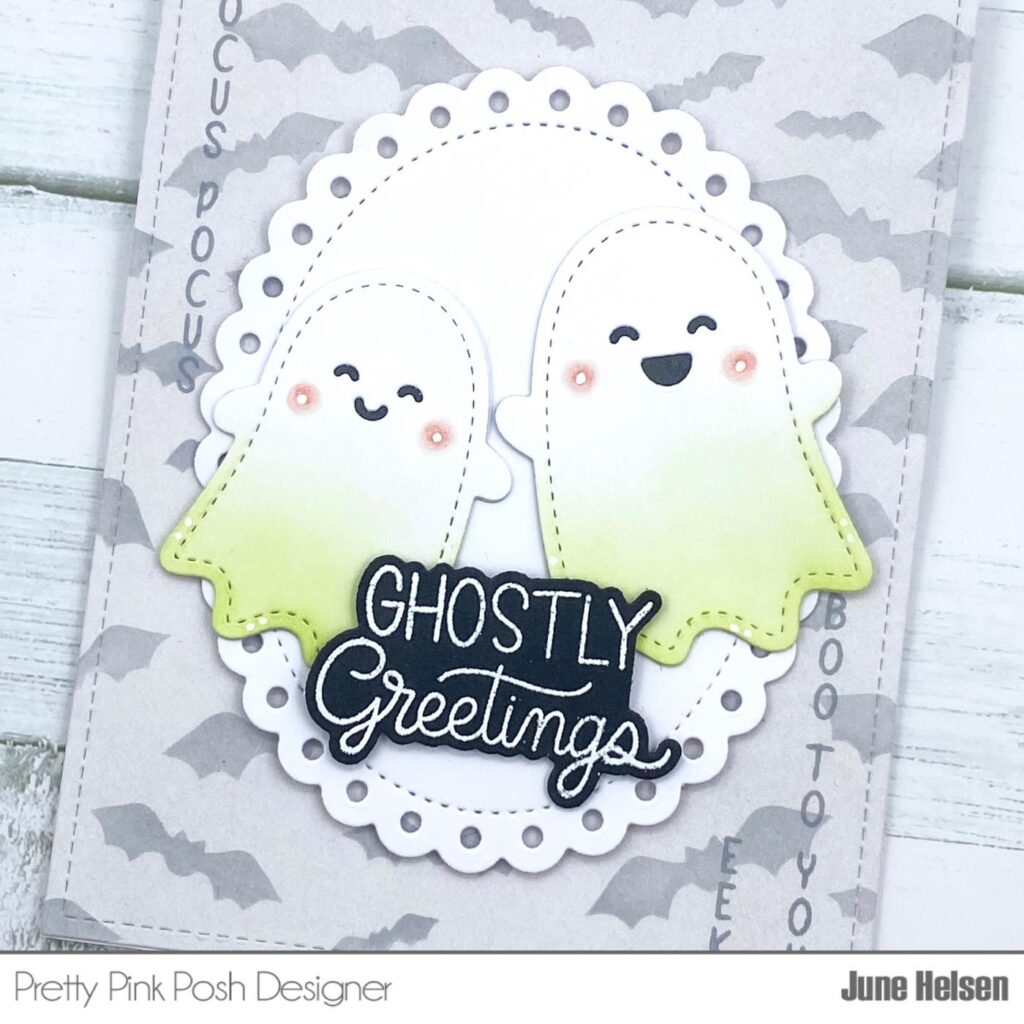
I feel like the background still distracted a bit too much from my ghosts, so I cut out one of the Eyelet Ovals Dies so I had something to back my ghosts onto. I used foam stickers to adhere them because I didn’t like the white-on-white look, and adding some dimension made them pop out a bit more.
I embossed one of my new favorite sentiments from the Halloween Corners Stamp Set in white onto some black cardstock and also adhered it using foam tape. I thought I was finished at this point, but it looked a bit… plain maybe? So I looked through the entire release to find something I could add more detail with, and suddenly realized how fun those sentiments from Upright Greetings: Halloween were. I chose my sentiments based on their length so it could frame my card nicely and I stamped them in a grey ink that was slightly darker than my bats for even more of the same tone-on-tone look.
I really like how this one turned out! I like the little pop of color on the ghosts against the ghostly pastel grey background.
Anyway, I’ll see you again soon, bye crafty friends!
Adorable – love both the ghosts and the background.
Lori S in PA
Omg this card is so cute 😍 love the ink blending on the ghosts!