
Christmas Train Trifold Card
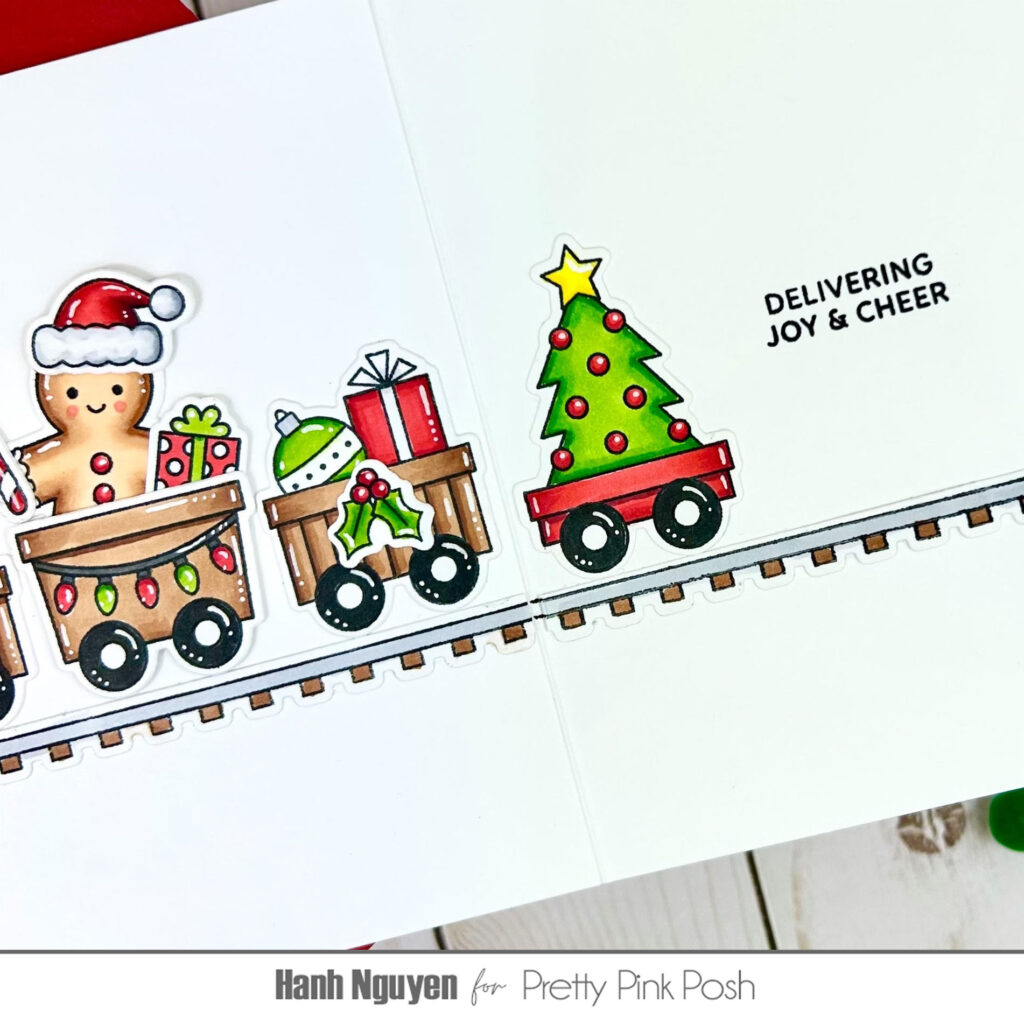
Hello Crafty Friends! It is Hanh here with you today. I’m sharing a fun Extra Long Christmas Train trifold card featuring the Christmas Train and some adorable Gingerbread Friends. It is super easy to customize the length of this cute Christmas Train set. However, there is only so much space on the front of a standard A2-size card. I was determined to find a way to fit more of the train onto my card. My solution: an unassuming card front that opens up to reveal a surprise trifold design that can hold 4 more carts of the train. So let’s get started.

First, I stamped the images from the Christmas Train stamp set and a couple of gingerbread images from the Gingerbread Friends set onto some Neenah Solar White cardstock with Memento Tuxedo Black ink.
NOTE: I used two different weights of Neenah Solar White cardstock for this card. The sturdiness of the Neenah 110 lb cardstock was perfect for the train engine and the first cart that I eventually adhered with foam tape to the card front. Whereas, the thin nature of the Neenah 80 lb cardstock was perfect for the remainder of the images which were adhered to the inside of the card and required a low profile in order for the card to fold up nicely.
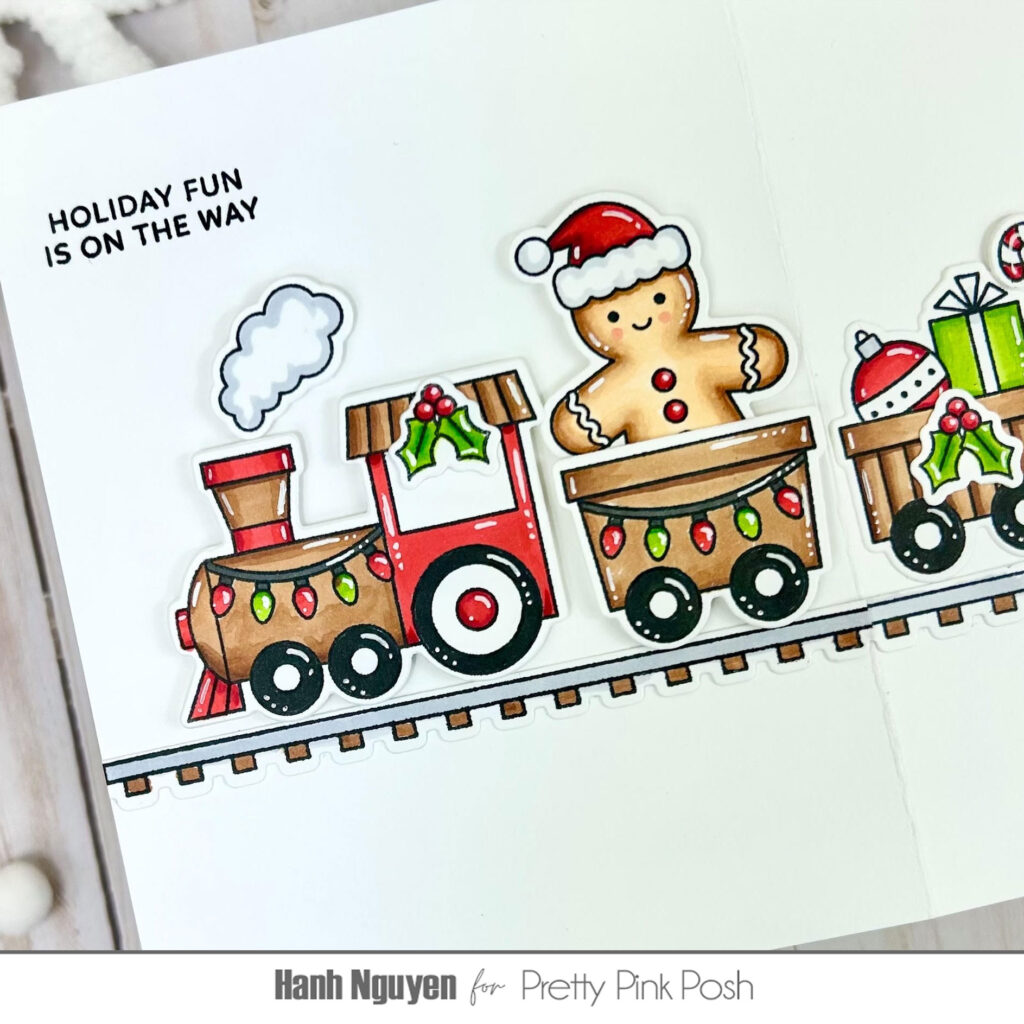
The Christmas Train Coordinating Dies and Gingerbread Friends Coordinating Dies were used to diecut the images out. I colored the images with Copic markers and highlighted them with a white gel pen.
COPIC COLORS
Train: E31/34, R24/29, T7
Smoke: C00/0/1
String of lights: T5, R24/29, YG03/17
Hollies/Gifts: R24/29, YG03/17, C1
Candy Cane: R24/29, C1
Christmas Tree: Y06/08, YG03/25/17, R24/29
Gingerbread men: E51/53/33/99, R20, R24/29
Hats: R22/24/29/39, C00/1
Train tracks: C1, E31

For the trifold cardbase, I took a piece of white cardstock (8.5″ x 11″) and trimmed it in half to create 2 smaller panels (8.5″ x 5.5″). I used a score board to score and fold at the midline 4.25″ mark to create 2 side-folding A2 cardbases. I will now refer to these 2 cardbases as Card A and Card B. Card A will eventually be the left two panels of the finished trifold card. Card B will eventually be the back of the center panel and the right panel of the finished trifold card.
I opened and flipped Card A upside down on my table top as if I flipped an open book upside down to save the page that I was on. Card A should look like a tent or mountain with the fold line as the peak.
Next, I opened and held Card B right side up as if I were reading a book. Card B should look like a valley with the fold line pointing to the ground. I trimmed a sliver (about 1/8″) off of the left edge of the left panel of this card. Then, I added liquid glue all along the outline of the left panel of the card. I adhered the left panel of Card B to the back of the right panel of Card A.

The end result should be a trifold card with a left panel, a peak up, a center panel (two layers), a valley and then a right panel.
For the sentiment, I stamped the sentiments from the Christmas Train Stamp set “Holiday Fun is on the Way” onto the left panel (card front) and the “Delivering Joy & Cheer” onto the right panel (card inside) with Memento Tuxedo Black ink.

The train tracks and the colored images added to the inside of the card were adhered with liquid glue. The train engine, smoke and first cart were adhered to the front of the card with foam tape for a bit of dimension and interest.
I appreciate you taking the time to stop by and visit today. I hope you liked my card and are inspired to make your own trifold card.
Have a wonderful and crafty day!
What a GREAT idea and darling coloring!
This is fabulous! I have a train obsessed little one and this is amazing!
What a fun clever card! Love the gingerbread!
Love your gingerbread train and great coloring!
Sweet trifold card! Love the adorable gingers!
This is adorable!!