
Whimsical Gingerbread Shaker
Hello crafty friends, Marine here, I’m super happy to be back with this bright and cheerful holiday card featuring a mix & match of items from the holiday release and “older” ones, including the new Gingerbread Shaker, which is so amazing! I’m a big fan of the Pretty Pink Posh Shaker Collection, so I had to feature this cute little guy on one of my projects.
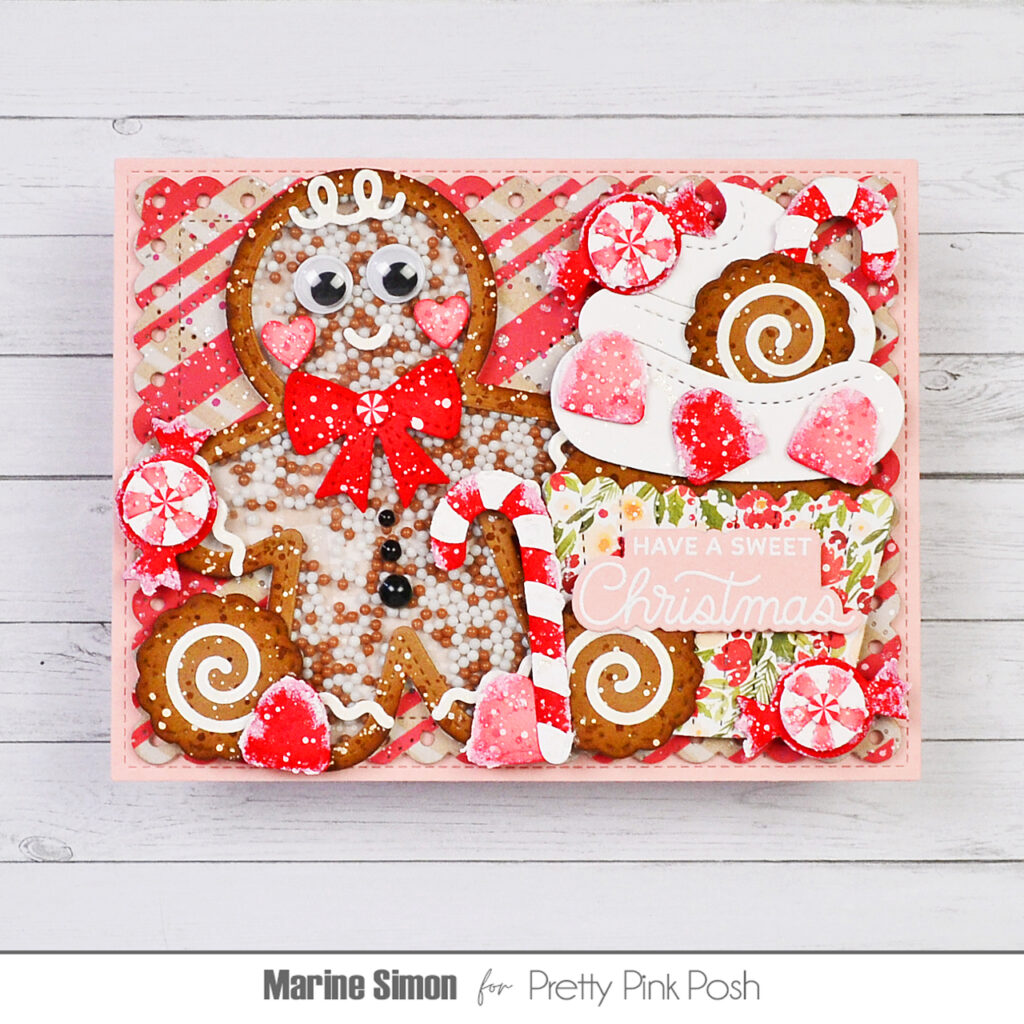
And speaking of which, I started off by building my Gingerbread Shaker following those steps: 1. I cut a Gingerbread Shaker frame out of dark kraft cardstock, applied gathered twigs distress ink on the edges, mixed that same ink with water, added brown splatters on my gingerbread frame, and then did the same with copic opaque white ink, 2. I cut a whole Gingerbread Shaker panel out of acetate, and stuck that panel at the back of the brown frame using liquid glue, 3. Still at the back of the frame, I attached foam strips all along the edges of my Gingerbread Shaker frame, bending and curving the strips to follow the shape of my die cut piece, 4. I poured a whole lot of Gingerbread shaker beads on the acetate, 5. I cut a whole Gingerbread Shaker panel out of a beige gingham pattern paper, added brown and white splatters to it, and when dry, attached it to the foam strips to close my Gingerbread Shaker, 6. I cut the icing decorative pieces out of white cardstock, added liquid stardust splatters to them, stuck them on my shaker with liquid glue, and applied glossy accents to those white pieces to make them shine.
Next I cut all the bits and pieces out of white cardstock, colored cardstock and pattern paper, and as always, here is a detailed list of the die sets I used: • Christmas Bucket Additions – gummies, candy canes, peppermint candies • Valentine Holder Additions – heart cheeks, bow • Big Valentine Cupcake – cupcake wrap, cupcake, whipped cream • Candy Treats – cookies.
To the white pieces I added liquid stardust splatters, to the pattern paper pieces I added white splatters, and to the colored cardstock pieces I applied matching distress ink to the edges, added white splatters and matching distress ink splatters. To some of them, such as the gummies, heart cheeks and candies, I added liquid stardust splatters, and just like the icing details on my Gingerbread Shaker, I applied glossy accents to the white swirling details on the cookies.
Next I cut a large Eyelet Rectangle panel out of light kraft cardstock, run it through my die cutting machine along with the Argyle Pierced Plate die to give my panel a nice texture, and then used the Candy Cane Stripes stencil to add a pretty pattern, lining up with the dots created by the Argyle Pierced Plate. In one way I applied white pigment ink, and in the other way I applied candied apple oxide ink. I mixed some copic opaque white ink with water and added white splatters all over my panel, I did the same with liquid stardust for sparkles, and then with lumberjack plaid oxide for contrast. When it was dry, I attached my panel to a 5,5 x 4,25 inches light pink panel, and then to a white card base.
I assembled and attached all my elements on my card, starting with the Gingerbread Shaker, next the cupcake and then all the small decorative pieces. I gave my cute little guy a pair of wiggly eyes and three Onyx Pearls as buttons, I picked some peppermint confetti from the Holiday Gingerbread Mix, attached one on the bow and one on each peppermint candy using liquid glue, and just like the other projects I created with the September 2025 release, I applied opaque white grit paste here and there for a lovely frosty look.
I white heat embossed “Have a sweet Christmas” from Gingerbread Friends on light pink cardstock, cut it with the matching die and finally attached my sentiment right on the poinsettia cupcake wrap using foam squares. And that’s it!
Thanks so much for stopping by, and see you next time!