
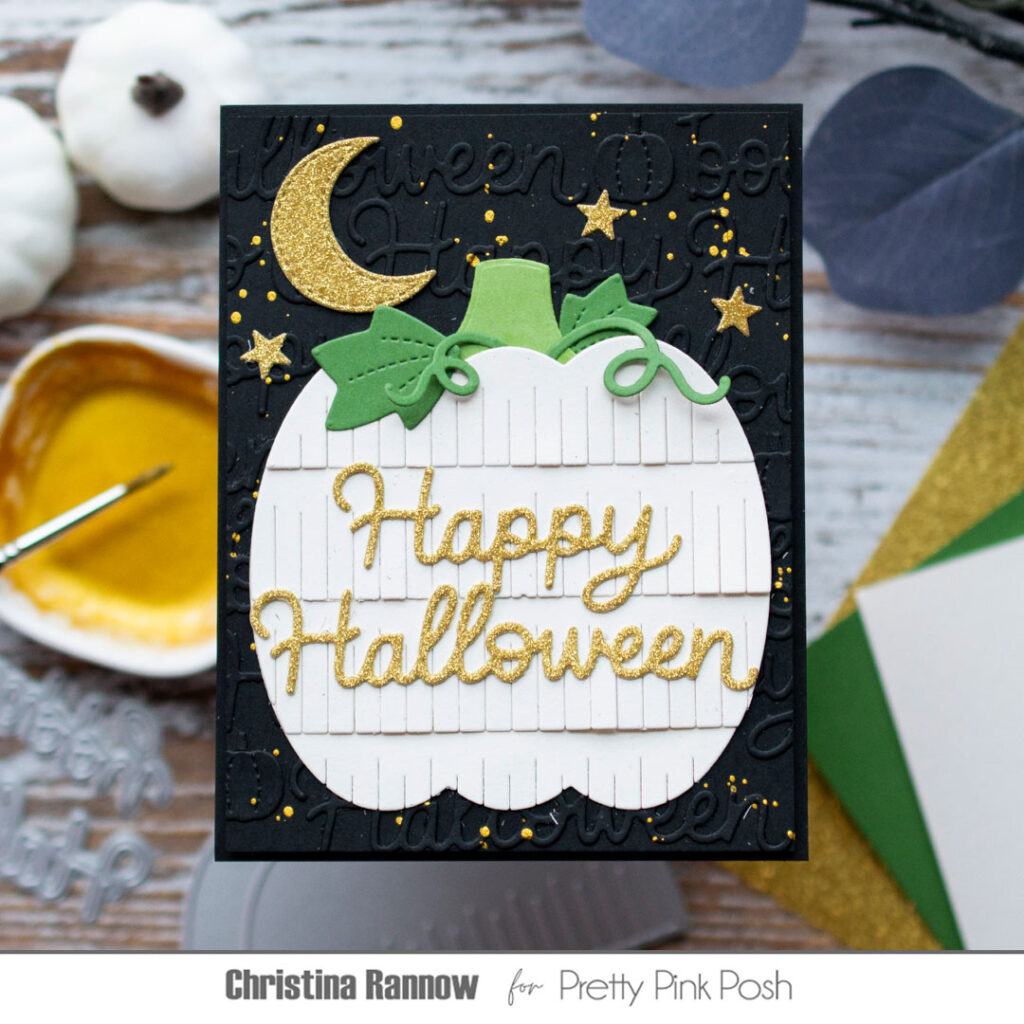
Halloween Fringe Pumpkin
Hi friends! Christina here to share a whimsical Halloween card featuring some of the new die sets in the latest spooky season release. I used the newest addition to the growing fringe dies collection, the Fringe Pumpkin, and paired it with the new Happy Halloween Shadow dies, which I also used to create a fun tone-on-tone text background. Grab your die-cutting machine, and let’s get started!
Fringe Pumpkin Dies
Happy Halloween Shadow Dies
Halloween Mug Addition Dies – moon & stars
Big Halloween Cupcake Dies – scripty “boo” for background
Spooky Mug Additions Dies – small pumpkin for background
Stitched Pumpkins – leaves & vines
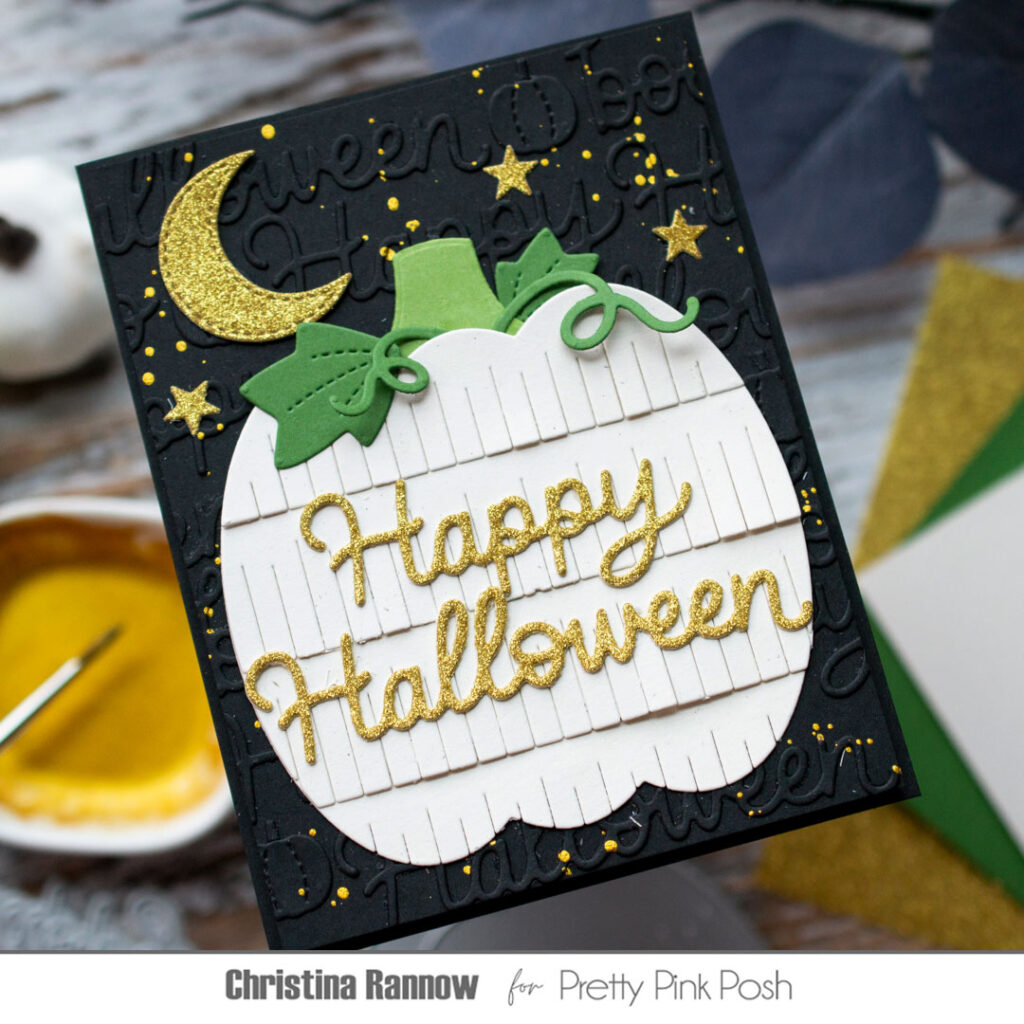
I started by creating the text background on a black cardstock panel trimmed slightly smaller than A2, about 4 x 5 ¼ inches. Then I die-cut multiple sets of the Happy Halloween, the scripty boo, and the small pumpkin from more black cardstock. I glued these randomly across the black cardstock panel, staggering the words and the pumpkin, letting them hang off the edges of the panel and trimming them afterwards. Two tips: you don’t have to fill in the area behind the fringe pumpkin, but you’ll need some scrap cardstock behind it so that it will be flush with the other text, and the text that you trim from the edges can be used to fill in other areas!
I finished the background panel by using gold Perfect Pearls powder mixed with a little water to add some metallic gold spatter and then mounted it to a black A2 cardstock panel with foam tape.
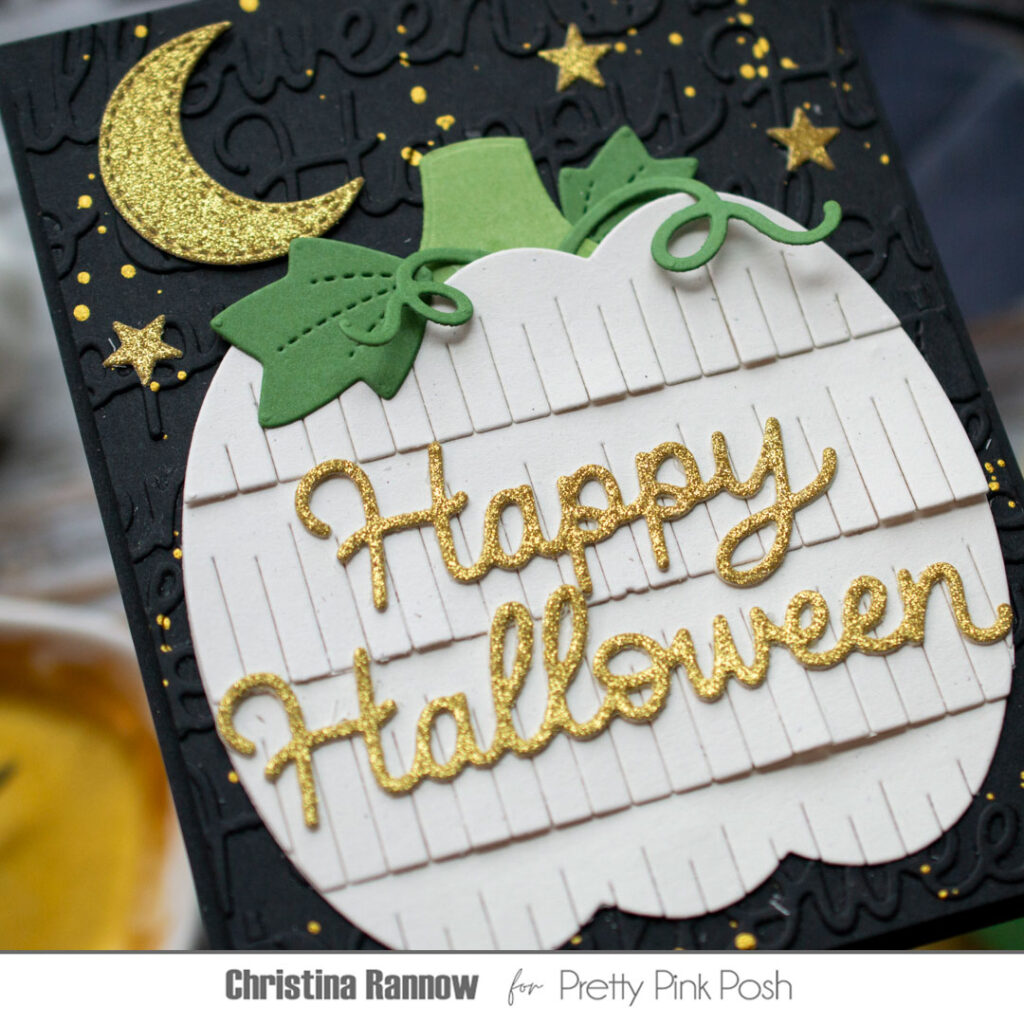
Next, I got to work die-cutting the other elements of my card design. I used ivory and green cardstock for the components of the pumpkin and gold glitter cardstock for the sentiment and the moon and stars. I attached these to the text background and then finished things up by mounting it to an A2 card base.
Thanks for reading about this whimsical Halloween card design featuring new dies from the latest release! See you again soon!
Gorgeous card! I love the white fringe pumpkin and the beautiful background!