
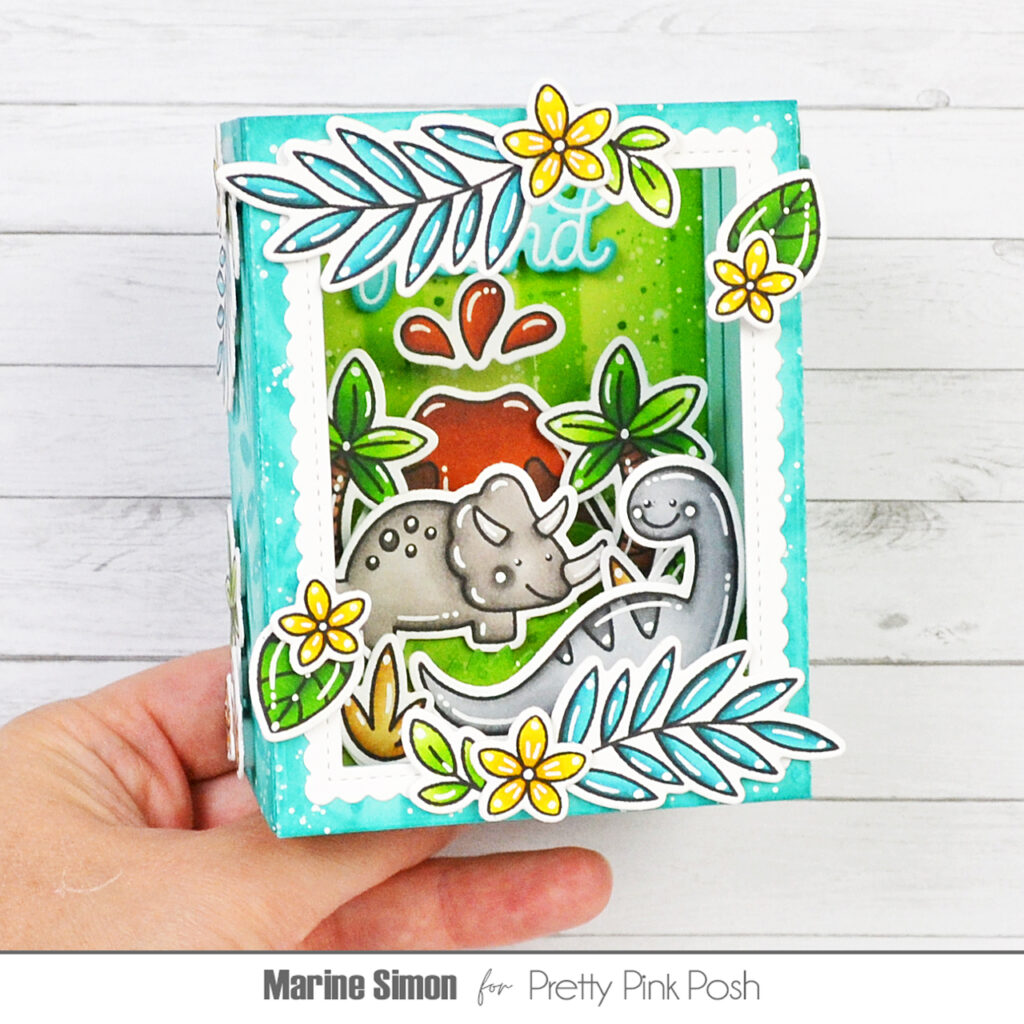
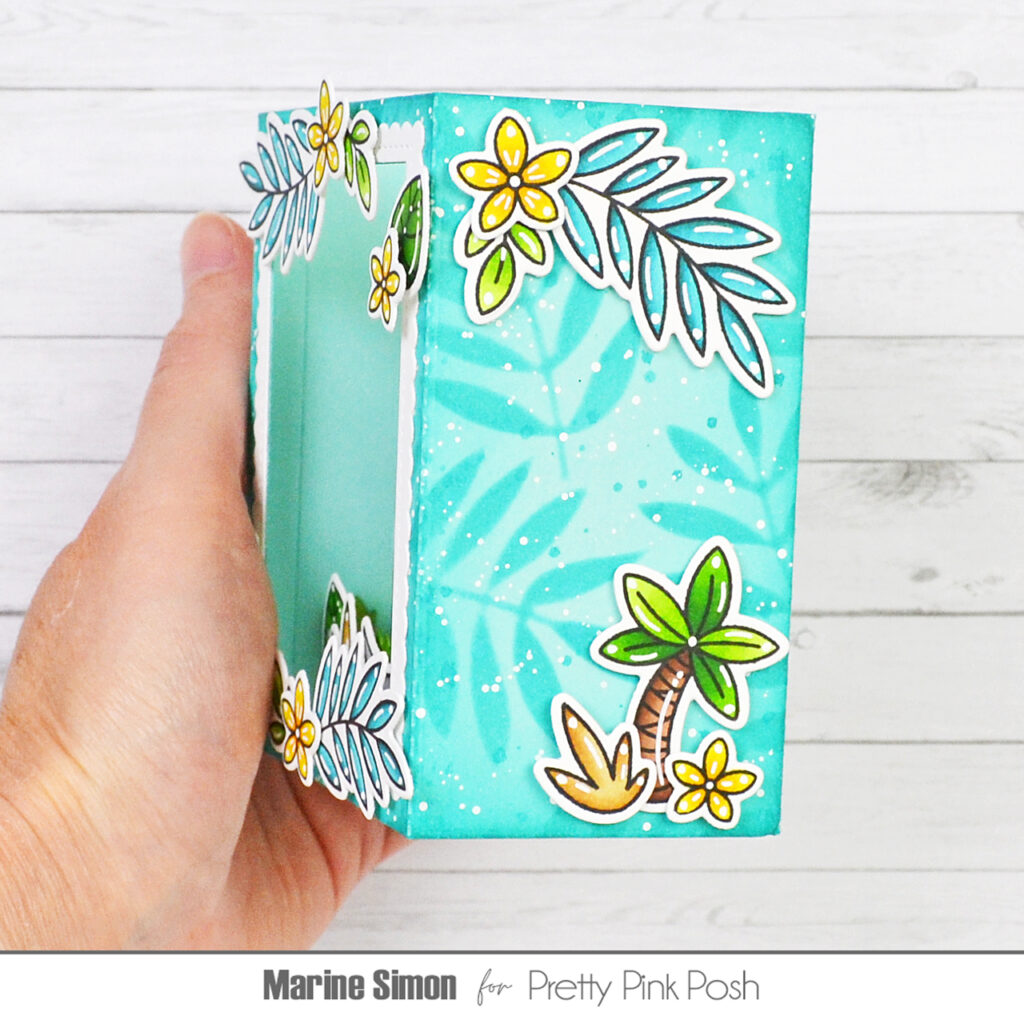
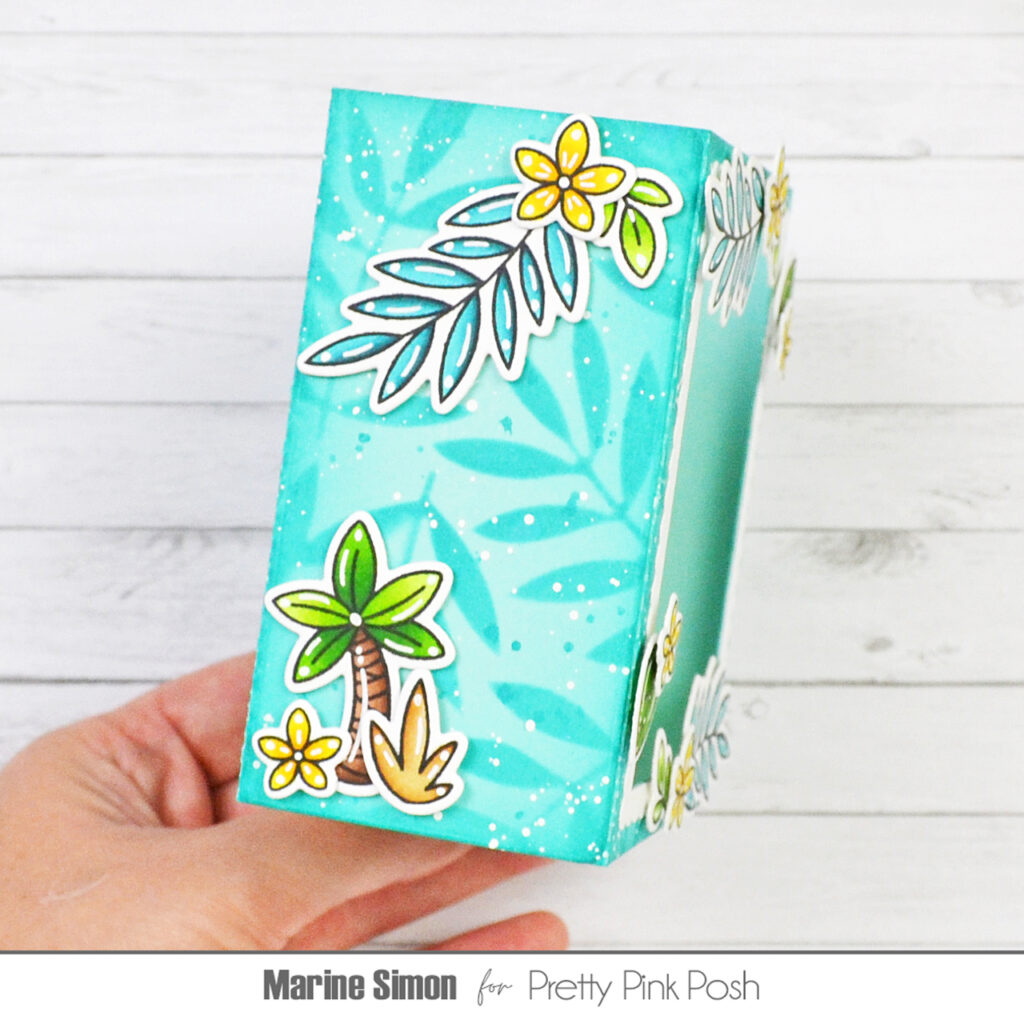
Dinosaur Shadow Box
Hello crafty friends, Marine here, I’m happy to be back on the blog with this super cute Shadow Box showcasing two sweet dinosaurs in their tropical habitat. It was not intended, but as I’m writing this blog post, I’m realising that those dinosaurs remind me of Littlefoot and Cera from The Land Before Time, one of my favorite animated movies from childhood.
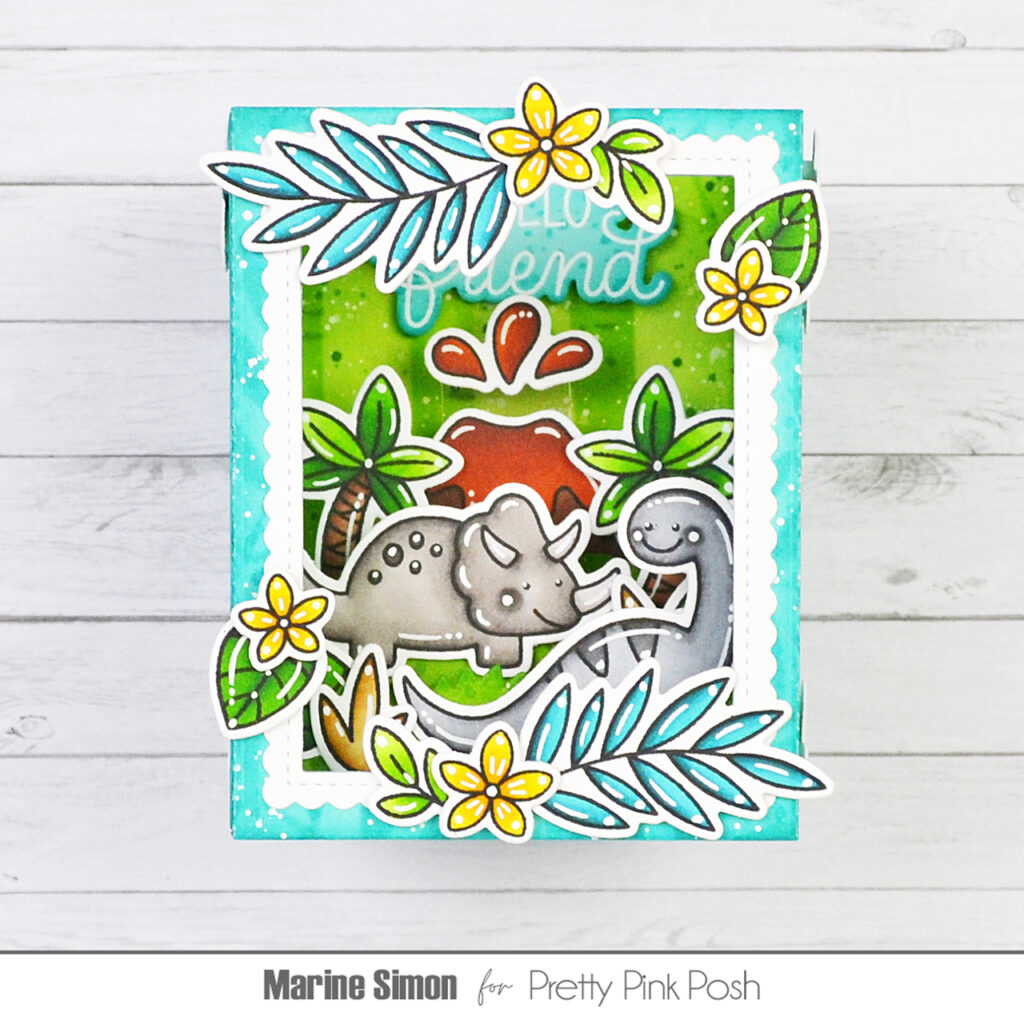
I started off by stamping all the images on 110lb Neenah solar white cardstock using an alcohol marker friendly black ink. I used the matching dies to cut them all, and my Ohuhu markers to color everything. As always, here is a detailed list of the stamps sets I used: • Dinosaur Friends – apatosaurus, palm trees, leaves, grass • Dinosaur Additions – triceratops, volcano • Simple Thanks – large greenery • Jungle Friends – flowers.
Once the coloring was done, I added highlights and details to the images using a white gel pen, attached the lava splatters above the volcano using a small piece of acetate, and then started working on my Shadow Box.
I cut two Shadow Box panels out of aqua cardstock, kept one of them, and used the rectangle die from the set to cut an opening out of my panel. I added a little bit of peacock feathers distress ink to the edges of both panels, and then created a leafy pattern on both of them using one of the Layered Leaves & Flowers stencils along with the same distress ink. I mixed that ink with water, used a slim brush to add splatters to my panels, and then did the same with copic opaque white ink.
For the background, I cut a 4 x 3 inches panel out of Strathmore bristol smooth cardstock, started by covering it with shabby shutters distress ink, and then added a tree pattern using the Layered Birch Trees stencils along with mowed lawn distress ink. I splattered water on my panel and dried it with a paper towel, mixed a bit of rustic wilderness distress ink with water, and added green splatters to my panel using my slim brush, as well as white splatters.
To ground my little scene, I cut three basic insert pieces out of green cardstock using a Shadow Box die. I used the grass border die from that set to turn two of my basic inserts into grass inserts, and the cloud border die to turn the third one into bushes. I added a little bit of rustic wilderness distress to the top of each insert, mixed that same ink with water and added green splatters on each piece, and then white splatters as well.
Before assembling my box, I used the scalloped rectangle die and the rectangle die from the Shadow Box die set to cut a frame out of white cardstock. I assembled my Shadow Box, attached the inserts and the back panel using liquid glue, stuck the white frame using liquid glue again, and then stuck all the images on the inside, outside and sides of the box using 1mm and 2mm foam squares.
I white heat embossed “Hello friend” from Friend Greetings on the same aqua cardstock as the box, cut it with the matching die, added a little bit of peacock feathers distress ink to the edges, as well as matching splatters, and I finally attached my sentiment inside the box, right above the volcano, using 2mm foam squares.
And that’s it! I hope that this Shadow Box has inspired you to create your own little scenes. These are just so fun to put together! Thanks so much for stopping by, and see you next time.
This is a fantastic, adorable card, Marine! Great work!