
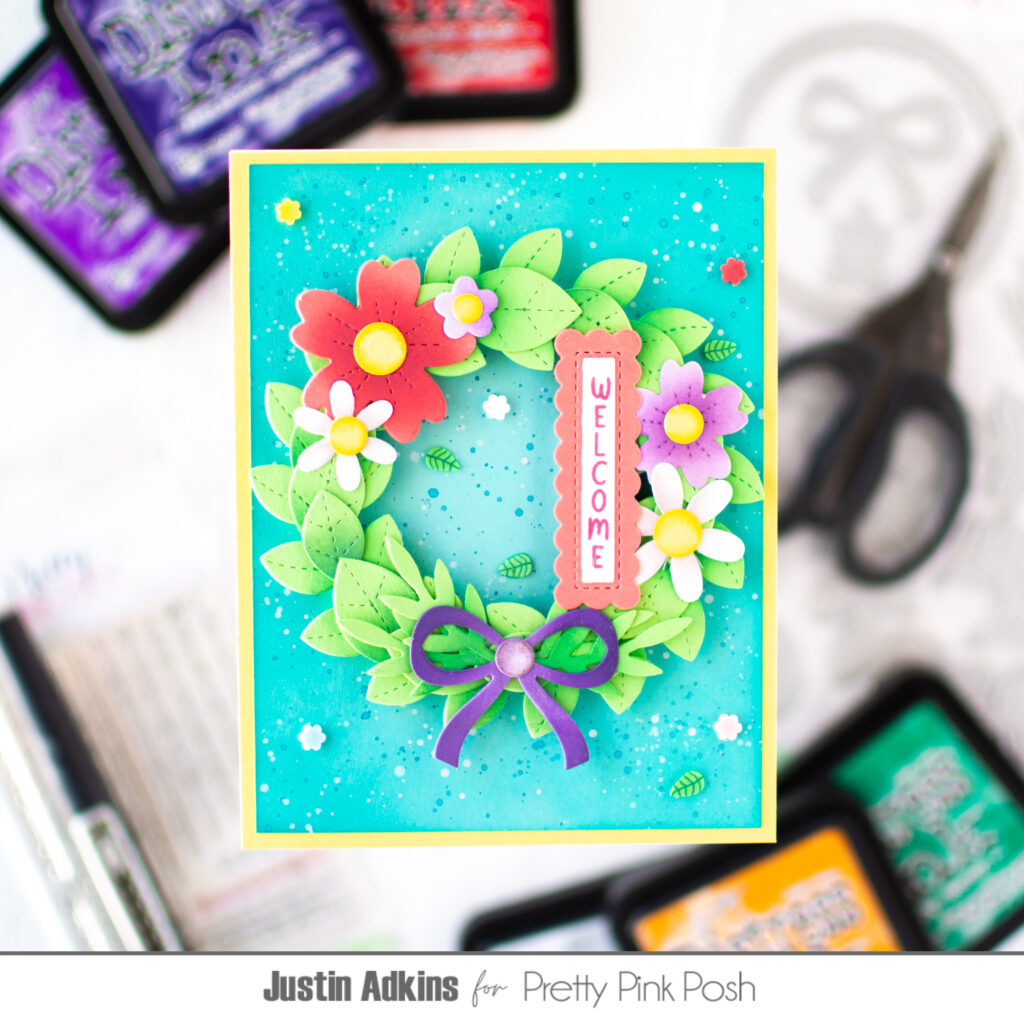
Welcome Spring Wreath
Hello friends! Justin Adkins here, and I am so excited to be guest designing for Pretty Pink Posh for their May Release! This release features Spring-themed items that I feel are slightly delicate by design! For today’s post, I am featuring a project using the new Floral Wreath Builder dies, along with the Upright Greetings: Occasions stamp set.
Floral Wreath Builder Dies
Sentiment Strip Dies
Upright Greetings: Occasions Stamp Set
Enchanted Garden Clay Confetti
When working with wreath-related images and shapes, the first thing my mind goes to is “what sort of design elements for a wreath do I want to see on my own front door”. So, using this mindset, I went ahead and cut different shapes included with the Floral Wreath Builder Dies from colored cardstock. For my sentiment, I wanted to make the sentiment look like it was a vertical sign that was actually part of the wreath itself, so I stamped out the sentiment “welcome” from the Upright Greetings: Occasions stamp set, and then used the Sentiment Strip dies to cut out the sentiment and also frame it with an included scalloped rectangle die from the same set.

I think the design of the Floral Wreath Builder Die is really unique, because it allows you to transform your wreath into different aesthetics based on what you’re going for! I wanted my wreath to have that over-sized bushy and leafy look to it, so I die cut out a handful of the individual leaf dies included in the set, ink blended the bottom edges of the leaves, along with the center circle of the base wreath die, with Lucky Clover Oxide Ink, and layered the individual leaf dies on top of the base die cut! I thought this made the wreath look full! I then took the different floral die cuts, ink blended the edges, and adhered them around the wreath for a simple arrangement! I finished off the wreath element with popping on my “welcome” sentiment sign.
My background was honestly pretty easy to create. I cut down some light aqua cardstock to 4″ x 5.25″, ink blended the edges with Peacock Feathers Distress Oxide Ink, splattered the background for some fun interest, and then adhered it to an A2-size panel of light yellow cardstock to give it a nice frame!
Of course, I finished this card off with some embellishments. I loved using the Enchanted Garden Clay Confetti because it helped play with the colors that existed with the wreath and background already!
Please feel free to follow me on Instagram at @justanotebyjustin and also on YouTube at https://www.youtube.com/@justanotebyjustin
Thank you for stopping by, and happy crafting!
– Justin
Justin, this card is beautiful, and I can see it for so many different occasions. Just change up the colors and sentiment and it could be Birthday, Christmas, Spring, Summer, Fall… so many possibilities. Thank you for sharing.
Such a lovely card 😍