
Easter Wishes Basket
Hello! Christina here to share a sweet Easter shaker card featuring some of the new things from the latest PPP release. This release has the most adorable things that will definitely inspire you to start your springtime crafting ASAP!
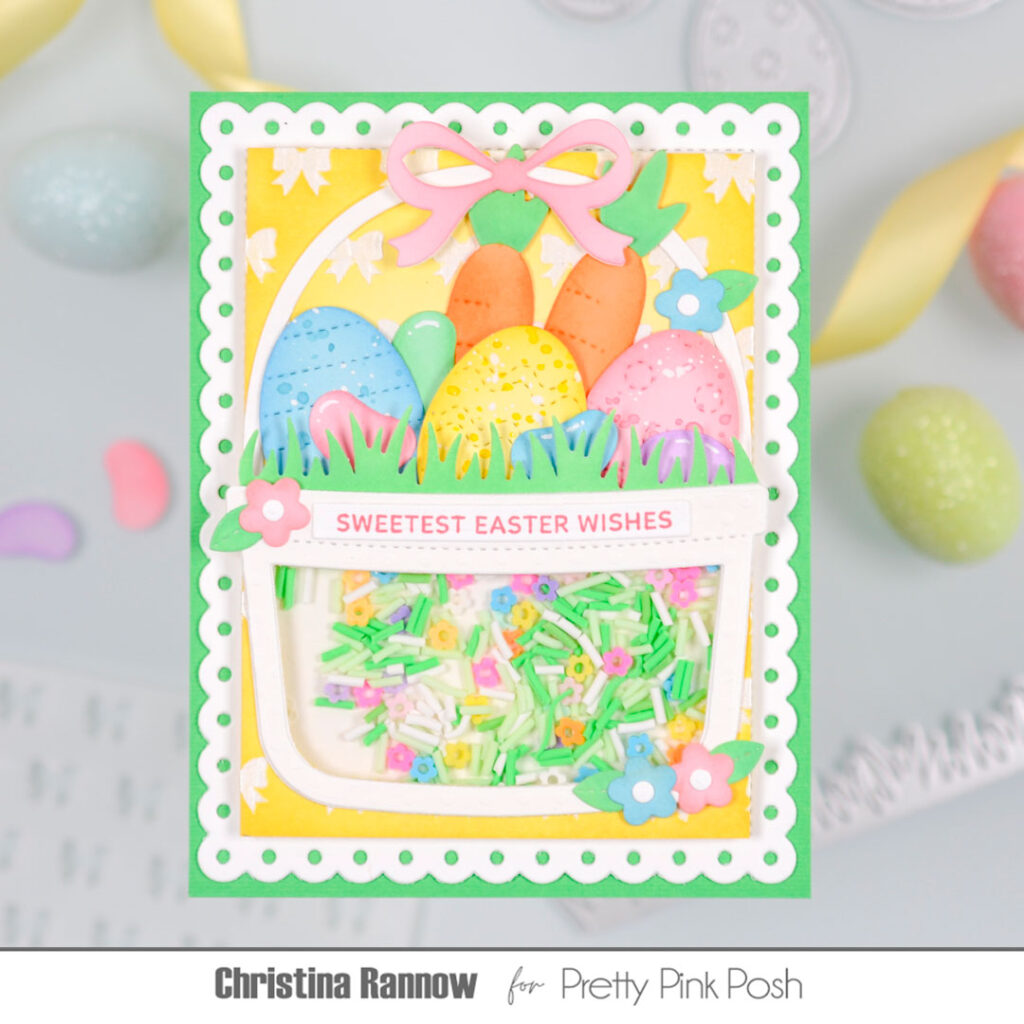
For my project, I used the new Easter Bucket Additions Dies to create an Easter basket filled with springtime goodies, like speckled Easter eggs, cute carrots, and of course, jelly beans!
Follow along as I give you all the details for creating this Easter shaker card, including a supply list.
Candy Bucket Dies – the bucket/basket
Easter Bucket Additions Dies – all the goodies
Easter Holder Addition Dies – small flower
Tiny Bows Stencil
Grass Border Die
Eyelet Rectangle Dies
Spring Flowers Clay Confetti
Sentiment Strips Dies
Sentiment Strips: Easter Stamp Set
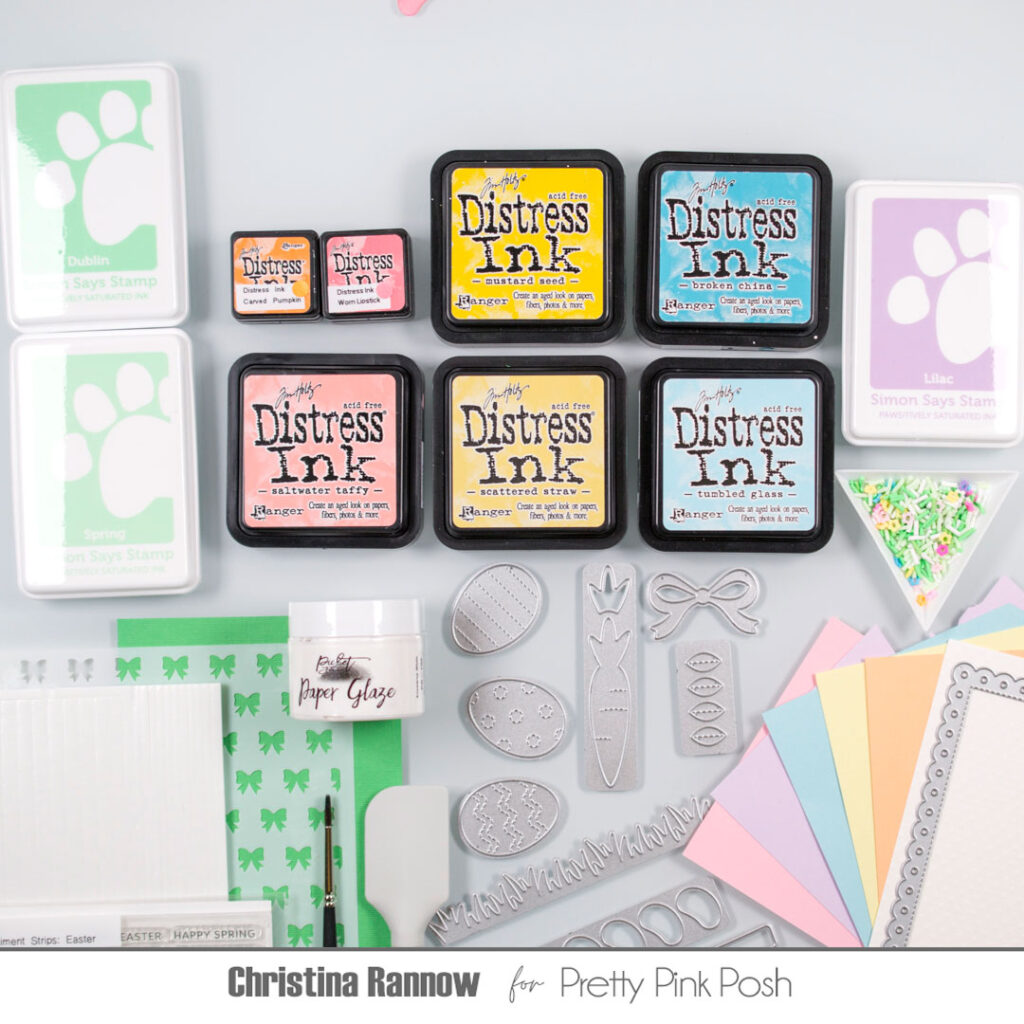
Distress Inks – Saltwater Taffy, Scattered Straw, Tumbled Glass, and Carved Pumpkin to shade colored cardstock for the die cuts and scattered straw for the background panel
Distress Inks – Worn Lipstick, Mustard Seed, and Broken China for adding a speckled detail to eggs
Pawsitively Saturated Inks – I used Spring and Dublin for leaves, grass, and the jelly bean. I used Lilac to shade the jelly bean
Paper Glaze Snowdrop White for stenciling
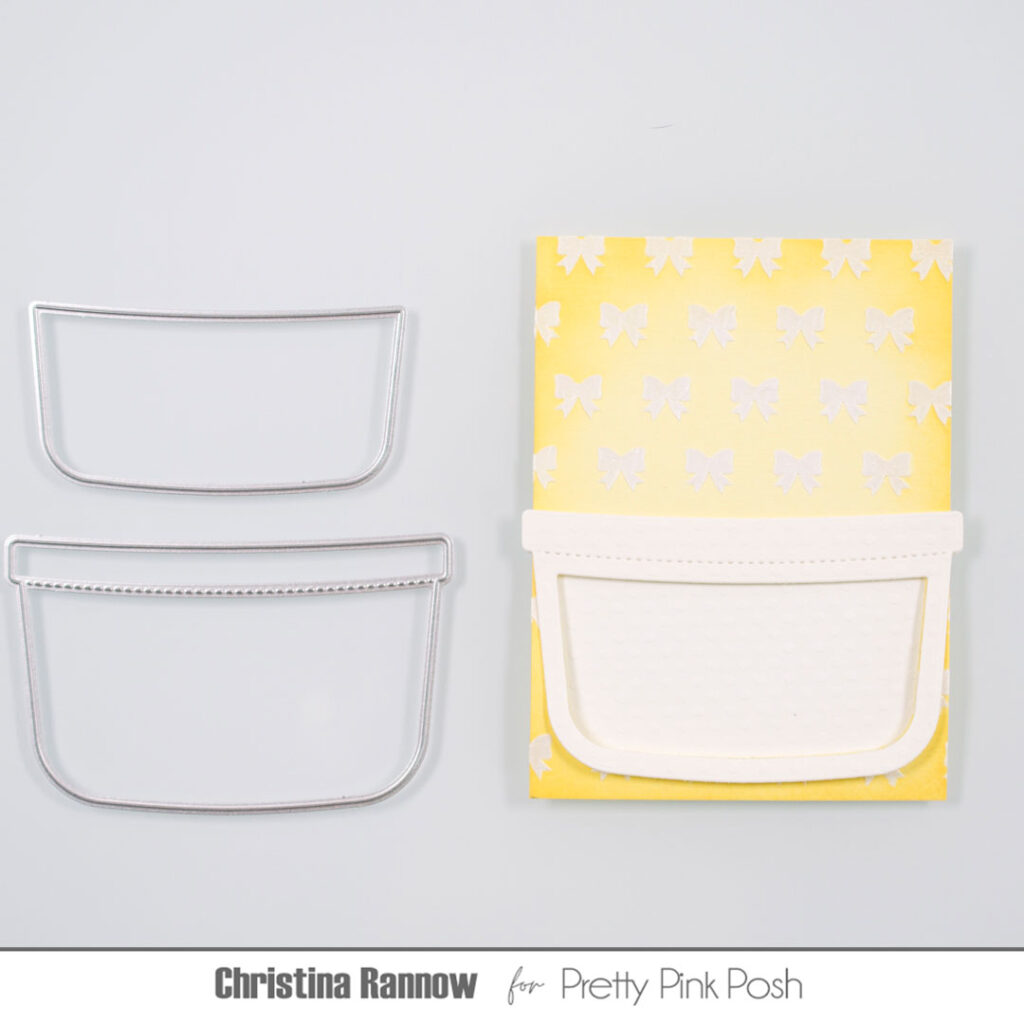
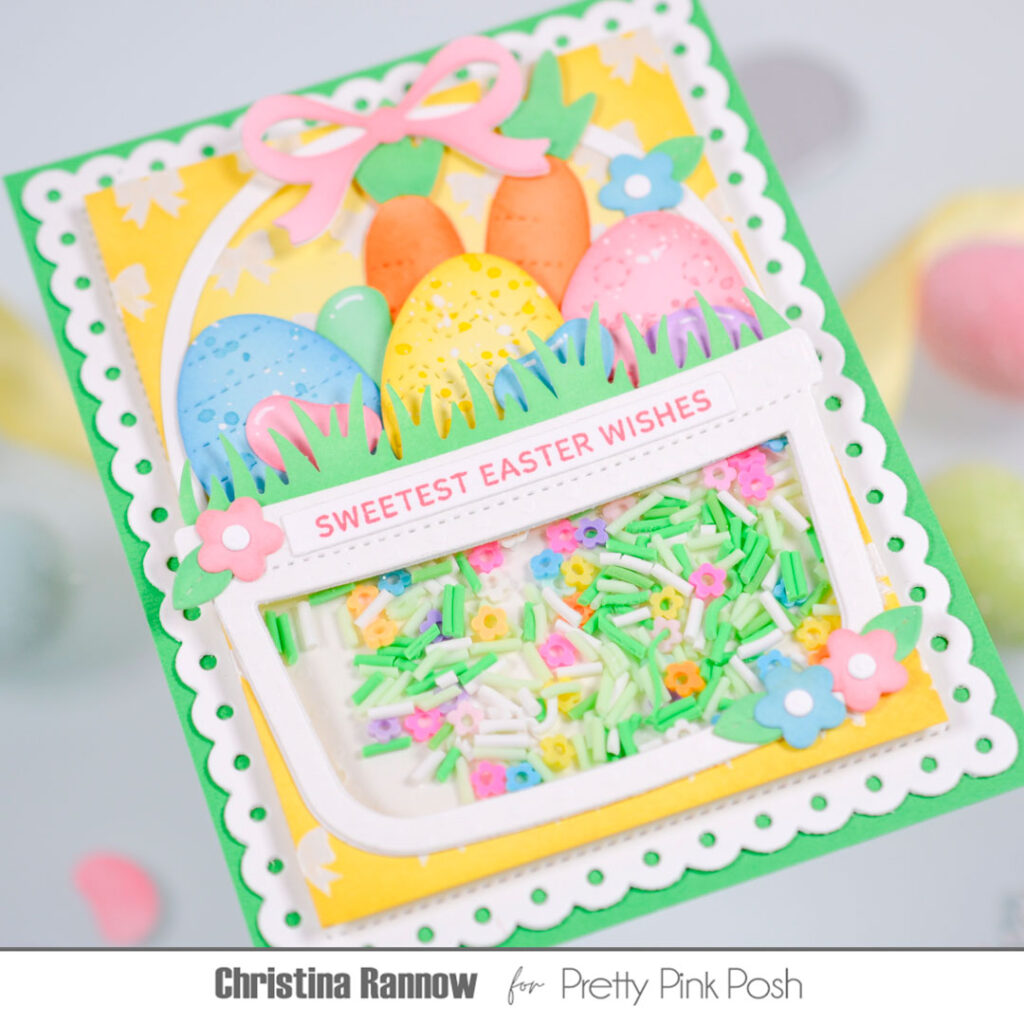
My first step was to create the background panel. I trimmed a piece of pale yellow cardstock to fit inside the stitched detail of the largest Eyelet Rectangle. Then I blended Scattered Straw Distress Ink around the edges, leaving the center the lighter yellow. Next, I stenciled the panel with the Tiny bows using the stencil paste and set it aside to dry.
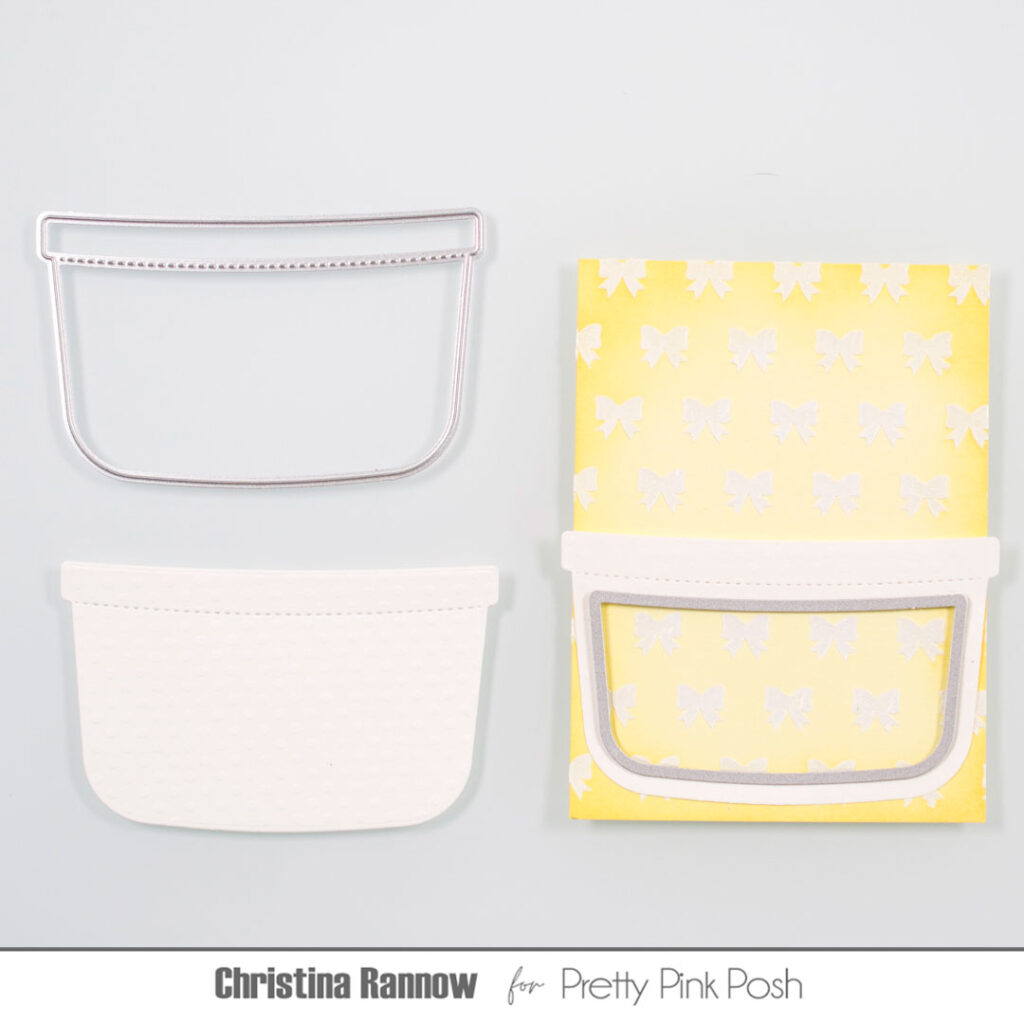
My next step was to create the shaker. I die cut the bucket shaker components from white cardstock with an embossed dot detail and used the frame piece as a template to die cut the shaker window from the background panel. Then I attached a piece of acetate over the opening on the reverse side before attaching foam strips around the window to create the walls of the shaker. Next, I filled the shaker with the confetti and placed the bucket die cut on the foam strips to complete the shaker component. Then I mounted this panel to the Eyelet Rectangle using more foam strips and a little liquid adhesive.
With the shaker complete, I got started on all the fun bucket additions. I die cut most of the elements from colored cardstock and inked the edges for a little dimension. The green die cut elements started with white cardstock before I inked them with two shades of green ink. To give the Easter eggs a decorative detail, I spattered them with coordinating ink colors and thinned white gouache paint.
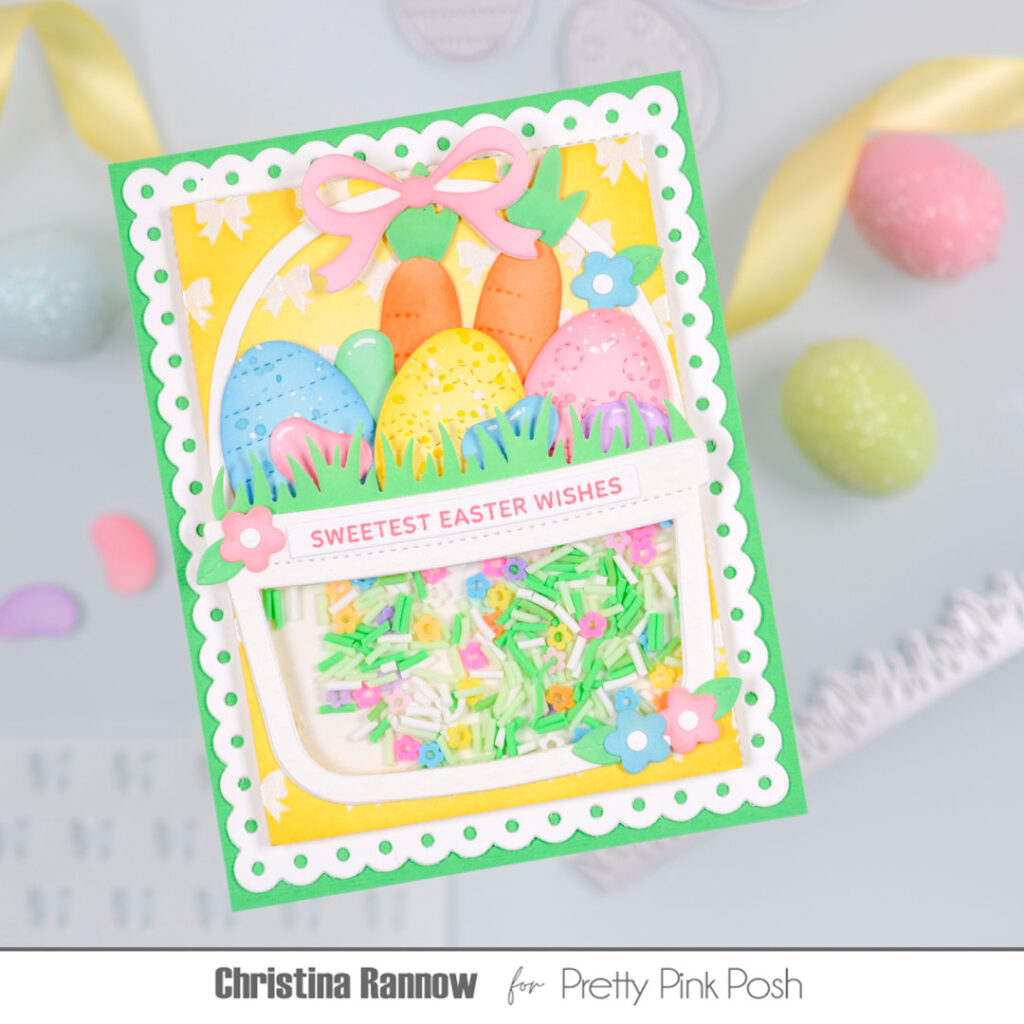
To assemble and finish the card, I mounted the card panel to an A2 spring green cardstock panel before adding the bucket frame and handle to the card front. Then I tucked all the goodies inside the bucket using either liquid adhesive or thin foam squares. The final details were to add a sweet bow, a few small flowers, and a stamped and die cut sentiment right across the center of the Easter bucket.
And that completes this sweet Easter shaker card showcasing the new Easter Bucket Additions! Thanks so much for reading, and see you again soon!
This is so super-pretty! TFS