
Spring Theme Week: Day 1
**All items in the Spring section are 15% off during theme week**
Hello crafty friends, Marine here with you today, thanks so much for stopping by! I’m thrilled to be back with this super bright and fun only die-cut card featuring a lovely peacock perched on a branch. As a huge fan of mixing and matching items from my stash, this is what I did on this card, and you will find a detailed list of the supplies I used down below.

I started off by creating a bright rainbow leafy background to set my tropical scene on a 5,5 x 4,25 inches Strathmore bristol smooth panel using distress oxide inks. From top to bottom, I applied kitsch flamingo, dried marigold, squeezed lemonade, twisted citron and salvaged patina. This gave me a nice pastel rainbow base, and then I added leaves using one of the Layered Leaves & Flowers stencils along with darker oxide inks. From top to bottom, I applied picked raspberry, carved pumpkin, mustard seed, mowed lawn and peacock feathers. I mixed each of these darker inks with water to make splatters on the background using a small brush, and then did the same with black soot oxide ink and copic opaque white ink to bring more contrast and interest to my panel.
Next I die cut all the bits and pieces from colored cardstock using multiple dies from different sets: • Big Easter Cupcake for the peacock’s body, wings, cheeks, sign • Easter Mug Additions for the feathers, eyes, feet, beak • Party Hats for the peacock’s comb • Spring Mug Additions for the butterflies, leaves, flowers • Nature Essentials for the branches
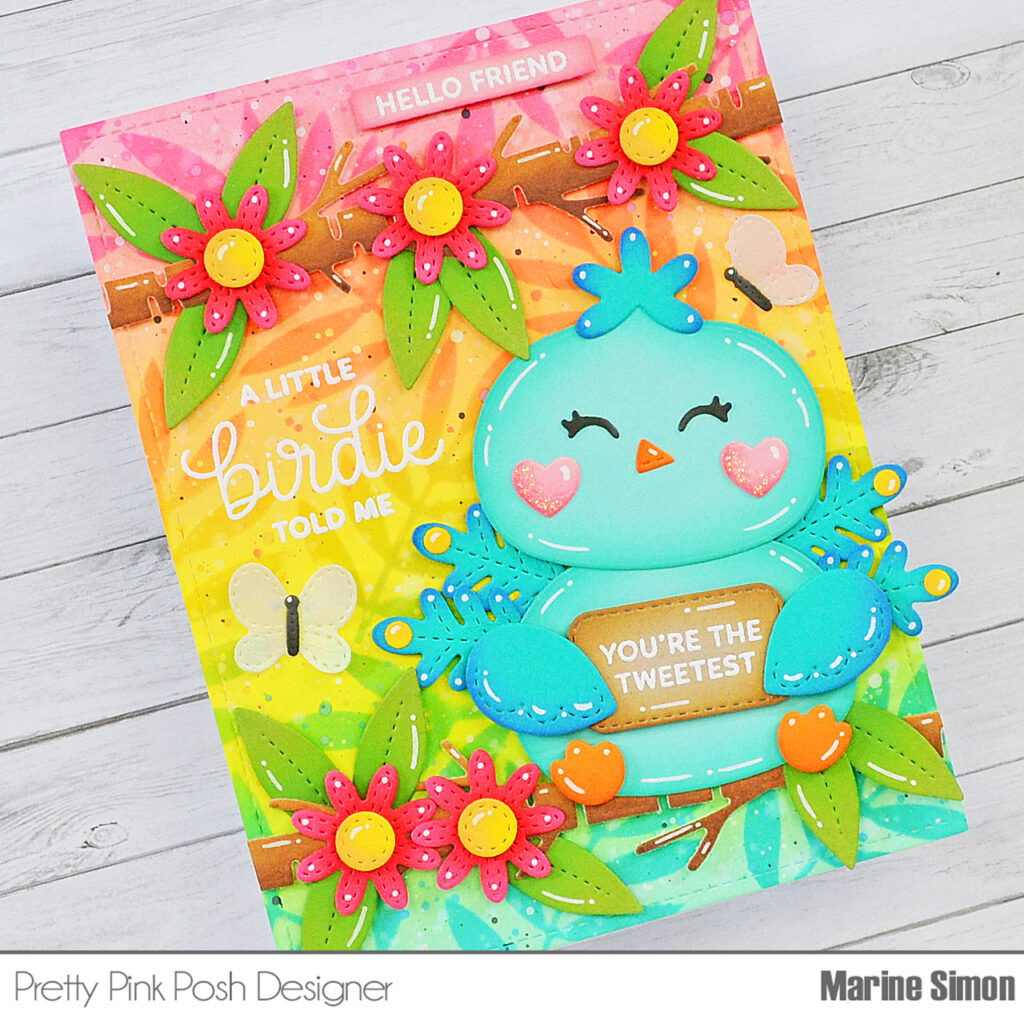
I added more depth to each die-cut piece using matching oxide inks, and attached everything on my panel using 1mm and 2mm foam squares, as well as liquid glue, leaving enough space on the left and at the top for two of my greetings.
Speaking of which, next I worked on my three white heat embossed greetings. I embossed “Hello friend” from Mouse Friends on light pink cardstock, trimmed it into a slim banner using a Sentiment Strips die, and attached it at the top of my panel using 1mm foam squares. Next I embossed “A little birdie told me” from A Little Birdie on the left hand side of my panel, and finally embossed “You’re the tweetest” from the same set on the sign that I attached between the peacock’s wings using 1mm foam squares again.
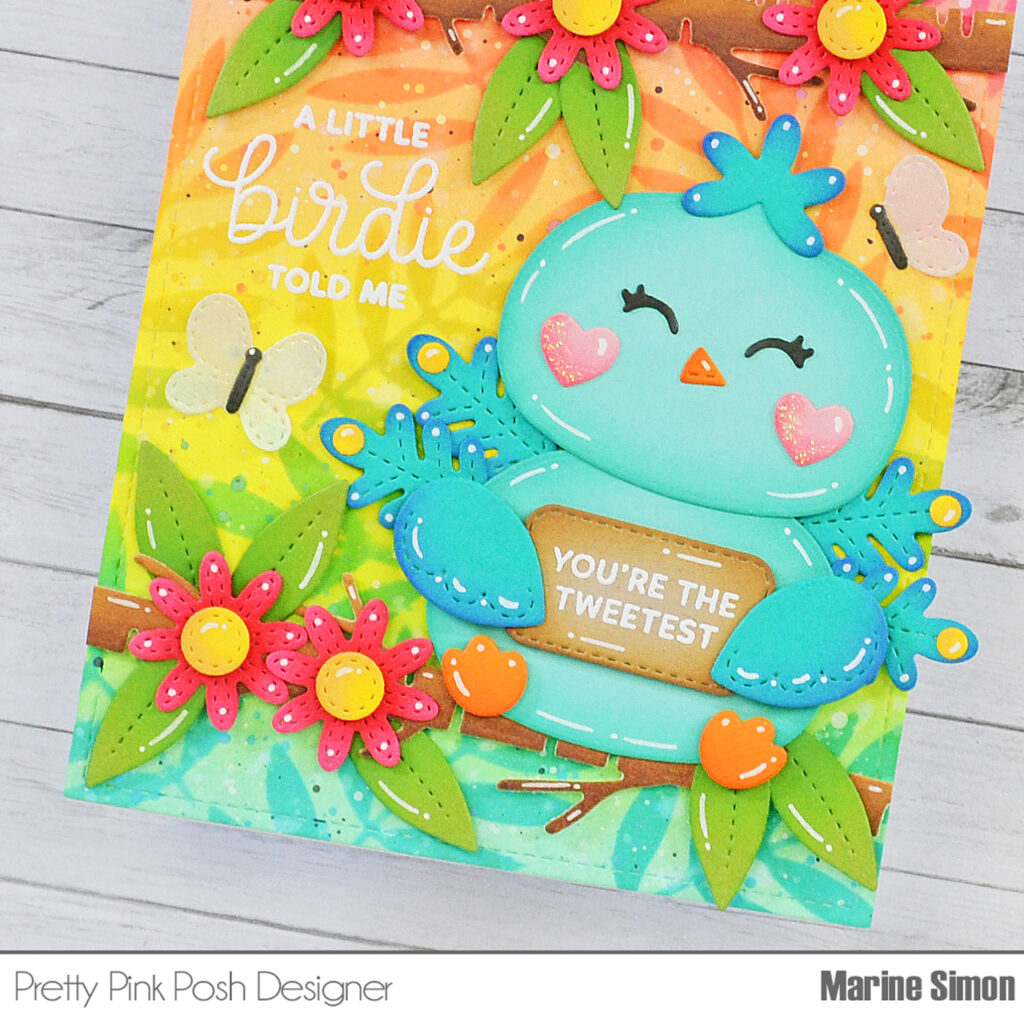
As always I finished my card by adding highlights and details to my card using a white gel pen, and that’s it! I hope that my card has inspired you to look at your supplies differently, and to think outside the box. This peacock could definitely turn into a chubby seagull at summertime, or even a crow during the fall season. So many possibilities here, it just depends on the colors you use.
Thanks again for stopping by, and see you next time.
Such a fun card 🤩 spring crafting is the best with all the florals 😍
Love the color combinations you used! This peacock is adorable!