
Somebunny Loves You
Welcome Pretty pink Posh friends… Annette Allen here with you today with this Spring filled guest design post. I am so excited to have this opportunity to share with you today.
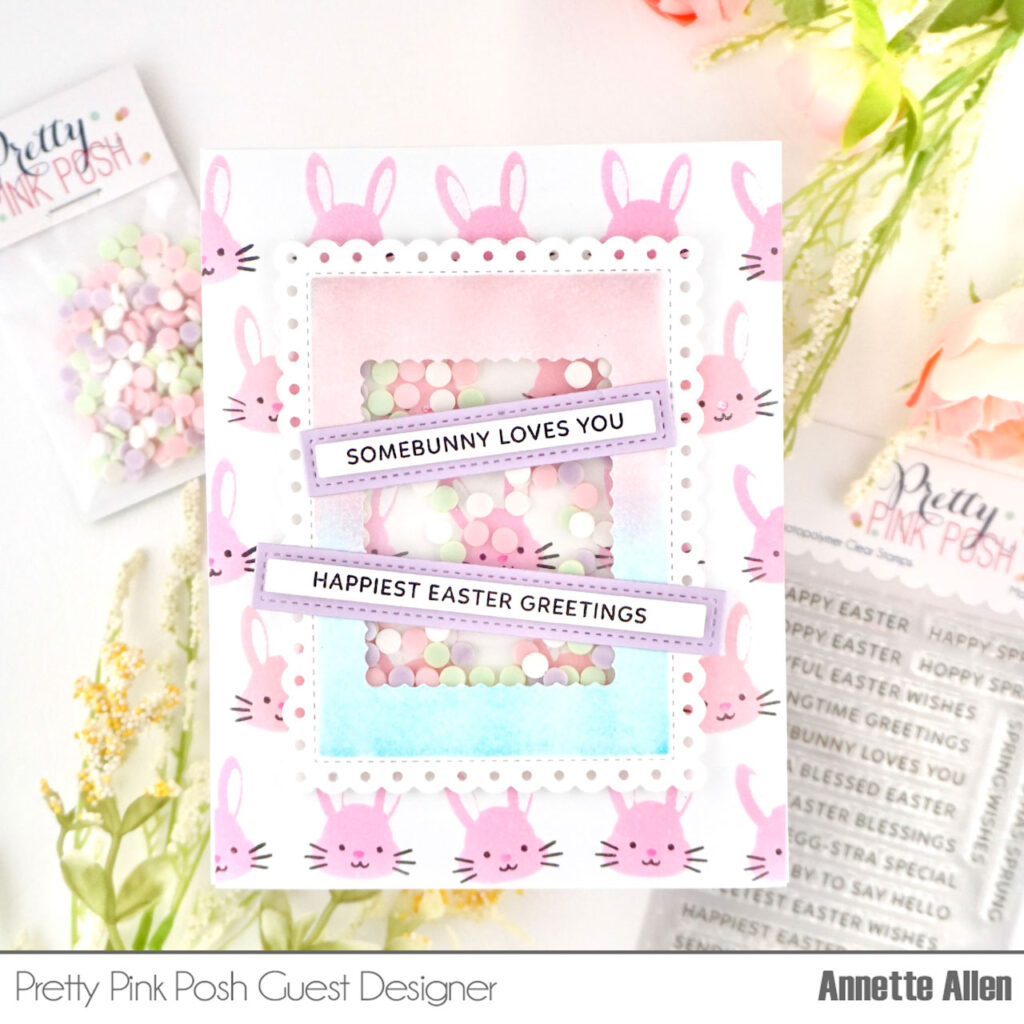
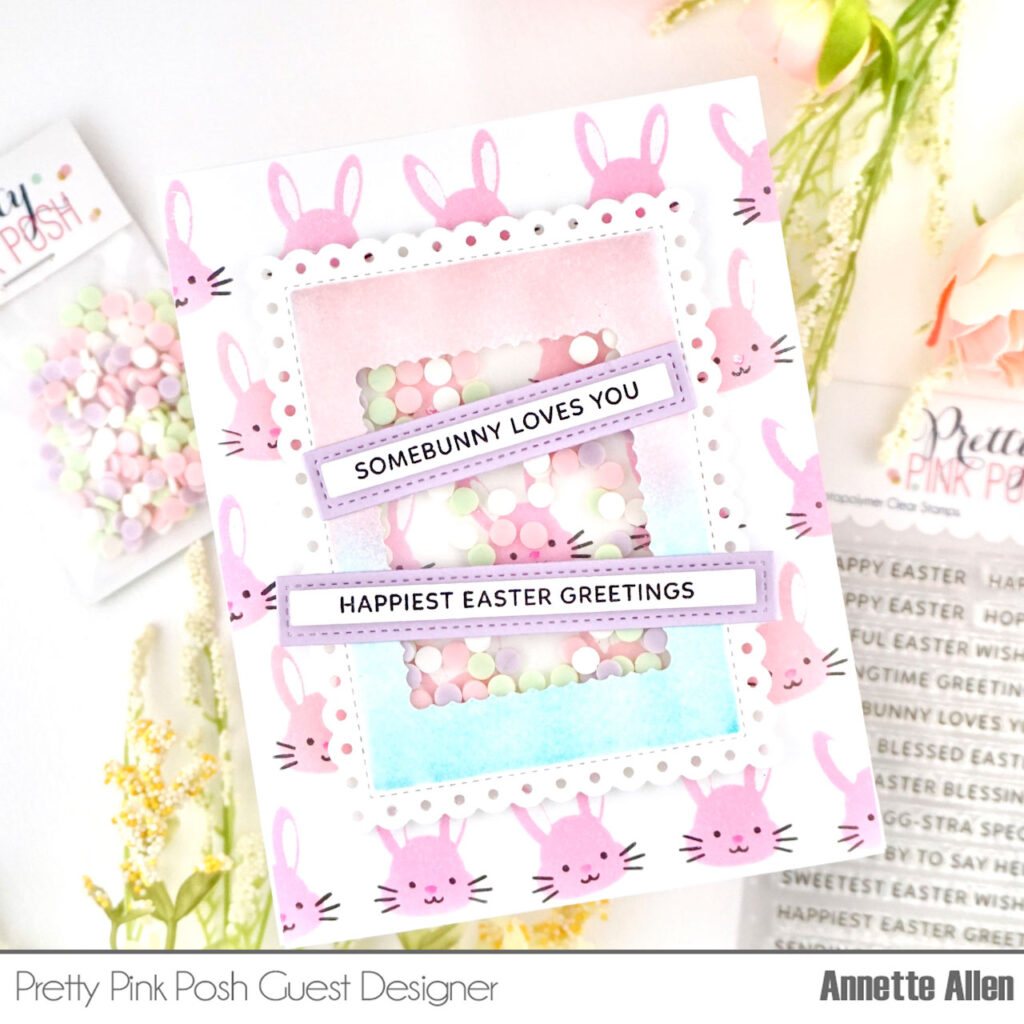
Create card on white cardstock A2 size.
Cut a panel on white cardstock A2 size and stencil these cute new Layered Bunny Faces using pink ink on the first (A) stencil, Black ink on the second (B) stencil and for the third (C) stencil we are going to use embossing ink only on the ears and for the nose a darker pink. Remove the stencil and add some white embossing powder to the ears and heat emboss to activate it.
Adhere your panel to your card base using liquid glue.
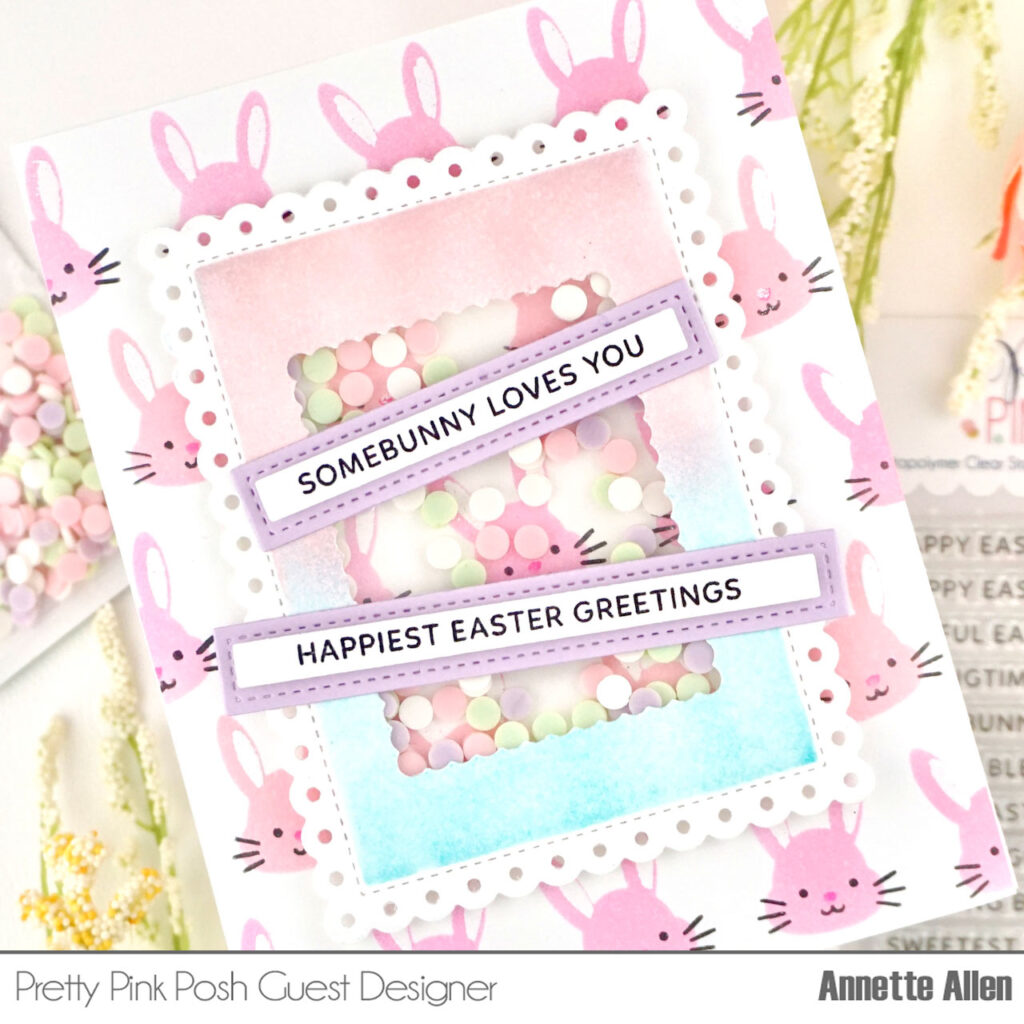
Die cut the second largest Eyelet Rectangles die on white cardstock. Leave your die in place and ink blend some pink and teal onto your panel. The die will act as a mask, as you can see in the photo the outer edge is still white.
Now die cut the third largest Eyelet Rectangle in the center of your large Eyelet Rectangle we just die cut. This will create a window. Cut a piece of acetate that will cover your open space of your rectangle and adhere it to the back using tear tape.
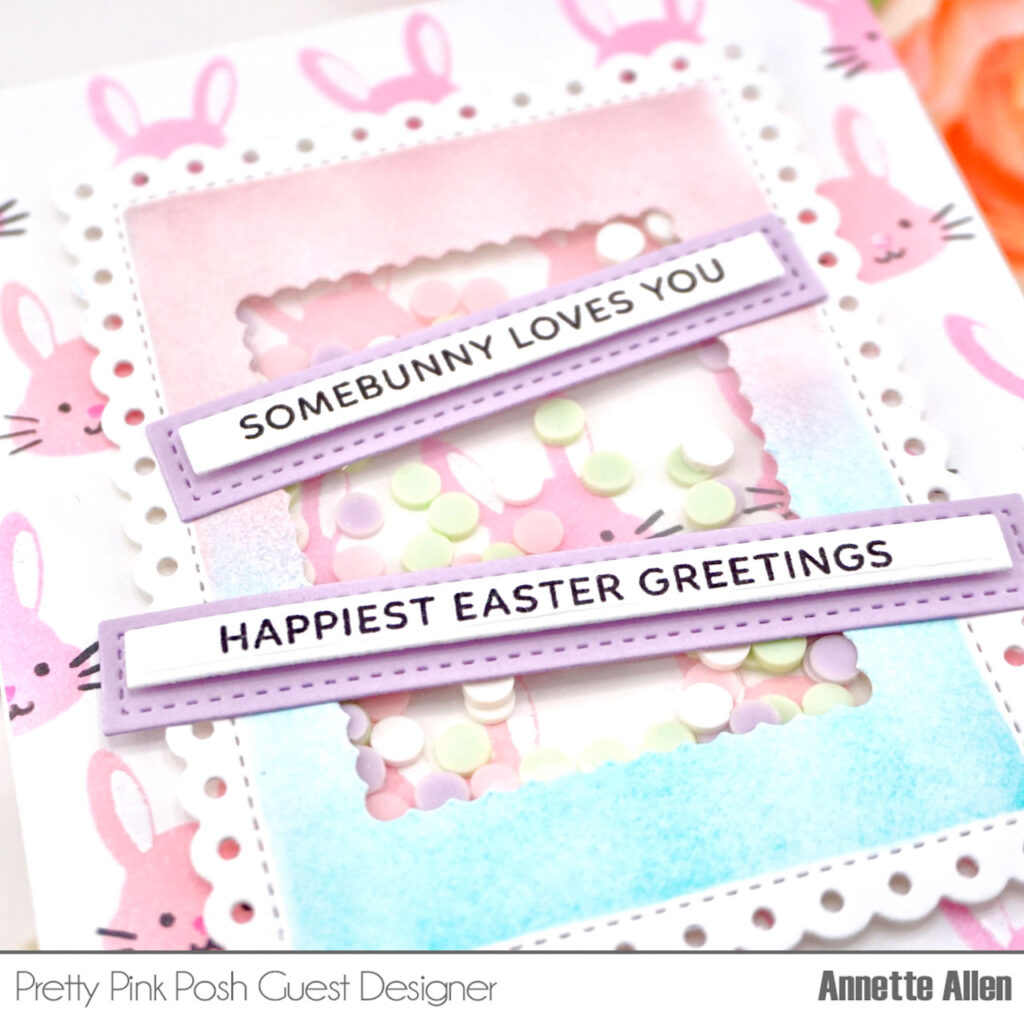
Now add some foam tape to the back of your rectangle. When covering the back make sure to leave no gaps around the center rectangle. We don’t want those fun shaker bits to escape. Add some of those fun new Cotton Candy Mix to the center of your shaker. Make sure all the Cotton Candy is sitting flat.
Peel the protectant layer of your foam tape and this is where it gets a little tricky. You can either create another small panel with the Layered Bunny Faces stencil to add to the back to close up your shaker or flip your card onto the back of the shaker, just make sure you do it straight.
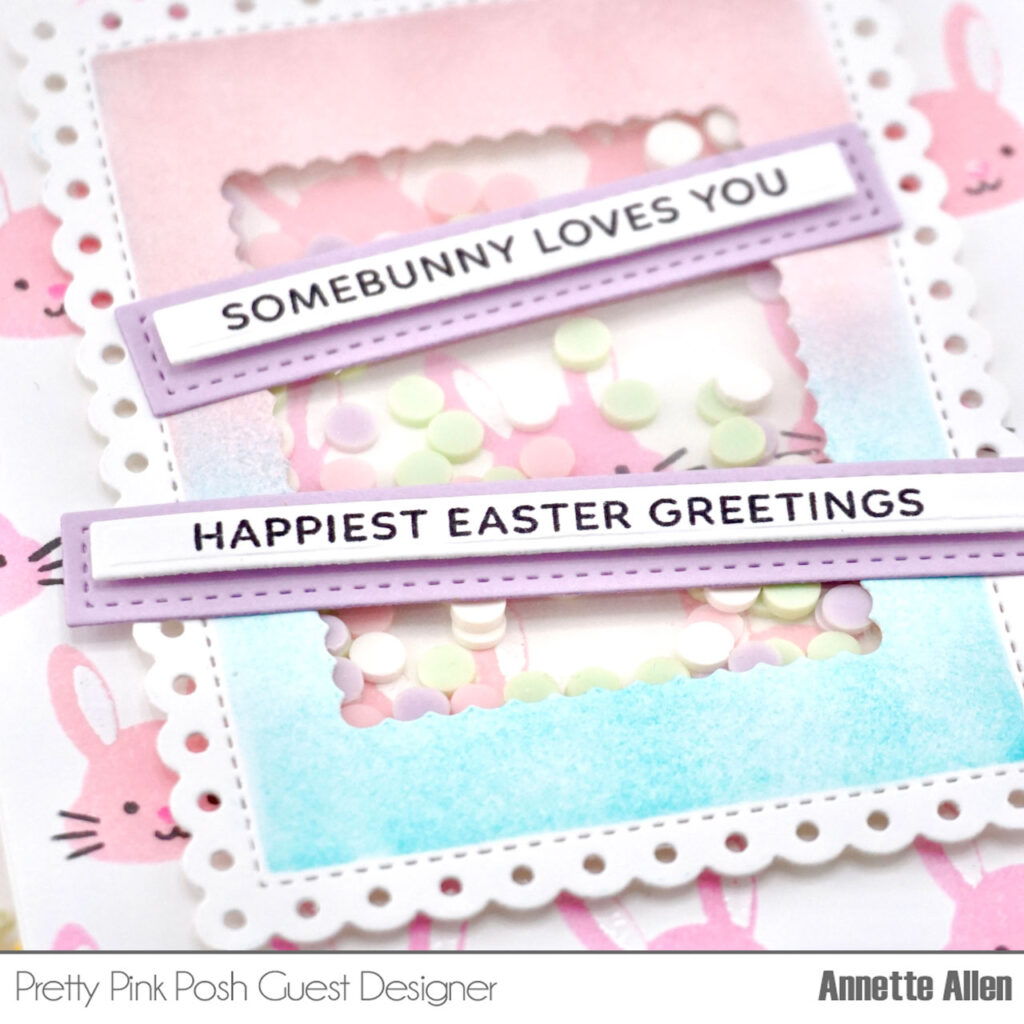
Stamp out both of your sentiments from the new Sentiment Strips Easter stamp set on white cardstock using black ink.
Die cut the sentiments using the Sentiment Strips. Pick the proper size for your sentiment. Die cut the coordinating decorative Sentiment Strips on light purple cardstock and adhere them to the back of each of the sentiments using foam tape. Adhere your sentiments to your card using tear tape.
I hope you enjoyed this fun shaker card fill of cute bunnies and lots of shaker goodness.
Thank you for letting me share with you all today.
This card is Adorable!! That bunny background is too cute. I love the blue and purple you added in to the card.
Fabulous card!! Love the design, the colors, etc. That eyelet frame is a rock star that I need to add to my stash.
Lori S in PA
Thank you so much for the fun guest design spot.
Love all the layers on the cards 😍