Month: January 2023

| |

Day 1: Blog Hop- January Release Now Available

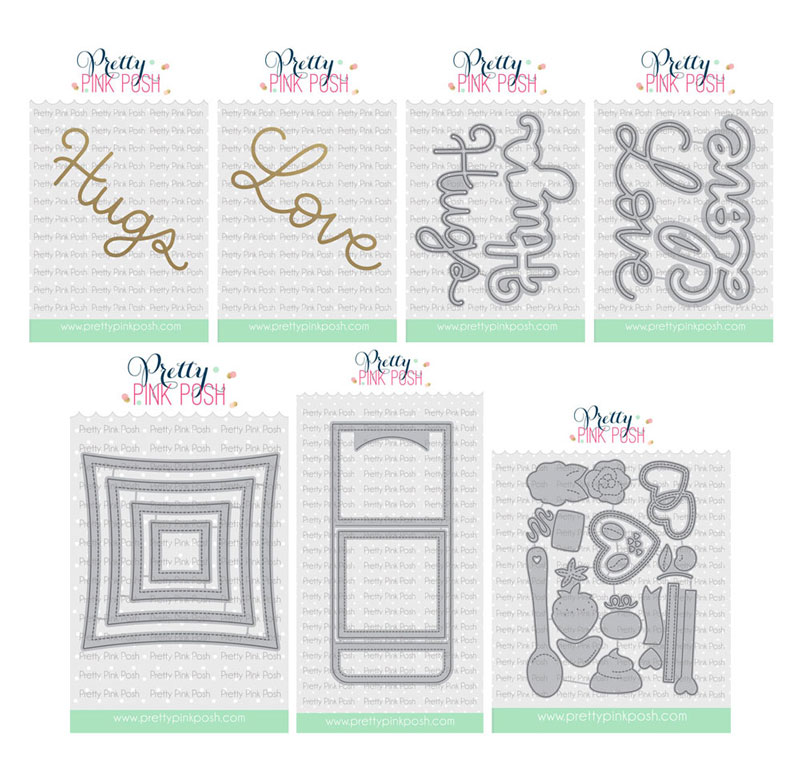
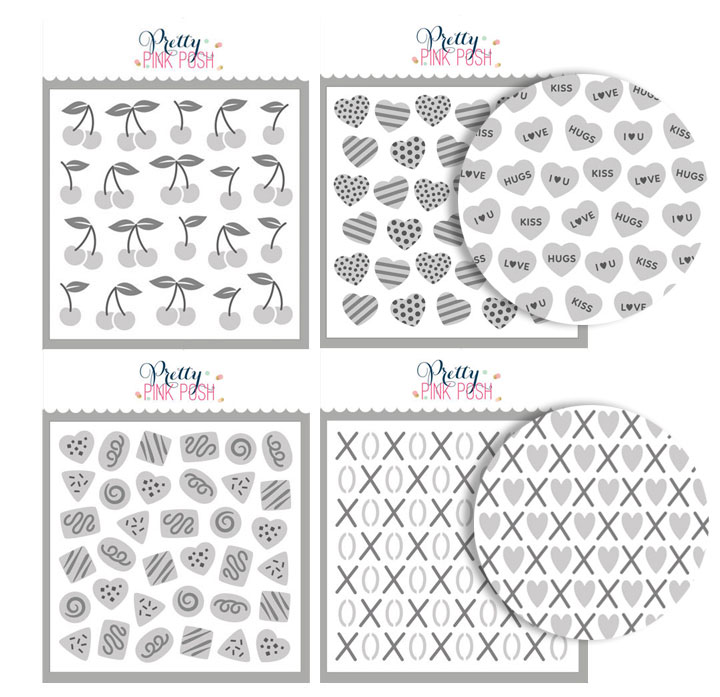
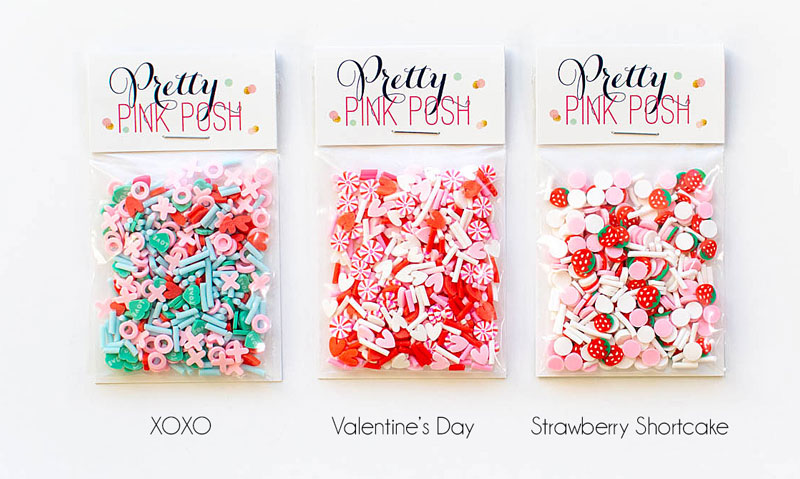
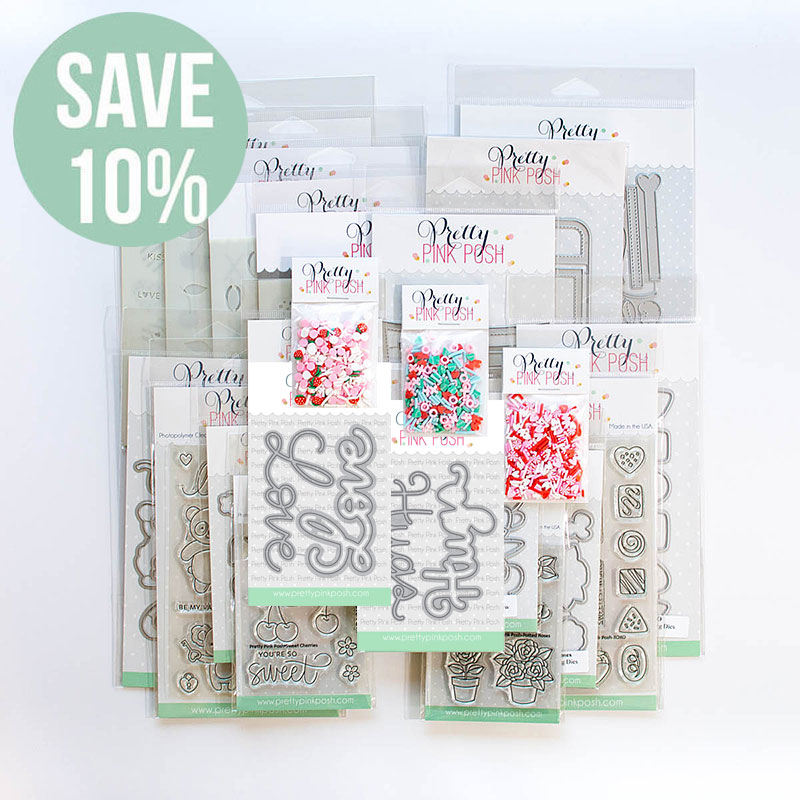
The January 2023 Release is now available in the Pretty Pink Posh Shop and select retailers that carry our products. If you missed our post yesterday, we revealed all of the products in picture form, but if you would like to see them in a video, Mindy has that for you today!

Watch the video above  I  Watch the video in HD on YouTube

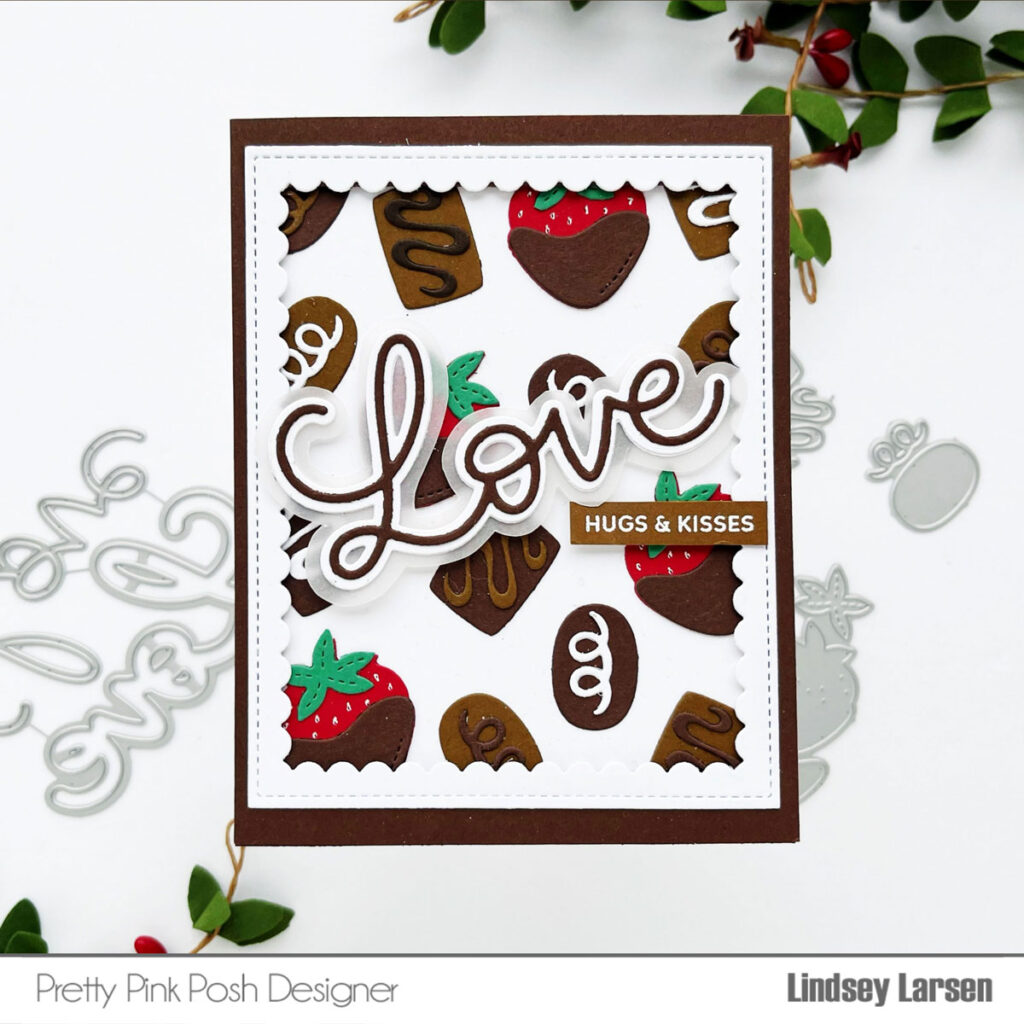
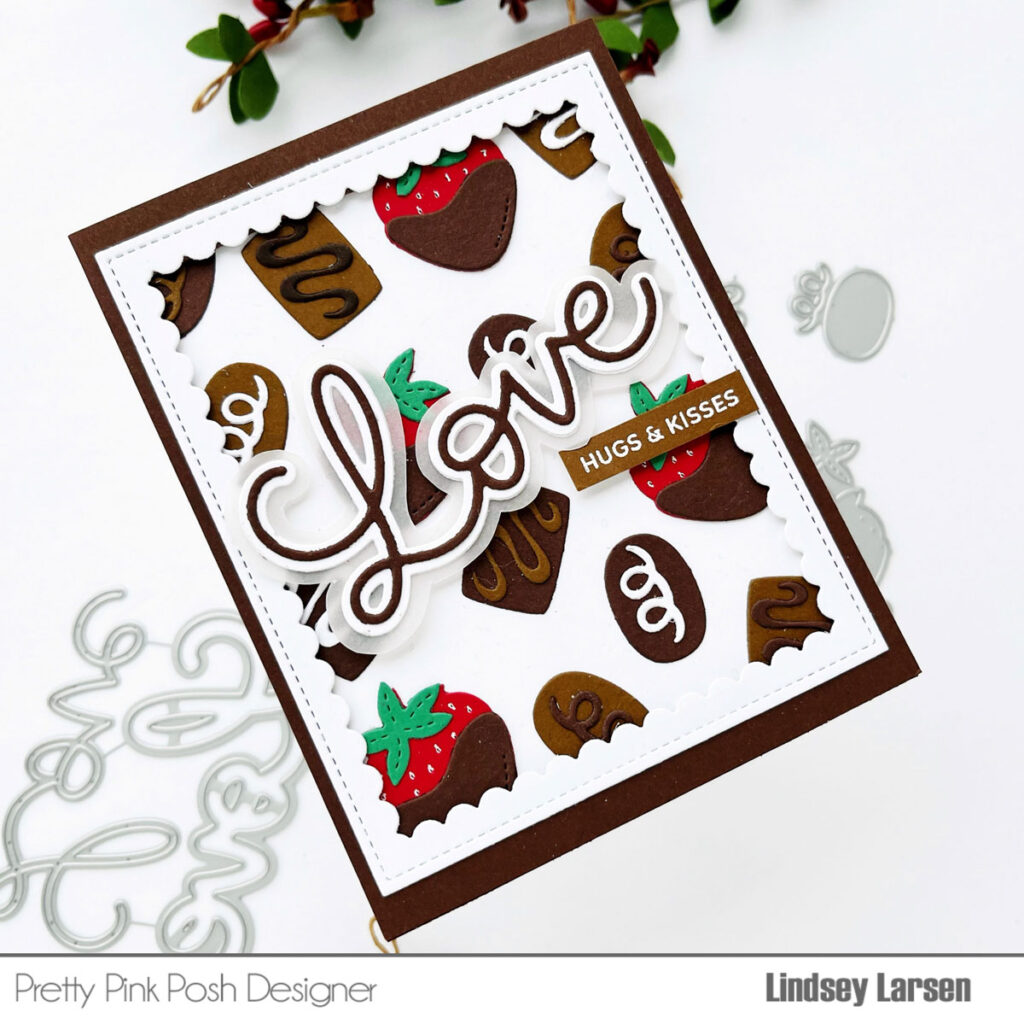
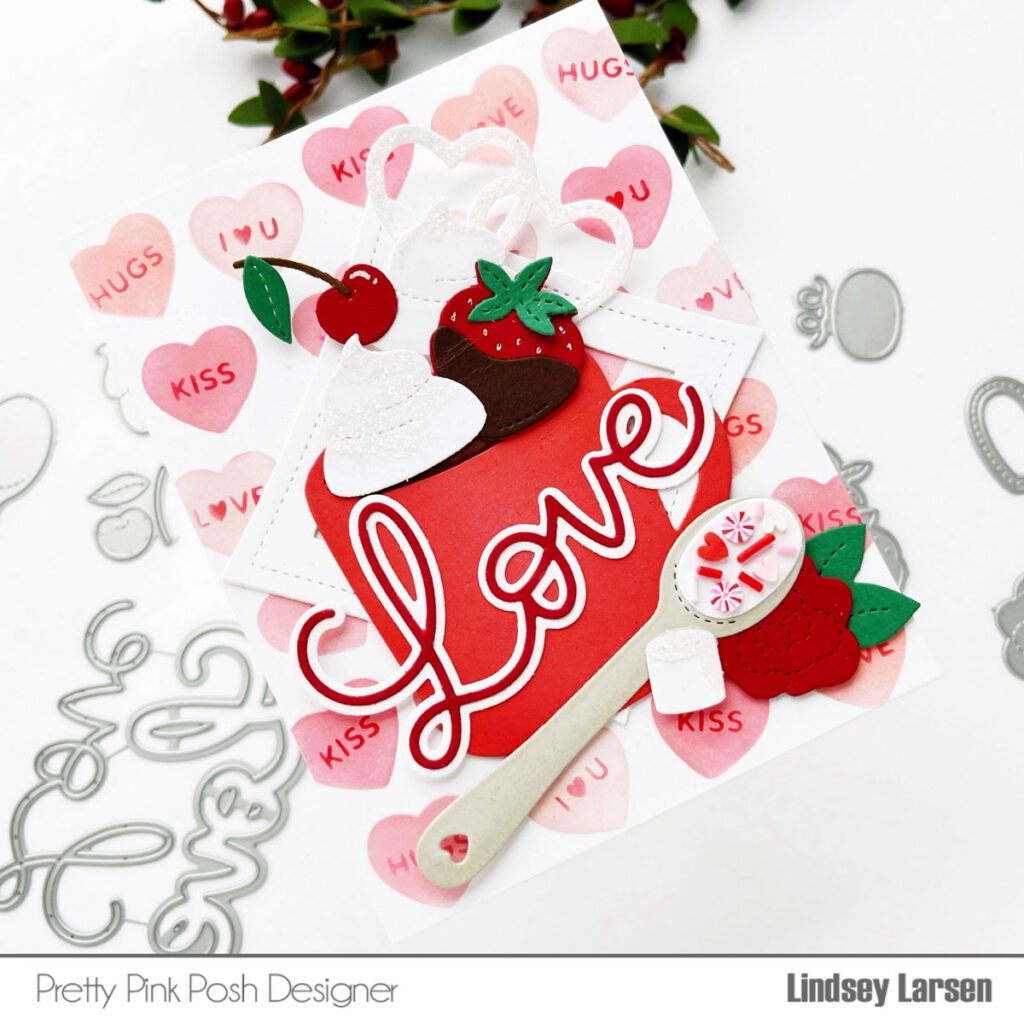
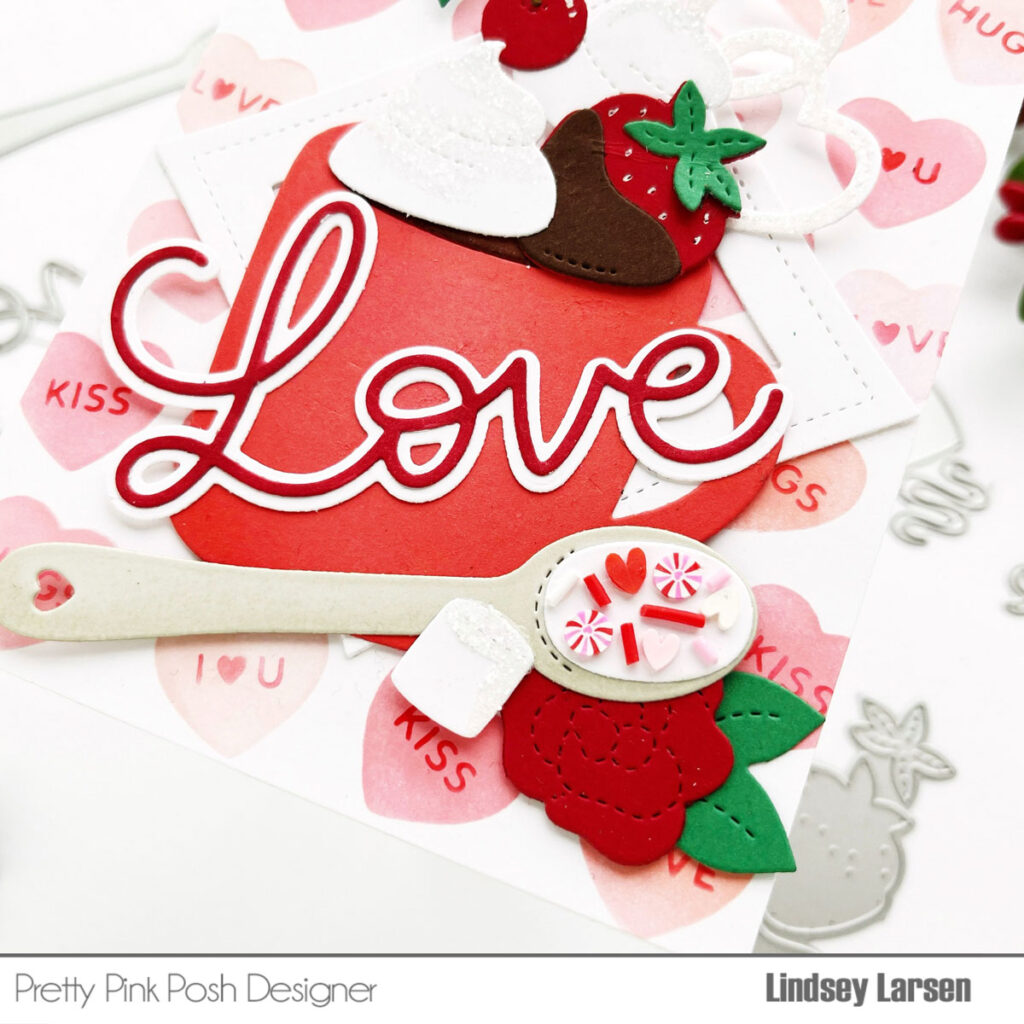
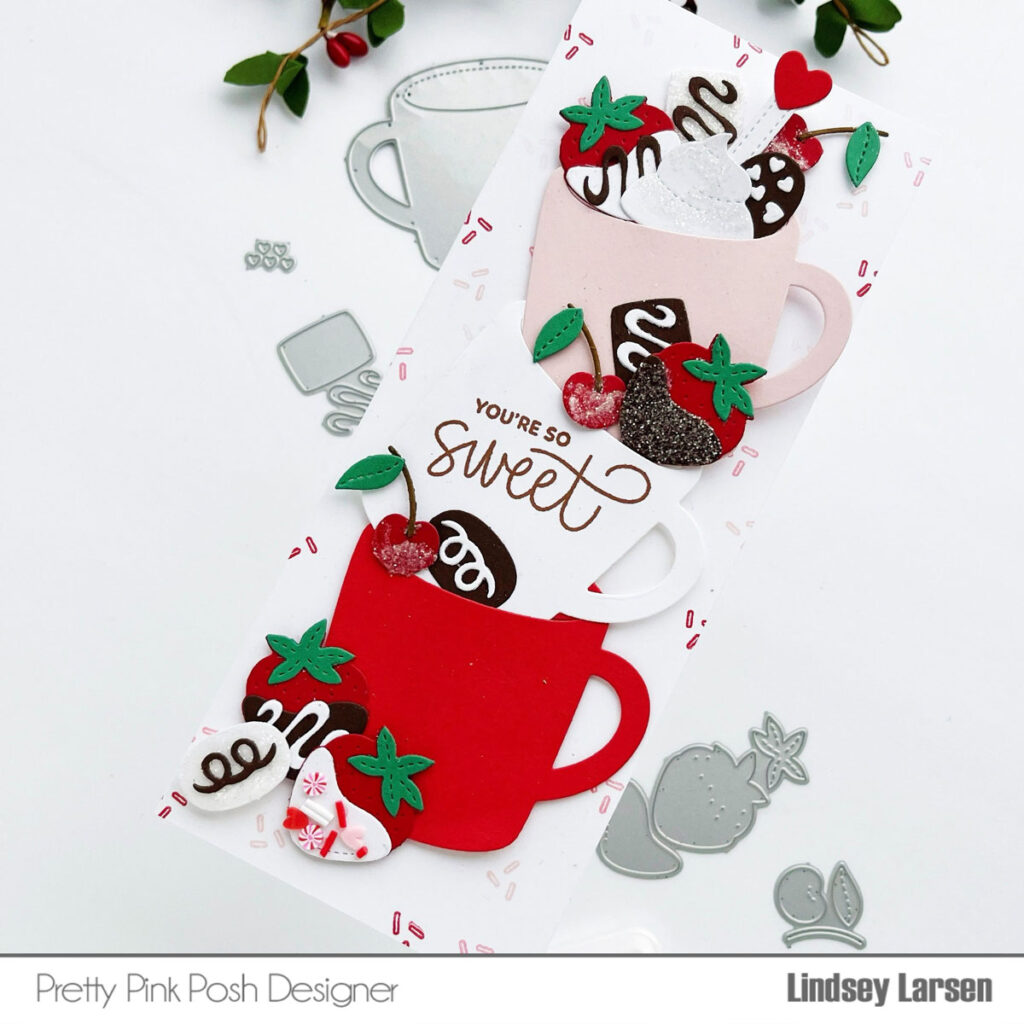
Good morning!  It’s Lindsey here and welcome to day 1 of the blog hop! Today I’m sharing a fun spin off of a previous card I created using the Winter Mug Dies. It was one of my favorite Christmas cards last year, and I couldn’t wait to give it another go with a Valentine’s Day edition!

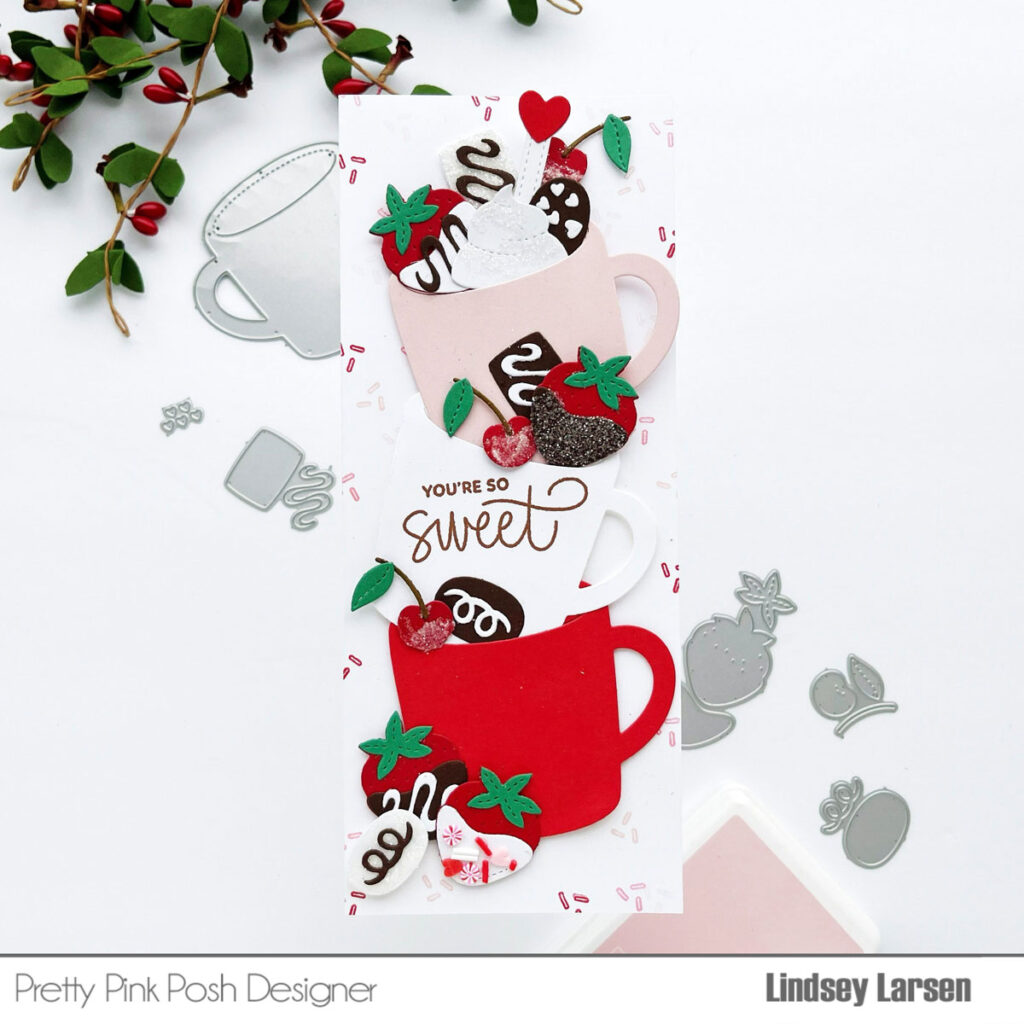
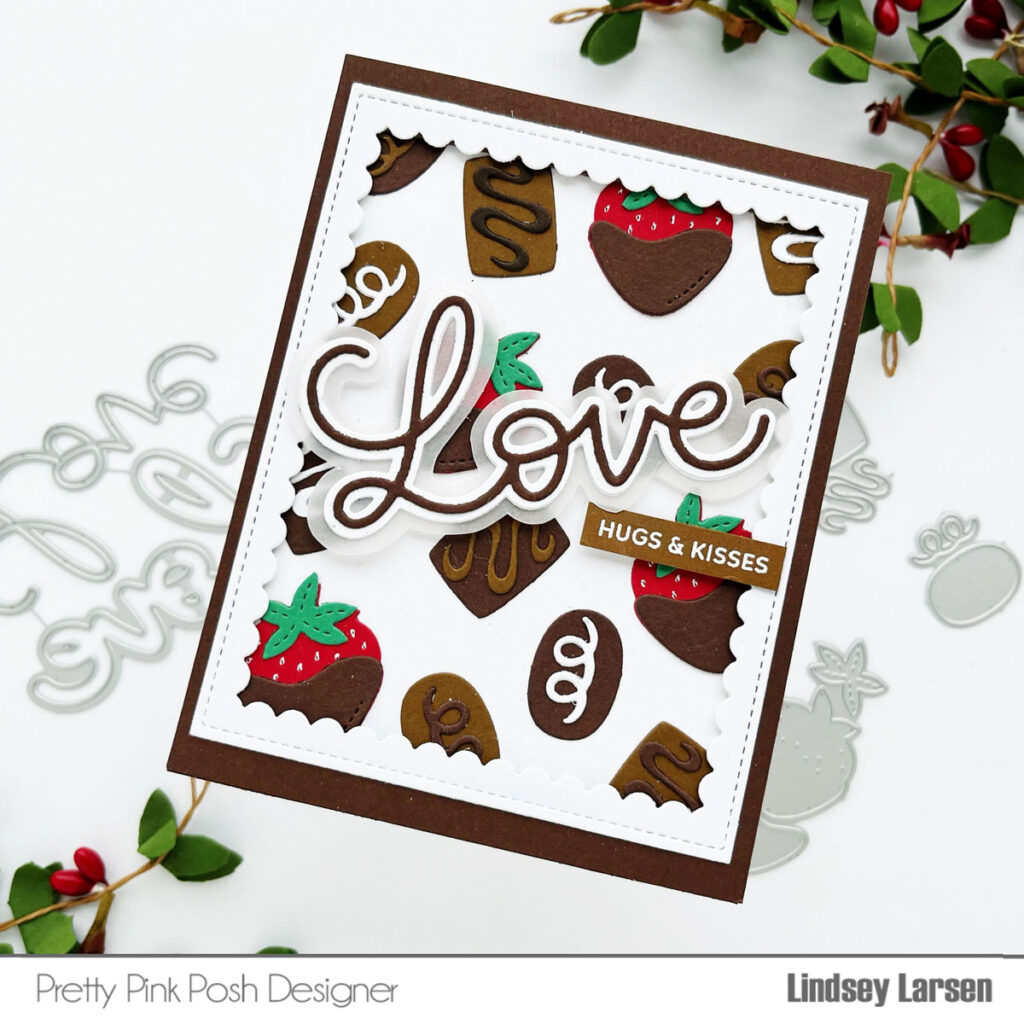
I started by cutting three Winter Mugs and stacking them together.  The pre-cut slits on the mugs make this quick and easy. Next I die cut piles of strawberries, cherries, and candies from the Valentine Mug Additions and pieced them together. 

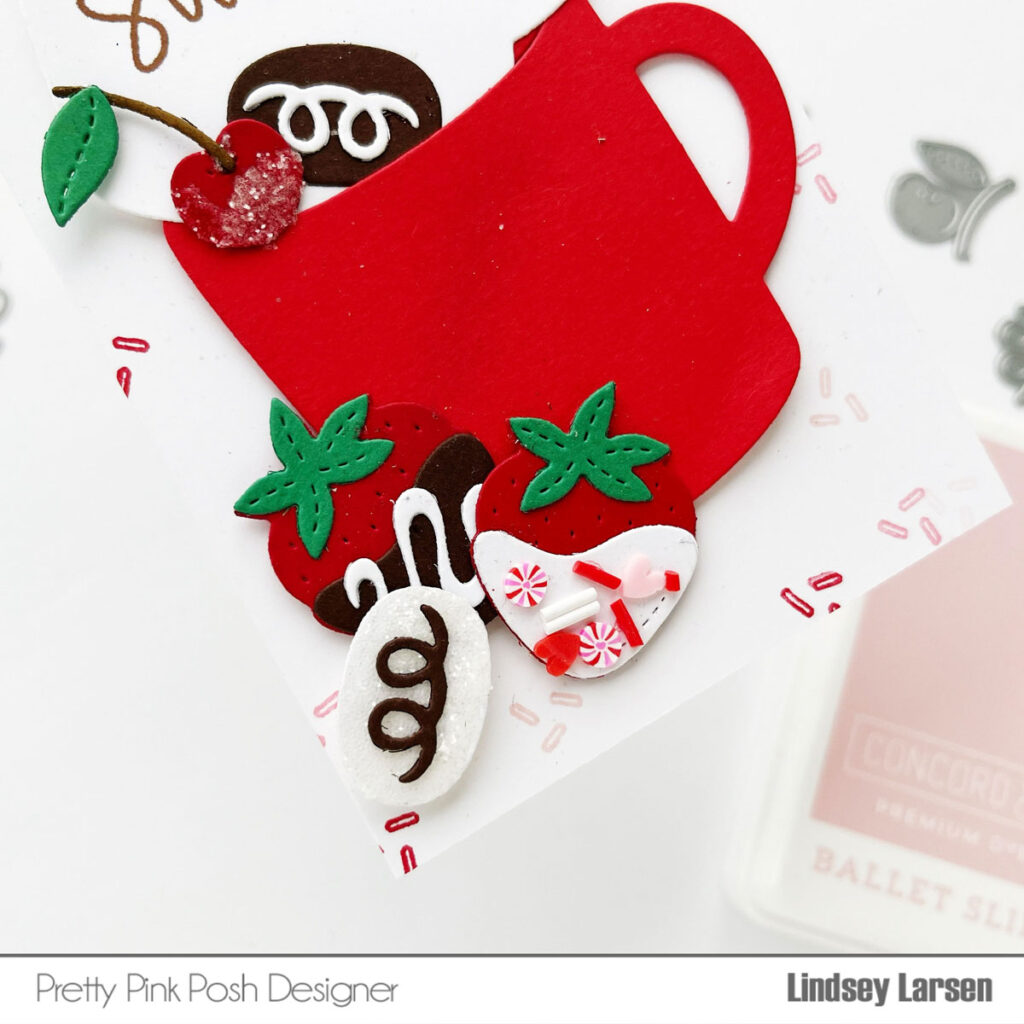
Now for the fun part….decorating!  I added sugar coating (glitter lots of glitter!), chocolate drizzles, and sprinkles.  Then I tucked the treats inside and around the mugs. 

The background needed just a little something, so I used a tiny sprinkle stamp from Build A Cupcake to add sprinkles in different shades of pink and red.

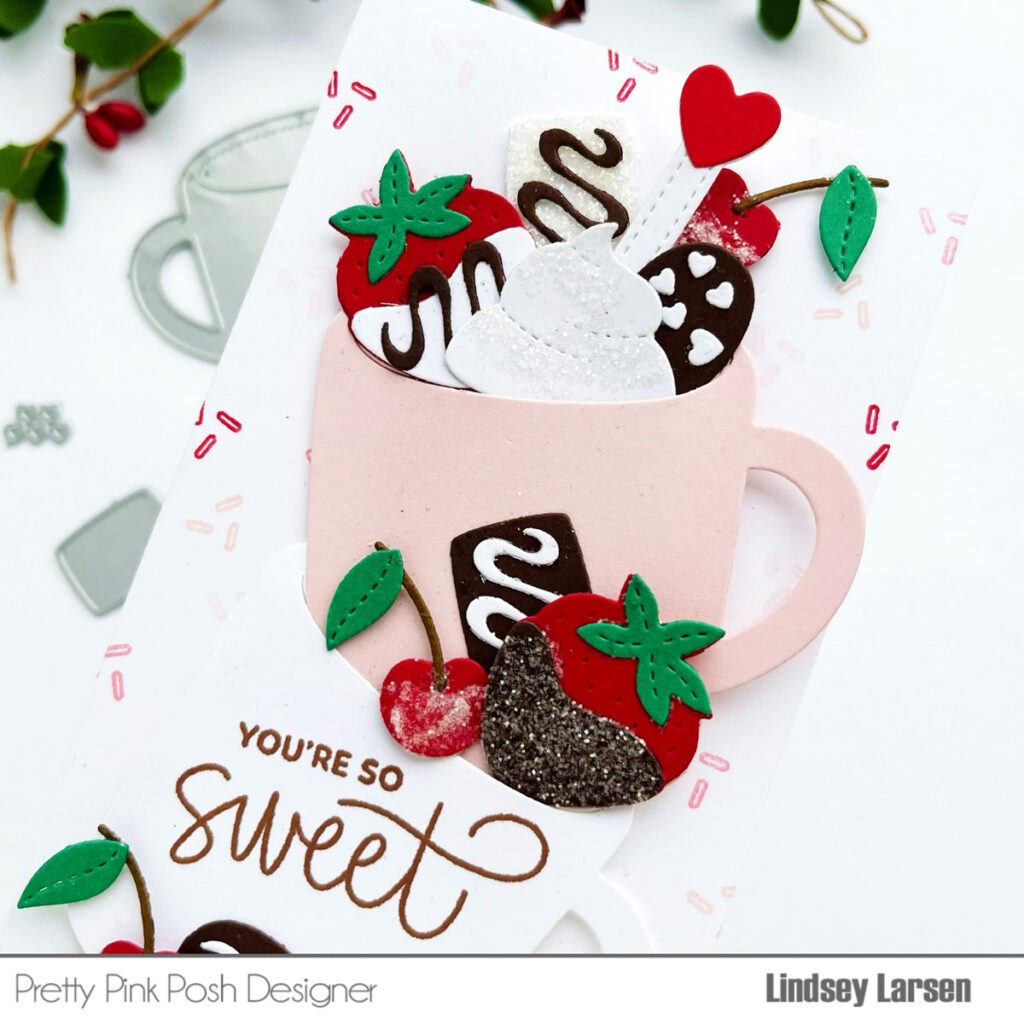
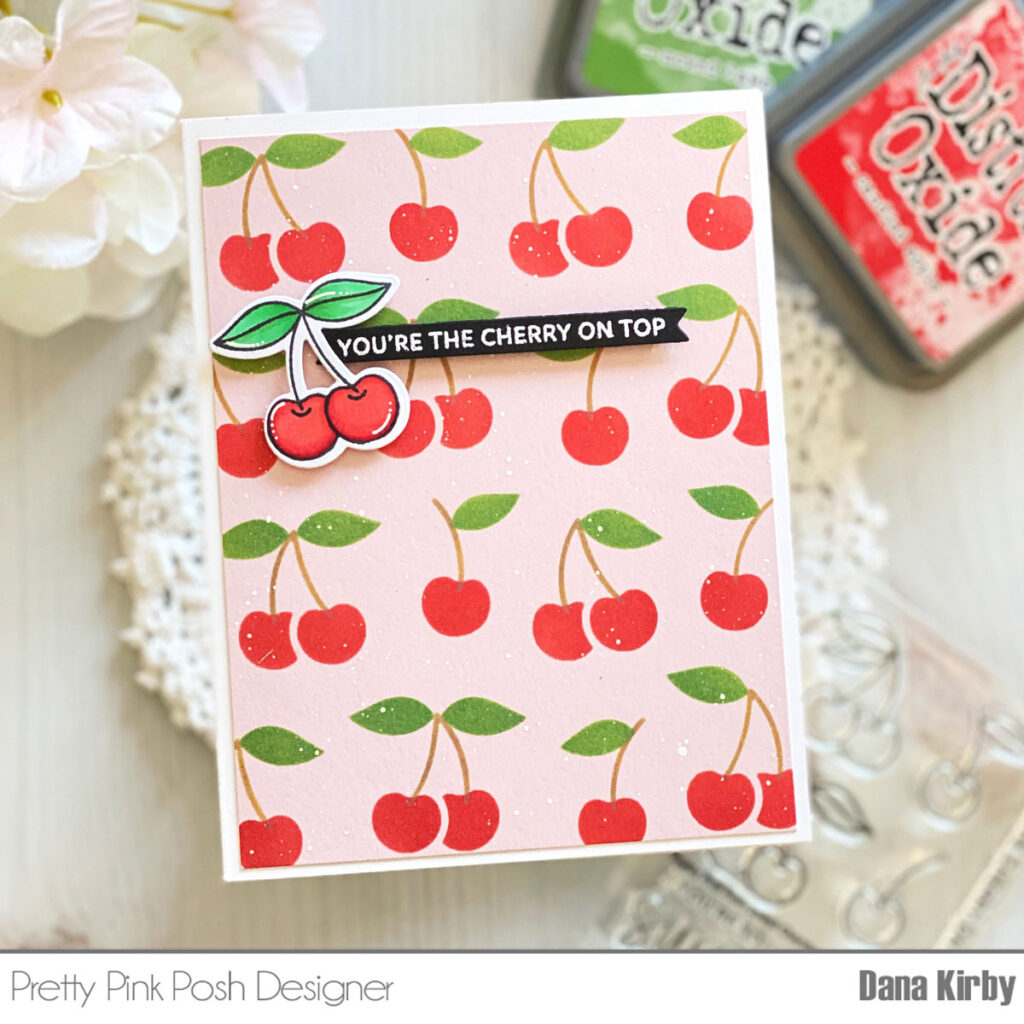
The sentiment is from the new Sweet Cherries stamp set

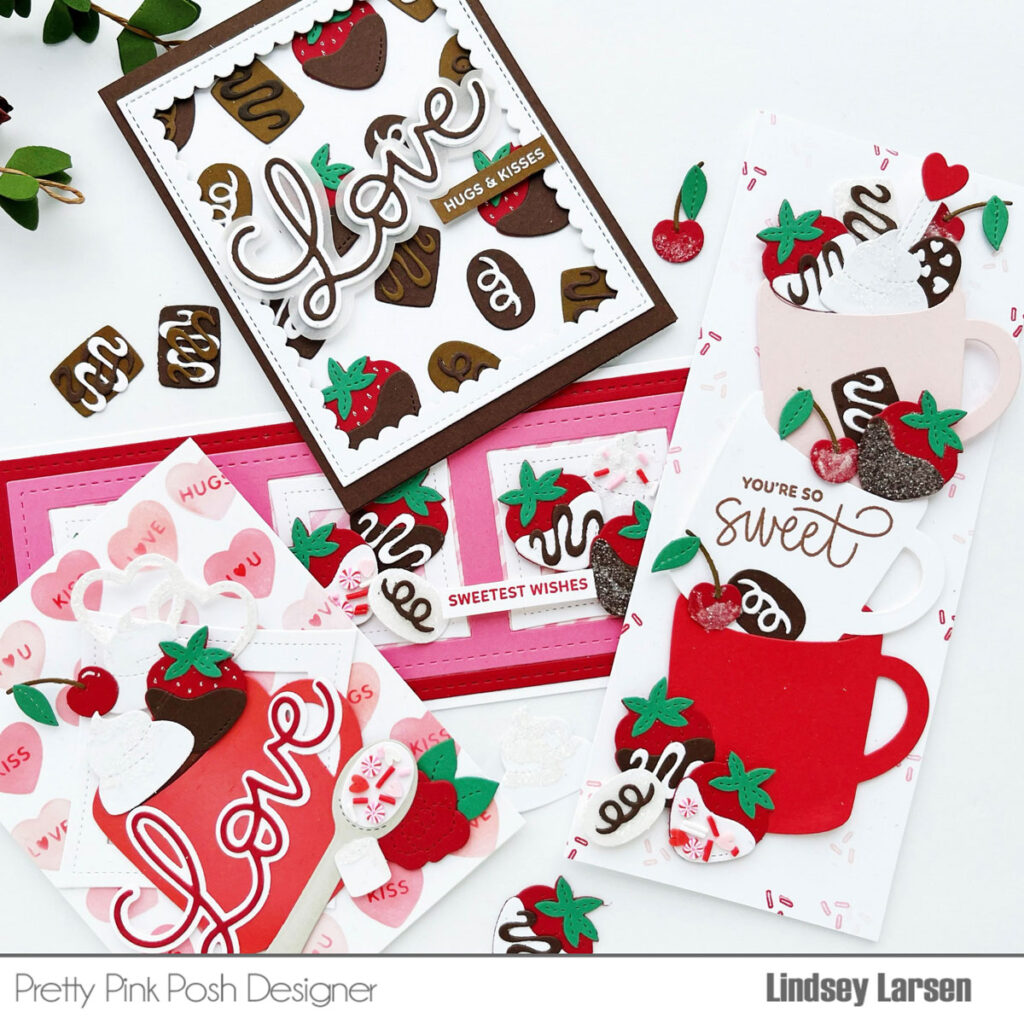
I’ll leave you with one last shot of all the sugary goodness I made with these products. :) 

PRIZES: be sure to leave comments on each stop. We are giving away 3 $30 gift certificates to three random comments (1 winner each day) left before January 12, 2023 at 11:59 PM PST. I’ll be announcing the winners next week, so be sure to return and see if you are one of the winners.

Pretty Pink Posh blog << you are here
Caly Person
Raquel Arribas
Melissa Phillips
Davina Cantrell
Kristie Marcotte
Zsofia Molnar

Thanks so much for stopping by today, we hope to see you again tomorrow for another day of inspiration!

January 2023 Product Reveal + Bundles

Hello friends! It’s time to reveal all of the products that are part of the January 5th release. As usual, we worked really hard to make things cohesive and work together, individually or you can pair them with “older” products.

Here’s a look at the four new stamp sets that will be available for purchase: Heart Critters, Potted Roses, Sweet Cherries and XOXO (all have coordinating dies available for purchase separately).

Here are the individual die sets that will be available: Hot Foil- Large Hugs, Hot Foil- Large Love, Large Hugs Shadow, Large Love Shadow, Wonky Stitched Squares, Sweet Note and Valentine Mug Additions (designed to be used with the popular Winter Mug dies).

*The shadow dies work individually, or you can use them in conjunction with the hot foil dies!

This month we have four new stencils: Layered Cherries (3 layer),Layered Valentine Hearts (4 layer), Layered Chocolates (3 layer) and Layered XOXO (3 layer).

*The Layered Valentine Hearts and Layered XOXO stencils are a little different as you can mix and match which layers you want to use. (patterns, words or both for the hearts and O’s, hearts or both for the background)

There are three new embellishments this month: XOXO clay confetti, Valentine’s Day clay confetti and Strawberry Shortcake clay confetti.

We have a limited amount of bundles available where you can buy this release in one easy click. Plus, you’ll get 10% off when you buy it all together.

Due to not everyone owning a hot foil machine, we did NOT include those in this bundle. You can however buy those together at a discount as well.

We will see you tomorrow as we show you the new products in a video and the products go live individually. Plus, we will be kicking off our three day blog hop!

|

Sneak Peek: January 2023 Dies

Good morning! It’s Lindsey here and I have the lucky task of giving you a peek at some of the new dies releasing this month. They are amazing! I am completely smitten, and I think you will be, too!  

New release will be available January 5th. 

Sneak Peek: January 2023 Dies

One of the die sets I am most excited about is the Valentine Mug Additions. The dies are designed to pair perfectly with the previously released Winter Mug Dies, but I wanted to start by showing you that they can be used on their own, too!  

Sneak Peek: January 2023 Dies

What better way to showcase these new sweets than creating a chocolate box? I created my box using a a brown card base and the largest Scallop Frame die. Then, I pieced together lots of chocolates and chocolate covered strawberries using the Valentine Mug Additions. There are lots of mix and match options in this set and super cute stitching details throughout. 

Sneak Peek: January 2023 Dies

I used a white gel pen to highlight the seeds on the strawberries.  

Sneak Peek: January 2023 Dies

Front and center on my card is one of two new script dies called the Large Love Shadow die. These dies are a fabulous large size and come with the script + an outline, which I love. I couldn’t help myself and added a third layer of vellum to help the sentiment stand out a bit more against the chocolates. Then I added a secondary embossed sentiment “hugs and kisses” from the new Potted Roses stamp set

My second card uses many of the same Valentine Mug Additions dies, but this time I paired them with the Winter Mug.   

Sneak Peek: January 2023 Dies

I started by creating a candy heart background using two of the layers in the new Layered Valentine Hearts stencils. So much fun! Next, I used the two largest Wonky Stitched Squares dies to create a frame, which in this case anchors my focal point. 

Sneak Peek: January 2023 Dies

Now for the mug! I blended on a little ink around the edges of the mug, then I stuffed it full of darling dies from Valentine Mug Additions – cherry, whipped cream, strawberry, and double hearts.

The fabulous Large Love Shadow die fit perfectly across the mug. I adore it.  

Sneak Peek: January 2023 Dies

Speaking of things I adore, how cute is that spoon?! I figured a chocolate and sprinkle coated spoon would be the perfect thing to stir into a mug of hot chocolate. The sprinkles are from the new Valentine’s Day Mix clay confetti.  I added a marshmallow from the Winter Mug dies and a rose from the Valentines Mug Additions dies, and called it a day. :) 

Thanks so much for joining me today! I had so much fun creating with the new dies, and I know you will too. Join us tomorrow as we reveal the products and the bundles go live!

|

Sneak Peek: January 2023 Stencils

Hi crafty friends! It’s Dana here and I am excited to be back sharing a sneak peek of the new stencils coming to Pretty Pink Posh. This release includes four new stencils: Layered ChocolatesLayered Valentine Hearts, Layered Cherries and Layered XOXO. Today I will be using two of the sets, so let’s get started…

New release will be available January 5th. 

Sneak Peek: January 2023 Stencils

My first card uses the Layered Cherries stencils to create my card panel. This is a three pack of stencils that layer together to create a fun background. To make my background, I used Distress Oxide ink (Candied Apple, Mowed Lawn and Brushed Corduroy) and small blended brushes to add ink to each layer. Once my panel was finished I added a few white paint splatters and set it aside to dry.

Sneak Peek: January 2023 Stencils

Next, I used the Sweet Cherries stamp and die set for my stamped cherries and sentiment. I colored the cherries with Copic markers and attached them along with my sentiment to my card panel with foam adhesive. I love how these products coordinate together though also can be used on their own! Lastly, I trimmed my panel down and attached it to an A2 card base to finish my card.

Sneak Peek: January 2023 Stencils

My next card uses the Layered XOXO stencil set

Sneak Peek: January 2023 Stencils

I started my card by using the Layered XOXO stencil set to make my card panel. This is a set of three stencils: X’s, O’s and Hearts. I used the Hearts in place of the O’s to make my background, but either layer works the same. I love that you have both options! I used Distress Oxide ink in Spun Sugar and Salvaged Patina for my layers. 

Sneak Peek: January 2023 Stencils

Next, I used the Scallop Heart die to die cut a heart from the center of my panel. I attached acetate behind the opening and added foam adhesive to create a shaker. I then filled the shaker with the XOXO confetti mix before closing it up. Lastly, I used the Large Love Hot Foil Plate to create my sentiment. Following the directions for my machine I foiled the sentiment onto a piece of red cardstock with gold foil. I then used the Large Love Shadow die to cut it out. Lastly, I attached it to my card panel with a little liquid glue.

Sneak Peek: January 2023 Stencils

Thanks for joining me today! I know you will love these new products and I can’t wait to see what you create with them!

Enjoy your day, Dana

|

Sneak Peek: Heart Critters

Hi friends! It’s Stefanie here today and I am sharing a sneak peek of the Heart Critters stamp set. The critters are just adorable and I thought they were the perfect size to use with the Sweet Note dies.

New release will be available January 5th. 

I created two Sweet Notes and added a leopard on one and a panda on the other. To begin, I colored both of the critters using a mix of Copic and Ohuhu(O) markers.

  • Leopard yellow: E37, YR24, YR21, YR20, E30
  • Leopard nose and ear pinks: E11, R30, R000
  • Leopard white: E40
  • Leopard heart: R20(O), R19(O), R18(O)
  • Leopard bow/Panda flower: R9(O), R21(O)
  • Panda green leaf: GY4(O), GY7(O)
  • Panda black: NG09(O), NG06(O), NG03(O)
  • Panda white: W3, W1, W00

Next I used the Heart Critters coordinating dies to cut out the images and set them aside while I worked on the envelopes. 

I knew I wanted the envelopes to be a dark pink and the background for the critters to be a light pink. Since I didn’t have any dark pink cardstock, I die cut 2 envelopes and used Picked Raspberry distress oxide to color them in. 

For the backgrounds, I die cut 2 squares and used distress oxides in Kitsch Flamingo and Spun Sugar to create a gradient from pink to white on each. I also used water droplets to lift up some of the pink and give the background some more texture. To create a bit more subtle valentine theme, I pulled out all the cute valentine sentiments from the release and stamped them in the bottom portion of the background in Spun Sugar.

To finish off the outside of the envelope, I adhered the background onto the envelope and propped up the critter using foam tape.

For the inside, I used the Pinstripe stencil with Spun Sugar distress oxide to create the stripe pattern and adhered another square die cut in white card stock to create a little area for a handwritten note.

Thanks so much for stopping by and I hope you like my sweet little notes!