
Inlaying Stencil Pieces with Die Cuts
Hello, Gemma here today with a card featuring lots of lovely new products from the March release.
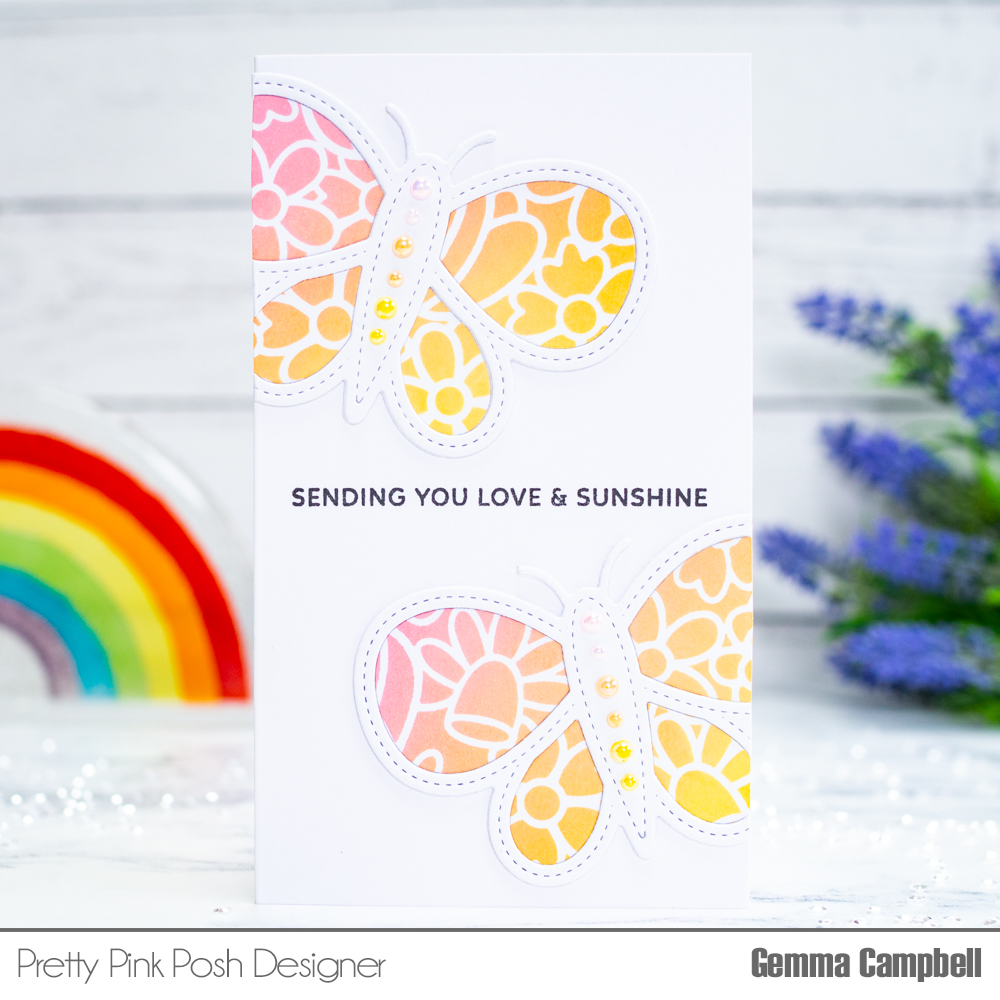
I began by creating a background, using the new Floral Background stencil with distress oxide inks. From this, I die cut the new Butterfly Shaker two times. I’m only using the inside pieces on this card but the butterfly frames can be kept for another card.
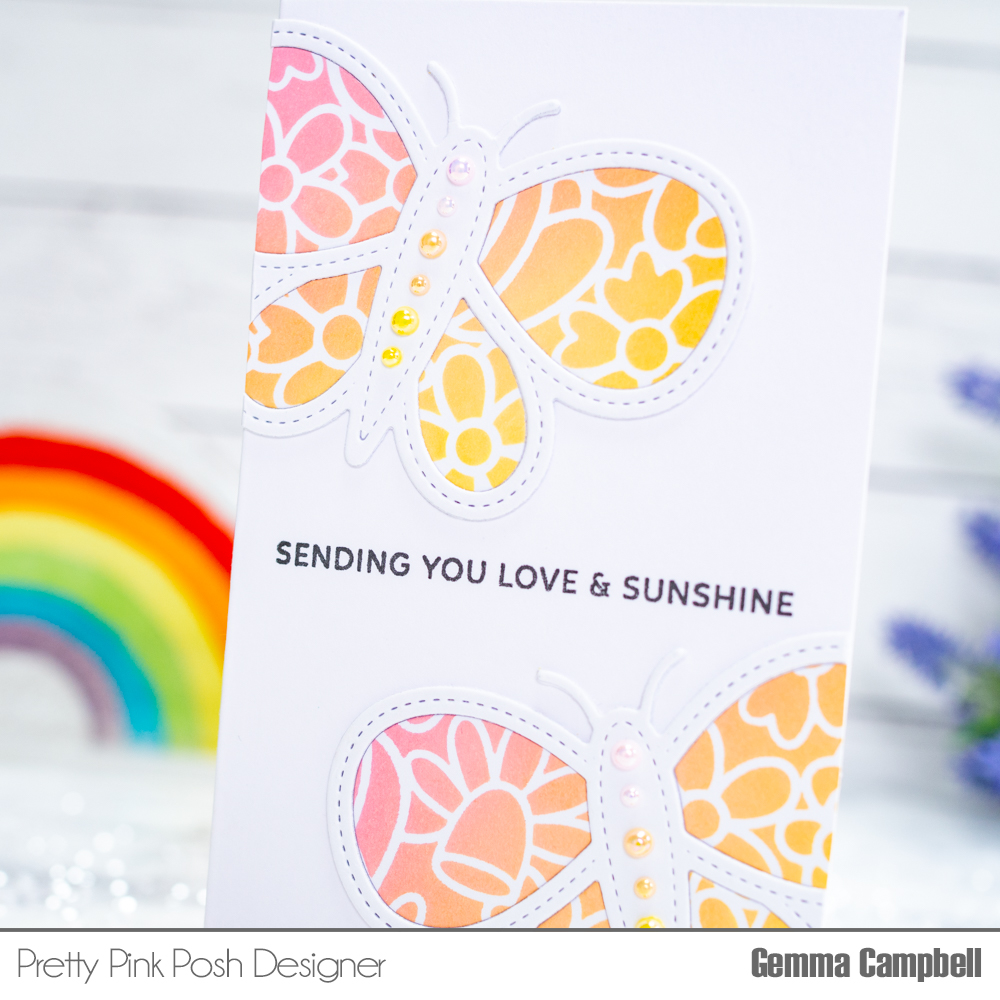
I die cut the Butterfly Shaker four times from white card as well, layering two of the die cut frames together for dimension.
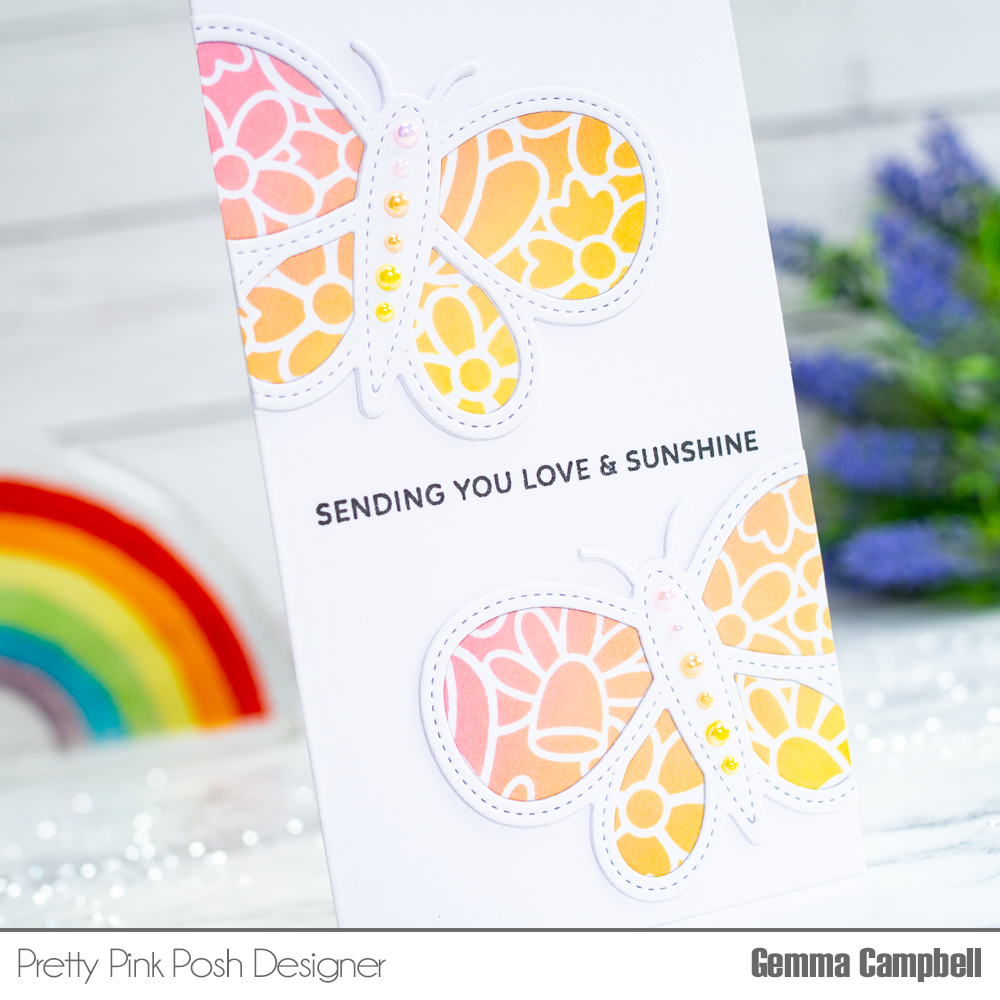
On a mini slimline card base, I stamped a sentiment from the new Hugs stamp set. I then adhered the two white Butterfly Shaker die cuts to the card.
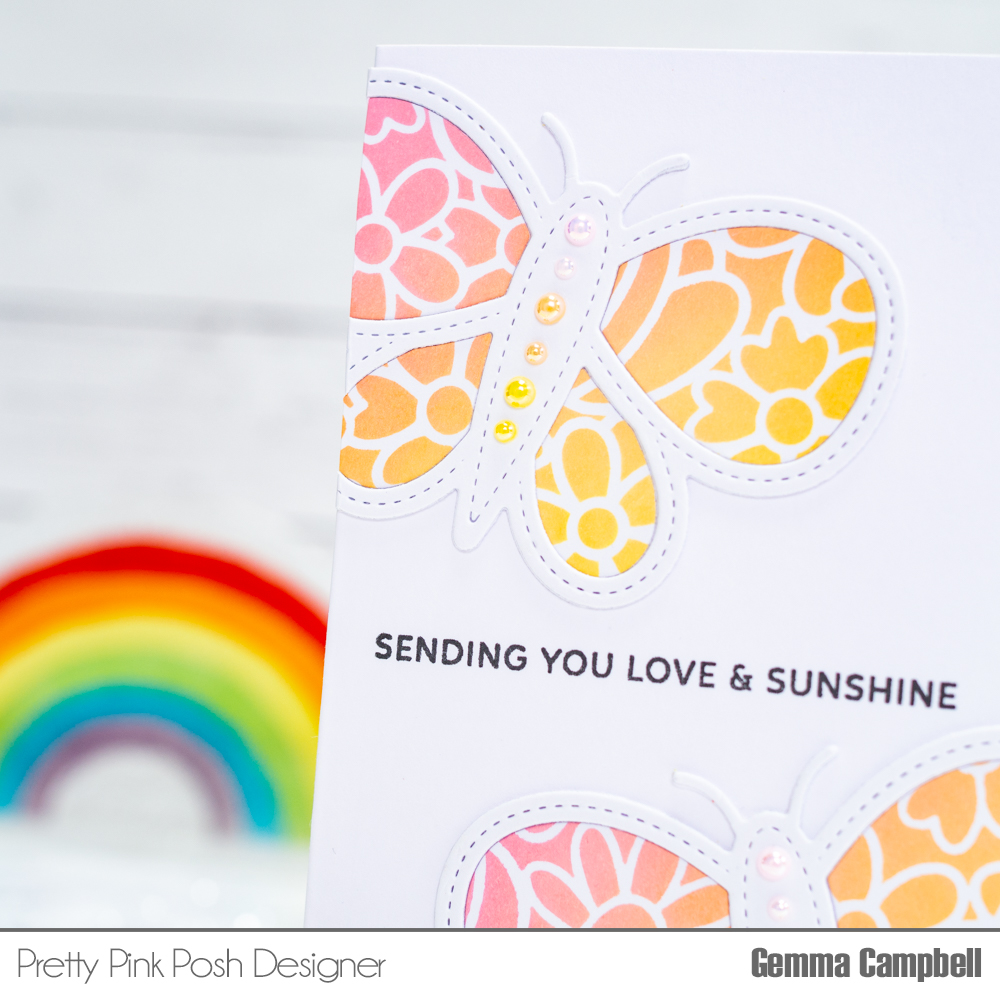
I added the stenciled pieces inside the butterfly frames, then cut away any excess overhanging the edges. As a finishing touch, I added some pearls to the centre of the butterflies.
I hope you were inspired by this card!
About this card
- Card base: Mini slimline (3.5 x 6”)
- Pretty Pink Posh Stamps: Hugs
- Pretty Pink Posh Standalone Dies: Butterfly Shaker
- Pretty Pink Posh Stencil: Floral Background
- Pretty Pink Posh Pearls: Pink Blush, Creamsicle, Sunshine
- Distress oxide inks: Kitsch Flamingo, Dried Marigold, Squeezed Lemonade
Love your card. It is so perfect for so many different occasions. Thanks so much for sharing it.
I am in Love with this card! So pretty!
What a gorgeous butterfly! I will be using this as a model for making some cards of my own! Thanks, Gemma!
Lori S in PA