
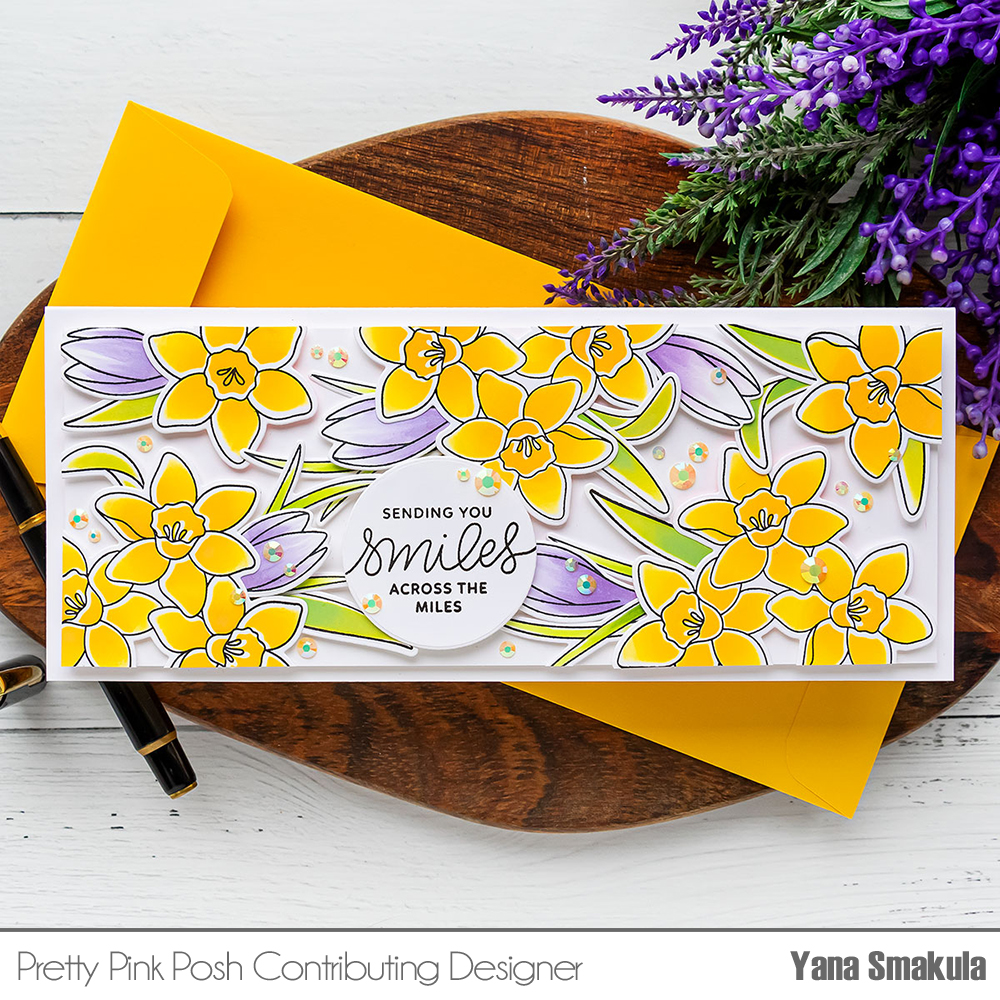
Slimline Daffodil Card + Video
Hello everyone! This is Yana Smakula, thank you for joining me! Today I have a slimline card to share featuring gorgeous daffodils, just in time for Spring!
Here is a video so you can see how everything came together.
Watch the video above I Watch the video in HD on YouTube
I am using the Daffodil stencil. This stencil can be used alone, by itself, but it can also be combined with 2 other products for easy coloring. The stencil coordinates perfectly well with the Daffodil stamp set, and it also coordinates with the Daffodil coordinating dies, so you can combine all 3 to quickly create, color, and cut beautiful images for your cards.
Pretty Pink Posh also has another product trio like this, where a Peonies stamp set, a Peonies coordinating die set, and a Peonies stencil coordinate.

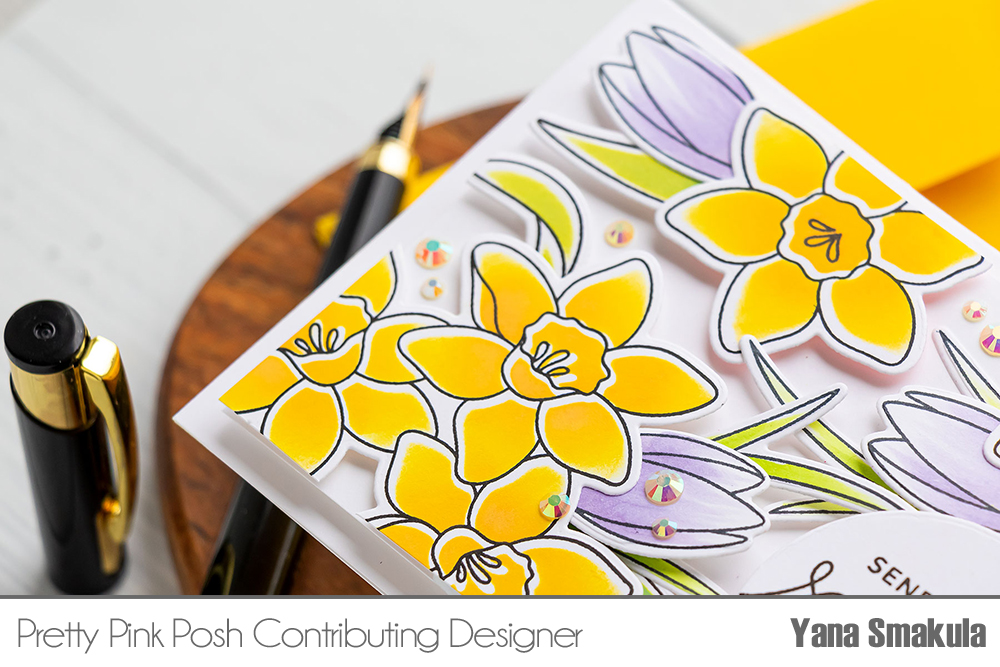
I started to work on my card by ink blending the images in Distress Oxide inks onto Neenah Solar White 80lb cardstock. I picked several colors of distress oxide inks – Squeezed Lemonade, Mustard Seed and Wild Honey to ink blend the flowers.
I started with the Squeezed Lemonade as my base color. Next, I added a bit of Mustard Seed to add shading to the petals and a bit of Wild Honey to the flower centers.
I prefer to work with these products by doing the ink blending first, do my stamping 2nd and die cut the images out 3rd. The reason behind it is I like to offset the stamping over the ink blending and I like to use Versafine Onyx Black ink for my stamping and if I ink blend over it, the oxide inks dull and mute the black a bit. So I prefer to ink blend, stamp, die-cut. You can also stamps, ink blend, and die-cut.
When ink blending the flower centers I tried to ink up just the edge of my blending tool and use just that edge to apply color. I love how easy it is and how simple it is to add color to these images using the stencil – you don’t have to think much, and it doesn’t take a lot of time. You can make a bunch of daffodils in no time.
I also ink blended the leaves, and the stems using Twisted Citron and Mowed Lawn.
With my ink blending done, I placed the panel inside my mini misti tool and stamped the image outlines in black. Next, I cut these images out using coordinating dies.
I knew I would need to add a touch of purple to my card, I love to combine yellow with purple, so I used my Crocus stamp set to stamp and color a few images. I used Copic markers in YG17, YG03, and YG01 markers to color the grass; BV11, BV00, and BV000 markers to color the flowers. These also have coordinating dies and so I cut them out.
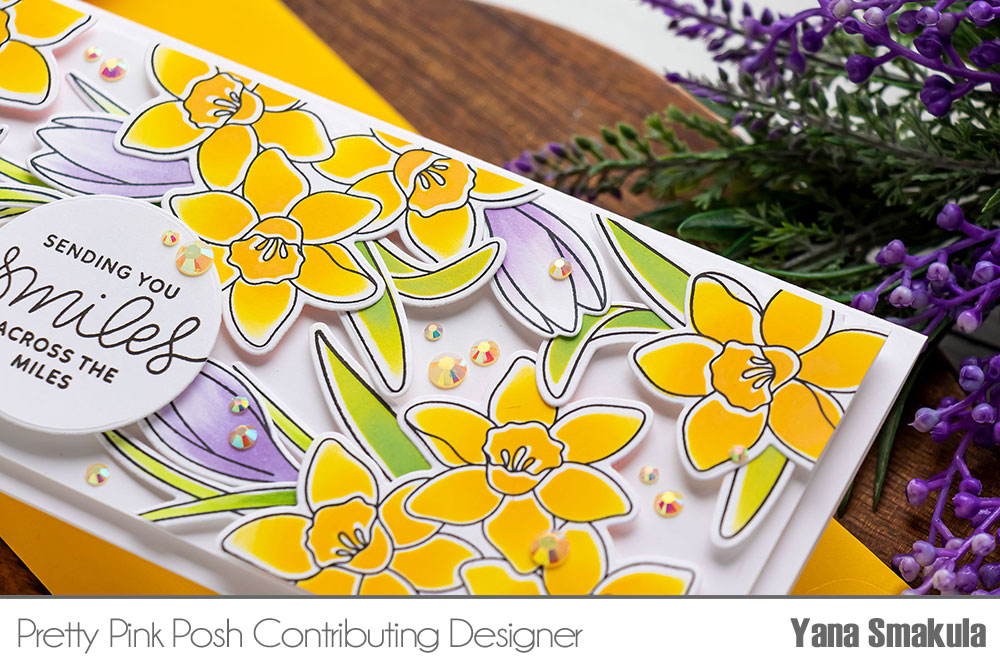
I wanted to include as many daffodils on my card as I could, and for that, I knew I’d need to make a bigger card, so I opted for a slimline one. I cut a white cardstock panel to 3 ⅛” x 8 1/8” to make a background.
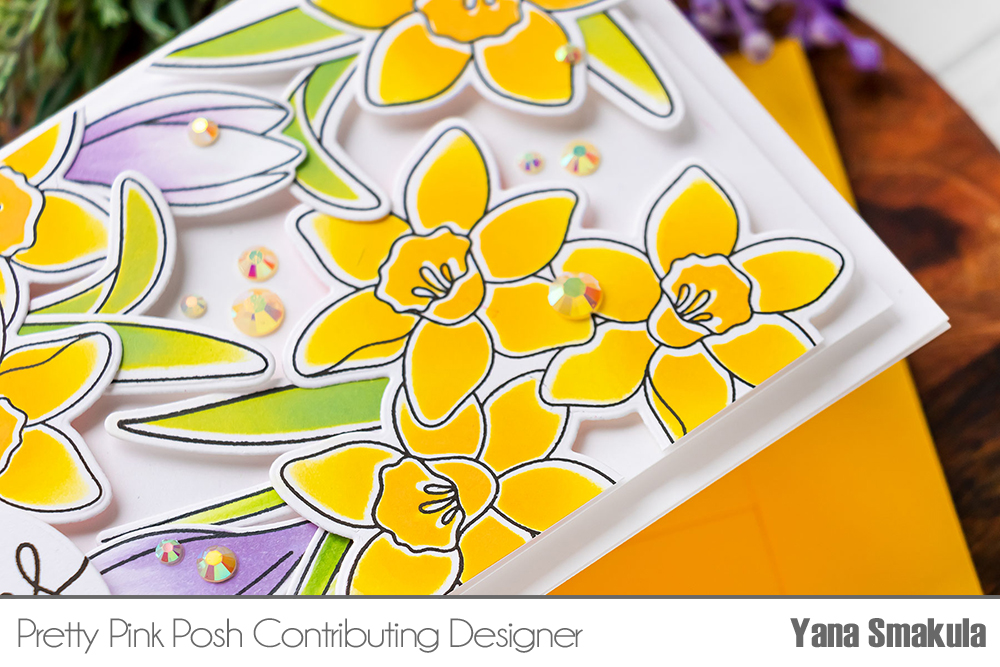
From here, I foam mounted the images onto the panel – I already had a plan in mind, I wanted to add a daffodil or a cluster of daffodils and add one crocus to add some purple color. I also added the leaves and the grass pieces to build my background.
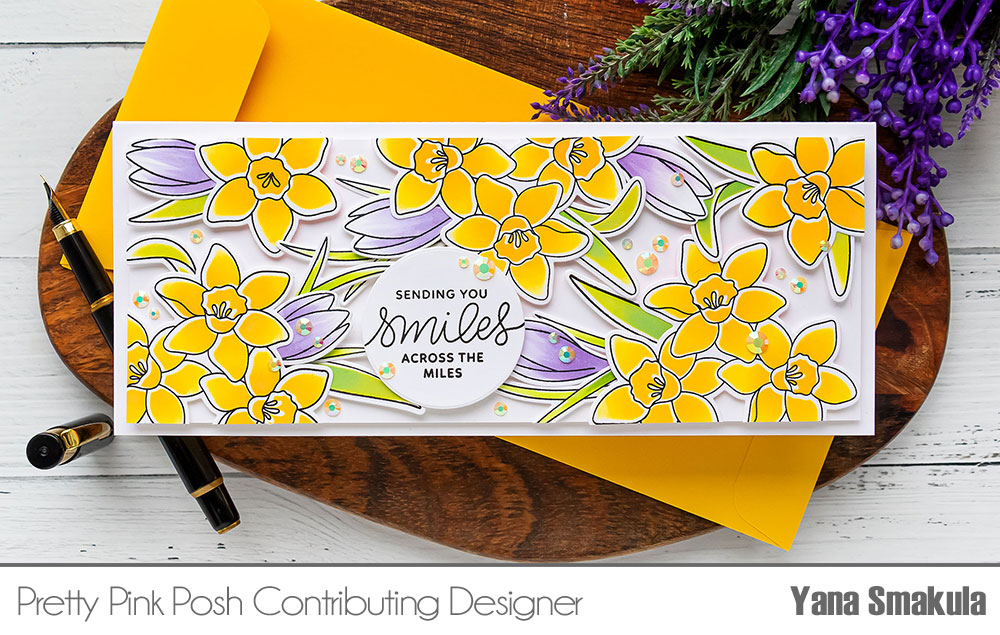
I foam-mounted all of the pieces as I like to have dimension on my card. Next, I used my scissors and trimmed the excess off. To create a sentiment I stamped one that reads Sending You Smiles Across the Miles, it comes from the Encouraging Greetings stamp set and cut it out to a circle using a die. I foam mounted it onto the card. I also foam-mounted the background panel onto a slimline card base. The card base measures 3 1/2 x 8 1/2”.
Finally, I embellished the card with my favorite Buttercream jewels.
Thank you for joining me today! Have fun ink blending!
Very pretty and the colors were amazing. I do like the slimline cards, also. Thanks for showing all your tips and techniques.