
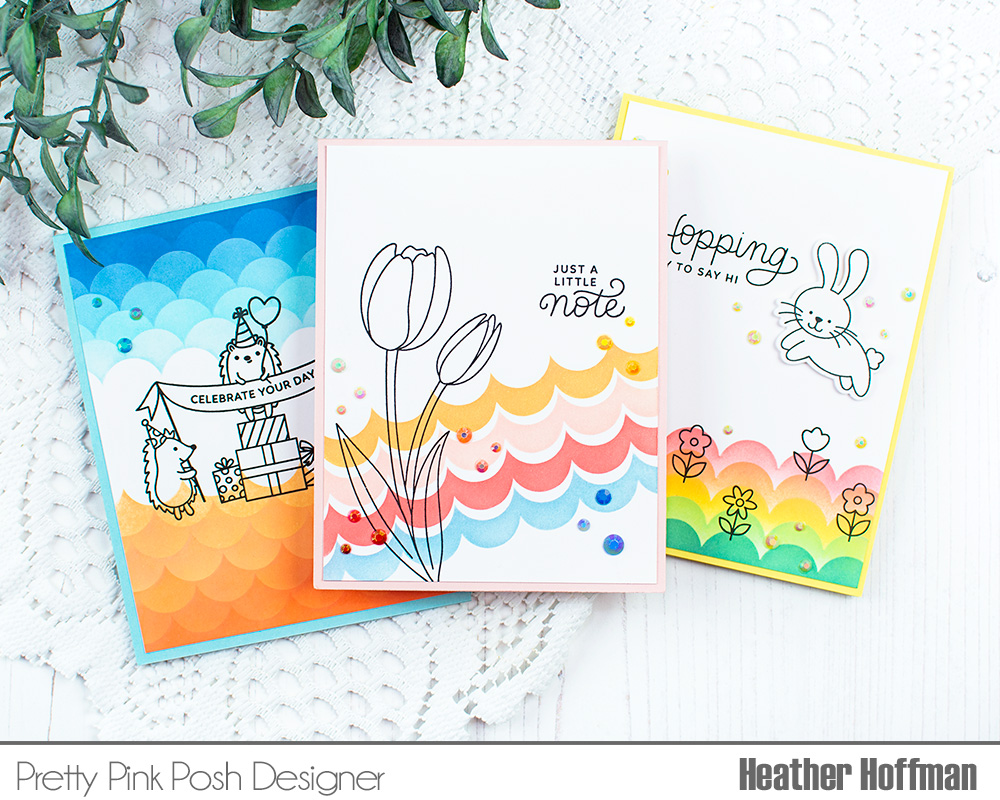
Creating 3 Cards with 1 Stencil Set: Scallop Edges
Good morning Pretty Pink Posh friends! Heather Hoffman here today with a look at the new Scallop Edges Stencil – this is a two piece stencil, and I’ve created a video showing how to use each piece on it’s own, as well as a way to combine them together. The possibilities with this stencil are endless when you add in that there are 4 different sizes to the scallops, and I only used the largest size to create my cards!
Here is a video for these cards, so you can see how they all came together:
Watch the video above I Watch the video in HD on YouTube
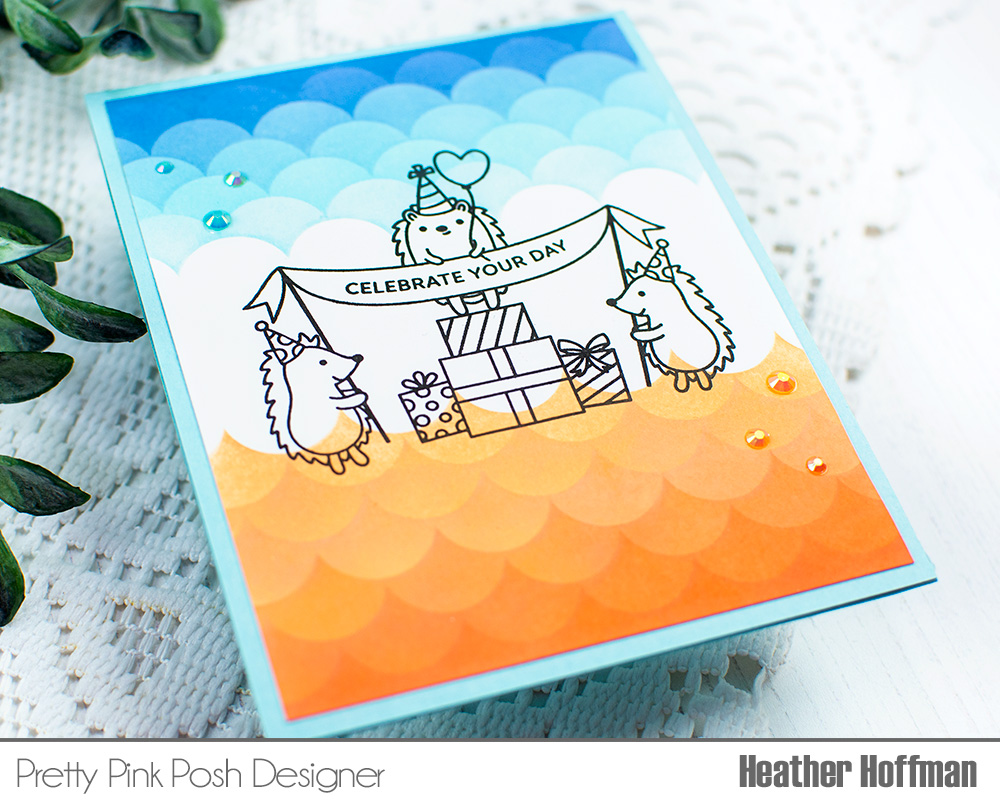
For this first card, I used the stencil that has the scallop facing outwards. I also alternated where I placed the scallop to get this fun background pattern! I used Dried Marigold, Ripe Persimmon, Tumbled Glass, and Faded Jeans Distress Oxide inks to create the background.

I finished this card off with the adorable Hedgehog Birthday stamp set (not released yet), and a few sparkly jewels in Buttercream and Sea Glass before mounting on a coordinating blue cardbase.
This second design uses the stencil where the scallops face inwards. For this one I used it to create a border along the bottom, and this time I did not alternate the stencil, so it gave a more uniform pattern. I used Worn Lipstick, Dried Marigold, Squeezed Lemonade, Cracked Pistachio, and Evergreen Bough Distress Oxide inks for this one.

I created a scene on this card using Easter Bunnies stamp set – the bunny was stamped and cut out with the coordinating dies, and I stamped the sentiment and the flowers directly on the card panel. A liberal does of Pearl White jewels add a bit of fun sparkle, and I mounted that panel on a soft yellow cardbase.

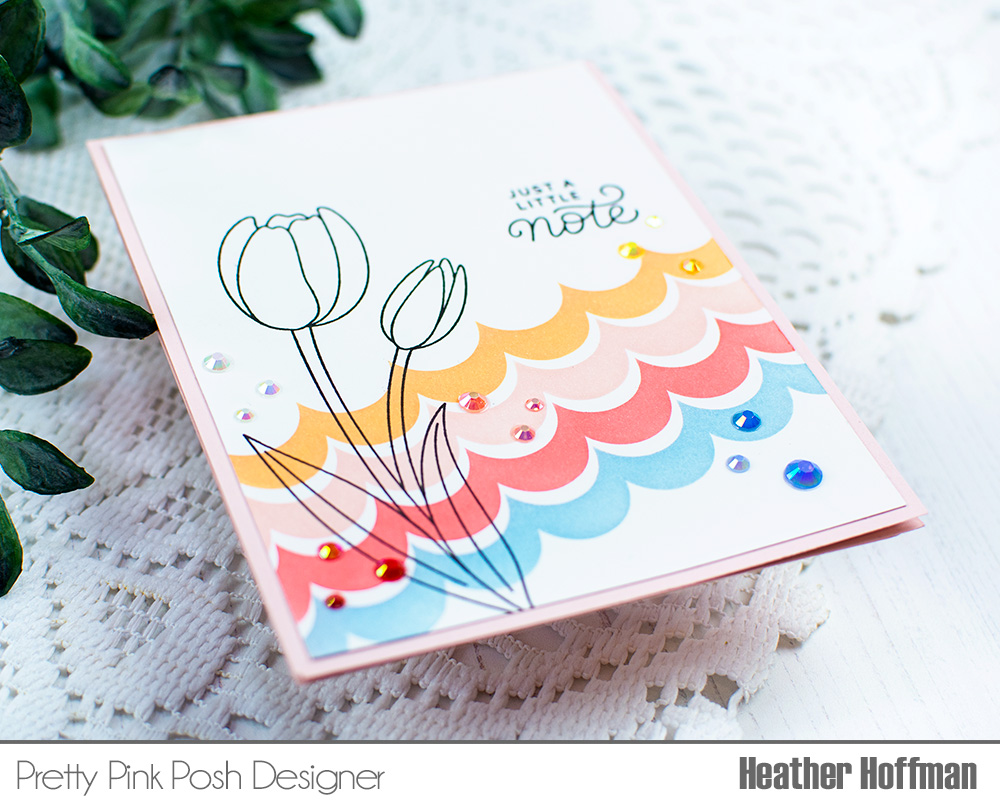
Finally, the last card used both portions of the stencil to create this fun graphic design. I used Post It Tape to hold the stencils pieces together to ensure a uniform stripe design, and stenciled this one with Dried Marigold, Tattered Rose, Abandoned Coral, and Tumbled Glass.

I used Tulips stamp set to add a floral image, and Spring Robins for that cute sentiment. A few coordinating jewels in Cornflower, Raspberry, Pink Blush, Marigold, and Pearl White grouped around their ink colors add a touch of interest and whimsy before mounting on a soft pink cardbase.
So there you are – 3 different and fun ways to use these versatile stencils! I hope they inspired you to give them a try!

Thanks so much for stopping by today – have an absolutely wonderful day!
These are so cute. I LOVE how you stenciled the hedgehog birthday party. I am going to watch the video now. THANKS!
I’m so glad that I decided to watch Heather’s video. I learned so much about using these stencils. The possibilities really are endless. I am now wondering what different combinations would look like—small scallop with large negative scallop, etc. Hmmmmmm. The hedgehog birthday stamp is ADORABLE!!!!!