
Stenciling with Mayra: Bold Stripes

Hello everyone! Happy Tuesday. Mayra here with you today and I am excited to be starting a new series on the blog called “Stenciling with Mayra”. I recently discovered stencils, and I absolutely had a blast creating with them. For my cards today, I used the awesome Wide Stripes stencil. This is such a versatile stencil!
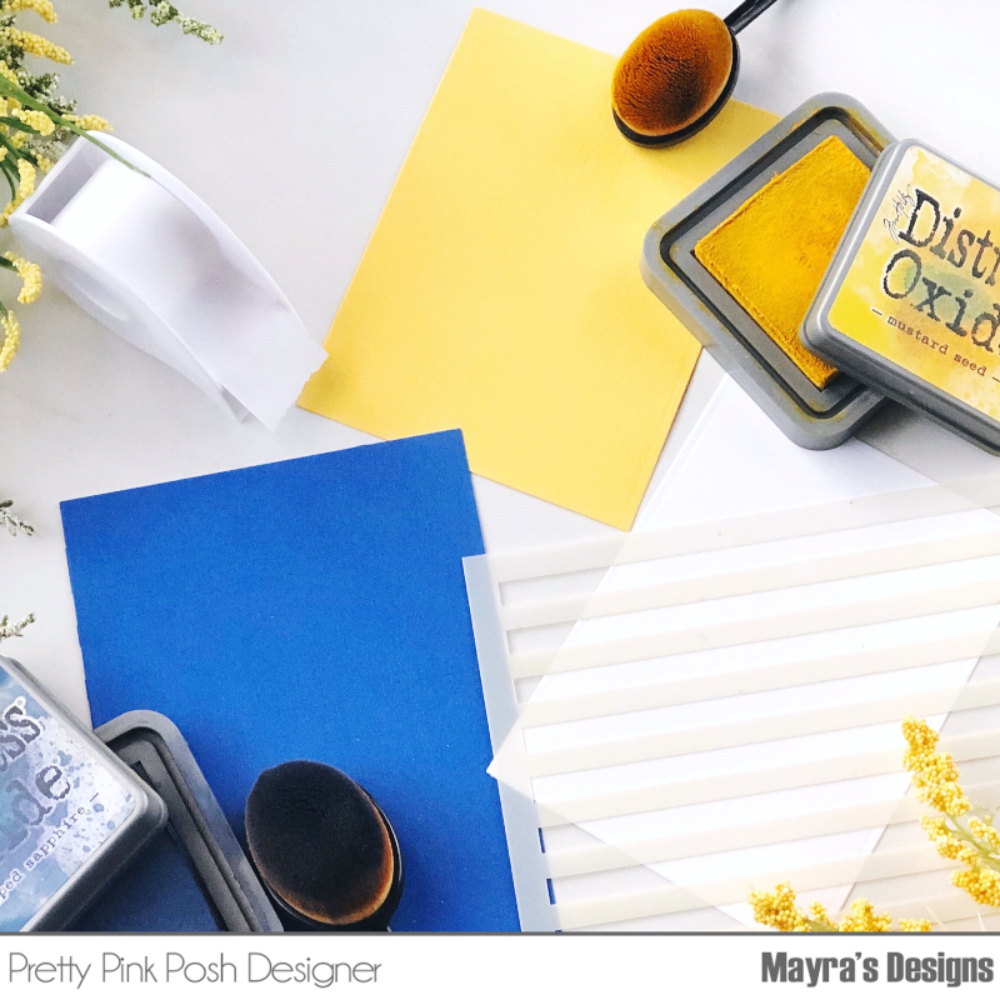
I know there are many ways to hold your stencil in place. Pretty Pink Posh offers iCraft Pixie Spray (it is definitely something I want to try out), and iCraft Purple Tape that will also hold the stencil and paper in place without tearing it (I really need to try this also). I am using plain post-it tape for now, lol. I add a bit of dot glue adhesive on the back of my panel to keep that in place and then I tape the stencil to my mat over the panel.
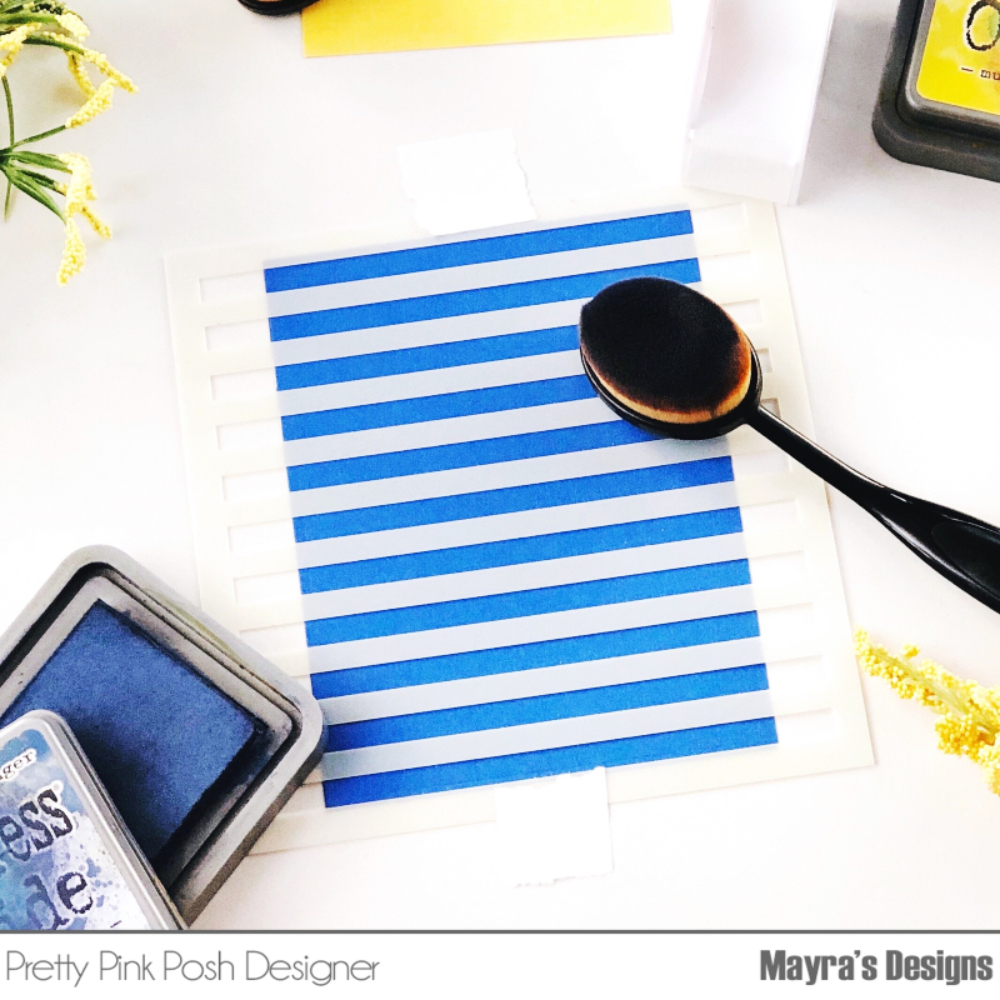
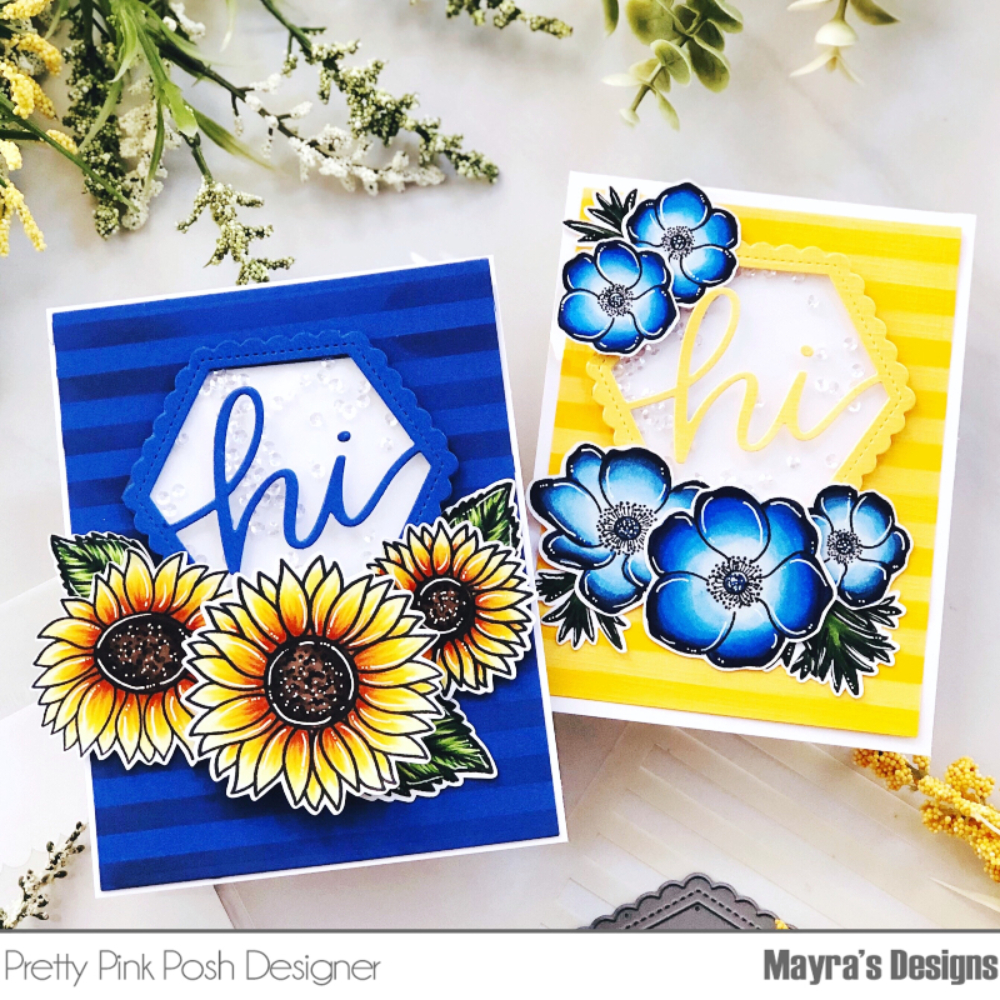
I used Distress Oxide Inks to add the color to my panels. I like the look it gives to colored cardstock. For my cards, I used Chipped Sapphire for the blue panel and Mustard Seed over the yellow panel. After adding the stripes from the stencil, my panels were ready to be made into cards. I used the Hi Shaker die to maker a shaker to go on the card. I used the beautiful 3mm Sparkling Clear Sequins for the inside. Next, I added the images from the lovely Anemones and Sunflowers stamp sets.
I hope you enjoy these cards and feel inspired to create. Thank you so much for stopping by. Hoping you each have a wonderful and blessed day.