
Stencil Theme Week- Day 7
Angelica here with a pair of clean and simple Christmas cards that will surely make a loved one smile. I have used a couple of my favorite techniques with PPP stencils to enhance them.
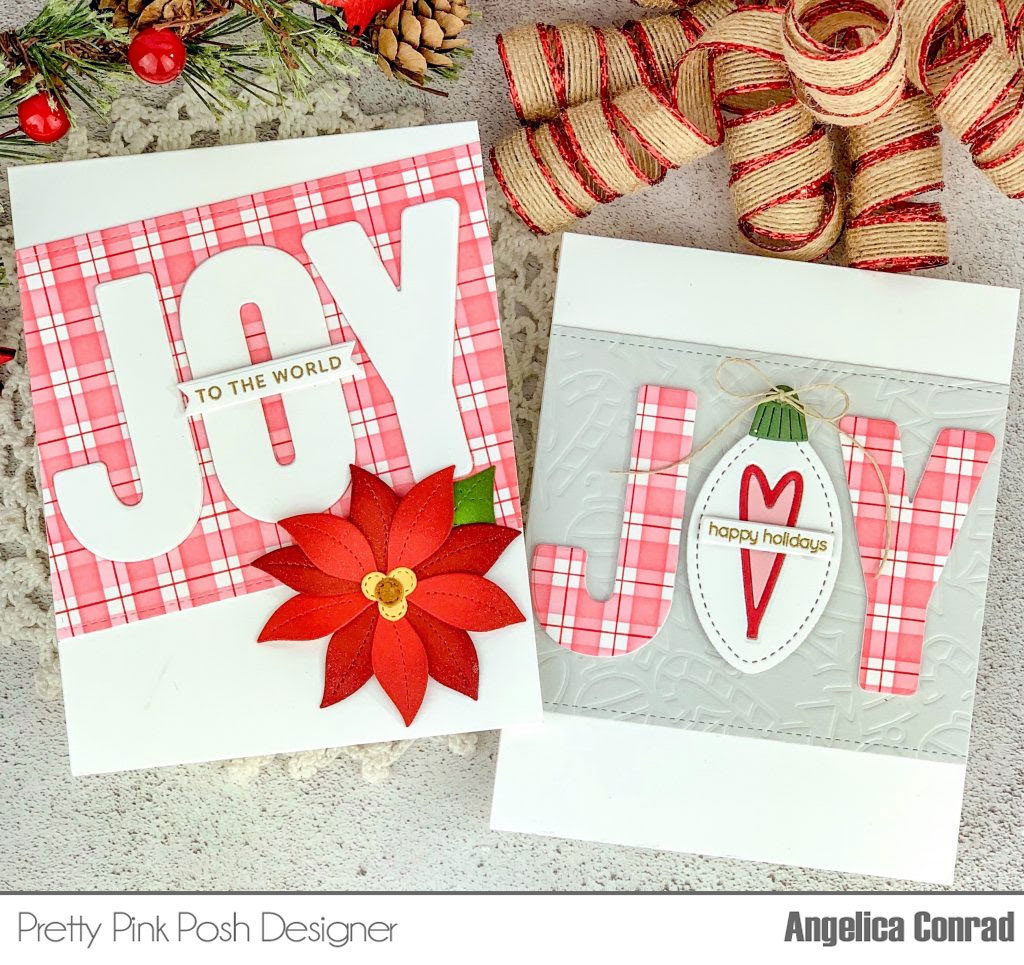
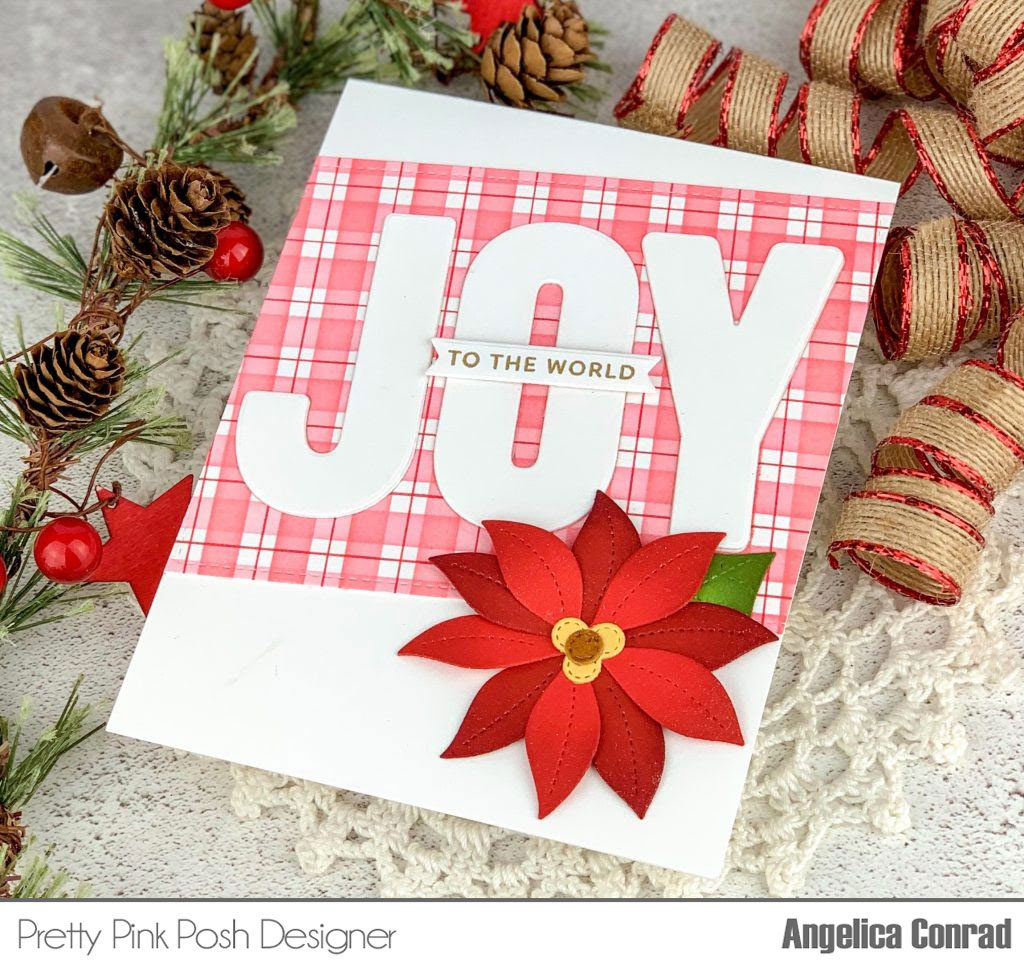
I started my project with the Wide Stripes stencil. This stencil is my favorite in PPP’s stencil collection. It’s such a simple design, with endless possibilities. For this project, I made a plaid design, using the grid on my Make Art Stay-Tion for perfect alignment. I blended Passion Fruit ink with a blender brush over the stencil until I was happy with the blend. I removed the stencil, turned my Make Art Stay-tion 90 degrees, re-attached the stencil, and repeated the ink blending process. Once finished, I used a T-ruler and a red Fineliner pen to add red grid lines. I die-cut the panel with the Stitched Notes rectangle, then moved on to assembling the cards.
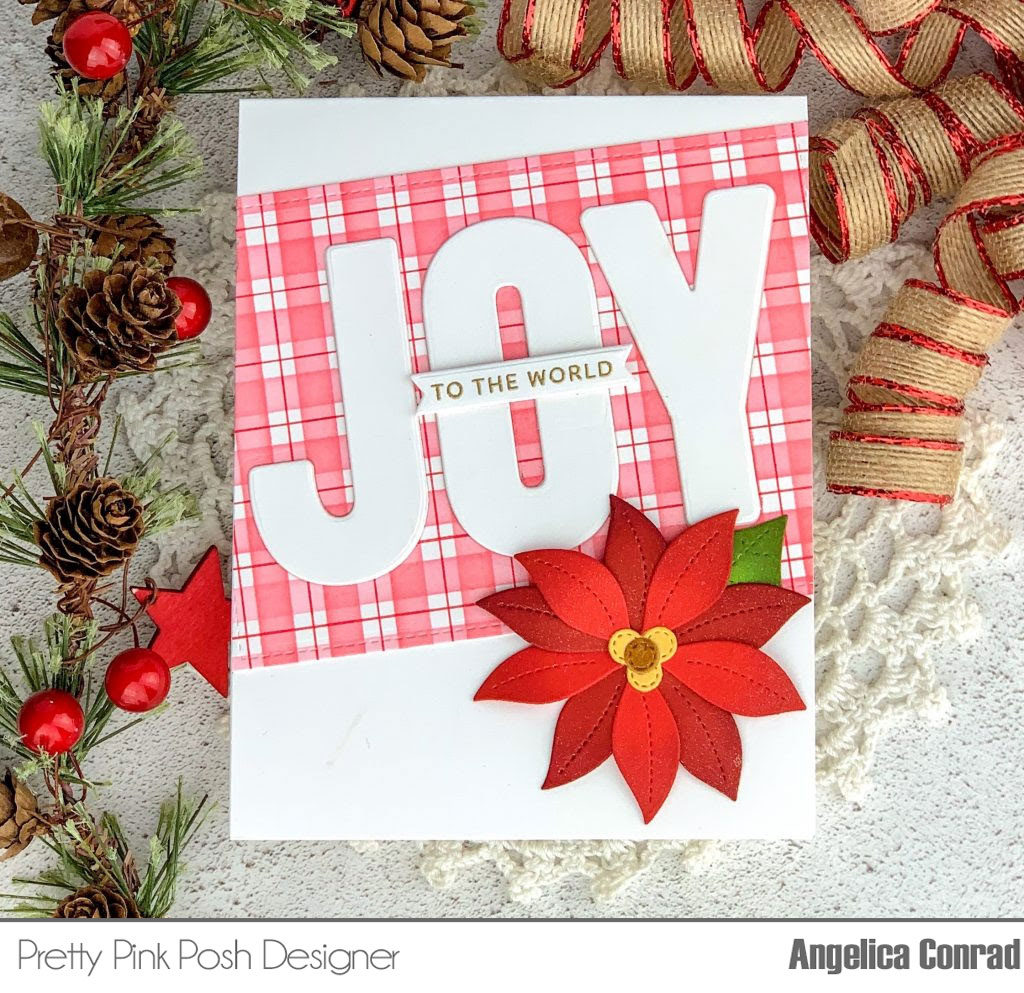
I used the Joy die to die-cut Joy from the middle of the plaid panel, and to die-cut white card stock 3 times. I attached the plaid panel to a card base at an angle before adding the white letters I had stacked and glued together for dimension. I stamped and gold heat embossed a sentiment from the Joy stamp set, trimmed it, and attached to the card with thin foam squares. I finished the card with a die-cut Stitched Poinsettia, spraying it heavily with glitter spray before attaching it to the card with Glue Dots.
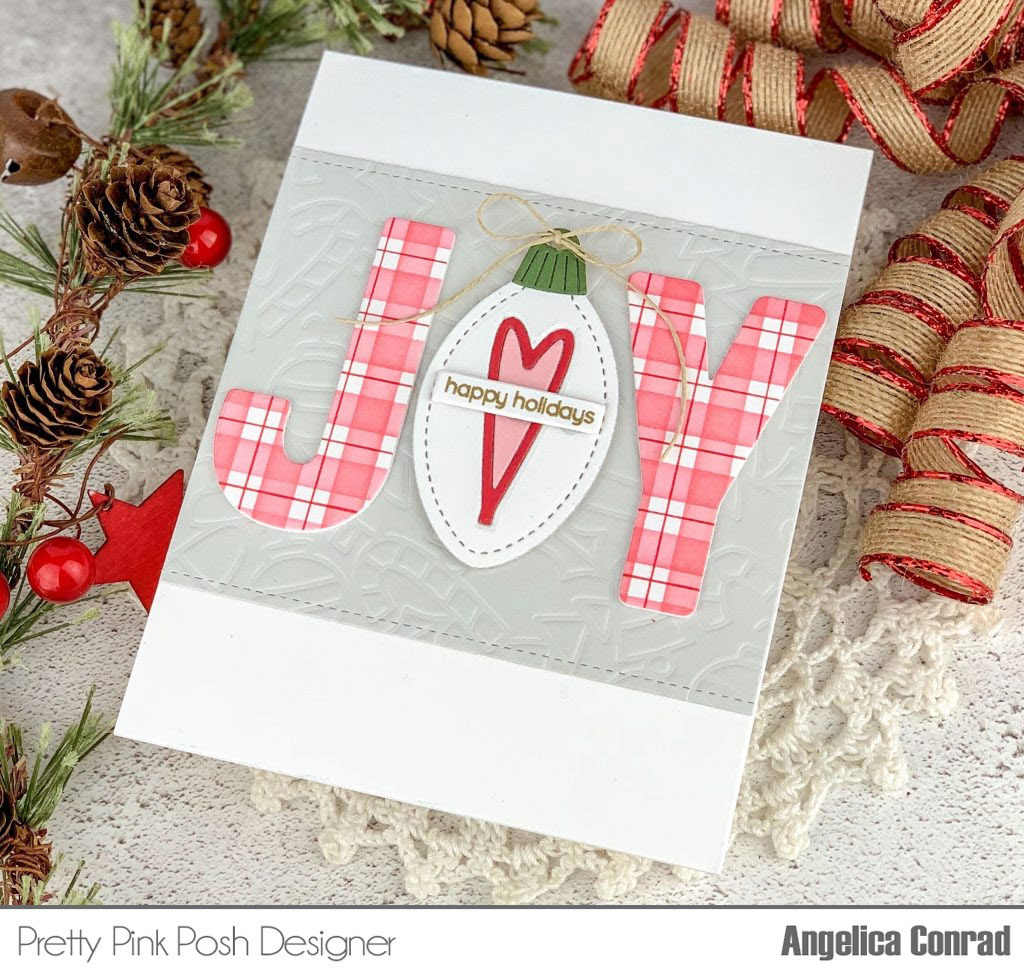
I made a dry-embossed background for my second card, using the Whimsical Christmas stencil.

I die-cut Sea Salt card stock with the Stitched Notes rectangle. I dry-embossed the panel in my die-cut machine, using the stencil and thick rubber mats. I attached the panel to a card base, trimming off the sides with my paper trimmer. I die-cut Joy 2 times from white card stock, glued them together, and added the plaid letters to the top. I replaced the O with a Stitched Ornament, using the heart die included in the Stitched Ornament die set to decorate the ornament. I added a stamped and gold-embossed sentiment from the Winter Friends stamp set. I used my Make Art Stay-Tion grid lines and magnetic ruler to align my letters straight and evenly to the the card base. I glued the letters first, then used foam squares to add the ornament. I added a small twine bow to the ornament to finish the card.
I hope you were inspired by this week of new stencil inspiration. If you haven’t already, be sure to check out the stencil collection and get yours while they are 15% off through November 18, 2019!
Thanks for stopping by!
Dear Angelica
Your card is really pretty i thought at first that it was a patterned paper. Blessings to you , your family Paulina and her family as well.
Fabulous cards!!!
Gorgeous cards!
The plaid looks wonderful. It is very versatile since you can use different colors for all sorts of occasions, or no occasion at all. Nice.