
Stencil Theme Week- Day 3
Hi Pretty Pink Posh Friends! It’s Jeanne here today and I’m helping celebrate Stencil Theme Week with another technique for you to try! I love gold, but honestly don’t use it very often because it’s difficult for me to photograph, but if you got this stunner in your hands you’d be hooked!
All stencils are 15% off during Stencil Theme Week!
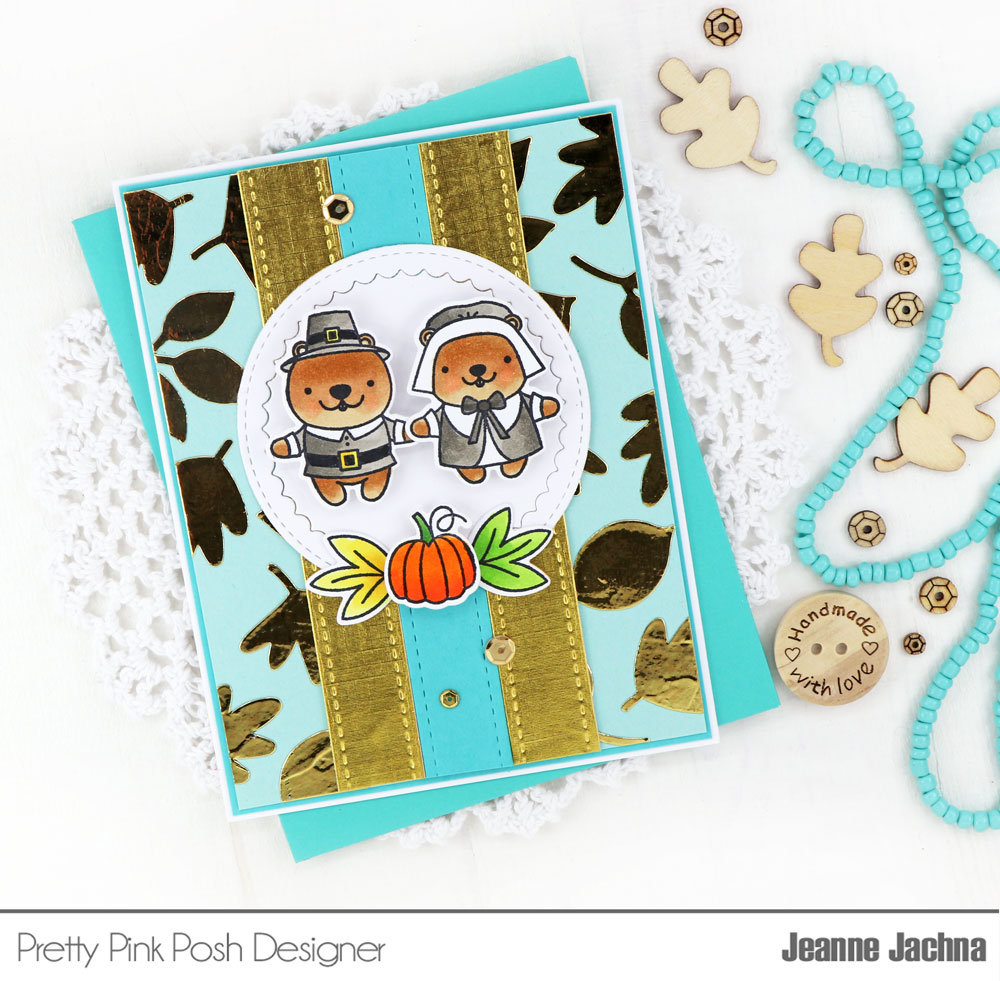
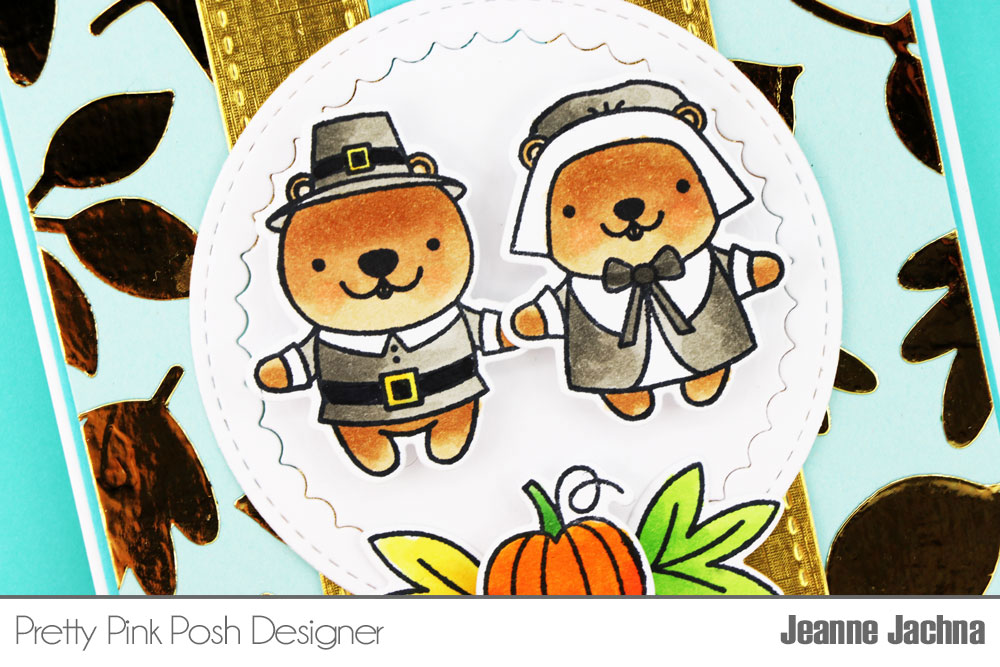
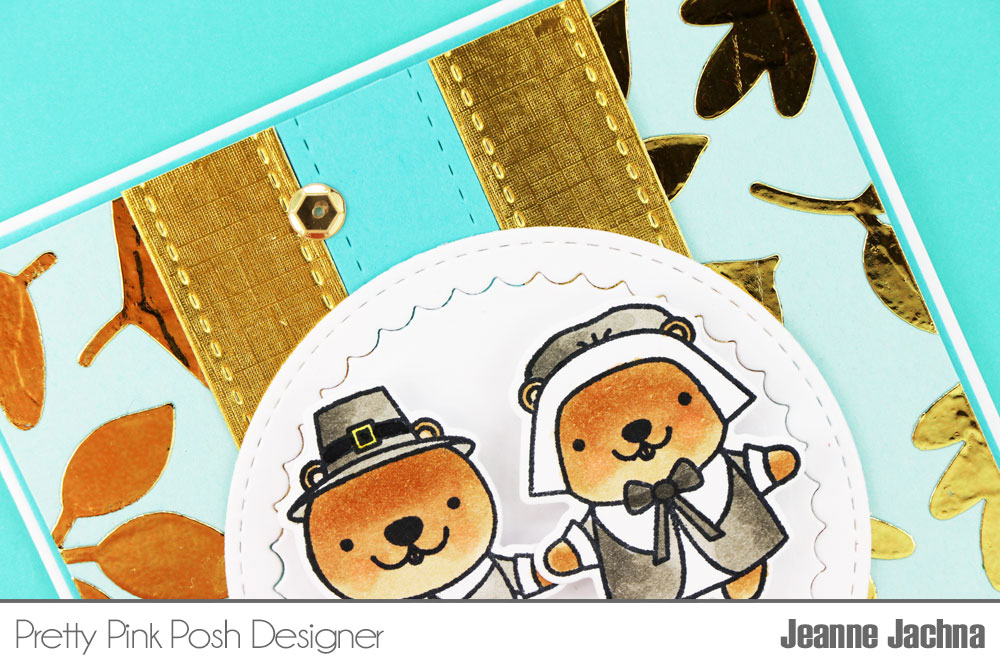
Here’s the card I made for today. It’s got lots to love.. a shiny gold foil stencil, gold foil die cuts and I can’t forget the two cute little bears from the Giving Thanks stamp set.
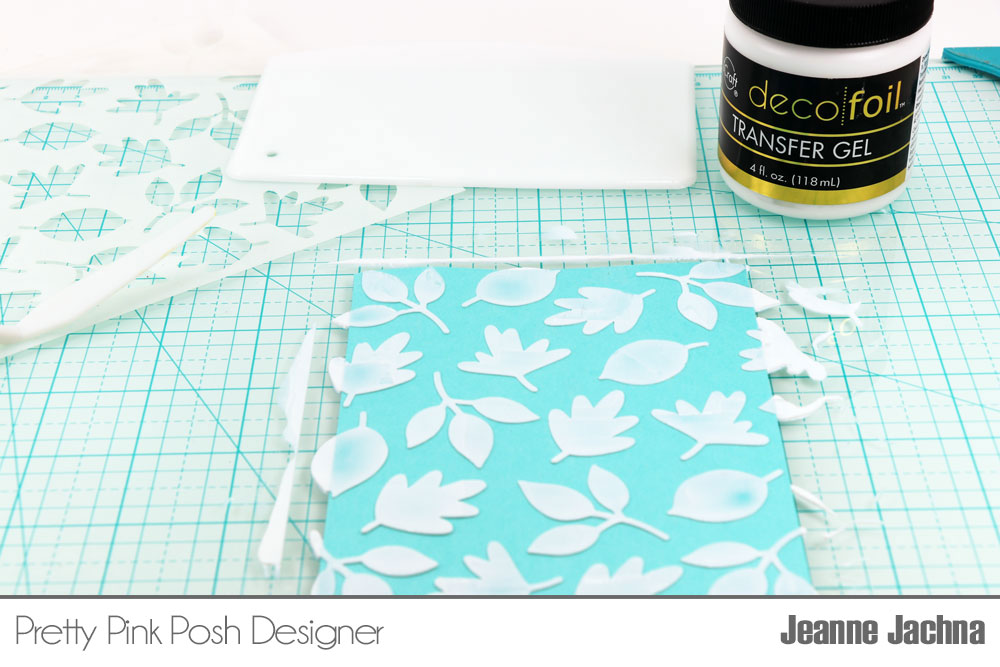
For this technique you’re going to need some Art Deco Transfer Gel, Deco Foil (in any color you like – I used gold), and a laminator. Laminators are very inexpensive – I did a quick check on Amazon and see three that are under $25.
I use Pixie Spray light adhesive spray whenever working with stencils. Whatever technique you use, Pixie Spray will keep your stencil in place while your working and is very easy to reposition and remove.
Use a palate knife, old plastic credit card or scraper to apply the Art Deco Transfer Gel over your stencil (I used the Autumn Leaves stencil). When you have a smooth application remove the stencil and set your cardstock to the side to dry. Immediately wash the stencil for your next application.
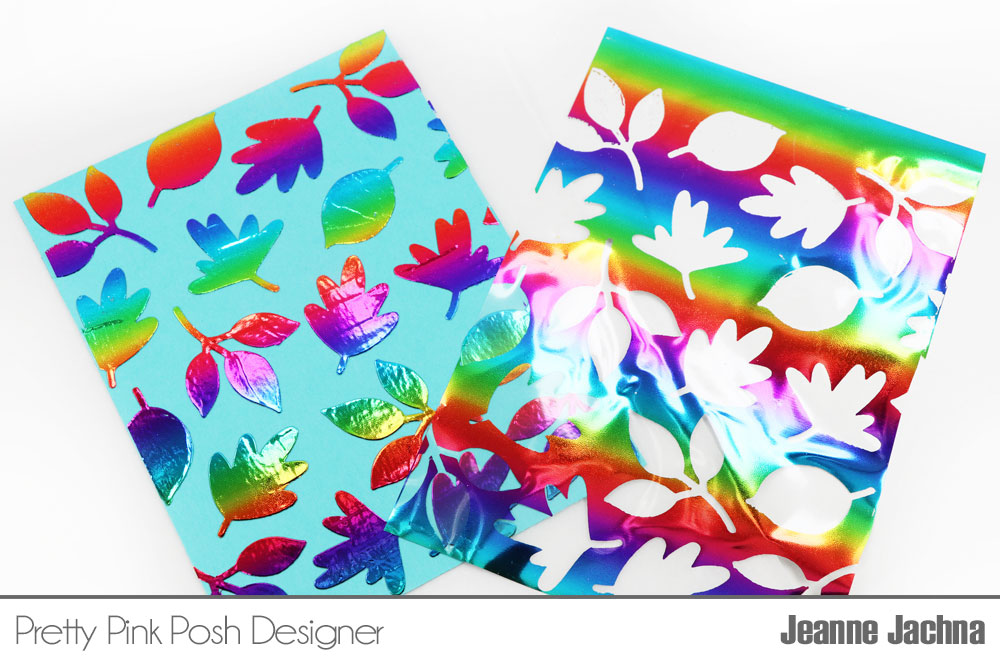
When the Art Deco Gel is clear it’s ready to work with. Simply place your Deco Foil over the cardstock panel, put it inside a folded piece of parchment paper and run it through your laminator. After you run it through your machine you can peel off the foil sheet and you’ll see it stuck wherever the Art Deco Gel was applied.
I wanted the little bears to be the focal point of the design so I layered them inside a small Scallop Circles die cut.
I added a bitty pumpkin and some foliage to add a little color to the design.
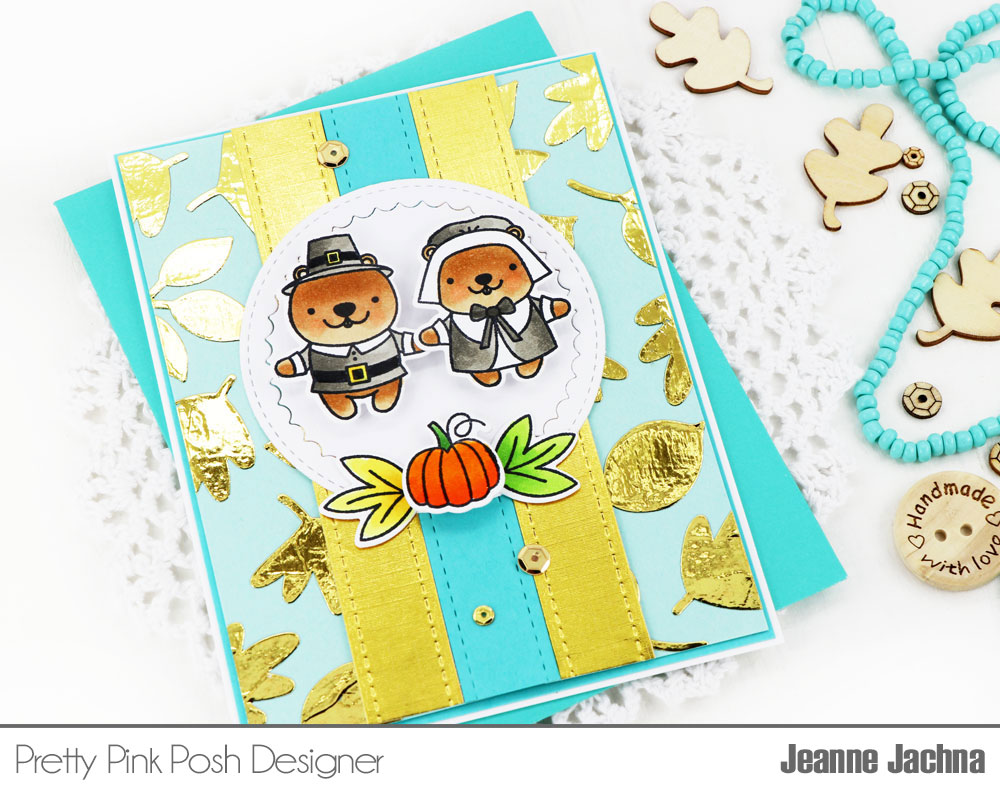
To “ground” the Scallop Circle I added some Stitched Borders 3 behind it. I adhered them together on their reverse side to create a panel and then attached it to the center of the design. I find that this keeps things from looking like they’re floating on the page.
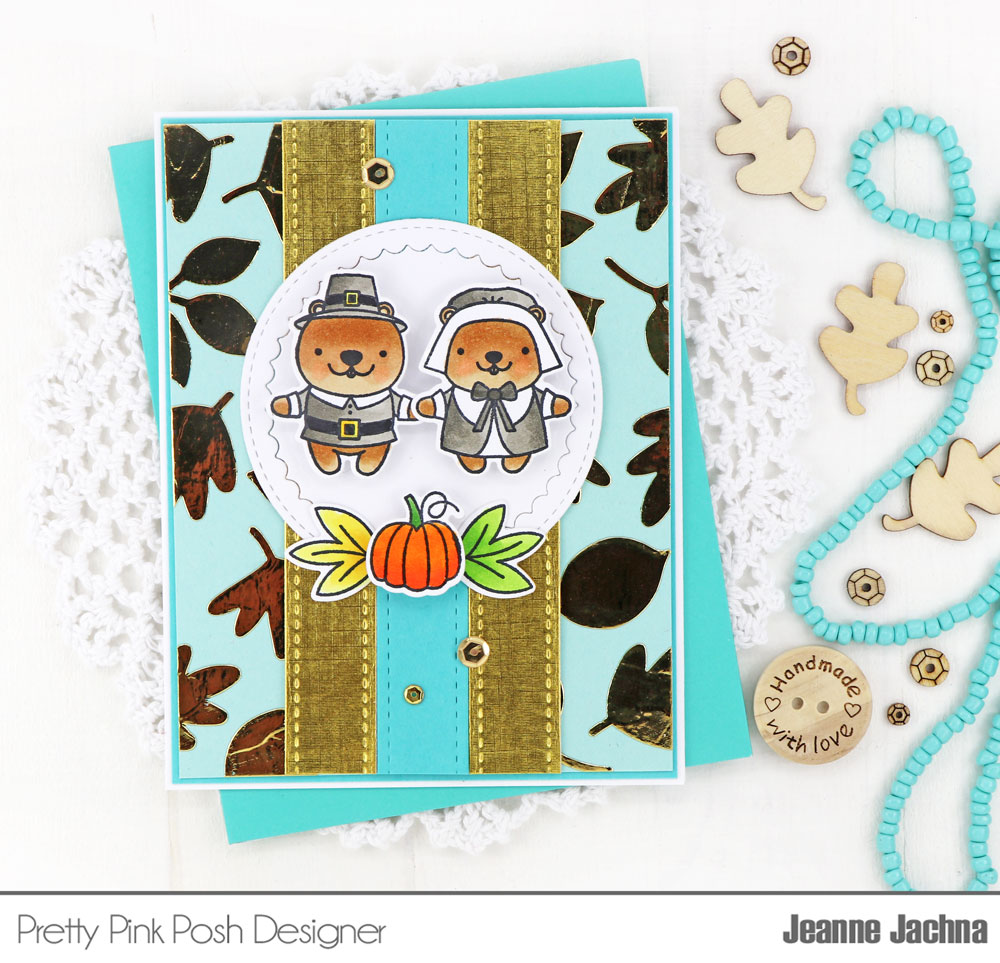
The gold on this design is beautiful! I sure hope you give this technique a try! Stop by tomorrow for another day of stencil inspiration and another technique!
So cute. The pilgrim hears are adorable. I will have to try the foiling. I don’t have a machine so I will try the paste.
SO MUCH FUN with FOIL! Love them!
Super cute! Love the gold!