Month: September 2019

|

Halloween Theme Week- Day 7

Pretty Pink Posh: Halloween Theme Week- Day 7

Hi Friends- Angelica here with a fun Halloween card to share for the last day of Halloween week. All products in the Halloween section on the PPP shop is 15% off through tonight. 

Pretty Pink Posh: Halloween Theme Week- Day 7

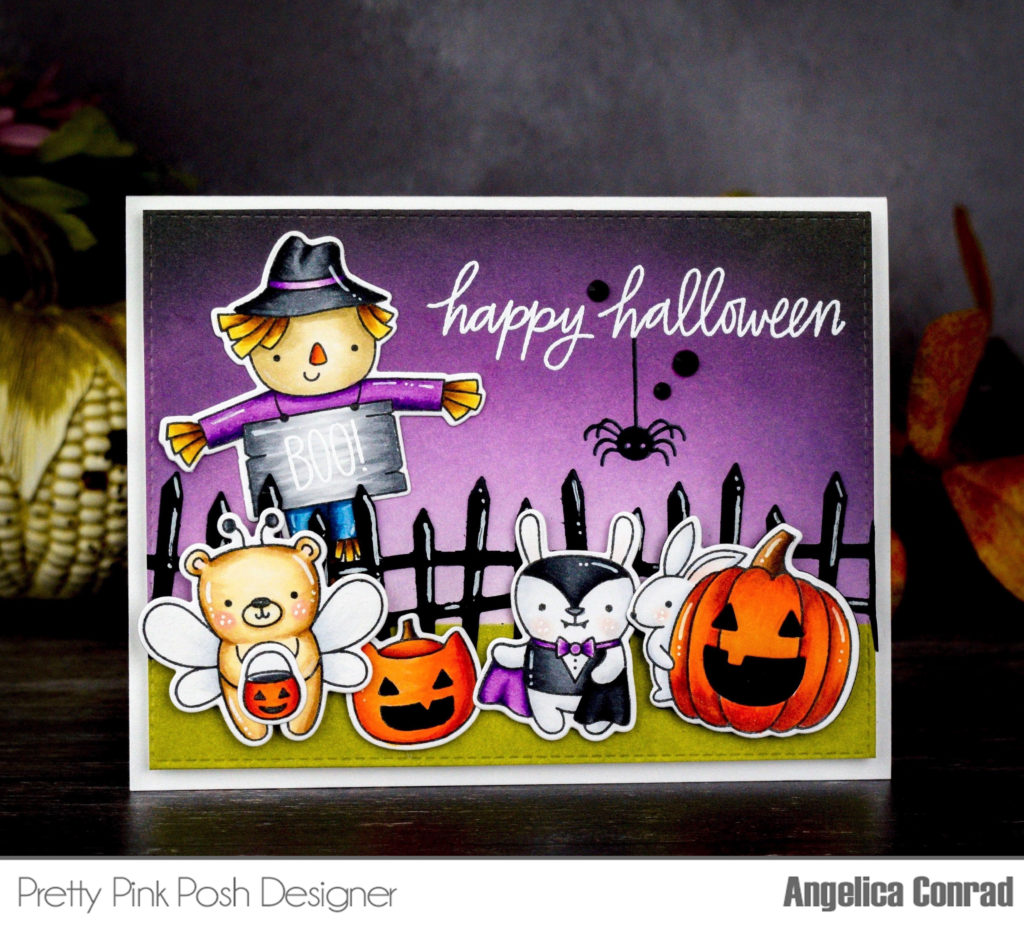
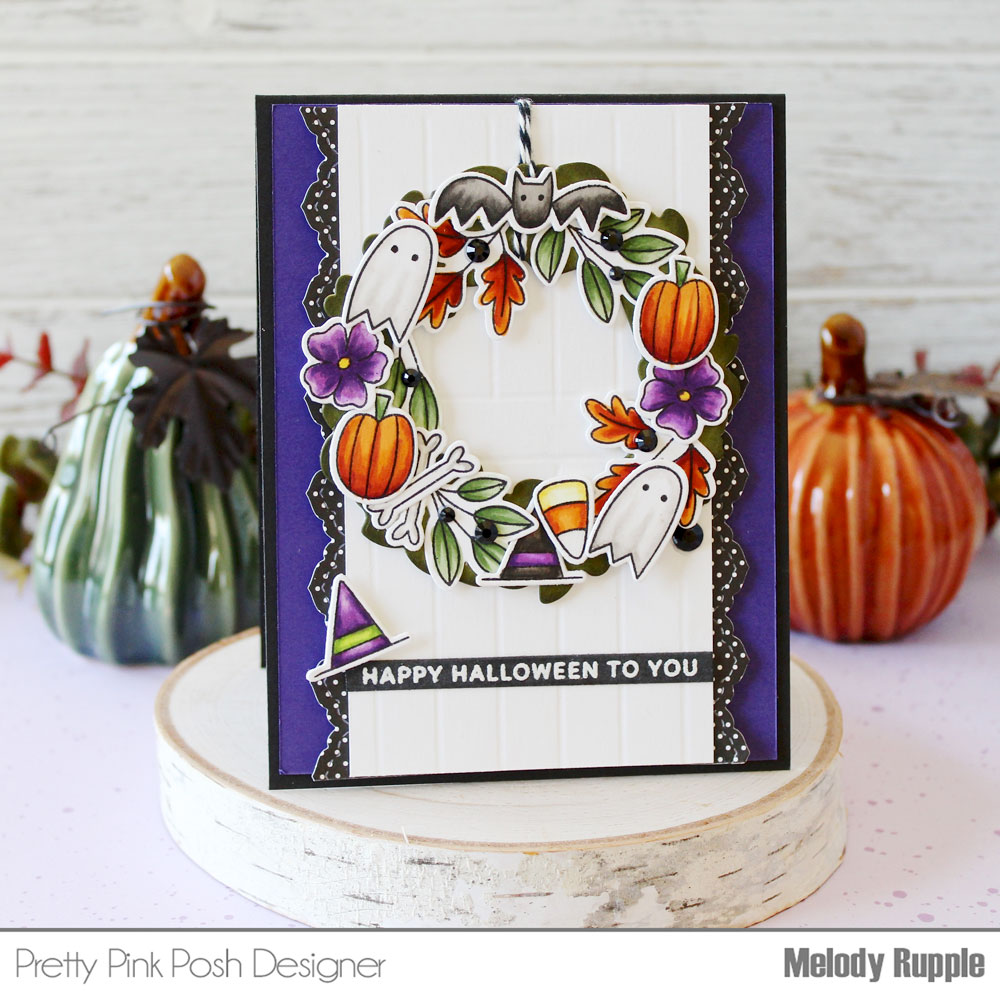
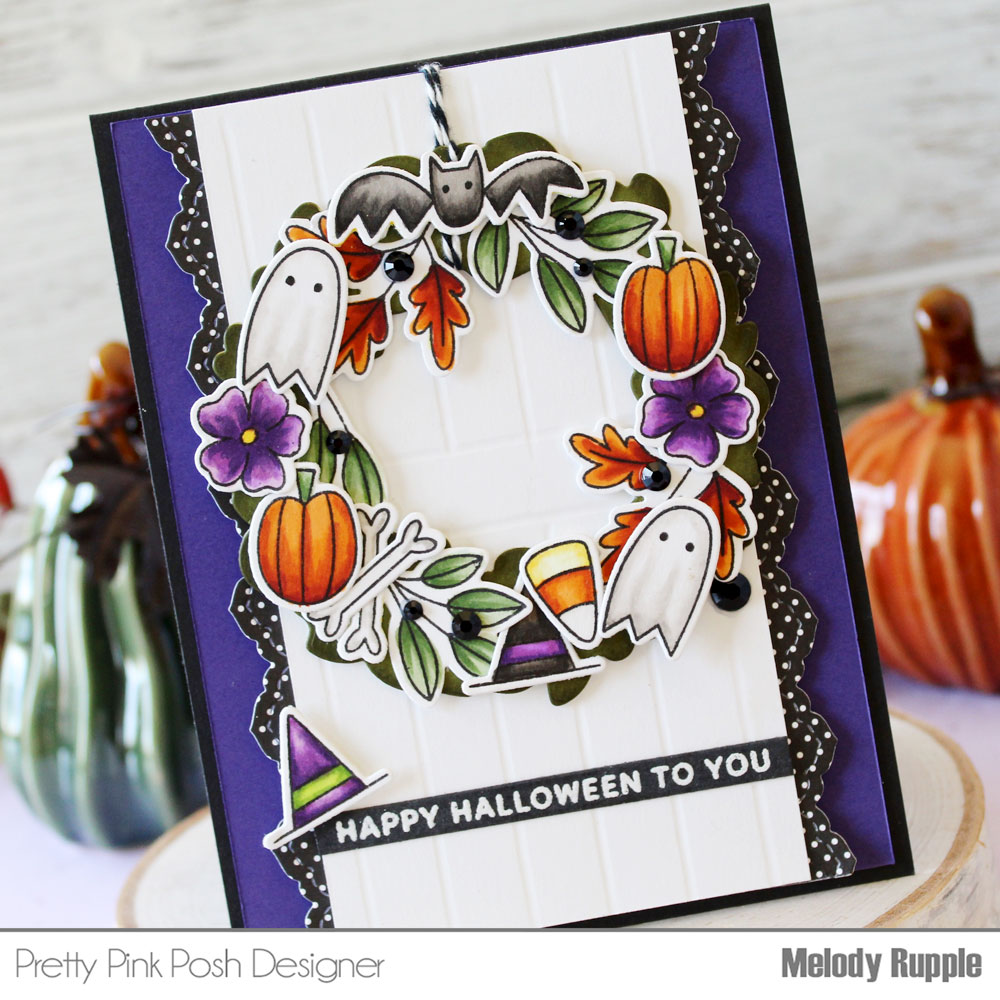
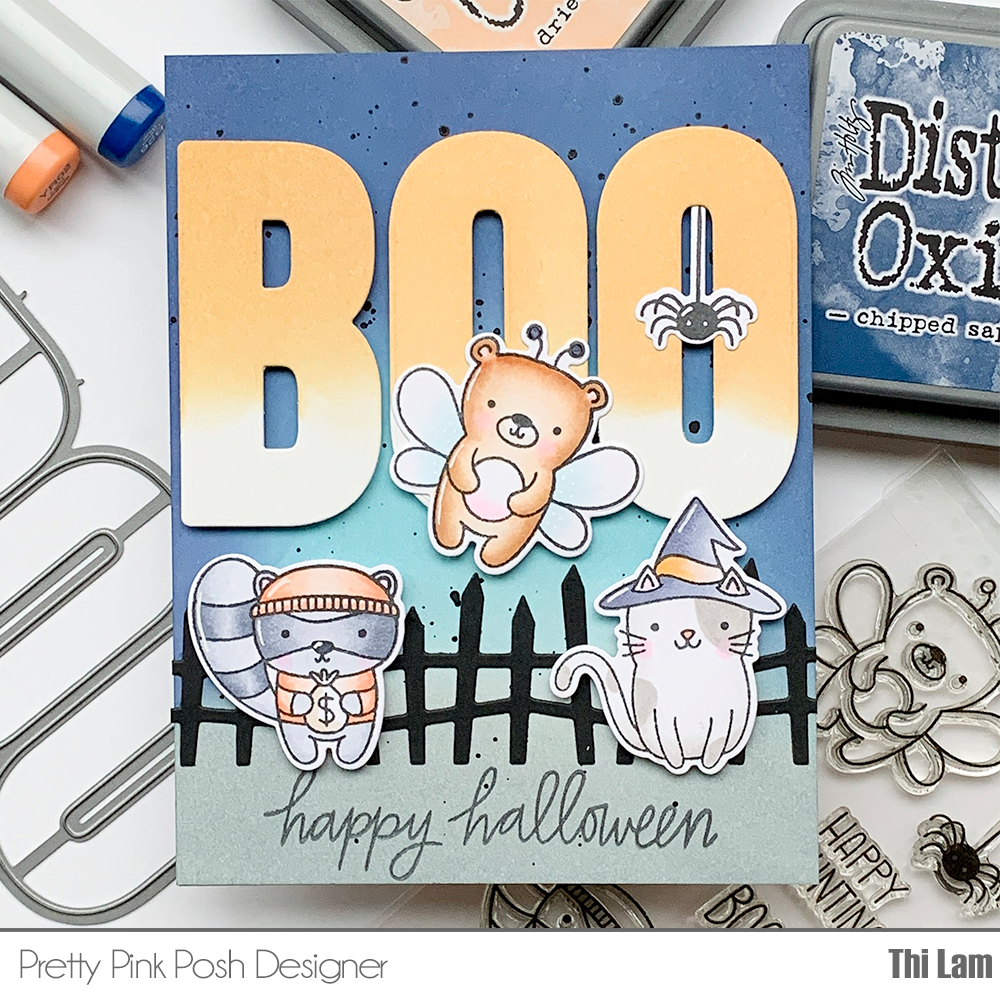
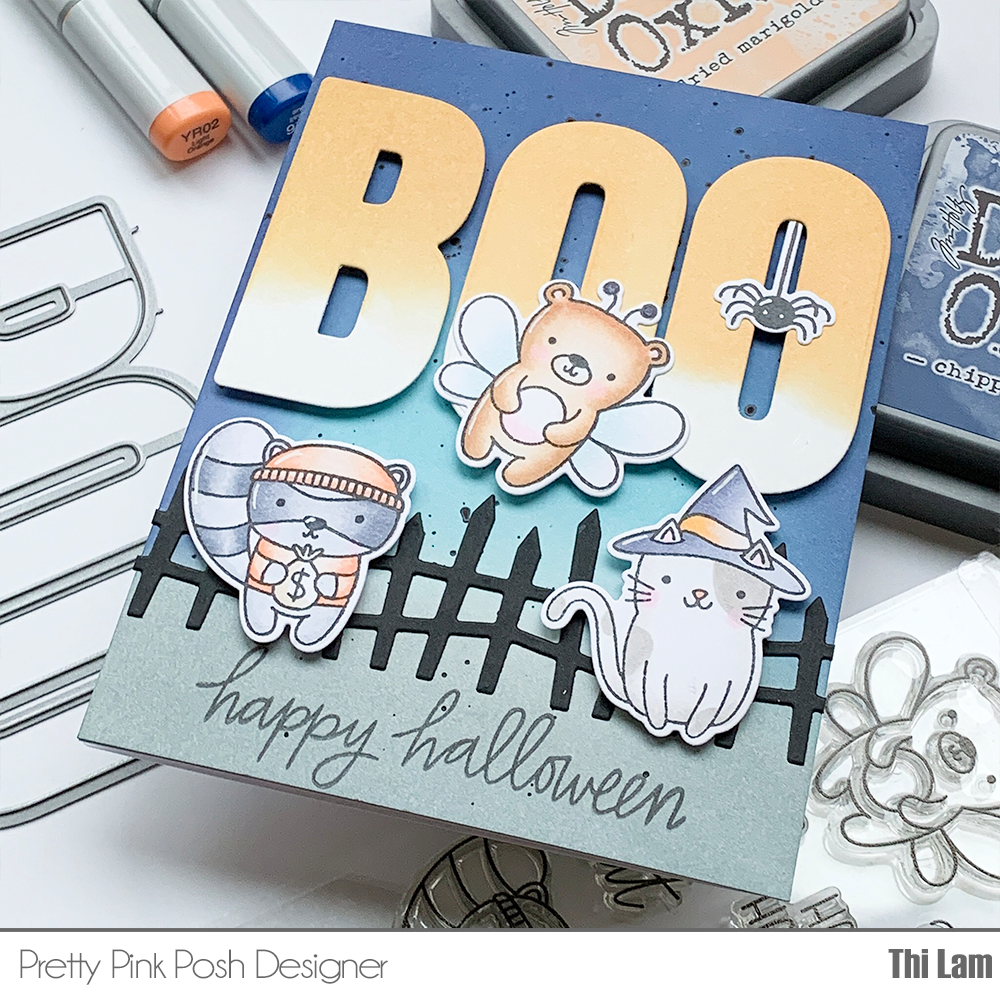
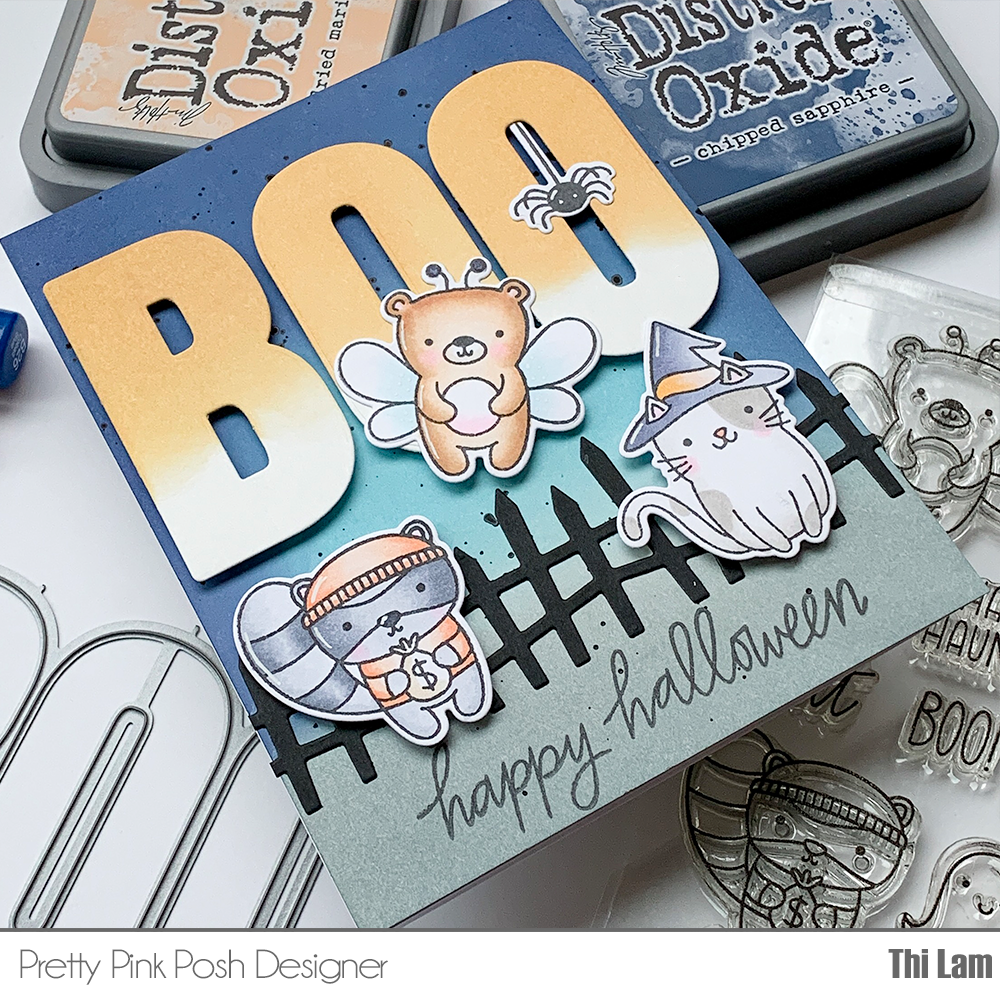
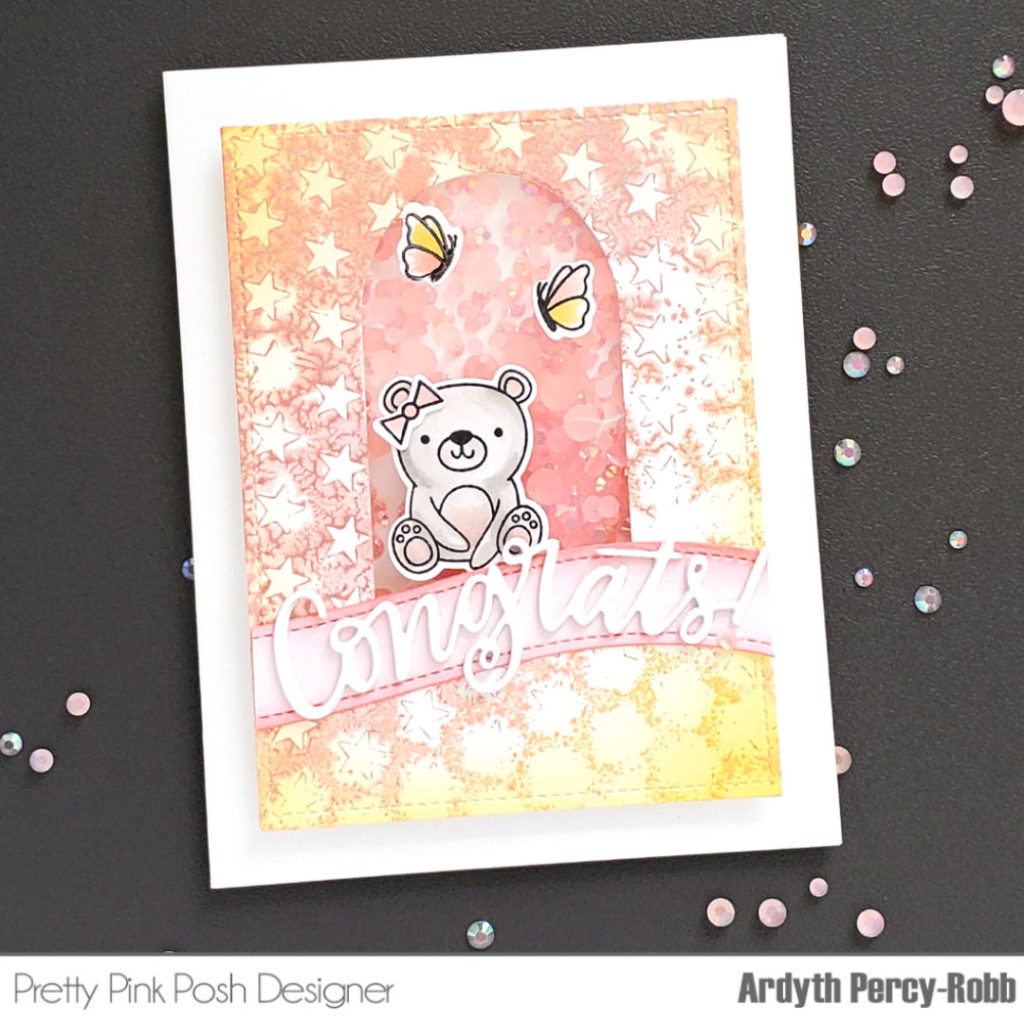
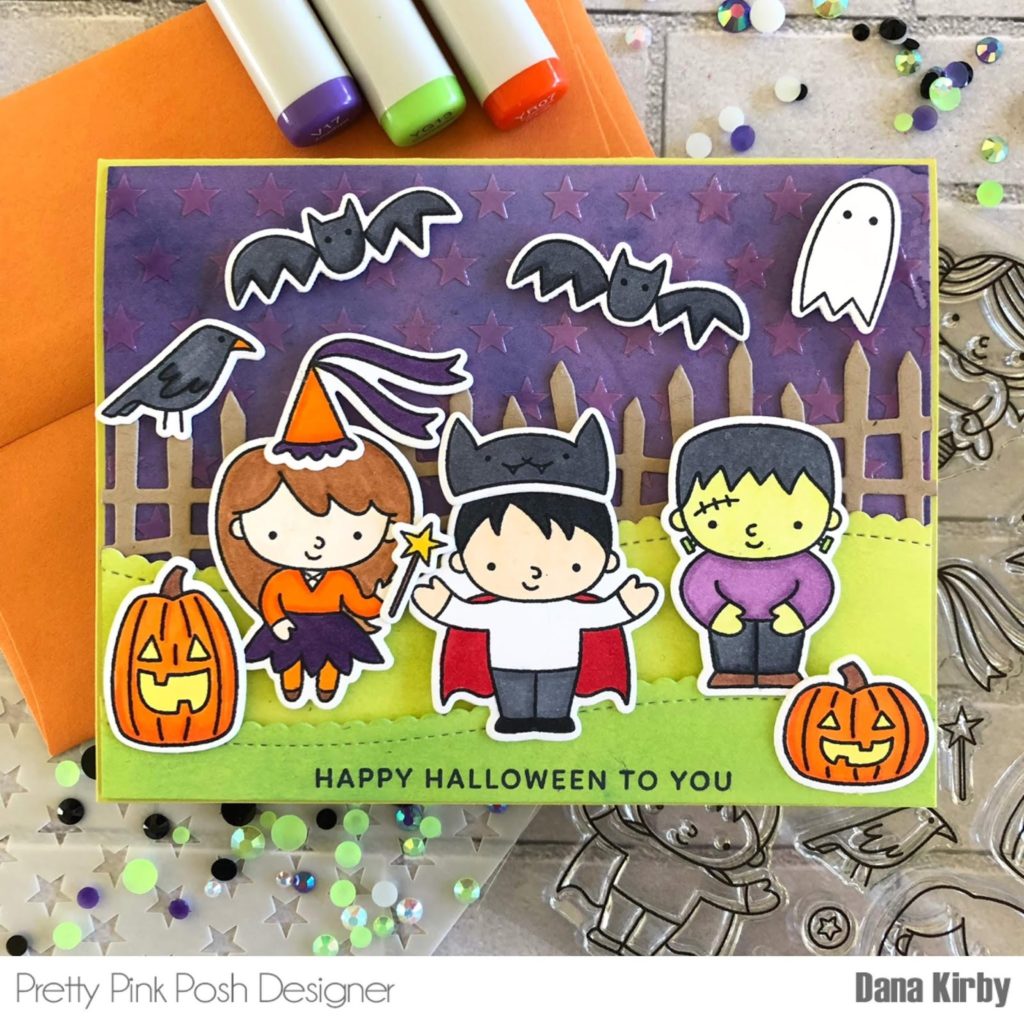
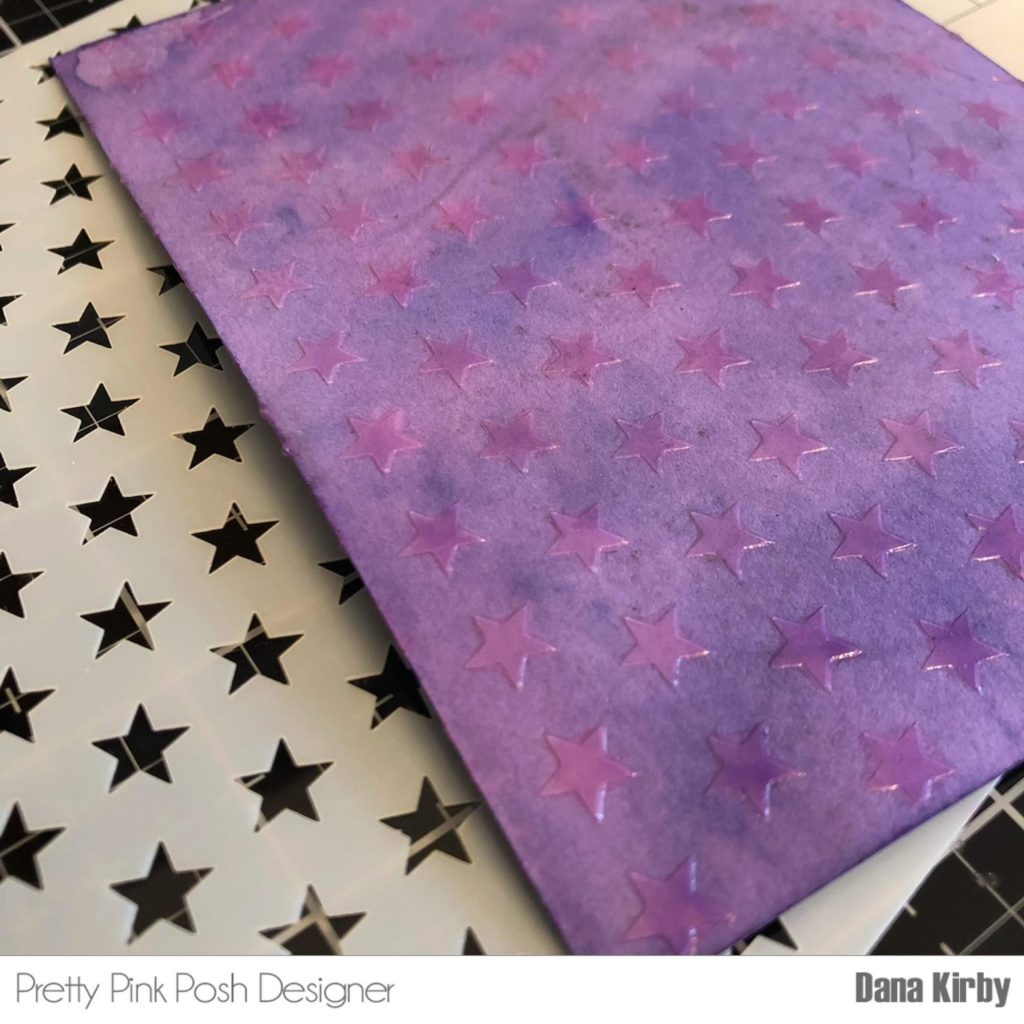
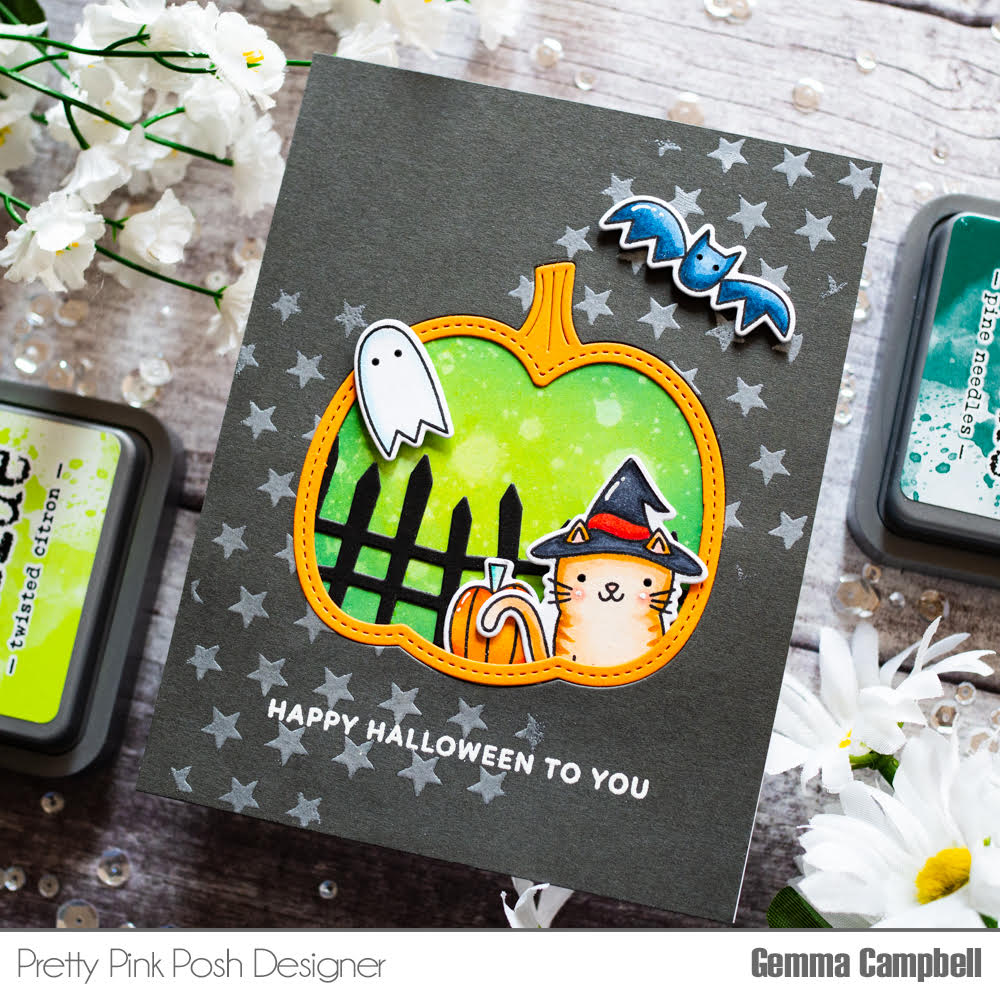
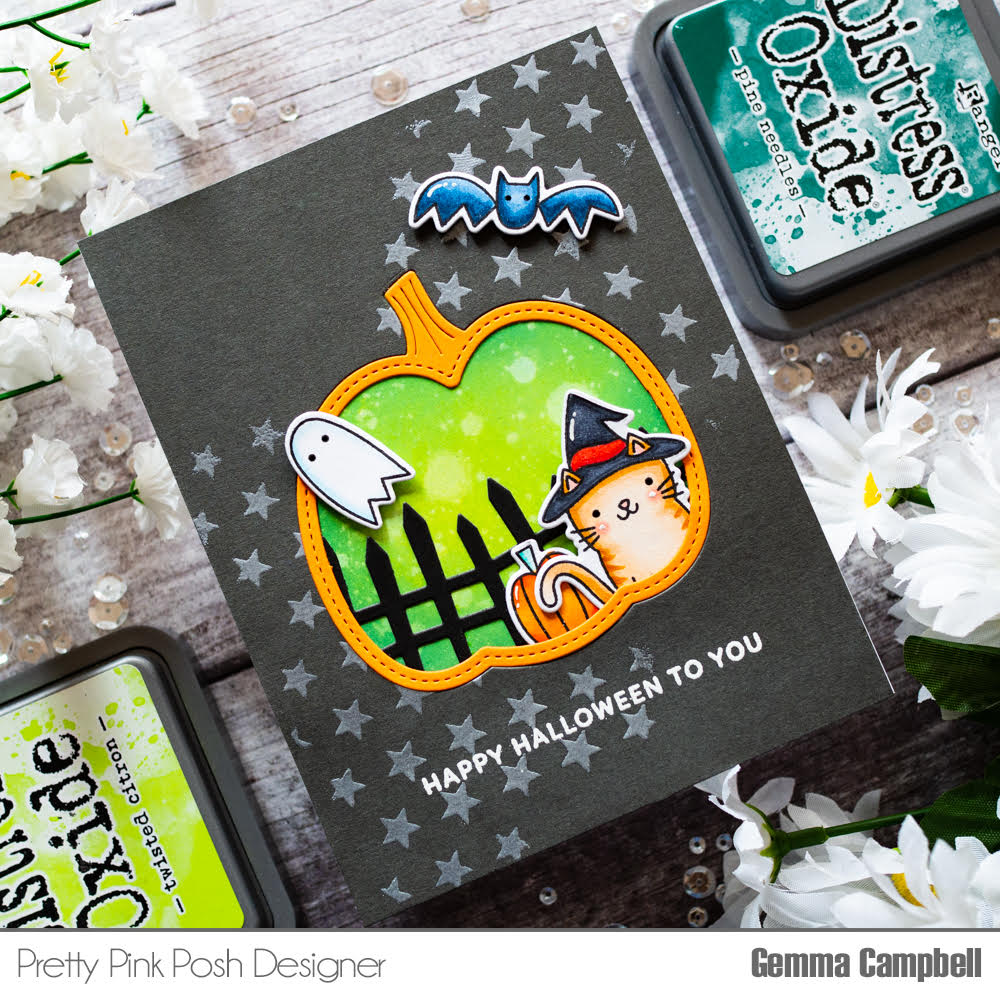
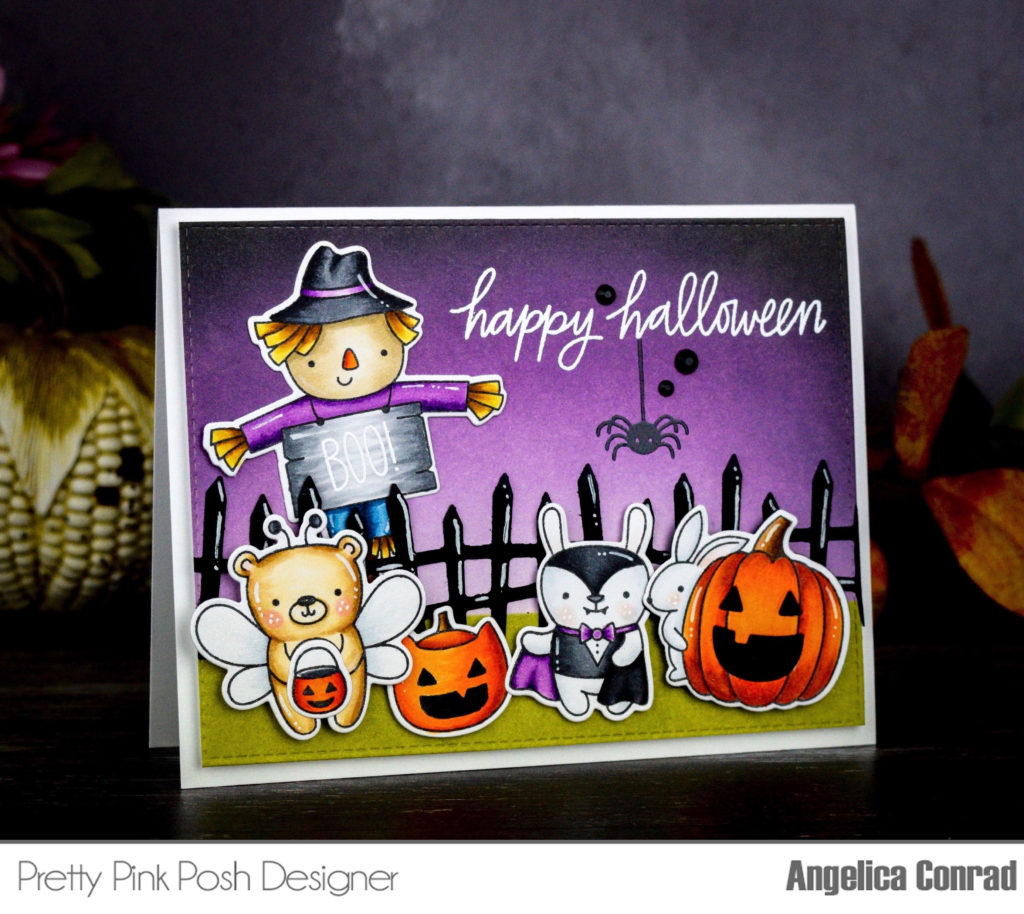
I love using the color purple for Halloween cards, and that’s exactly what I did here. I taped off the bottom of a panel of Bristol Smooth Paper, and blended Milled Lavender, Dusty Concord, and Black Soot Distress Oxide inks for the sky. I flipped the mask around and blended Forest Moss Distress ink for the ground. I trimmed the panel down, then stamped and white heat-embossed a sentiment from Halloween Friends stamp set. I then stamped the spider from the same set in black ink, and heat embossed clear embossing powder to make the spider shine. I attached then panel to a card base with foam adhesive. 

Pretty Pink Posh: Halloween Theme Week- Day 7

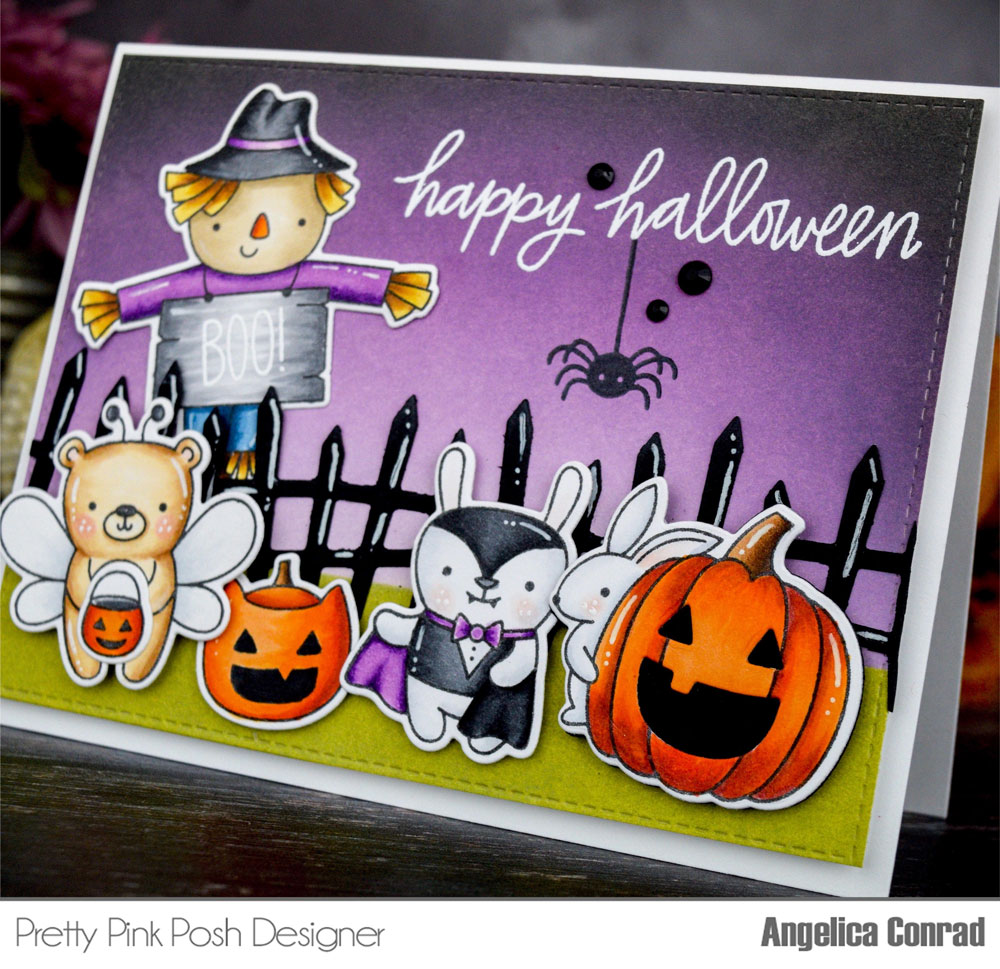
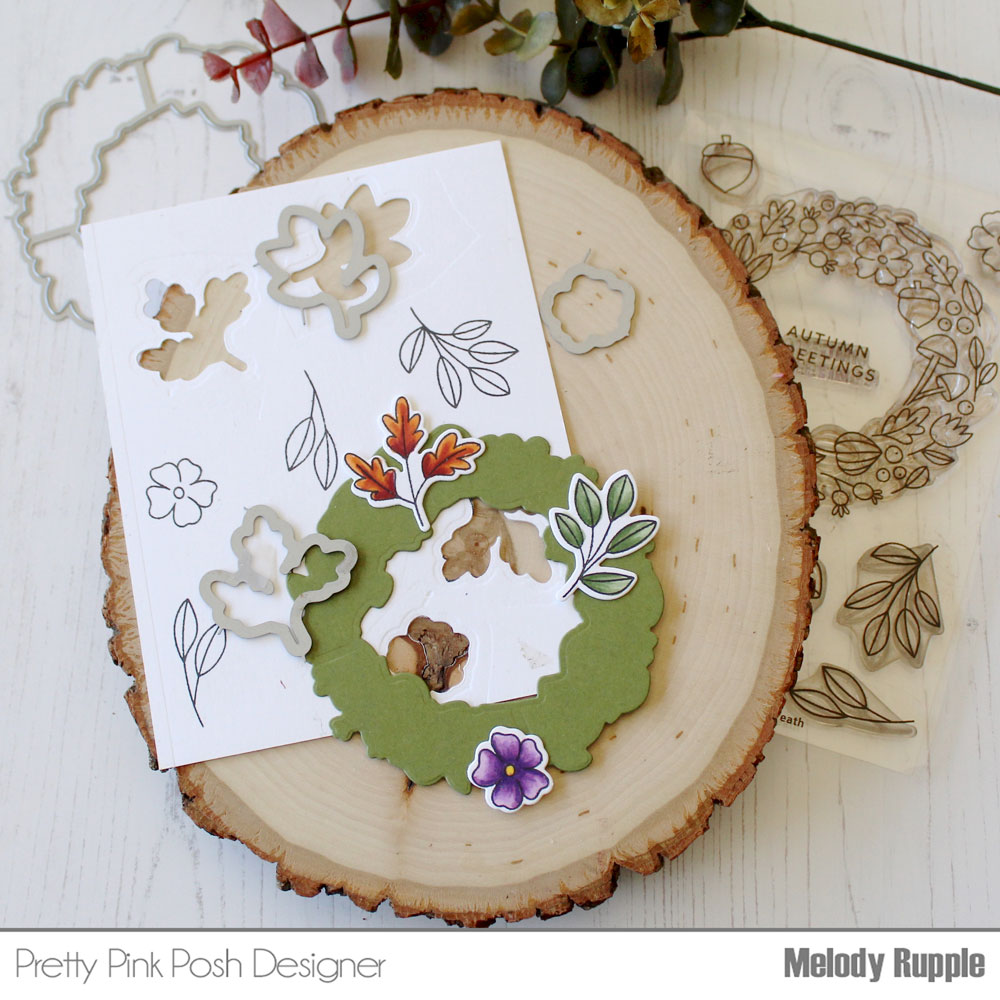
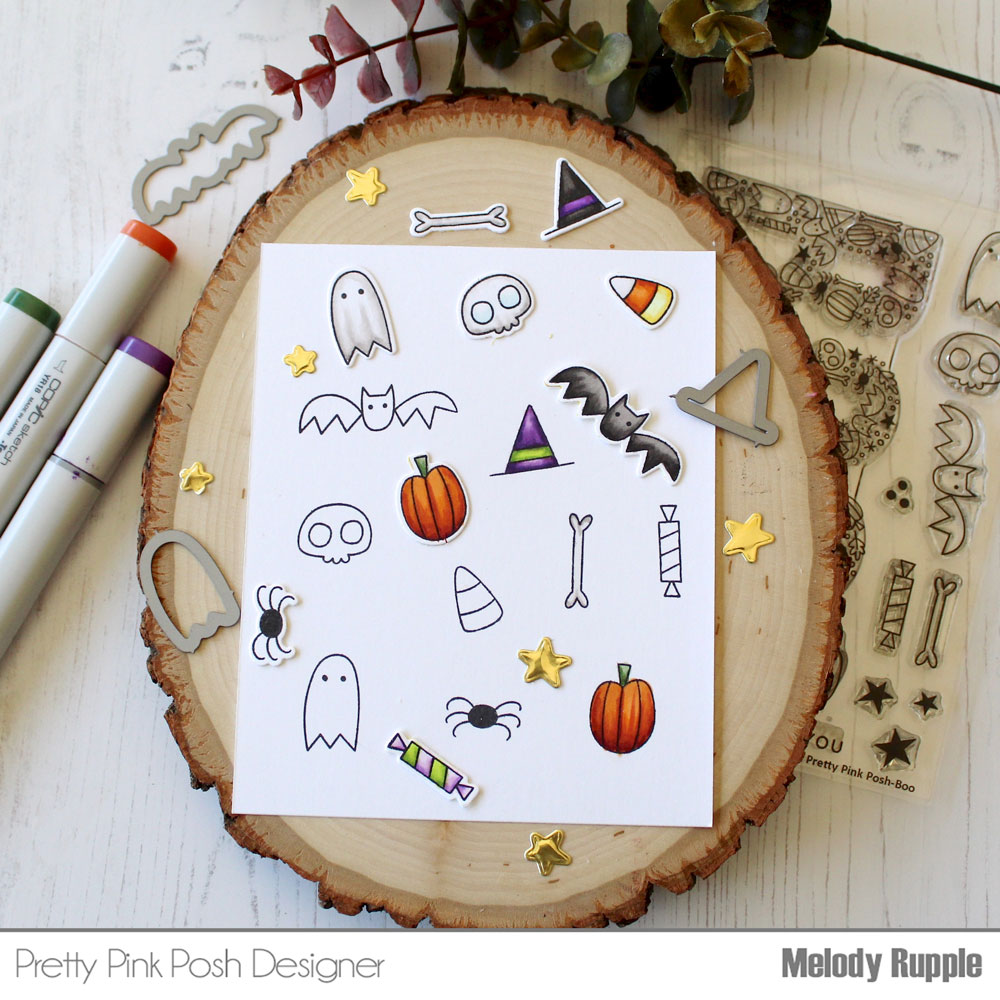
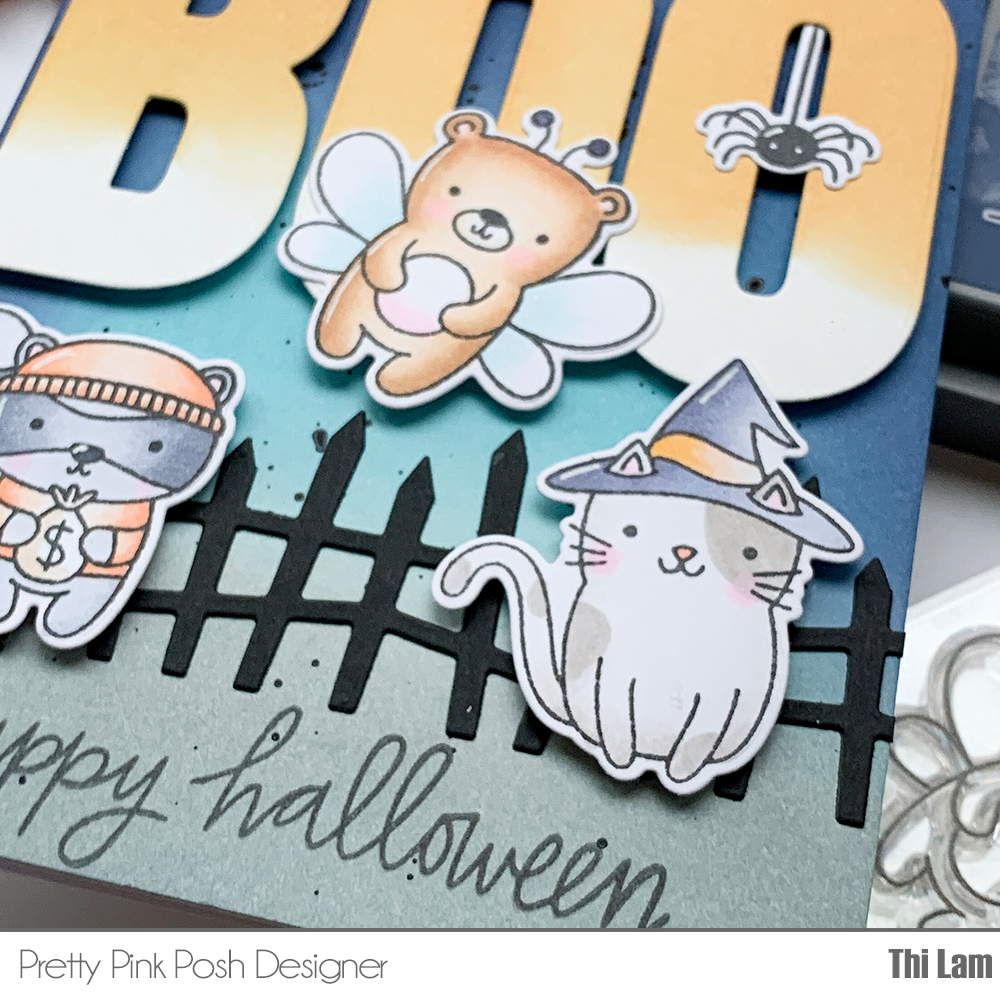
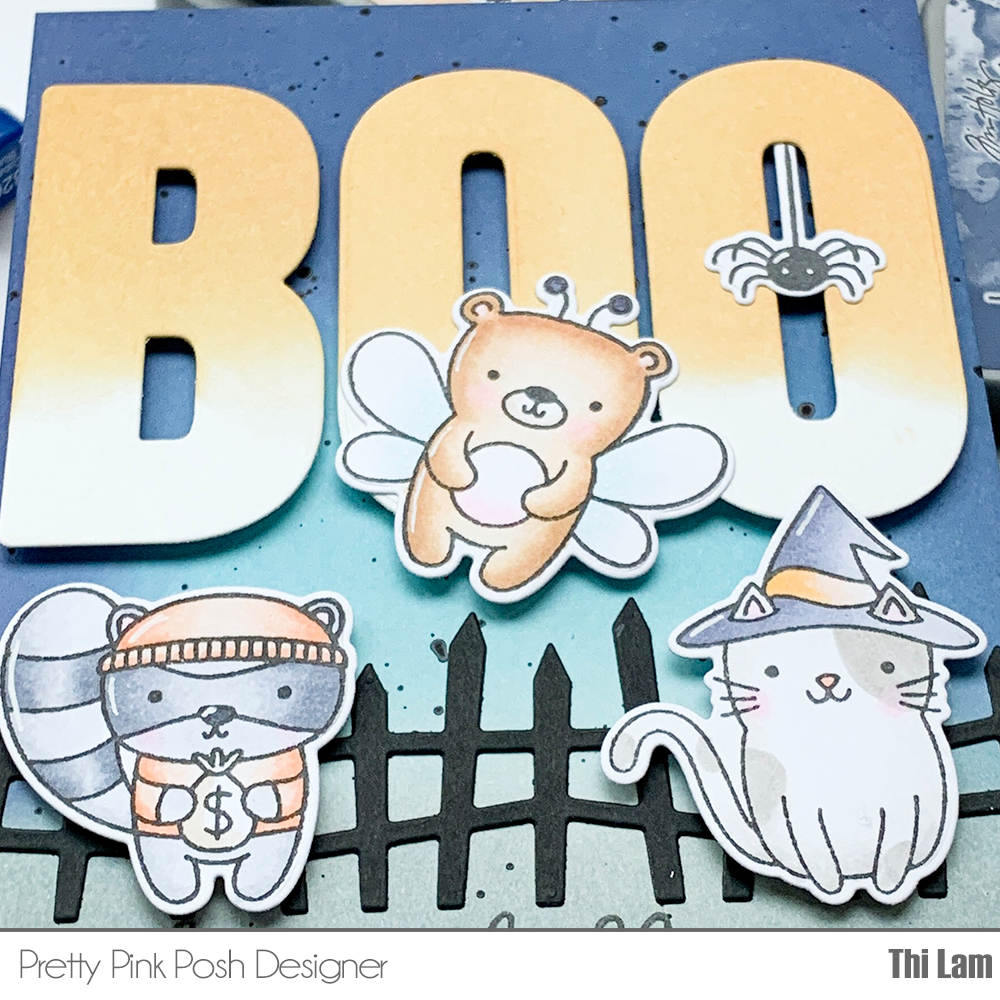
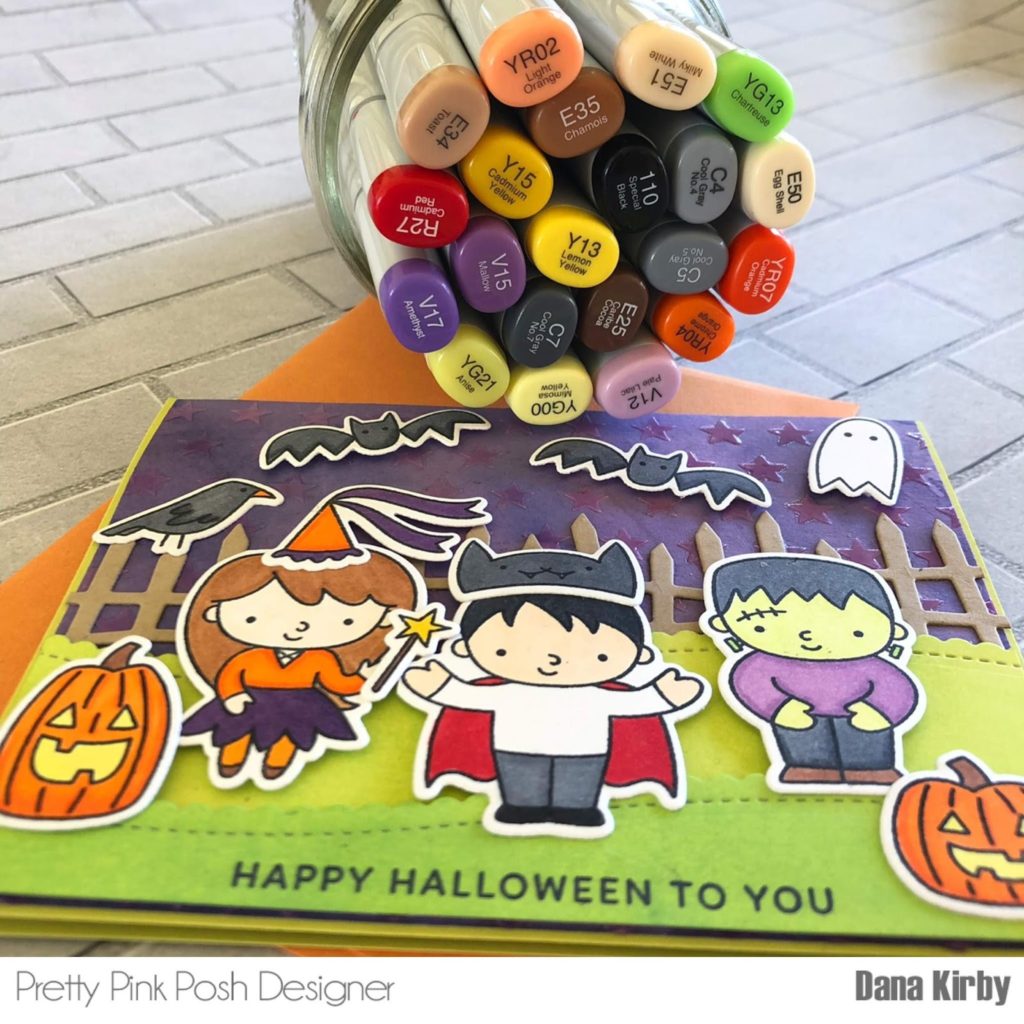
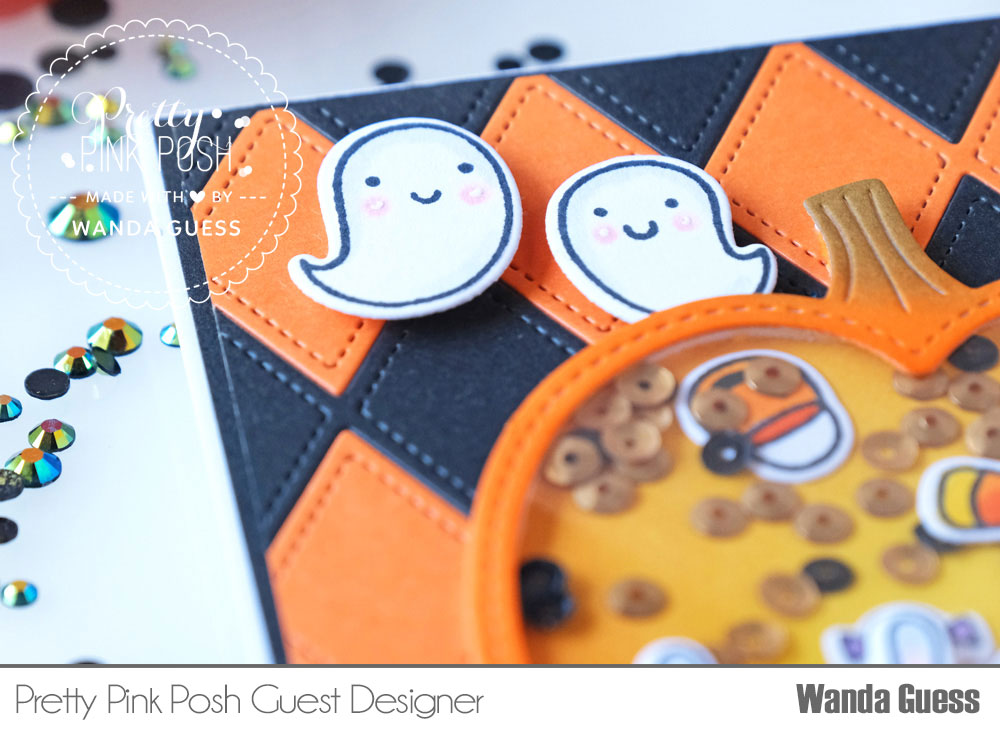
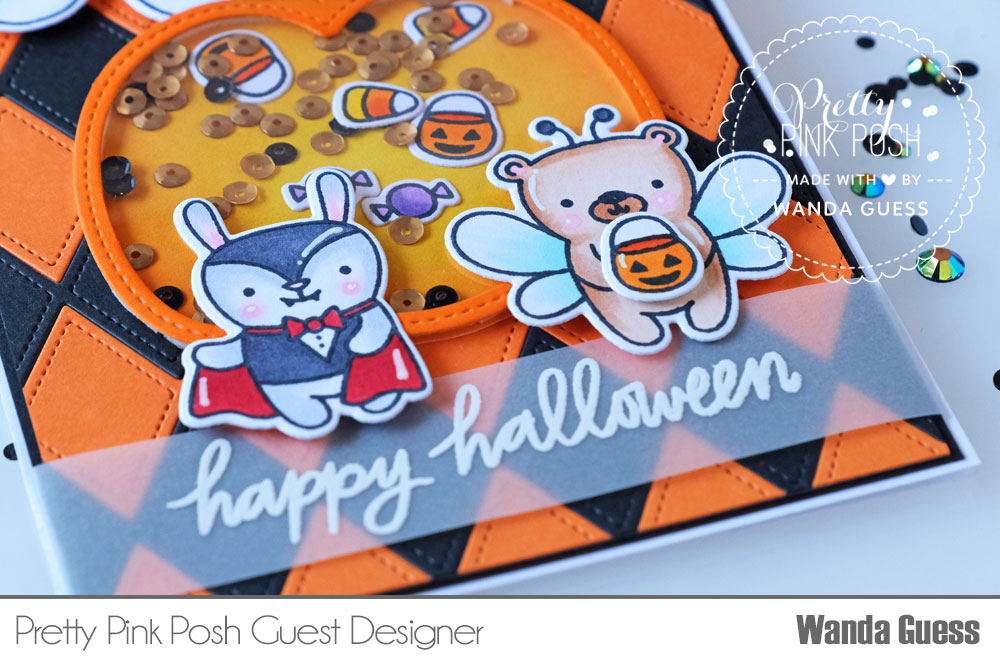
Next, I did a lot of Copic coloring. I pulled stamps from several sets to build my Halloween scene. I started with the little critters in costume and candy bucket from the Halloween Friends stamp set. I used the coordinating dies to die-cut them. The little pumpkin is from the Halloween Pals stamp set, and coordinating die. I stamped BOO! from Halloween Friends onto the Scarecrow’s sign before die-cutting him. My last colored image is the pumpkin and rabbit from the Pumpkin Patch Friends stamp set. I made the pumpkin into a jack-o-latern before die-cutting it. My last die-cut was the Spooky Fence.

Pretty Pink Posh: Halloween Theme Week- Day 7

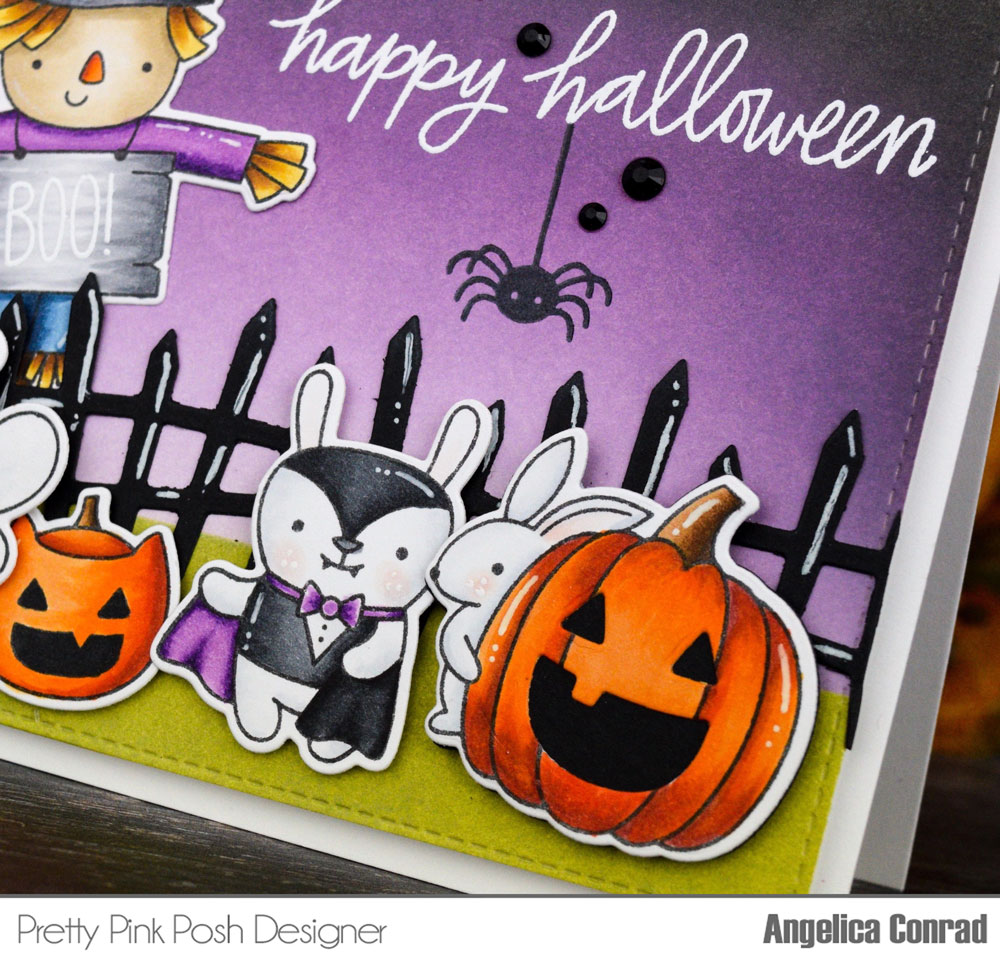
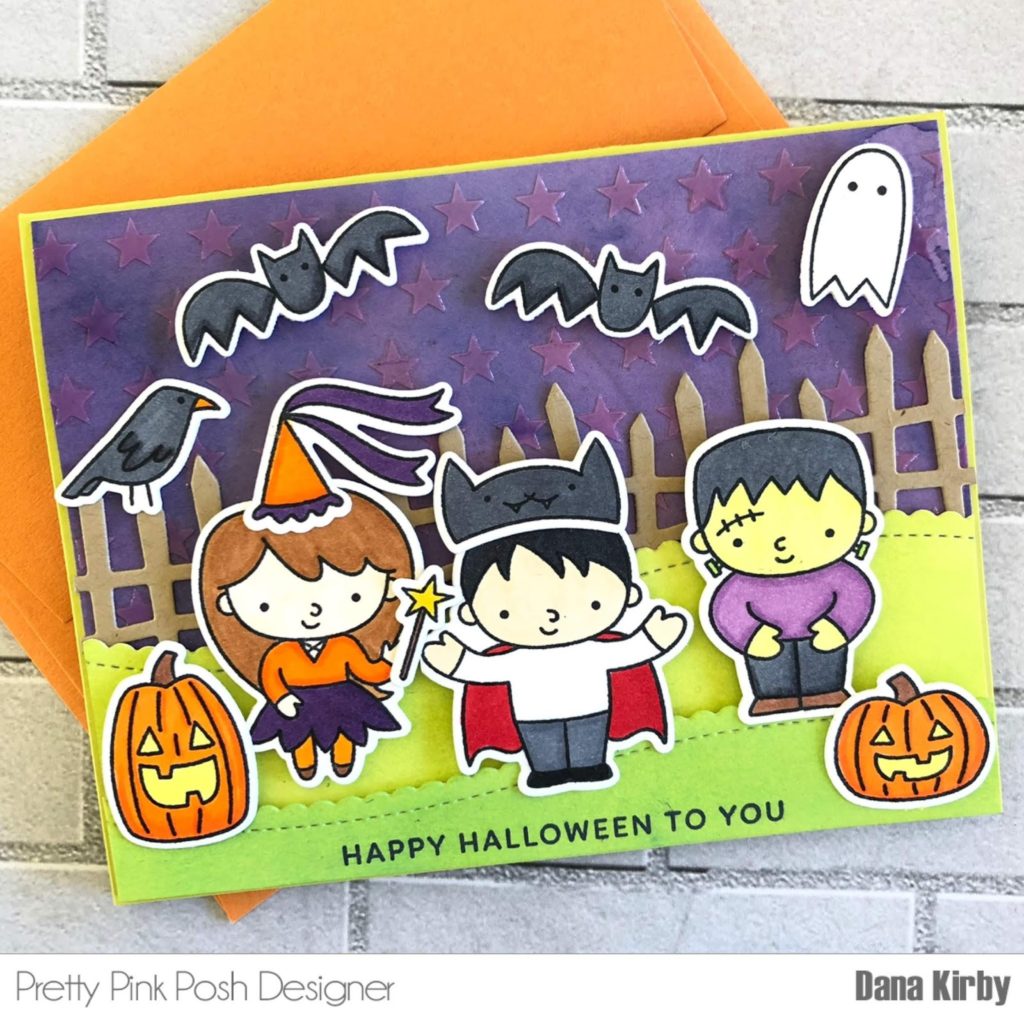
I glued the fence to the card, and added highlights with a white gel pen. I attached each image with thin foam squares. To finish the card, I added three Glossy Black Jewels.

Pretty Pink Posh: Halloween Theme Week- Day 7

I hope I have given you some creative ideas for your next Halloween card! That’s all that I have for today. Thanks for stopping by.

|

Halloween Theme Week- Day 6

Pretty Pink Posh: Halloween Theme Week- Day 6

Hi Everyone! It’s Melody here with you today for Day 6 of Halloween Theme Week. I have a Halloween card to share with you that was created with a friend or older child in mind. Even though my girls are not “kids” anymore, I still like to give them a card and a sweet treat! I used a combination of the Autumn Wreath Stamp Set and Autumn Wreath Coordinating Dies and the Boo Stamp Set and Boo Coordinating Dies to create my Halloween Wreath. 

Pretty Pink Posh: Halloween Theme Week- Day 6

With the Autumn Wreath Stamp Set and Autumn Wreath Coordinating Dies I die cut the wreath to used for the base. Then I stamped and colored a variety of leaves and flowers and die cut with the coordinating dies. 

Pretty Pink Posh: Halloween Theme Week- Day 6

Then with the Boo Stamp Set and Boo Coordinating Dies I stamped and colored all the spooky and festive elements included in the stamp set.  

Pretty Pink Posh: Halloween Theme Week- Day 6

I attached a piece of twine at the top the wreath. Using the die cut wreath as my base I layered on a mixture of the die cut pieces until I was happy with the arrangement and then glued each die cut to the wreath. I added a few Glossy Black Jewels to the wreath for a little bling. The sentiment is included in the Boo Stamp Set. I stamped in Versamark Ink and embossed with white embossing powder. 

Pretty Pink Posh: Halloween Theme Week- Day 6

I cut a white panel of cardstock to give the feel of a door and scored lines on the panel. I added the border one each side of the door with one of the borders in the Stitched Borders I Dies

Thanks for stopping by! Join us tomorrow for the last day of Halloween Theme Week!

|

Pretty Pink Posh 2019 Stamptember Exclusive Set

Pretty Pink Posh: Pretty Pink Posh 2019 Stamptember Exclusive Set

I’m so excited to announce we are releasing an exclusive, limited edition stamp set for STAMPtember® over at Simon Says Stamp! We are so excited about this set and hope that it will inspire you to create wonderful projects! Our new exclusive set is called Topiary.

Pretty Pink Posh: Pretty Pink Posh 2019 Stamptember Exclusive Set

Here are a few of the amazing samples the DT created with this set.

Pretty Pink Posh: Pretty Pink Posh 2019 Stamptember Exclusive Set

I hope that you all love this stamp set and are inspired by the samples the design team created. A giant thank you to Simon Says Stamp for letting us be part of STAMPtember®.

NOTE: these sets are available exclusive through Simon Says Stamp and are limited edition. Hurry and get them while you can!

|

Halloween Theme Week- Day 5

Pretty Pink Posh: Halloween Theme Week- Day 5

Hello! Thi here and today I am thrilled to be sharing a Halloween card I made for Halloween theme week! Pretty Pink Posh makes some of the most unique and fun Halloween products and I was very excited with the chance to mix some old and new products for today’s card.

Pretty Pink Posh: Halloween Theme Week- Day 5

For today’s card, I used the following Pretty Pink Posh products:

I started by coloring all my critters from Halloween Pals & Halloween Friends with Copic markers and die cutting with their coordinating dies. 

Pretty Pink Posh: Halloween Theme Week- Day 5

Next, I cut an A2 size piece of Bristol smooth card stock and ink blended with Distress Oxides in Stormy Sky, Broken China and Chipped Sapphire. I splattered some black ink on top of my ink blended background for interest and spooky fun!

Pretty Pink Posh: Halloween Theme Week- Day 5

I then die cut the Spooky Fence in black card stock and directly glued this onto my background while trimming off the excess with a pair of scissors. To finish my background, I stamped the sentiment from Halloween Friends directly onto the bottom of this background piece.

Pretty Pink Posh: Halloween Theme Week- Day 5

For some fun impact, I die cut the BOO from the coordinating dies for the Boo stamp set (which is gorgeous but I did not use today though) onto Bristol smooth card stock and ink blended with Distress Oxide in Dried Marigold and blended down into white. I felt this gave it some color but kept it subtle since it will be sitting on a dark background.

Pretty Pink Posh: Halloween Theme Week- Day 5

I lined up and popped the BOO and my colored critters onto the card with foam tape for dimension. For a little something-something, I added that cute spider from Halloween Friends into the O in boo and my card is finished!

I hope you liked my Halloween card and as always, thanks for reading! Have an amazing day!

| | |

Ardyth’s 3K YT Subscriber Celebration

Good morning! It’s Ardyth, and I’m excited to be here on the Pretty Pink Posh blog today. In fact, today I’m doubly excited because Paulina agreed to be part of my video hop to celebrate 3000 subscribers on my personal channel, and so Pretty Pink Posh is not only part of the hop, but a very generous sponsor as well, and has contributed 4 $25 Gift Certificates for 4 randomly-chosen comments along the hop. Be sure to head to my personal blog for all the details!

Watch the video above  I  Watch the video in HD on YouTube


I made a sweet baby shaker card with the Stars stencil, Bear Friends stamp set, Stitched Essentials 1, Stacked Edges 1 and Congrats Script.

In fact, the starry background panel on my card started as part of another card. I created this background with the inky, sparkly ‘mess’ that was left on the stencil after I blended ink and spritzed sparkle spray onto it to make the card in the video on my personal channel for today’s hop. 

It was so pretty, that I just couldn’t waste it, so I pressed it down onto a clean panel of white cardstock and the result was a shimmery, peachy background!

I created my shaker window with a tag die from Stitched Essentials 1 but I altered the shape and size a bit by covering the fish-tail bottom with my sentiment panel.

The sentiment was created with the Congrats Script die. This script font means that even after I stacked 3 of them together, the die cut was still flexible enough to be made to perfectly fit the curve of the banner. I filled the shaker with Pink Blush jewels – the perfect shade of pink, plus the iridescence picked up some of the yellow and peach tones from the background. 

Finally, I added the baby bear and a butterfly to the front of the card. I did some mirror stamping to create a second butterfly facing the first.

From its humble beginnings as ‘leftovers’ from another card, I would say this starry background has become a main player in this adorable baby card. I hope you agree!

Be sure to hop along (next video HERE) for lots more fun video inspiration using a variety of products AND a chance to win some prizes!

|

Halloween Theme Week- Day 4

Pretty Pink Posh: Halloween Theme Week- Day 4

Hi friends, it’s Dana! It is Halloween Theme Week at Pretty Pink Posh and I am excited to be sharing a fun Halloween card with you all. This week the design team will be sharing lots of projects that use many favorite Halloween products from the Pretty Pink Posh online shop. For my card, I used the Trick or Treat Friends set along with many other favorite supplies.

As an added bonus all the Halloween Products will be 15% during Halloween Theme Week. 

Pretty Pink Posh: Halloween Theme Week- Day 4

For my  card, I started by creating my background. I added Color Burst powders (Orchid, Merlot and Indigo) to a piece of watercolor paper along with some water to create my night sky. Once that was dry I used the Stars Stencil along with some Transparent Gloss Texture Paste. I love how the stars have a subtle but shiny texture.

Pretty Pink Posh: Halloween Theme Week- Day 4

Next, I stamped my images from the Trick or Treat Friends Stamp Set and the Boo Stamp Set with a Copic friendly black ink. I colored my images with Copic markers and used the coordinating dies to cut them out. 

Pretty Pink Posh: Halloween Theme Week- Day 4

I then ink blended Distress Oxide Ink in Twisted Citron and Mowed Lawn to a piece of smooth cardstock. I used the Scallop Borders 1 Die Set to create my ground/grass, and the Spooky Fence die to create the fun fence line in my background. Next, I stamped my sentiment from the Boo Stamp Set onto the bottom section of my grass.

Pretty Pink Posh: Halloween Theme Week- Day 4

To finish my card, I attached my grass along with my fence line to my sky background. I then added all of my fun Halloween images to my card front with foam adhesive. These little trick or treaters, all dressed for Halloween, sure do make me smile!

I hope you enjoyed my card today! Join us tomorrow for another day of inspiration.

Dana

|

Halloween Theme Week- Day 3

Pretty Pink Posh: Halloween Theme Week- Day 3

Hello, friends! Welcome to day 3 of the Halloween Theme Week!  This is Caly and I’m here to share a fun Halloween card made using new and old products.  The Trick or Treat Friends set is a classic that I go to every year and the new BOO set is so much fun, I had to pair them together.

Need to stock up on your Halloween items? All this week, save 15% on items in our Halloween section!

Pretty Pink Posh: Halloween Theme Week- Day 3

Copic colors used:

Girl:  R20, C2, C5, C8, E30, E31, E37, V01, V12, V17

Boy:  G21, G24, C2, C5, C8

Ghost:  C0, C2, R20

Pumpkins:  Y18, YR16

Broom:  E31, E35, E37, R14, R29

Bat:  C2, C5, C8

I started by creating my background.  I ink-blended with Cracked Pistachio, blending towards the center, then darkened it with Peacock Feathers, then a bit of Black Soot Distress Oxide Inks.  After blending, I splattered the panel with water, white and black ink.  

Pretty Pink Posh: Halloween Theme Week- Day 3

I set the panel aside to dry before cutting the word BOO out of it.  I stamped the BOO stamp on black cardstock and embossed it with white embossing powder then added foam adhesive to the top panel before adhering it over the black embossed panel.

Pretty Pink Posh: Halloween Theme Week- Day 3

I colored the images from both stamp sets using Copic markers  and after die-cutting them, I arranged them all over with the two Trick or Treat Friends popping out of the word.  

The Pretty Pink Posh stamp sets are so easy to mix and match. I hope I inspired you to try mixing your stamp sets!

|

Halloween Theme Week- Day 2

Pretty Pink Posh: Halloween Theme Week- Day 2

Hello and welcome to day 2 of Halloween Theme Week. Wanda here and today I am sharing a card featuring several PPP products.

All this week, save 15% on items in our Halloween section!

Pretty Pink Posh: Halloween Theme Week- Day 2

Begin with a white A2 card base. Cut a layer of black cardstock to go on top of the white card base. Using the diamond shape from the Stacked Edges 2 die set, cut several strips of black and orange diamonds.Glue the diamond shapes onto a thin piece of cardstock, carefully matching the edges.

Pretty Pink Posh: Halloween Theme Week- Day 2

Trim this piece with the diamonds and layer onto the black cardstock. Set this part aside.Use a strip of vellum and heat emboss the Happy Halloween Sentiment (from Halloween Friends) in white embossing powder.Wrap this vellum strip around the layers of black cardstock and diamonds.

Pretty Pink Posh: Halloween Theme Week- Day 2

Attach this entire piece to the front of the white card base. Create the pumpkin shaker piece by die cutting the Grateful Shaker Die out of white cardstock. With a pair of scissors, trim the words from the center of the pumpkin.

Pretty Pink Posh: Halloween Theme Week- Day 2

Color the pumpkin and the background using Distress Inks and small sponge daubers. Use acetate for the shaker part. Fill the shaker with PPP sequins, and tiny die cut images!

Thanks so much for stopping by today- hope you have a wonderful day!

|

Halloween Theme Week- Day 1

Hello, Gemma here today with a Halloween pumpkin card. When I saw the new Grateful Shaker die, I thought it would work really well as a window scene for a Halloween card.

All this week, save 15% on items in our Halloween section!

Pretty Pink Posh: Halloween Theme Week- Day 1

I began by die cutting the pumpkin from orange card. Although the die cuts with the word across it, it’s very easy to snip this away. I love this option as it makes it more versatile.

Next, I die cut the pumpkin again, this time from a piece of dark grey card, cut to the same size as my card base.

Pretty Pink Posh: Halloween Theme Week- Day 1

On this piece of card, I used the new Stars stencil and WOW Silver Pearl embossing powder to add a pattern of stars on the panel. I didn’t cover the whole panel with stars and allowed some of the pattern to fade off at the edges. I also embossed, in white, a greeting from the new Boo stamp set.

On my card base, I added a blend of distress oxide inks in twisted citron, mowed lawn and pine needles. I kept the lightest colour in the centre to get a glow effect and flicked the ink with water for droplet details.

Pretty Pink Posh: Halloween Theme Week- Day 1

To build my scene, I die cut the new Spooky Fence die from black card, adhering it to my card base. I added the dark grey embossed panel on top, then the orange pumpkin die cut in the window space on the card I coloured some images from the new Boo stamp set, and also some previously released sets – Halloween Pals and Pumpkin Patch Critters.

I tucked the cat and pumpkin into the window scene, using some foam tape under the cat. I then added a ghost and bat to finish my spooky cute scene.

Pretty Pink Posh: Halloween Theme Week- Day 1

I hope you were inspired to think outside of shakers when using the shaker dies- the shapes are so fun and versatile. Join us tomorrow for a new day of Halloween inspiration!

|

Fall Theme Week- Day 7

Pretty Pink Posh: Fall Theme Week- Day 7

Hi crafters! Adelle here. It’s the close of Fall Theme Week from Pretty Pink Posh and today I’m featuring a couple of stamp sets from both current and past releases. I hope you’ve taken advantage of the 15% off in the Fall Section of the Pretty Pink Posh store- TODAY is the last day to save!

Pretty Pink Posh: Fall Theme Week- Day 7

For this card I used the Pumpkin Patch Critters, Fall Borders, and Fall Signs stamp sets. I began by cutting masks for the stamps I was using from the Fall Signs and Pumpkin Patch Critters sets. On a sheet of ivory cardstock I stamped with the leaves border from the Fall Borders stamp set. 

Pretty Pink Posh: Fall Theme Week- Day 7

On ivory cardstock, I stamped the scarecrow and some pumpkins and colored with Copic markers. I then reapplied the masks and used Scattered Straw and Brushed Corduroy Distress Inks to create a smooth blend behind the scene. 

Pretty Pink Posh: Fall Theme Week- Day 7

Copics: YG67, YG63, YG61. Y38, Y19, Y18, Y15. YR15, YR68. R46, R39, R35. E29, E27, E25, E23, E21. E35, E33, E31. 

After coloring the leaves and scene, I used a border from the Stitched Borders 2 die set to size down the colored panel. I glued the 2 leaf panels to a card base and used thin foam to pop up the colored scene. I finalized my project by embellishing with Metallic Gold Jewels

Pretty Pink Posh: Fall Theme Week- Day 7

Thanks for stopping by and I cannot wait to see what you create for your fall scenes! Visit us tomorrow for a brand new week of inspiration for your Halloween projects!