Sneak Peek: November Die Cuts
Hi Pretty Pink Posh friends, Angelica here excited to share a sneak peek of the upcoming November release, which is everything Christmas! My favorite time of the year to make cards. Today we are going to focus on the stand-alone dies. There’s 7 in total (including two script words and two shaker dies!). I have used a few today in my pair of cards. Lets get started.

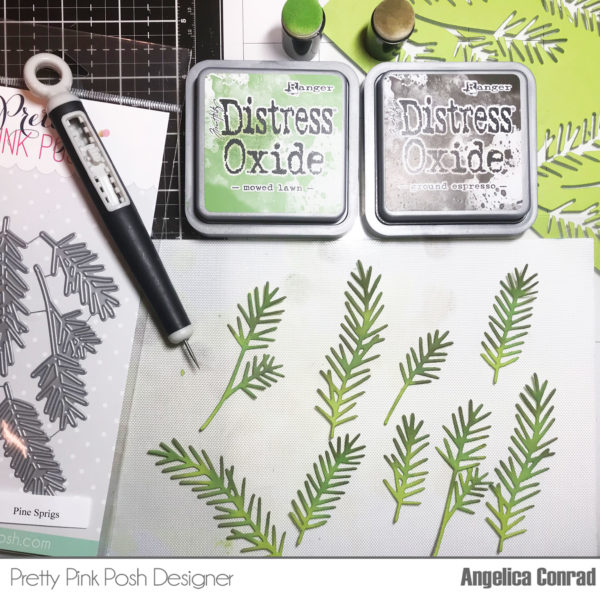
My First card I used the Pine Sprigs dies and the Stitched Ornaments dies. I die cut all the sprigs out with green cardstock, then used finger daubers and Distress Oxides Mowed Lawn and Ground Espresso to add color and texture.
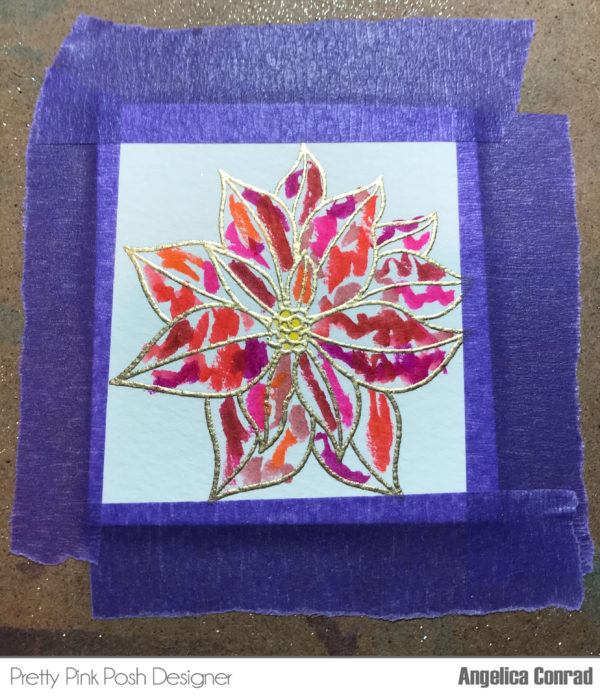
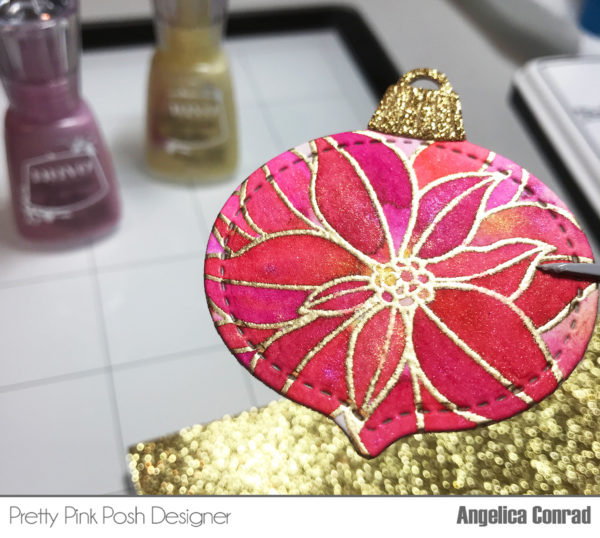
Next I worked on the stitched ornament. I decided to use a stamp from the Poinsettias stamp set to decorate the bulb. I heat embossed the stamped image with embossing ink and Brutus Monroe Gilded embossing powder onto Canson Watercolor paper. I taped the paper down to a clipboard with purple tape, then scribbled on the petals with my Zig markers.
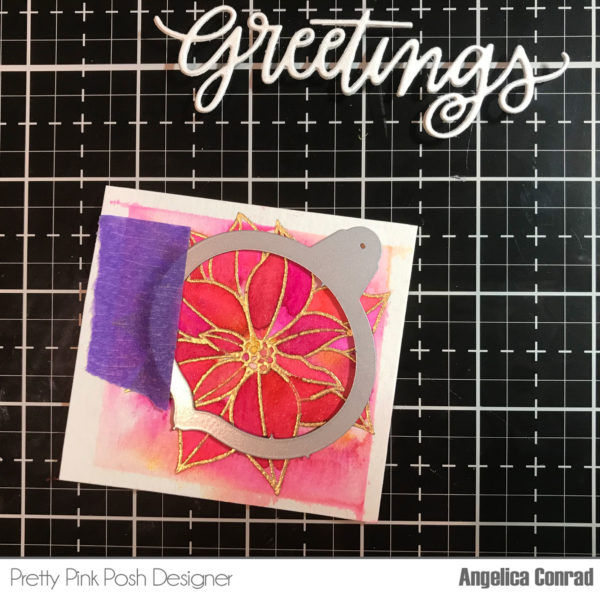
I heavily misted water on the flower and used my Wagner heat gun to start the drying process. When the paper was almost dry, I added a few shakes of Solar Flare and Cherry Bomb NUVO shimmer powders and resprayed again. I then finished the drying process. The result was a beautiful shimmery poinsettia. I taped the stitched ornament die over it and cut it out. I also used the topper die to cut out gold glitter paper.
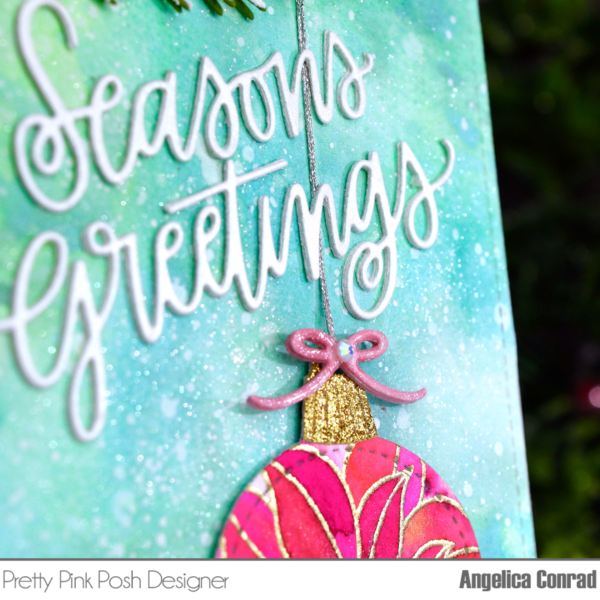
For the background, I used Distress Oxides Peacock Feathers, Evergreen Bough, and Cracked Pistachio. I did an ink smooshing technique on my craft mat with anther piece of Canson watercolor paper. Once dried, I splatter white paint, dried the paper, sprayed a generous amount of shimmer spray, then dried the paper again. I trimmed the paper down to be my card front. I added a sprig at the top, tied a piece of silver embroidery thread around it and connected it to the back of the ornament. I attached the ornament towards the bottom of the card front with thin Scrapbook Adhesive 3D squares. I die cut a small bow from Twine and Bows die set out of pink paper, added shimmer with Wink Of Stella, and topped the bow off with a layer of Nuvo Crystal Glaze. I die cut the Season’s Greetings Script out of shimmer white paper and glued to the card front with Ranger Multi Media Matte. I attached the card front to an A2 size card base and added the bow once dried. My final touch was adding a single jewel to the bow from the new Holiday Mix.
Card 2:
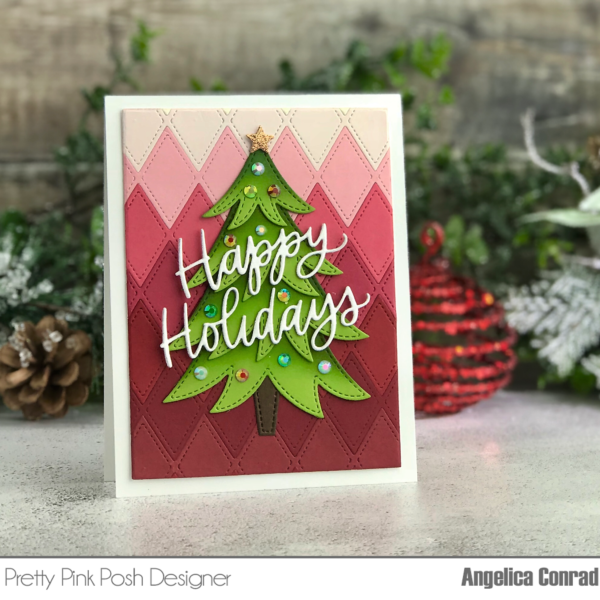
My second card has a lot less steps. I die cut the Layered Tree dies out of green paper. I used Distress inks Mowed Lawn and Forest Moss to shade them with finger daubers.
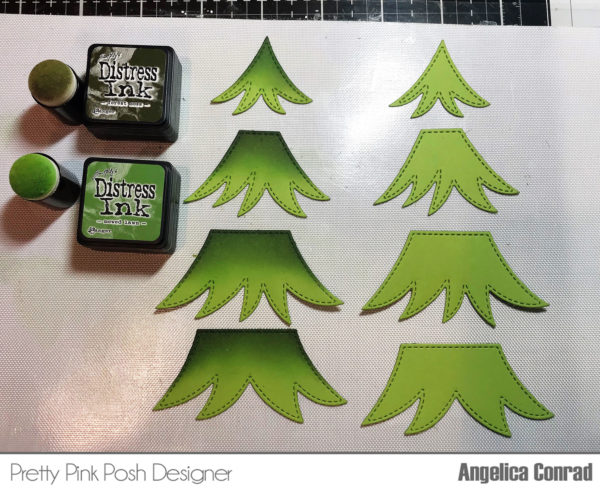
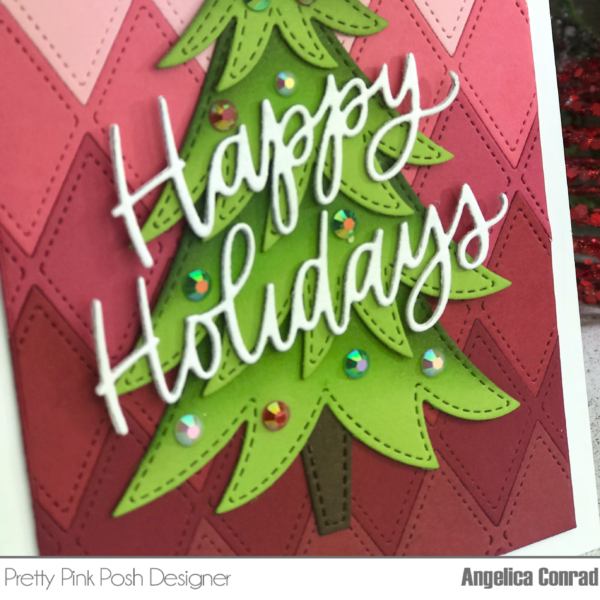
Once shaded, I glued them to a strip of paper I cut from the same green paper. Next, I die cut the Happy Holidays Script and glued the words to the tree. I picked out a rainbow of pink and red cardstock, and die cut them with the diamond edge die from the Stacked Edges 2 die set. I then attached them to computer paper that I had ran through my Xyron Creative Station to add adhesive to the paper. Once the strips were stacked, I trimmed the the paper down for the card front and attached the tree using Glue Dots. My final touch was adding Holiday Mix jewels on the tree as ornaments.
I’m looking forward to diving deeper into this new release. There’s so many fun stamps to color and match up with these new dies! Join us tomorrow for more sneak peeks!

These dies are awesome! Love that tree!
Fabulous card ideas & samples. Thank you so much
Ohhh I’m excited for this new release. Looks fabulous so far!!
Lovin’ today’s sneak peeks. Can’t wait to see more.
LOVE the diamond background!!!!!!!
Wow these are fantastic! I love the beautiful poinsettia ornament!
Both cards are gorgeous. The ornament is really beautiful and would look so lovely
on a tree, colored in many different color combos.
Angelica, your cards are both stunning, the Pine Sprigs are SO PRETTY with this ornament die. I love the Stacked Edges 2 die set in these colours and that tree….♥♥♥ IT! Very nicely done!
Beautiful cards! Fabulous dies. Looking forward to seeing the holiday jewels.
I really like how you inked the pine needles. NICE touch!
Lovely suggestions for this release. I love the ornament but I hated to see you cut that wonderful poinsettia… love the Christmas tree too!
Awesome!!! Love the tree!!!
OH MY OH MY! You out did your self Angelica, I don’t even make Christmas cards, now I want to get these ALL!! Can’t wait to see what else you are going to share!!
Love your beautiful cards. The ornament is fabulous.
Totally awesome dies. Can’t wait to purchase them. The poinsettia ornament is spectacular.
AWESOME projects, I absolutely love the watercoloring idea for the poinsettia ornament!