
Tutorial: Creating 4 St. Patrick’s Day Cards
Hello Pretty Pink Posh fans! This is Yana and today I am sharing video tutorial showing how to make several Good Luck cards featuring Best of Luck stamp set. I have 4 easy to make card ideas that work for St Patrick’s Day, but can also be used as an everyday Good Luck or Encouragement cards.
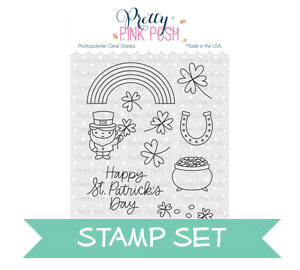
 I started working on my projects by stamping images from the Best of Luck stamp set in alcohol marker friendly ink onto white cardstock. I used Copic markers and did some very basic and quick coloring. These, of course, can be colored using any coloring medium you prefer, I decided to use Copic markers because I find them easy to use. I used mostly green colors, although I didn’t use the St Patrick’s Day green as I don’t particularly like that shade of green, I went with the green that I like.
Watch my video tutorial below to learn how I made this card.
I used the following Copic Marker colors: YG03, YG17, C7, C5, C3, C1, Y11, Y15, Y17, E00, E02. Once my coloring was done I used coordinating dies and cut my images out in my Spellbinders Platinum Die Cutting machine.
Card Idea #1
For my first card I decided to use the horseshoe and a 3 leaf clover. To add some interest to my card I used colored cardstock and added it from the corners of white panel. I picked 3 shades of green cardstock and trimmed it using paper trimmer into 4 pieces.

I had cardstock panels cut to 4 1/4 x 5 1/2 and I trimmed them going on a diagonal once and than once again in the opposite direction. Next, I stamped Best of Luck sentiment in black ink onto my white cardstock panel and foam mounted the horseshoe in place and also used glue to adhere the shamrock.
 Next, I temporarily adhered the panel onto my cutting mat – I aligned it with the grid and I started adhering green cardstock pieces in place. I didn’t measure anything, I just eyeballed the placement trying to evenly frame the image and sentiment in the center.
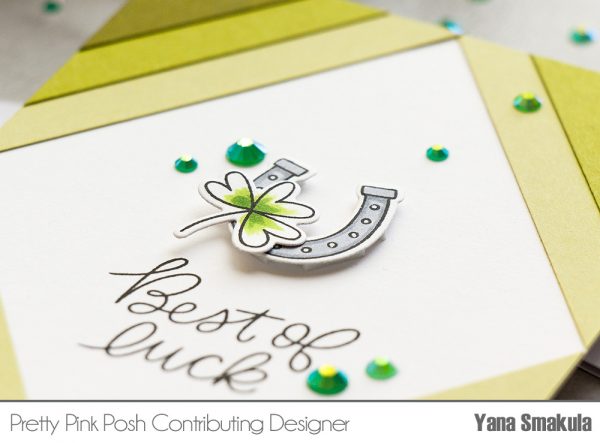 Once I had all the pieces adhered I used my scissors and I trimmed the rest of the cardstock off. I used new jewel embellishments from Pretty Pink Posh to dress up this card and I went with the Shamrock color of course – I used this color for most of my cards today.
Card Idea #2
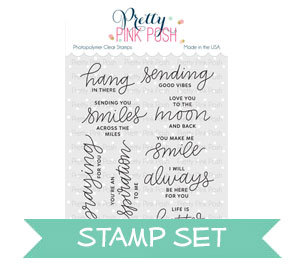
For my next card I decided to use a non St. Patrick’s Day sentiment, but rather one that reads Sending Good Vibes. This sentiment comes from the new Encouraging Greetings stamp set.

I stamped and die cut a rainbow, pot of gold and a few shamrocks. I didn’t want to color the rainbow as a regular rainbow, but used just yellows instead. I stamped my sentiment in black ink and foam mounted my elements in place. I used foam adhesive to foam mount the yellow rainbow and once I had it placed I used a double layer of adhesive to foam mount the pot of gold and the shamrocks on the other side of the rainbow. I also added one shamrock onto the pot itself – I used glue for that one.
 To add a bit of shine and sparkle to this card I used my Aqua Shimmer pen and added a generous amount of shimmer to the rainbow and also the gold coins in the pot. I feel like this shimmer really stepped up my card and added a bit of that necessary wow to this simple design.

Finally, I tucked 2 more shamrocks behind the rainbow for some additional interest. I also used new Jewels to embellish my card, I went with the lighter green color this time- Spring Green. I trimmed my panel to 4 x 5 1/4″ and foam mounted it onto an A2 top folding card base.
Card Idea #3
For my next card I did some negative die-cutting – I die cut an opening using a coordinating die for one of the images in a white cardstock panel.

I stamped a Best Of Luck sentiment and foam mounted my panel onto an A2 white card base. Next, I adhered my colored image in the opening, so it was recessed in the card and foam mounted a pot of gold over it creating a little scene.

I once again used my Aqua Shimmer pen to add some shine to the gold coins and I also adhered one of the shamrocks onto the pot with gold. Lastly, I couldn’t resist embellishing my card using new jewels and I used several Shamrock colored jewels to dress up this card.

Card Idea #4
My last card for today is an interactive one – I used a mini wobble spring to add movement and interest to this project. I stamped, colored and die-cut Patrick with the shamrocks and coins. I used scissors to just him out as I didn’t need to coins and shamrocks, I wanted to add the wobble spring just behind the guy.

I also stamped same image and Happy St. Patrick’s day sentiment onto a white cardstock panel. I colored the coins and shamrocks stamped in the background using Copics, but I didn’t color the little guy as I already have one colored and attached onto the mini wobble spring.

I adhere him in place and that added a ton of interactivity to this super simple card. Ever since I learned about these wobblers about a year or so ago I can’t stop using them for my cards! I think they are so much fun and every wobble spring card I’ve ever given to somebody made that person smile and play with the interactive element for a long time.

Which card idea do you like the most? Share below! And as always, have fun stamping!
Wonderful cards! The coloring is beautiful and highlights the cards!
the rainbow one! Thanks for sharing such a wide assortment of cards! I finally have some inspiration to use st pat day stamps!
Very pretty cards. love the spinner.. how cute.
Love the rainbow, I like card sets that can be repurposed, so good use beyond st. Patrick’s Day!
Wonderful cards! They really showcased the Pretty Pink Posh stamp set so nicely.
Your cards are fantastic. Love your designs and wonderful coloring.