
5 Easy Spring Card Ideas + Video
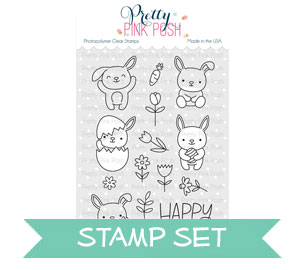
Hello Pretty Pink Posh fans! This is Yana and today I am sharing video tutorial showing how to make fun and colorful Spring cards featuring Bunny Friends stamp set.

I started working on all of my cards by stamping a number of bunnies on to Neenah Solar White 110lb cardstock in alcohol friendly ink. I stamped several panels with a bunch of bunnies and later also stamped additional images from this set – beautiful flowers. I didn’t know how many images I would need for my projects, but I wanted to make sure to have plenty on hand when I was creating. I ended up having too many, so I saved them for future projects.
Watch my video tutorial below to learn how I made this card.
One of the elements I loved the most in the Bunny Friends set is the cracked easter egg. I played a bit and cut it out – I wanted to customize my bunnies and have other bunnies sitting in the egg shell, not just the one bunny.
The most awesome part about these eggshells – is when put together they form a one full egg! Isn’t that cool? And seeing how you can kind of extract just the egg you can have any kind of critter sitting in there as long as the size of the critter works with the size of the egg. Pretty Pink Posh has a ton of cute little critters that would fit in there. I always love to stretch my stamps and with this particular Bunny Friends stamp set it was one of the ways to do it.

I did some simple and basic Copic coloring to color my images. At first I used W5, W3 and W1 markers to color bunnies, but later I completely skipped using the W5 and for some bunnies even the W3 markers and kept my bunnies almost white. There are many different ways these bunnies can be colored, be sure to check Pretty Pink Posh blog for more inspiration.
Card Idea #1
For my card idea #1 I colored and cut out a bunch of critters, I think I have every bunny from the stamp set cut out here, and some bunnies I cut out twice. I used my stamp positioner tool and stamped the Happy Spring sentiment in the center of my panel. Next I trimmed my panel to be 4 x 5 1/4″ as I wanted to foam mount it onto an A2 size card base and I foam mounted my bunnies around the sentiment.
 You’ll notice that I added white polka dots to the purple egg bunny – I just used my white gelly roll pen and added little details to spice this image up. You can customise these egg shells however you like really, or they can be left as is – it’s all up to you.
 Once I had all of my bunnies in place I used the new Watermelon Jewels and I embellished my card. I really loved these little jewels – they come is several sizes and the smallest is smaller than the 3mm sequin and sometimes I do want to add that one tiny embellishment to my card so these worked really well for me and I know I’ll be reaching for them often.

Card Idea #2
My card #2 features negative die cutting. I used a 4 x 5 1/2″ white cardstock panel and die-cut 3 bunny shapes in the panel – I taped my dies in place and run this panel through my die cutting machine. I set the die cut shapes aside and kept just the panel with the negative openings.
 At the same time I also die-cut same stamped bunnies out to place inside the openings. I used my Copics once again and did some quick coloring in the same way I mentioned before.
 I also die-cut more egg shells to place each of those bunnies in the shell – I had one yellow, pink, and blue. I also wanted to add some flowers to this card, I stamped a bunch of images from this same Bunny Friends stamp set, I did the same thing – I cut them out and colored with Copic markers using the same colors as before to make sure my colors would go well together.

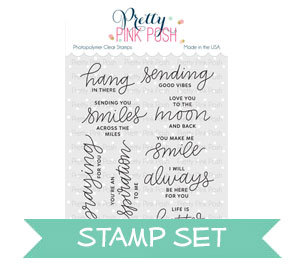
I also stamped a sentiment directly onto my panel and I went with You Make Me Smile from the new Encouraging Greetings stamp set. I also decided to stamp grass next to each bunny – I used a little grass image from the Camping Friends stamp set. This is what I love Pretty Pink Posh stamps for – they all go so well together and images can be used to tell an endless story. With each new set you get more and more options to create scenes and tell different stories on your cards.

Once my stamping was done I foam mounted my panel onto an A2 card base. You want to be sure to complete all of your stamping prior to foam mounting the panel as it will be very hard to add any additional stamping to this panel later if you use foam squares.
I used regular adhesive to adhere the bunnies, I inlaid them, but because the main panel is popped up, the bunnies are recessed on this card. And once that was done I foam mounted the egg shells over the bunnies and over the panel so I used double layer of foam adhesive there. I also added my little colored and die cut flowers next to each bunny and I think that the flowers really helped this card come to life. This card ended up being my favorite from all of the cards I’m sharing in this video. Once again I used new jewels to embellish it and add a bit of sparkle.
Card Idea #3
My next card is very simple and it is a fun Friendship card. I stamped Friends Make Everything Better sentiment in black into a white cardstock panel cut to 3 1/2 x 4 3/4″ .

Next I added one of bunnies – I picked one that isn’t holding anything and I added some flowers and die cut greenery to him. I used a solid layer of fun foam and double sided tape to foam mount the panel onto an A2 card base, I foam mounted my bunny and flowers and decided I wanted to stamp the grass on this card as well to help ground my little scene.

Because I had a solid layer of fun foam and not individual foam squares attaching my panel onto the card I was safe to do my stamping here. So I stamped the grass and used the Pink Blush Jewels to embellish this card.

Card Idea #4
Moving on to card #4 – I wasn’t planning on making this many cards at once, but I had a bunch of cute bunnies on my desk, so I couldn’t resist. I white heat embossed Sending You Smiles Across the Miles in white embossing powder and foam mounted two of the bunnies onto the card. I used one with the carrot and added an egg shell to the other bunny.

To hide the bunny’s ear under the shell I actually cut it partially off as I wanted to have the shell a bit closer to his head. This time I used glue to adhere the shell and skipped adding another layer of foam adhesive. Of course I used jewels to embellish this card.

Card Idea #5
For my last project for today I did some more negative die cutting, but this time I die cut identical shape in a layer of fun foam to foam mount my panel in place. I heat embossed a sentiment onto the panel and it warped slightly from the heat, so the solid fun foam layer served a double purple here – it popped the panel up and it helped to keep it flat and eliminated the warping.

I adhered a cute bunny with a carrot inside the opening – I think this little bunny is my favorite from this set and I also added an egg shell along with two die cut grass pieces. I didn’t stamp the grass onto the panel this time, but added it as a die-cut element as the panel was pink and I wouldn’t have been able to color it the light green with Copic Markers that I did on white cardstock.

I also used a white gel pen and added large white polka dots onto the egg shell to make it eggstaspecial.
Simple, yet super cute and beautiful! The coloring highlights the cards a lot!
Oh my!! I’m in awe of your creative ideas and well designed cards. This post is full of fresh inspirations and it gave me new insights into PPP products as well. To be honest, I have never thought that way like you did “cracked eggshell could be a fun place to any critters”!! . You totally rocked this set, Yana. And I agree with how you think of PPP jewels! They are just precious. Thanks for the inspiration again. Loved to see those beautiful cards
Marge
These bunny cards are just too SWEET!!!!
ADORABLE!! Great coloring. Fun way to use the eggshell!
These cards are so adorable! I just love the bunnies :)
I love all of your cute bunnies and awesome idea on cutting the shell off and thank you for showing how they fit together incase you need that option. I think I need this stamp set. Plus they are in my state so love supporting local companies. Thanks for the inspiration.
What a darling stamp
set and your cards are
adorable!
Carla from Utah
These are incredibly adorable!! So perfectly designed and colored!! Remarkable!
Yana’s cards are absolutely adorable. She has sold me on all the sets for sure. Is it possible to get the Copic Colors she uses on the Egg Shells? She mentions the Warm Gray tones copic colors, but not the egg shell colors.
Love Pretty Pink Posh….my wish list is always long.