
Tutorial: Creating Focal Points
Hello, sweet friends!
Today we have a special post that Liz put together showing how to create a focal point that stands out. Plus, she’ll be using a “Christmas” set and show us how we can use it year round!
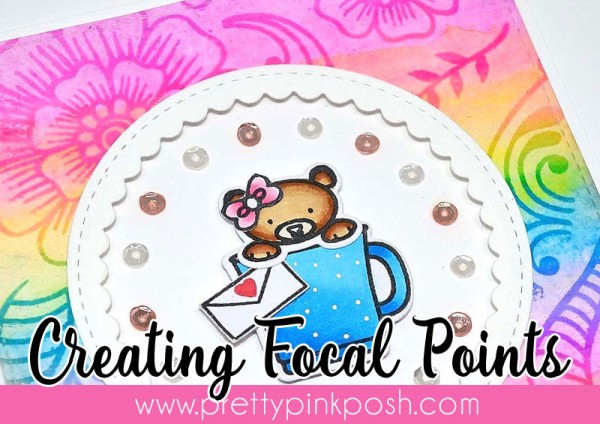
This card was fun to make and best of all, the steps are easy so you can make several cards to send out to family and friends.
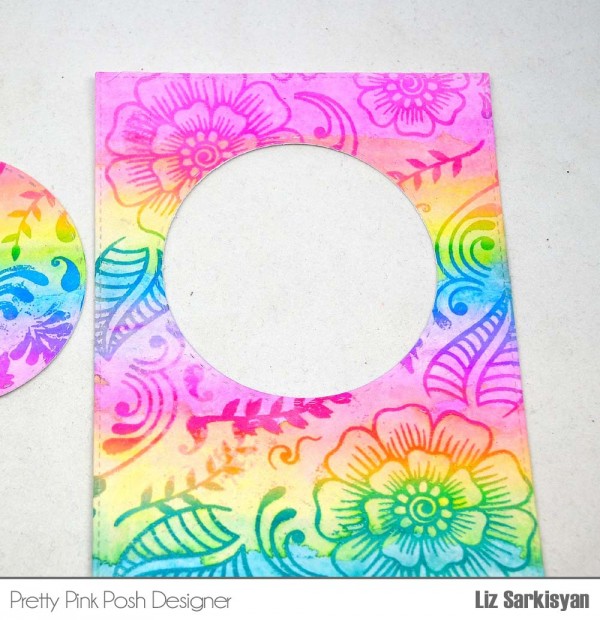
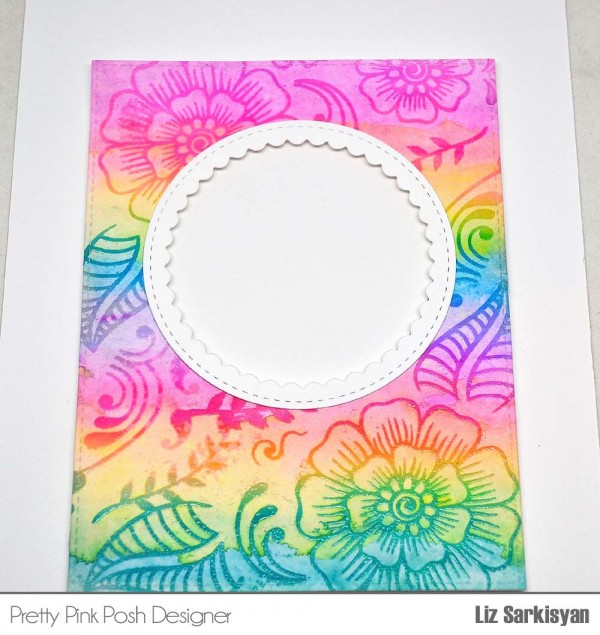
Take any A2 size card stock or designer paper and lay down flat. Then, place a circle die and rectangle die on top and run through the die cut machine. Here, I used a 2 5/8″ circle die as I wanted to add the smaller Scallop Circle from Pretty Pink Posh on top to add a decorate look.
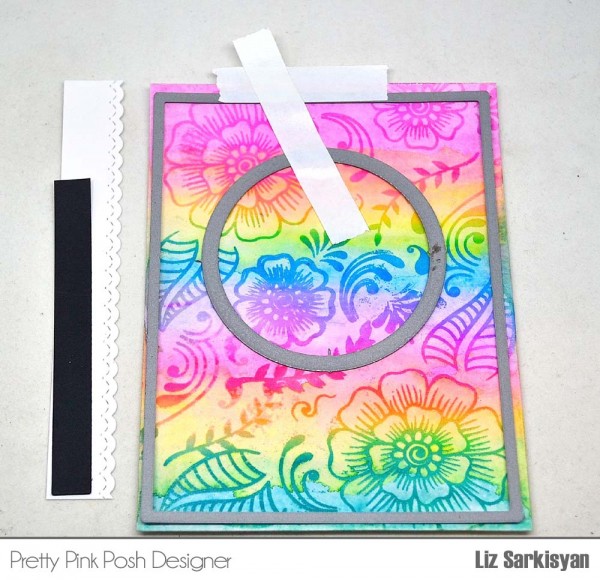
Here is a picture after I ran it through the die cut machine, but still wanted to add some extra touches.
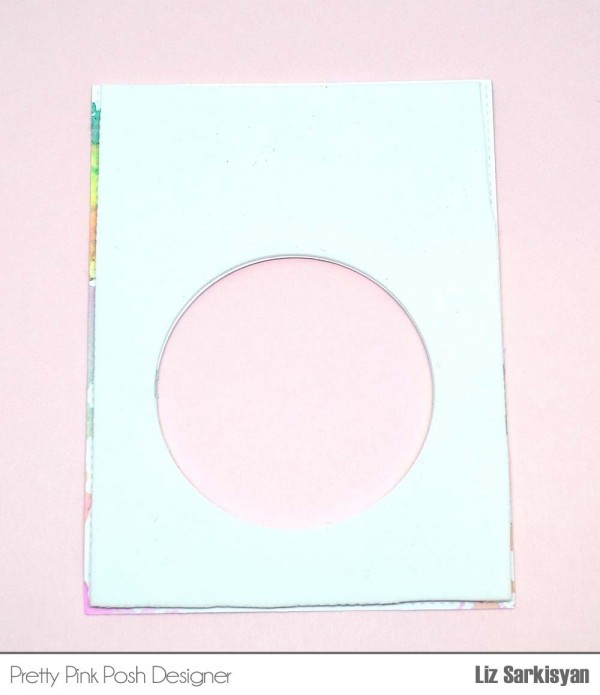
Next, I flipped the cardstock upside down and added white fun foam to pop the card base up. It doesn’t have to be fun foam. You can use foam mount tape instead.
Next step, I added the Scallop Circles directly on top of the circle opening that was previously cut. Here, I used the smaller scallop circle.
From there, I wanted to add a sentiment, so I die cut the mini scallop border using the Stitched Borders 4 as it’s one of my favorites and then cut a 3/8″ black strip to place on top and in the middle of the white border.
Here, I pulled out the Birdie Fiends stamp set as it has a wonderful variety of sentiments and love the font style which I embossed using versa mark and white embossing powder. Then, I stamped the little envelope and little heart from the Birdie Notes set to add next to the sentiment.
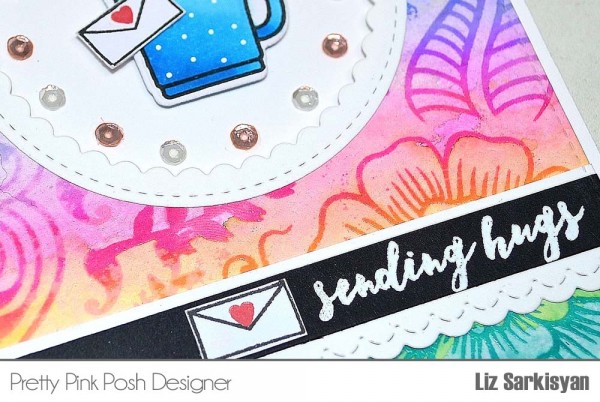
Now moving on to the focal point of the card, I pulled out the Winter Friends stamp set, again, it’s not just for winter and can be used all year round, so I stamped the little coffee mug along with the little bear. Then, I colored it using my copic markers and added foam mount tape to pop them up along with one more little envelope stamped with the little heart.
 Last but not least, I added some beautiful new 4mm Rose Gold sequins along the inside of the circle and alternated it with some 4mm clear sequins
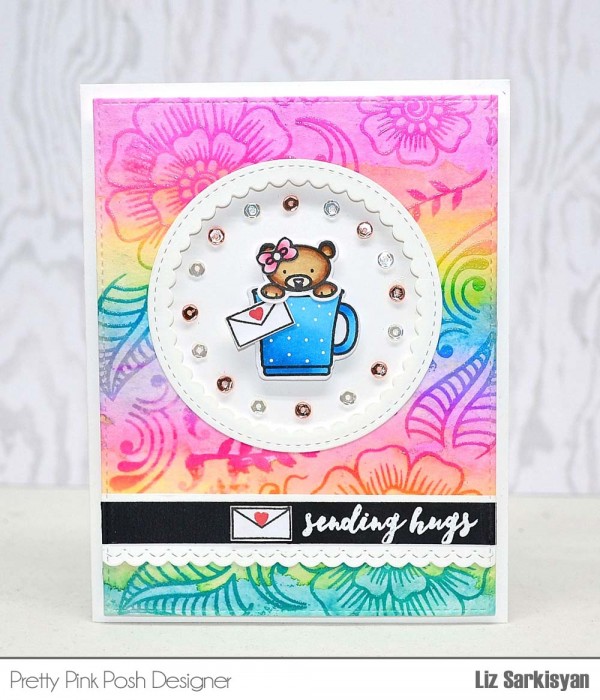
I love the rainbow background that Liz paired with her focal point. It really makes the card stand out and those 4mm sequins do a perfect job highlighting the adorable bear in mug!
Stay tuned to the blog… I heard there might be a sale in honor of Memorial Day happening soon!

Beautiful. The background paper looks like you made it. I love the little bear. She is a hug in a mug.
Very cute card, I love it ! So colorful and elegant, it’s very inspiring.
Hi Paulina ~ Liz did an awesome job high-lighting the focal point on this card! The background, in those yummy, brilliant colors, adds the perfect backdrop for that adorable bear. Thanks so much for sharing; have an awesome LONG weekend! ~HUGS~
Adorable card..love the background paper..is it paper or did she
sponge it herself? So so pretty!
I love these cards. Shaker cards are so much fun.