Halloween Theme Week

|

Halloween Theme Week- Day 7

Pretty Pink Posh: Halloween Theme Week- Day 7

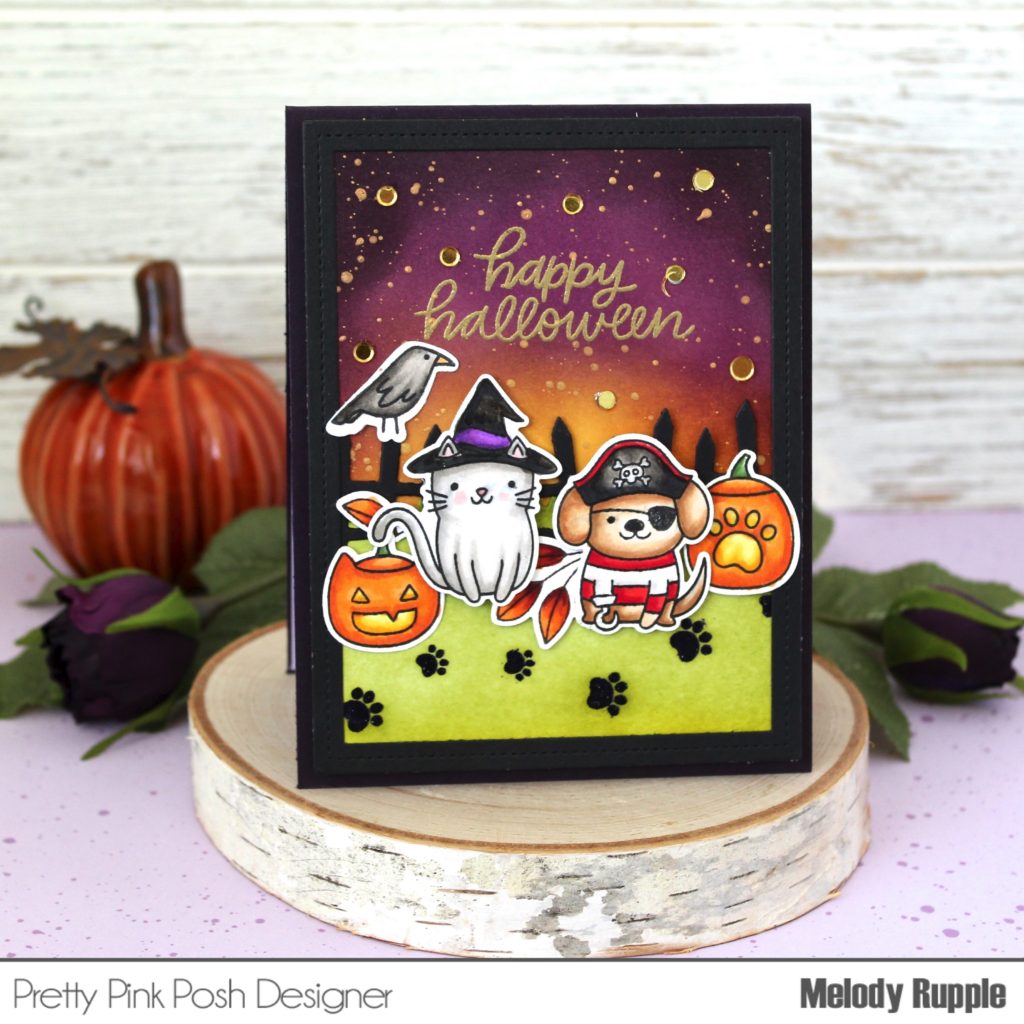
Hi friends! Tammy here, finishing up Halloween Theme Week. Today I have a fun Halloween card and set of tags to share with you, featuring the cutest little trick-or-treaters you’ve ever seen!

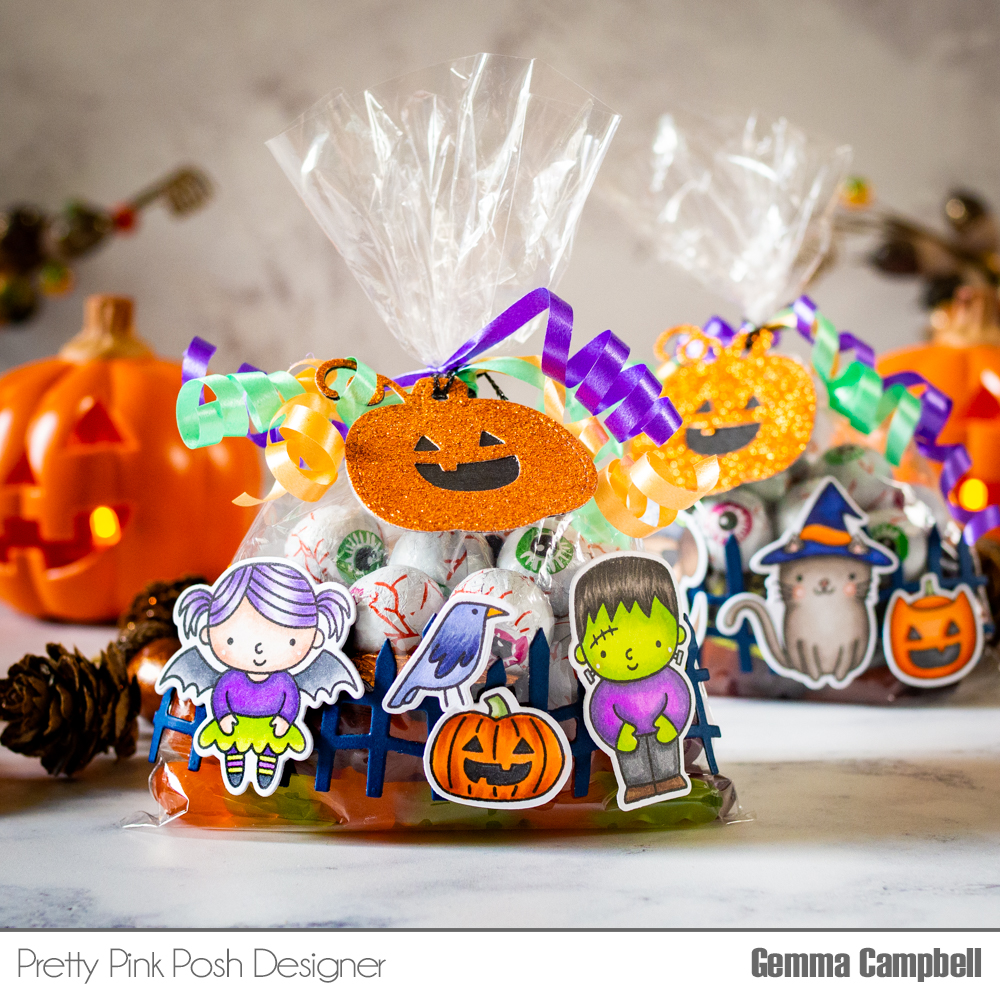
As an early Halloween treat during theme week, all products in the Halloween category are 15% off.! No coupon necessary.

Pretty Pink Posh: Halloween Theme Week- Day 7

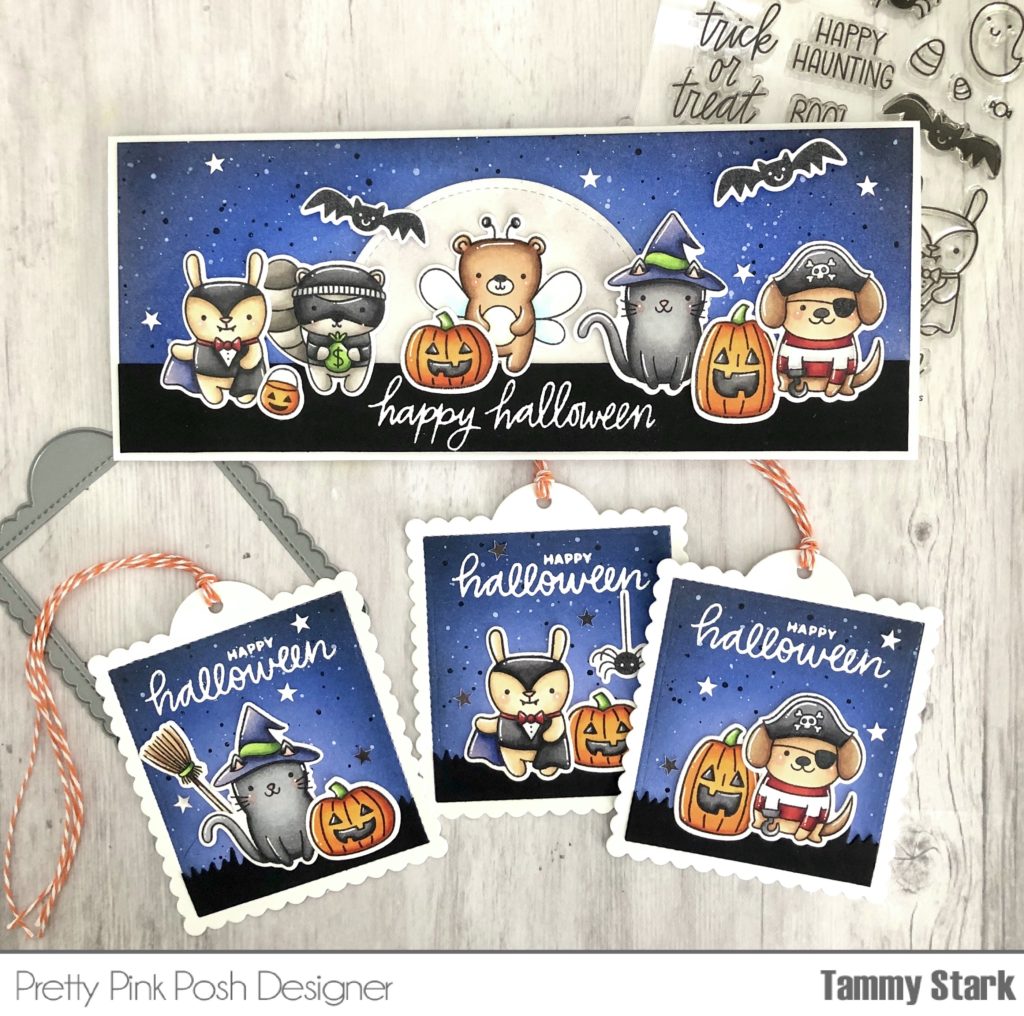
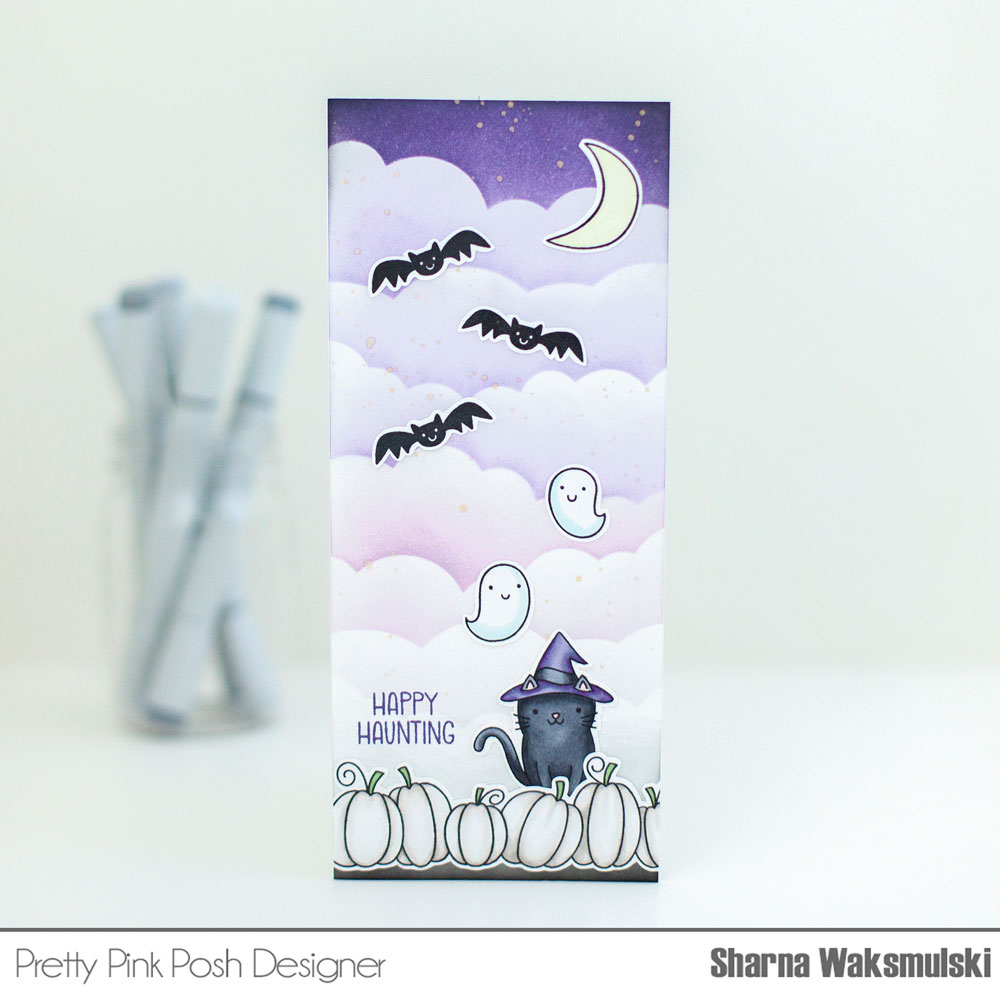
To begin, I stamped, colored with copic markers, and die cut the images from the following sets: Halloween PalsCoordinating Dies, Halloween Friends/Coordinating Dies, Trick or Treat FriendsCoordinating Dies.

Pretty Pink Posh: Halloween Theme Week- Day 7

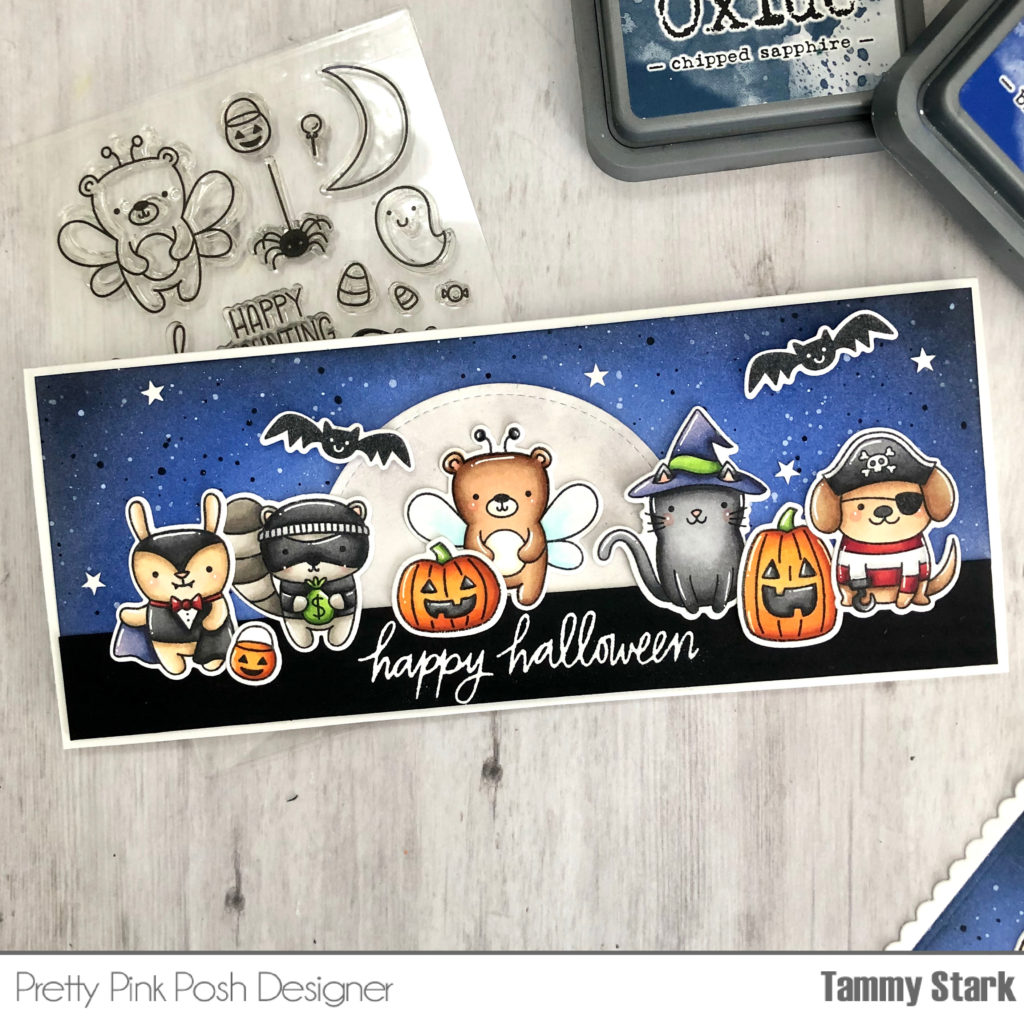
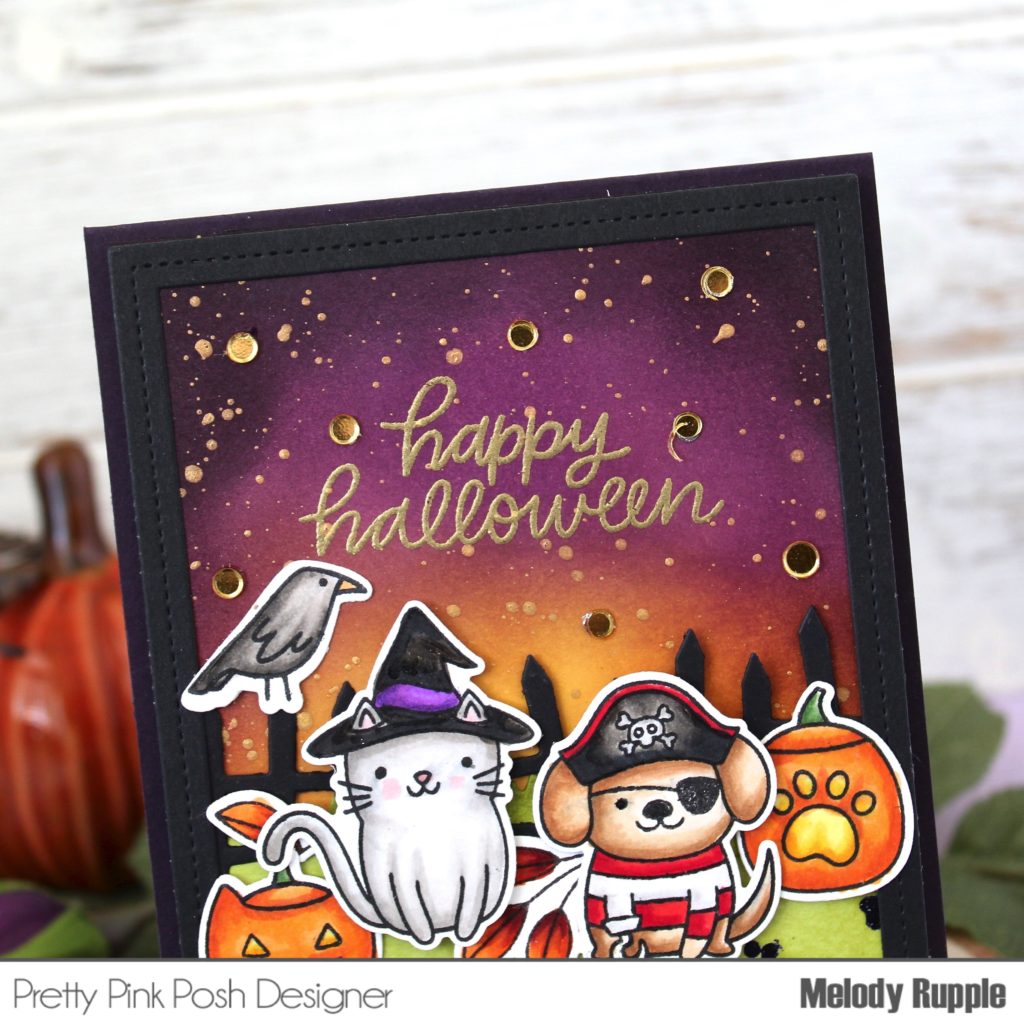
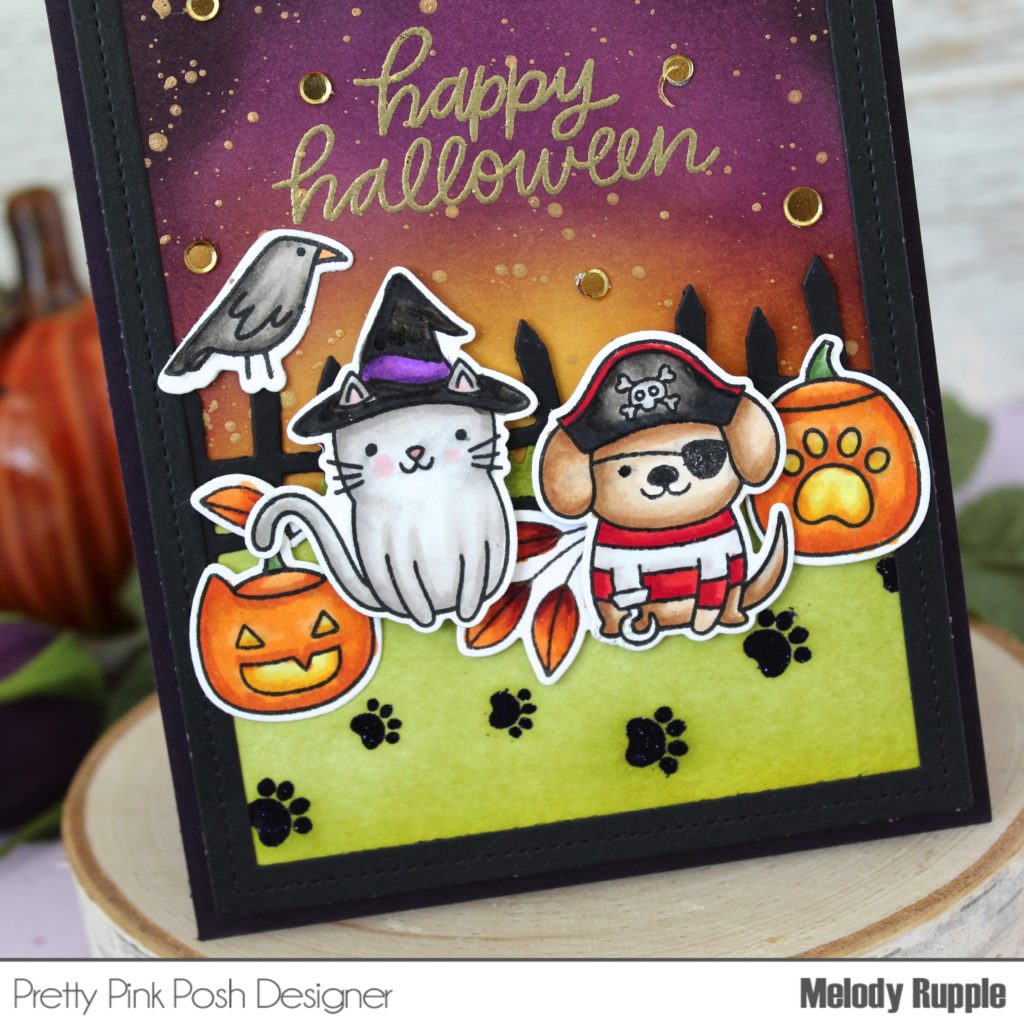
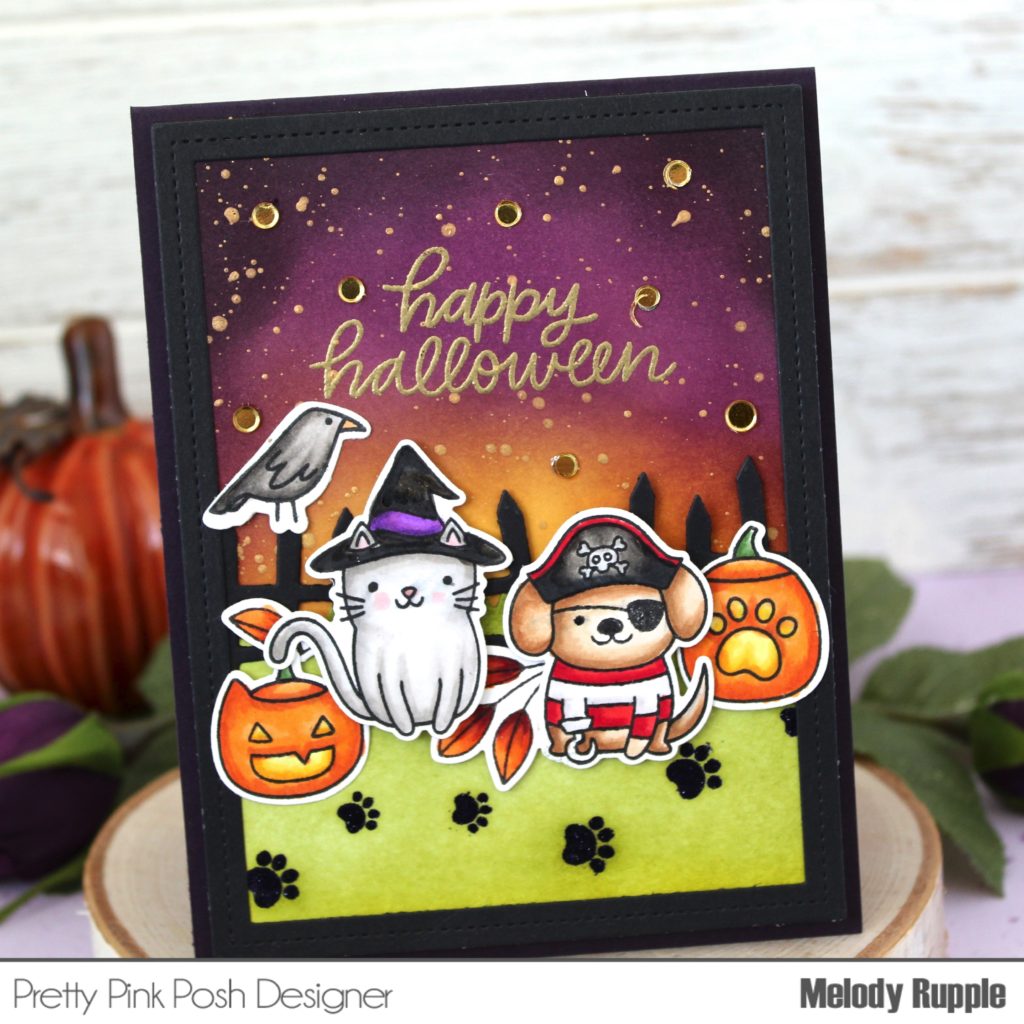
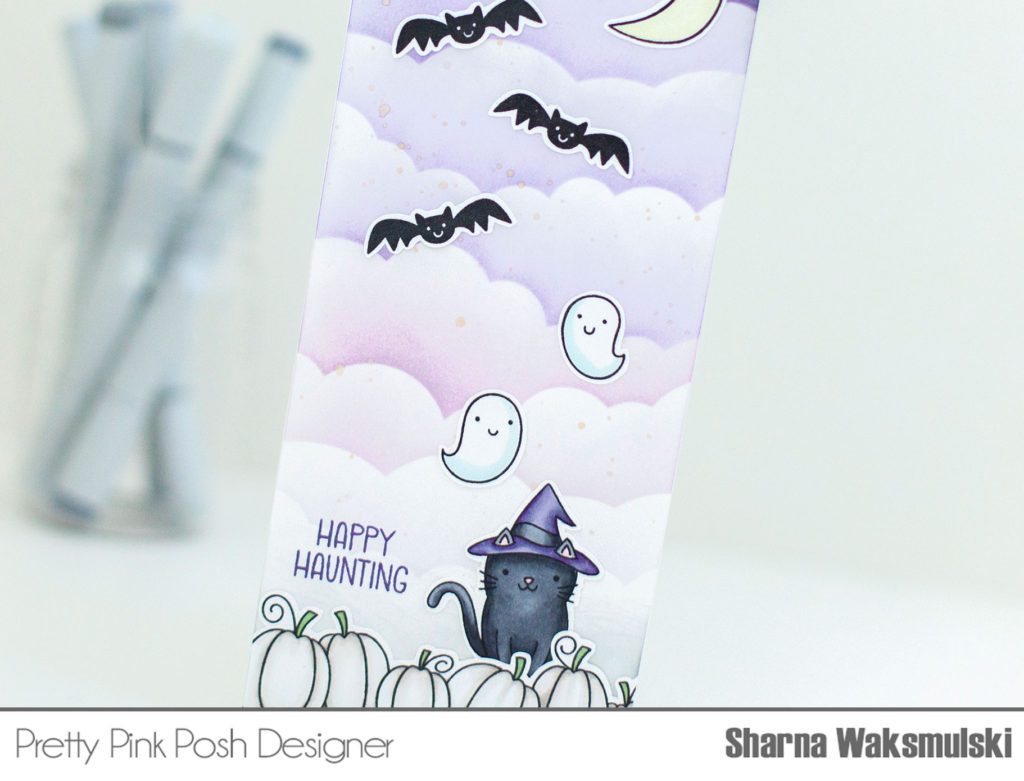
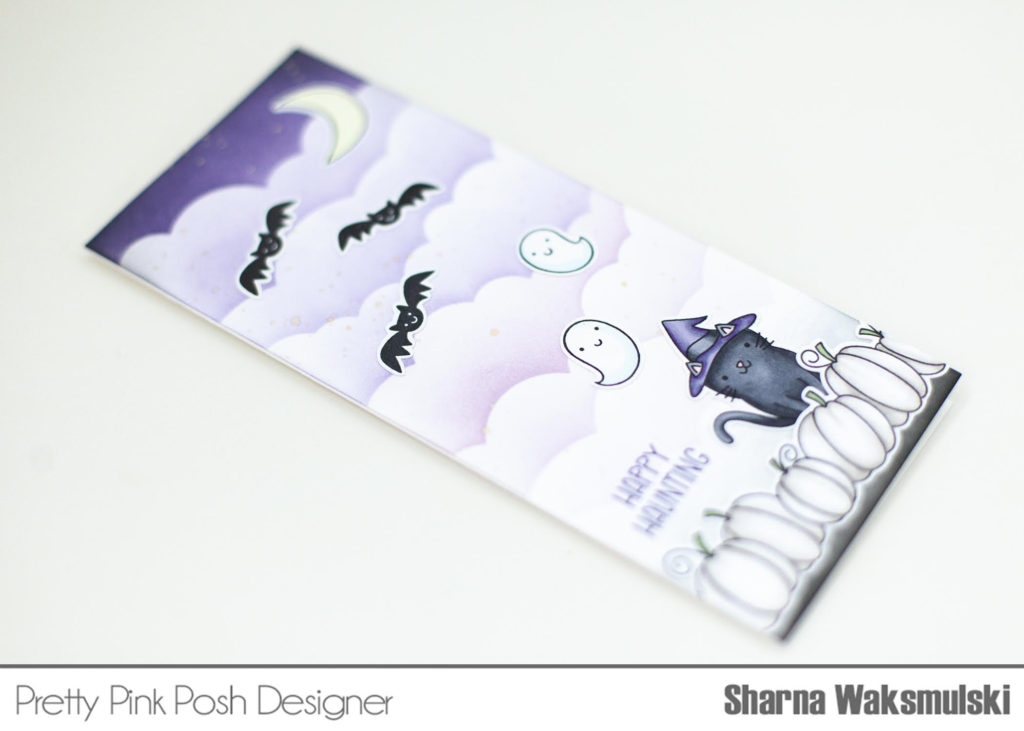
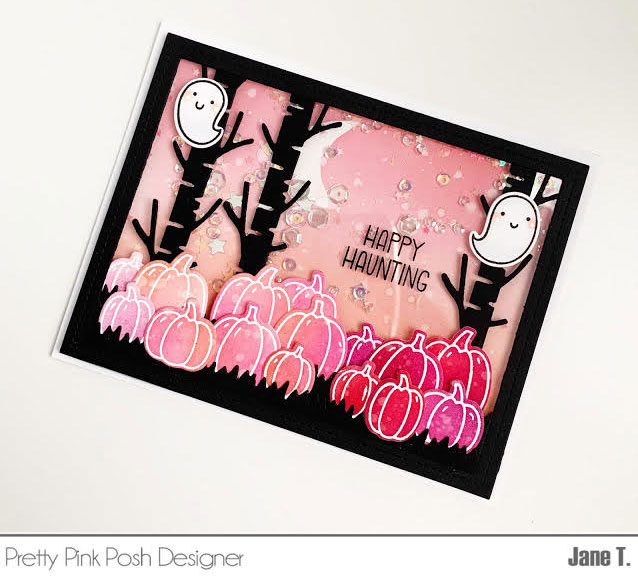
To create my slimline design, I began by cutting a piece of Bristol smooth cardstock to 3 1/4 X 8 1/4″ and ink blending with Blueprint Sketch, Chipped Sapphire, and Black Soot Distress Oxide inks. I added some black and white acrylic paint splatters to give some interest to the background. Next, I added a die cut circle, washed with watered down Hickory Smoke ink, and attached to the center of the card to create the moon. I then added a 1 X 8 1/4″ strip of black cardstock and attached my background to a white 3 1/2 X 8 1/2″ card base. I heat embossed the sentiment from Halloween Friends in white before adding the stamped images. Lastly, I added 1/4″ Silver Star Confetti for the perfect finishing touch!

Pretty Pink Posh: Halloween Theme Week- Day 7

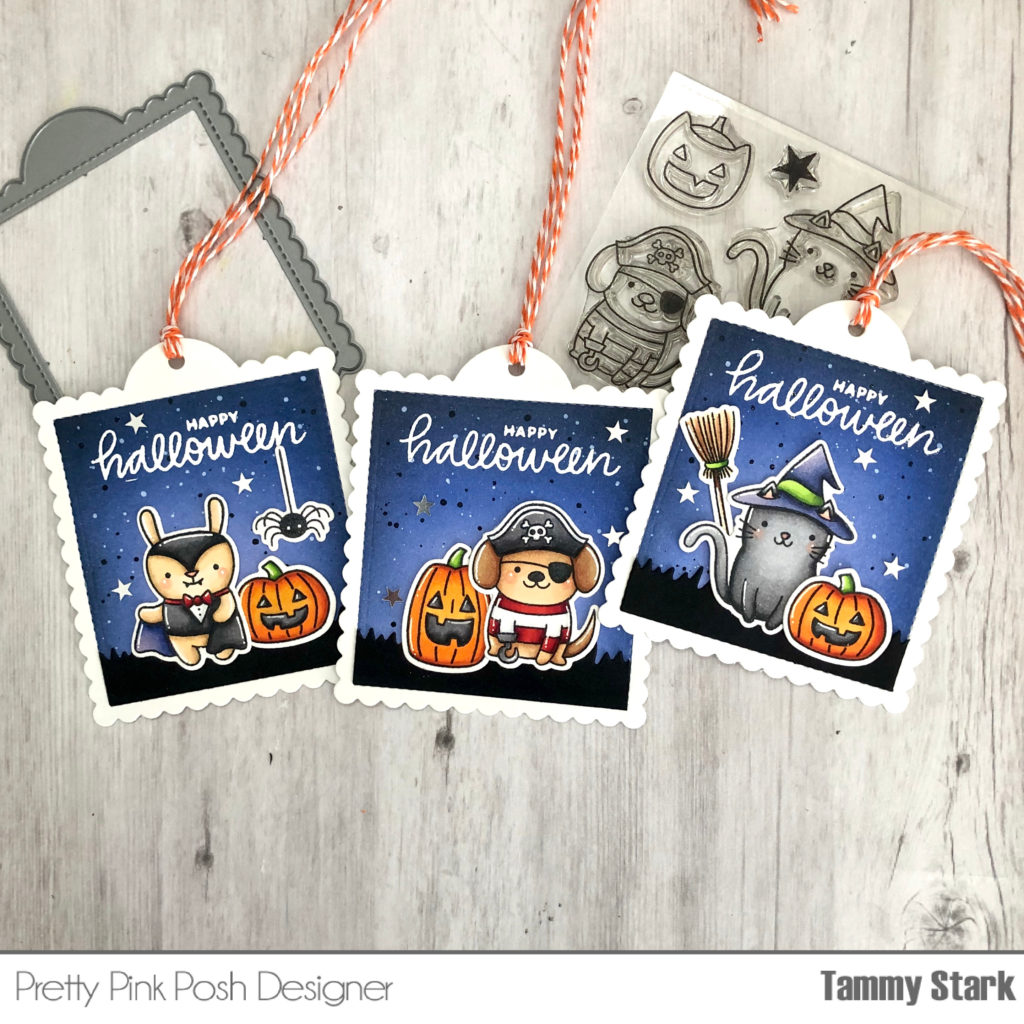
Next, I made a fun trio of tags, one of my favorite things to create! To begin, I cut 3 white Scallop Square Tags and masked off a square with washi tape, and ink blended the background exactly as I did the slimline card. Next, I used the Nature Essentials Dies to create the black grassy borders, trimming to fit the tag. I heat embossed the sentiment from Halloween Pals in white, and then added my stamped images. To finish my tags, I added some orange and white bakers twine and Silver Stars for a bit of shine.

Thanks so much for stopping by! I hope you all enjoyed all the amazing Halloween inspiration this week!

Big Hugs,
Tammy

|

Halloween Theme Week- Day 6

Pretty Pink Posh: Halloween Theme Week- Day 6

Hi! Melody here today for Day 6 of Halloween Theme Week.  I have a Halloween card to share with you that I created with the Halloween Pals Stamp Set

Have you taken advantage of the 15% savings on Halloween items this week? There’s only a few days left!

Pretty Pink Posh: Halloween Theme Week- Day 6

One of my favorite techniques is creating a fun background for my cards. I started with a piece of white cardstock for the card front. The first step on this background is to add the paw prints at the bottom of the card. I stamped the paws with the stamps in the Halloween Pals Stamp Set in Versamark Ink and embossed with black embossing powder. Then I used Peeled Paint Distress Ink to add the grass. 

Pretty Pink Posh: Halloween Theme Week- Day 6

For the night sky I blended Wild Honey, Seedless Preserves, and Black Soot Distress Ink. I stamped the sentiment from the Trick or Treat Friends Stamp Set in Versamark Ink and embossed with gold embossing powder. Then I splattered watered down gold paint to finish off the night sky. 

Pretty Pink Posh: Halloween Theme Week- Day 6

I die cut the fence with the Spooky Fence Die from black cardstock. The stamped images are colored with Copic Markers and die cut with the Halloween Pals Coordinating Dies. I added a few leaves with the Autumn Wreath Stamp Set and the Autumn Wreath Coordinating Dies.

Pretty Pink Posh: Halloween Theme Week- Day 6

I finished off the card by framing the scene in a black frame die cut with the Nature Essentials Dies and confetti from the Metallic Gold Confetti Mix.

Thanks so much for stopping by. I hope we have given you some ideas for Halloween projects. 

|

Halloween Theme Week- Day 5

Pretty Pink Posh: Halloween Theme Week- Day 5

Hello Crafty Friends! Sharna here with some Spooky inspiration for you during this Halloween Theme Week! Today’s card is a slimline card featuring a bunch of mix and match of Pretty Pink Posh sets to create this scene. 

Need to stock up on your Halloween items? All this week, save 15% on items in our Halloween section!

Pretty Pink Posh: Halloween Theme Week- Day 5

For the cloudy background I used distress ink in Dusty Concord & Milled Lavender and a tiny bit of black soot around  the top edge and the bottom to ground the card. I then splattered the background with light gold Starry Watercolors by Gansai Tambi. The images and sentiment are from Halloween Pals, Halloween Friends and Fall Borders

Pretty Pink Posh: Halloween Theme Week- Day 5

For the coloring I used my go to copic markers that I felt matched the background well. N8, N6 & N4 (Cat and Hat band); W3 & W00 (Pumpkin shading); B0000 (Ghosts); Y000 (Moon); YG63 (pumpkin stems); V28, V25 & V20 (Witch Hat). Lastly I used the same Dusty Concord to stamp the sentiment. 

Pretty Pink Posh: Halloween Theme Week- Day 5

Thanks so much for stopping by! Join us tomorrow for another day of Halloween Theme Week!

|

Halloween Theme Week- Day 4

Pretty Pink Posh: Halloween Theme Week- Day 4

Hello! It’s Lindsey here, and I’m super excited to be joining you for Halloween Theme Week.  If you know me, you know that I love stamping (I find joy in the simplicity of it!), and you may also know that I’m often inspired by my kiddos. Today’s cards are a combination of the stamping I love and each of my children’s favorite colors. 

Pretty Pink Posh: Halloween Theme Week- Day 4

The Boo stamp set is so fabulous on it’s own that it takes very little effort to make a card.  Love that!  I simply inked each individual letter using pink, orange, and chartreuse green.  The Misti stamping tool makes quick, precise work of this. 

Pretty Pink Posh: Halloween Theme Week- Day 4

I finished the card off by embossing the sentiment from the Boo stamp set onto black cardstock and popping it up with dimensional foam.

Pretty Pink Posh: Halloween Theme Week- Day 4

The Boo stamp set also comes with some great larger, individual images, so I grabbed the cute ghost for my next card.  I started by stamping 3 rows of ghosts in black ink.  Then I flipped the stamp over, inked up the back side, and stamped again over some of the images in pink, orange, and chartreuse.  This is one of my favorite techniques.  It is such a fun, simple way to add color and these stamps are perfect for it.

Pretty Pink Posh: Halloween Theme Week- Day 4

Thanks so much for joining me today!  If there ever was a year to be creating cards for all the things and mailing them, this is it! And these quick and easy techniques are perfect even for the busiest cardmakers and very mailer friendly, too.  Win-win!

Pretty Pink Posh: Halloween Theme Week- Day 4

PS We’re only half way through Halloween Theme Week, so there is still lots more inspiration to come. Yay! Don’t forget that everything in the Halloween section is 15% off, so fill your cart up with some of these cute stamps and dies and get creating! :) 

|

Halloween Theme Week- Day 2

Pretty Pink Posh: Halloween Theme Week- Day 2

Hi Friends! It’s Jane here today and I’m sharing this fun pretty pink Halloween shaker card. Breaking from tradition, I thought it would be fun to create a pink and black Halloween card (rather than the traditional orange and black).

Need to stock up on your Halloween items? All this week, save 15% on items in our Halloween section!

Pretty Pink Posh: Halloween Theme Week- Day 2

To start, I created a background using an A2 piece of Bristol smooth cardstock and masked a cresent moon  from the Halloween friends stamp set.  Next, I ink blended the following distress inks (bottom to top): tattered rose, spun sugar and worn lipstick and splatted the background with water to create some interest. 

Pretty Pink Posh: Halloween Theme Week- Day 2

Next, I heat embossed the pumpkins from Pumpkin Patch Critters stamp set using versamark ink and white embossing powder. Then using distress inks in the same colors as the background plus picked raspberry and festive berries, I ink blended the pumpkins in an ombre pink pattern. The ghosts are from the Halloween Friends stamp set. All the images were cut using the coordinating dies. Black cardstock was used to cut the grass, frame and trees using the Nature Essentials die.  

To create a shaker, I glued down all the elements to a clear acetate sheet and stamped the sentiment from the Halloween Friends stamp set using black StazOn ink. Here are the Pretty Pink Posh sequins used to fill the shaker: 3mm sparkling clear sequins6mm sparkling clear sequins4mm ballerina pink sequinssilver star confetti, iridescent stars and a few tiny iridescent stars. Double foam tape was adhered to the frame and the front of the card was adhered to the ink blended base. 

Pretty Pink Posh: Halloween Theme Week- Day 2

Finally, the card front was mounted to an A2 card base.  I added a few details with a white gel pen, and that completes the card!

Thanks so much for stopping by today! Be sure to check out the blog this whole week for amazing creations from the design team!  

|

Halloween Theme Week- Day 1

Hi there, it’s Gemma here. Today I have a fun Halloween project to share. I’ve made some Halloween treat bags and decorated them with Pretty Pink Posh stamps and dies. These were really easy and fun to put together.

Need to stock up on your Halloween items? All this week, save 15% on items in our Halloween section!

Pretty Pink Posh: Halloween Theme Week- Day 1

I’m using some 5 x 7 inch cellophane bags. I die cut the Spooky Fence die from navy card with stick-it adhesive on the back. The adhesive backing makes it very easy to add the spooky fence to the treat bags, which I did whilst the bag was empty.

I added some different sweets and chocolate to the bags, then used black ties to close the bags.

Pretty Pink Posh: Halloween Theme Week- Day 1

Next, I stamped and copic coloured images from the Trick or Treat Friends and Halloween Pals stamp sets. I chose green, orange and purple for my colour scheme, to match the curling ribbons that I plan to use.

I die cut the images with the coordinating dies, then used sticky dots to adhere them on the treat bags. They stick well but would also be easy for the recipient to gently remove and reuse on their own projects.

Pretty Pink Posh: Halloween Theme Week- Day 1

For the tags, I die cut the pumpkin from the Fall Tags die set. I cut two pumpkins for each treat bag – one from pearlescent black card and another from orange glitter card. From the orange layer, I also die cut the pumpkin face that’s included in the set, then layered them together so the black shows through underneath.

I added some curling ribbons to the bags, then attached the tags with black craft cord to finish.

Pretty Pink Posh: Halloween Theme Week- Day 1

I hope you were inspired by today’s blog post. Join us each day this week for new Halloween inspiration plus save 15% on all products in the Halloween section.