
Video Tutorial: Spring Daffodils Card
Hello, friends! Justin here and today I have crafted up some floral Spring inspiration to share with you! The Daffodil Shaker Dies are so perfect for putting big and bold florals on your project, and I’m going even bigger by using 3!
Watch the video above I Watch the video in HD on YouTube
Below is a list of Pretty Pink Posh products that I used to create this card:
Daffodil Shaker Dies
Large Spring Shadow Dies
Potted Daffodils Stamp Set
Potted Daffodils Coordinating Dies
Pinking Rectangles Die Set
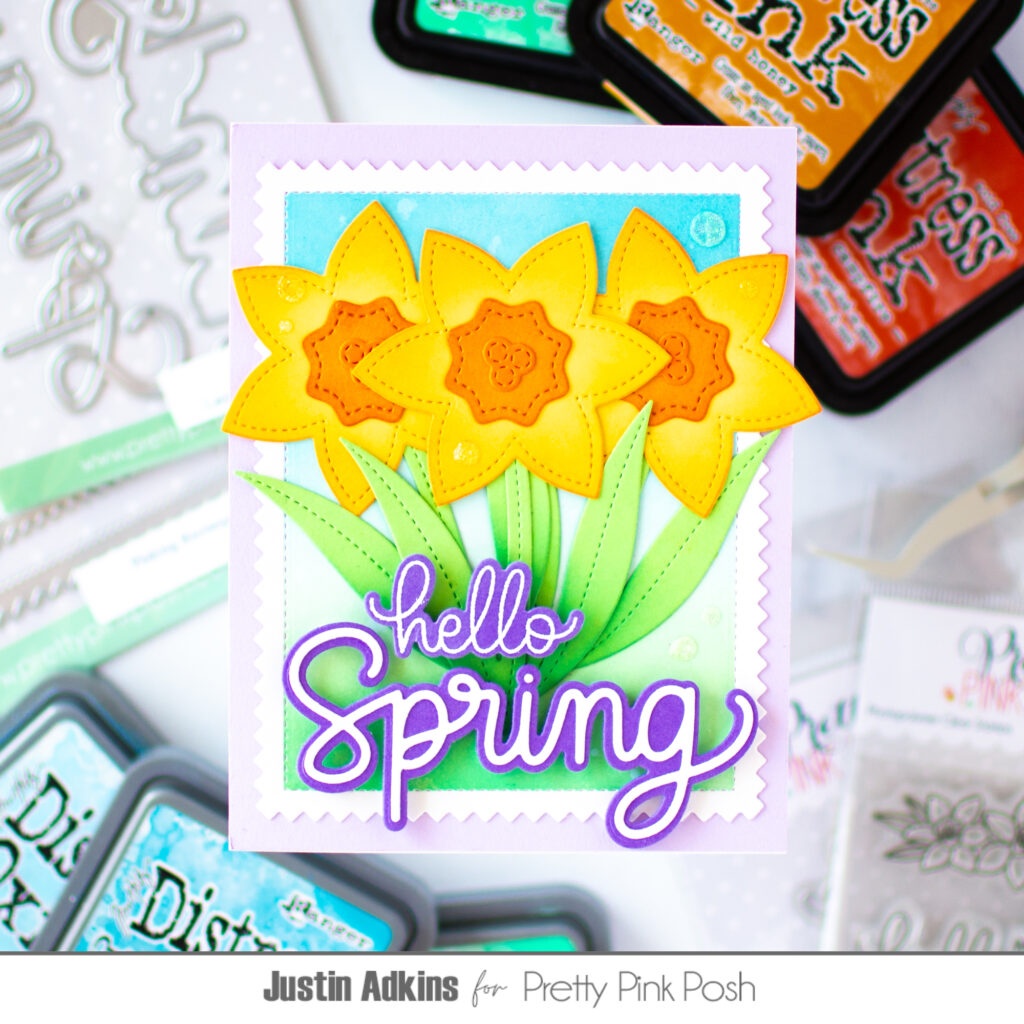
I think that one of the best ways to make your daffodil die cuts pop is by cutting the shapes from colored cardstock and ink blending the edges with dye inks. For this card, I am using various Distress Inks to blend up our daffodils, and they coordinated so perfectly with the color of our blends!
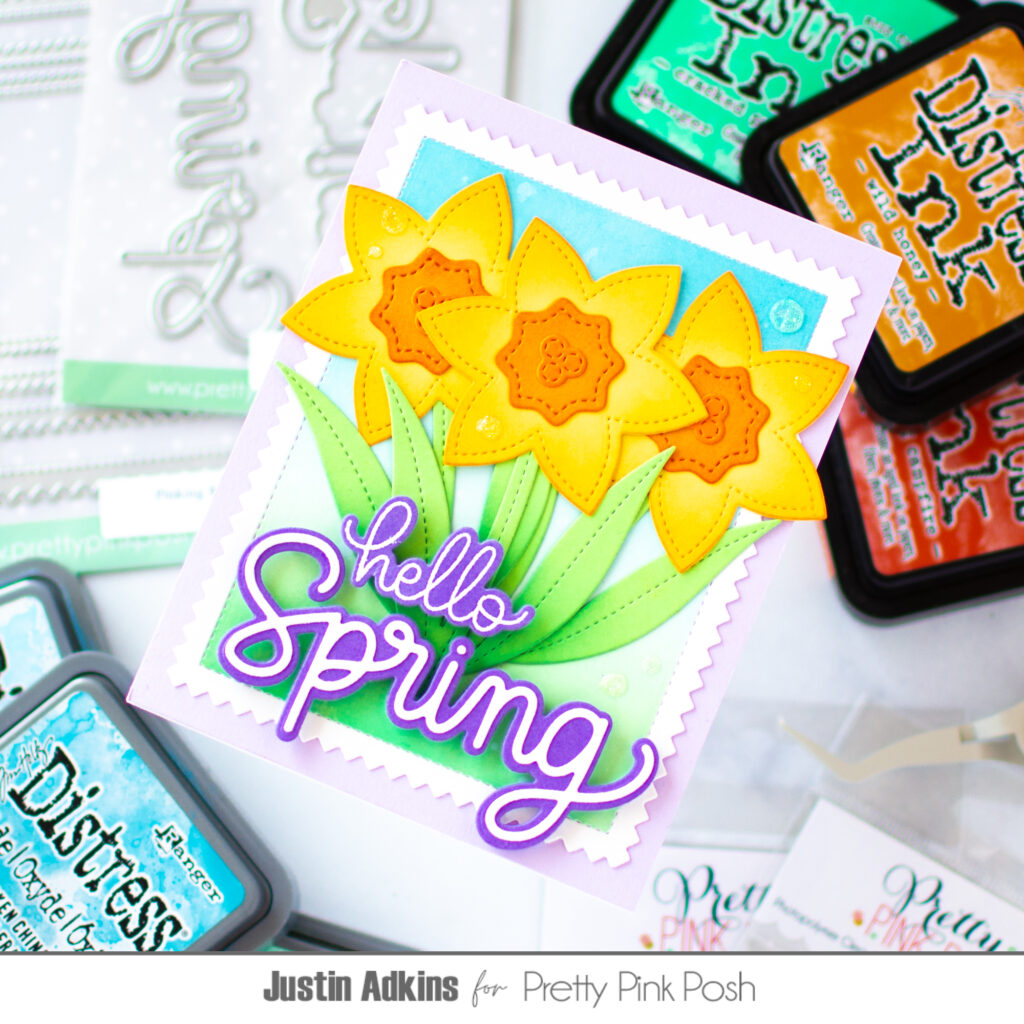
I also have a deep love for the Pinking Rectangles Die Set. First, I love the jagged edges, which really lends a fun personality to your project. I also love that there is a stitching that outlines an interior rectangle. I like to use this stitching as a guide to mask off the edges with tape, and then ink blend the center rectangle of the dies. This, in turn, gives a framed look to the die cut! For this card, I take white paper, mask the edges, and blend a grassy and blue sky background that will serve as the perfect scene for our daffodils!
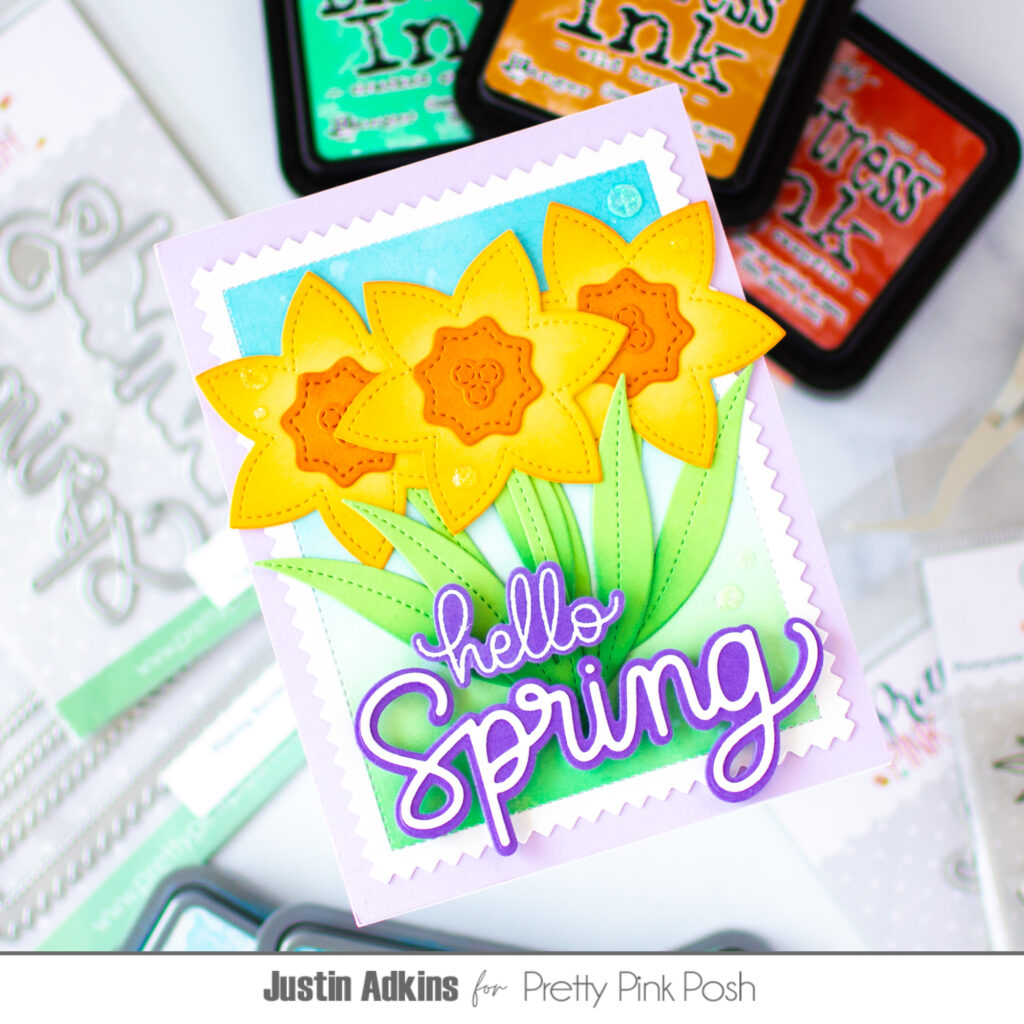
Lastly, big bold sentiments are going to definitely help send the feel of this card over the top! The Large Spring Shadow Dies is the perfect addition to the word sentiment die collection, and I just love how much space it takes up on the card! Adding the smaller hello from the Potted Daffodils stamp set above the word spring just makes the card even more fun!
Don’t forget to follow me on Instagram and YouTube at @justanotebyjustin for even more crafting inspiration!
Thank you so much for stopping by the blog today! Happy crafting!
LOVELY! That purple backer for this sentiment really is eye-catching!!