
Cheery Chick Shaker
Hello crafty friends, Marine here, I’m thrilled to be back on the blog with this bright and cheerful card featuring some of the brand new items from the Pretty Pink Posh February 2026 release. As I’ve already mentioned in previous blog posts, I’m a huge fan of the Shaker Collection, and that Chick Shaker caught my attention right away, it’s such a cutie!
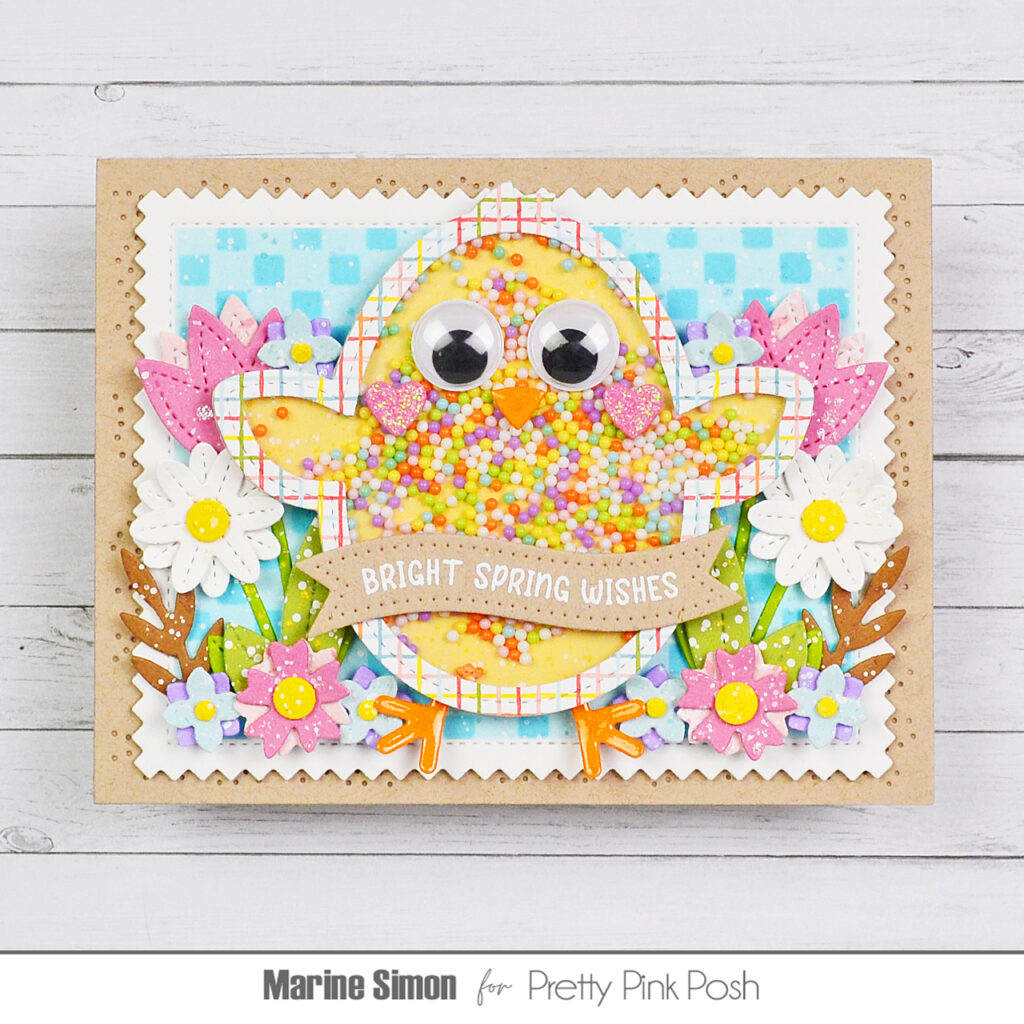
I started off by cutting a large Pinking Rectangle panel out of Strathmore bristol smooth cardstock, I masked the stitched edges off with washi tape, covered the whole panel with tumbled glass oxide ink, and then added a fun pattern using the Mini Checker stencil along with broken china oxide ink. Next I mixed copic opaque white ink with water, added white splatters to my panel using a slim brush, and then did the same with tumbled glass distress spritz for some sparkles.
While my panel was drying, I worked on my Chick Shaker and assembled it just like any other shaker item I’ve made in the past, following those steps:
1. I cut a Chick Shaker frame out of a multicolored stripe pattern paper, cut a whole chick out of acetate, and attached that acetate panel at the back of the multicolored frame using liquid glue,
2. Still at the back of the multicolored frame, I attached foam strips all around it, following the rounded edges of the chick,
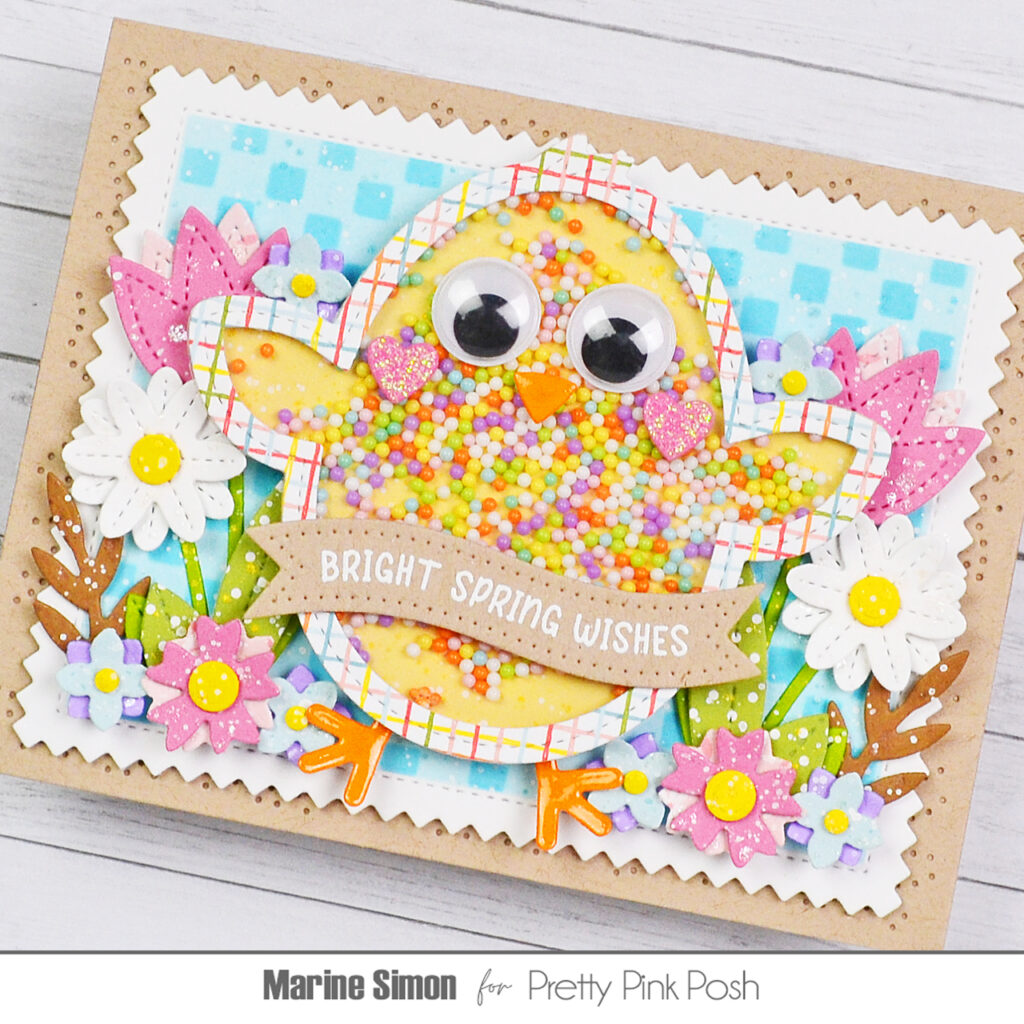
3. I poured a bunch of Bunny Hop shaker beads inside the chick,
4. I cut another whole chick out of a yellow pattern paper, added white splatters and fossilized amber distress spritz splatters to that yellow panel,
5. When dry, I attached my yellow panel to the foam strips to totally close my Chick Shaker.
Next I added a few more details to my Chick Shaker. I cut two small hearts out of pink cardstock using a Valentine Bucket Additions die, cut the beak and feet out of orange cardstock using other Chick Shaker dies, and picked two giant googly eyes from my stash. I stuck the beak and the heart cheeks using 1mm foam squares, peeled the backing papers off the eyes and attached them as well, and then stuck the feet using liquid glue. For more cuteness, I applied glossy accents to the beak and feet, white blizzard nuvo drops to the heart cheeks, and set my Chick Shaker aside to dry.
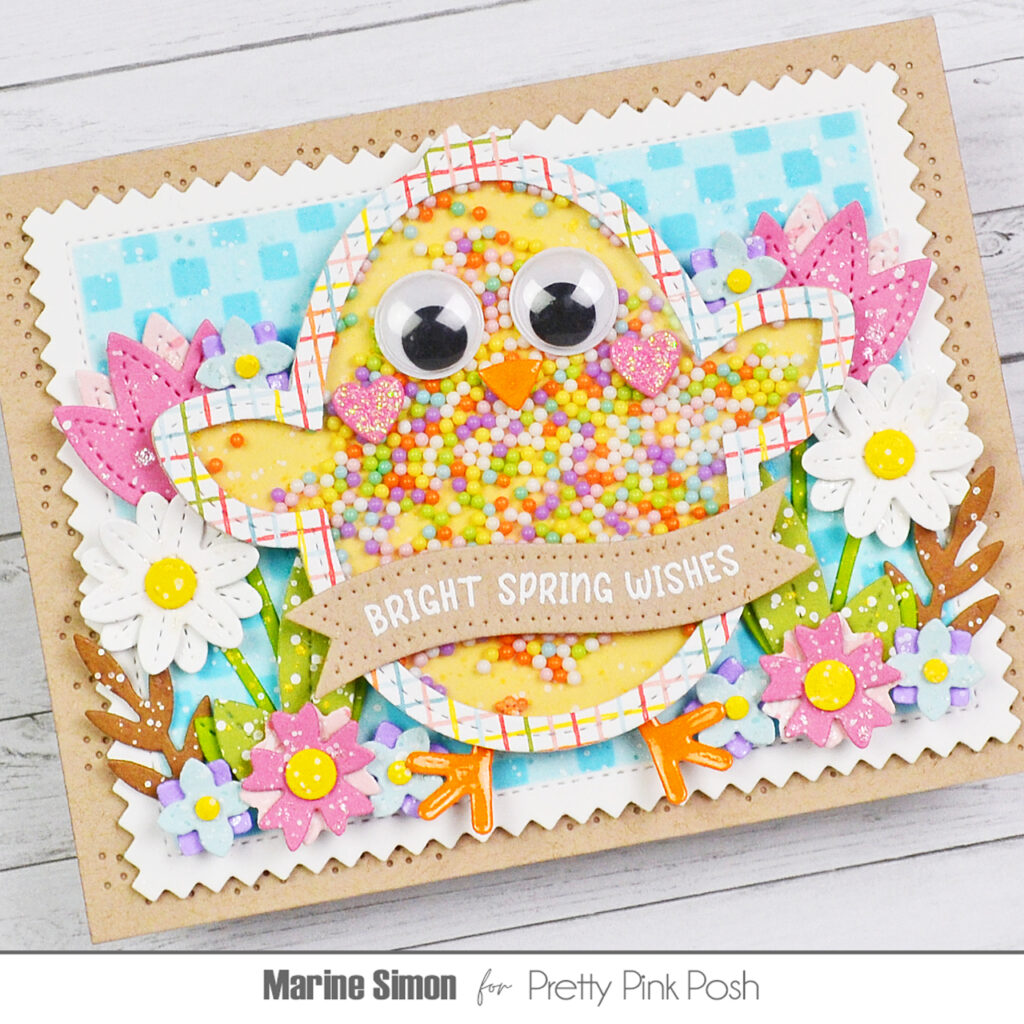
I cut all the Stitched Spring Flowers out of colored cardstock and pattern papers, added texture to each piece using liquid stardust, copic opaque white ink, fossilized amber distress spritz, and when everything was dry, I assembled all the flowers and greenery using foam squares.
Next I cut a Pierced Leafy Vines panel out of kraft cardstock, stuck it to a matching card base using double sided sticky tape, and attached my Mini Checker panel on top using 1mm foam tape. I stuck my Stitched Spring Flowers on both sides of the card in a symmetrical way using foam squares again, gave them more interest by bending the petals a little bit with my fingers, and then attached my cute Chick Shaker right in the middle of the card using more foam squares. For my greeting, I white heat embossed “Bright Spring Wishes” from Easter Banner Greetings, cut it into a wavy banner using a Banner Greetings 3 die, and stuck that banner to the Chick Shaker using foam squares.
And that’s it! Doesn’t it feel like Spring already with those beautiful Stitched Spring Flowers and that extra cute Chick Shaker? Can’t wait for warmer and brighter days!
Thanks so much for stopping by, and see you next time!
Marines cards are always so bright and cheerful