
Pastel Easter Egg
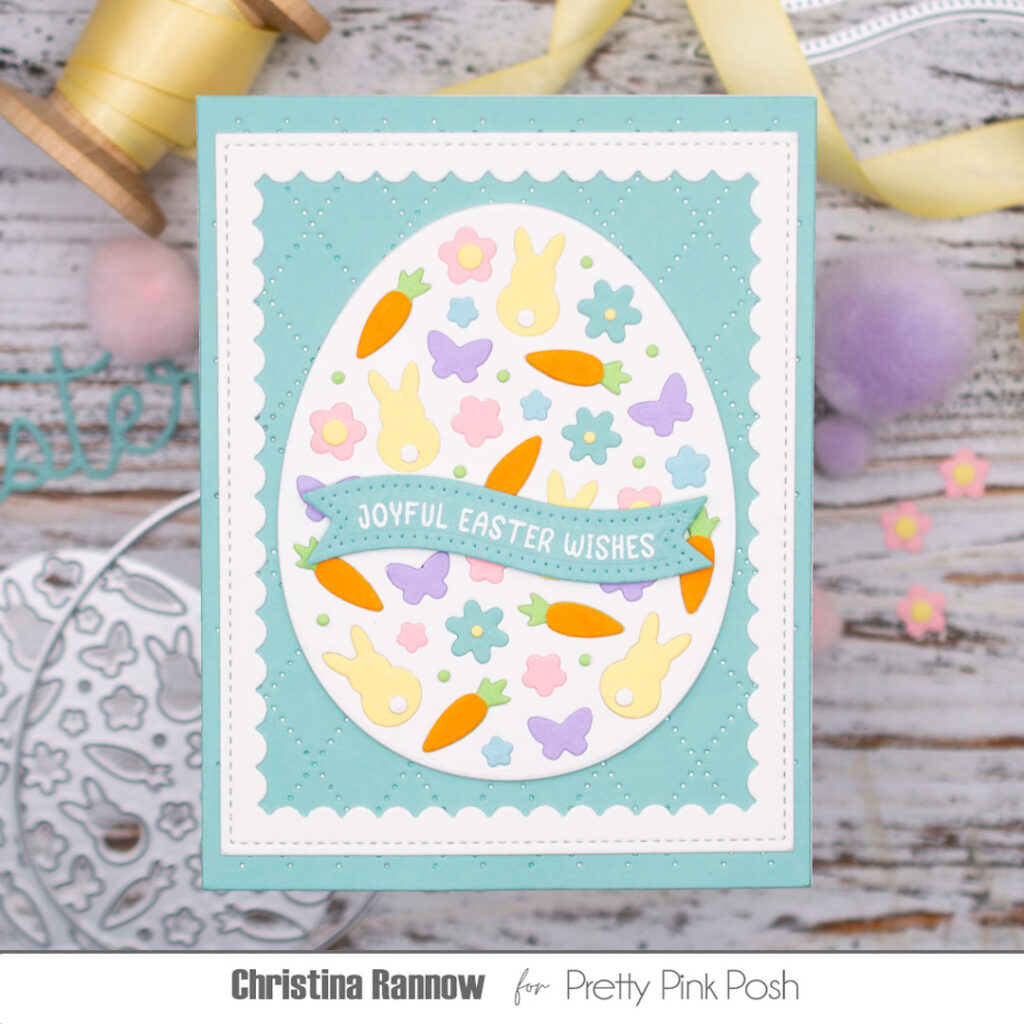
Hi friends! Christina here to share this pretty Easter card featuring a fun inlay technique using the new Decorative Easter Egg die set. You can use the Decorative Easter Egg in so many ways, even creating a shaker, but I love the inlay technique, and it’s so easy. The hardest part is choosing the cardstock colors! Take a peek at the supplies I used, and then we’ll get started!
Decorative Easter Egg Dies
Banner Greetings 3 Dies
Easter Banner Greetings Stamp Set
Argyle Pierced Plate
Scallop Frames Dies
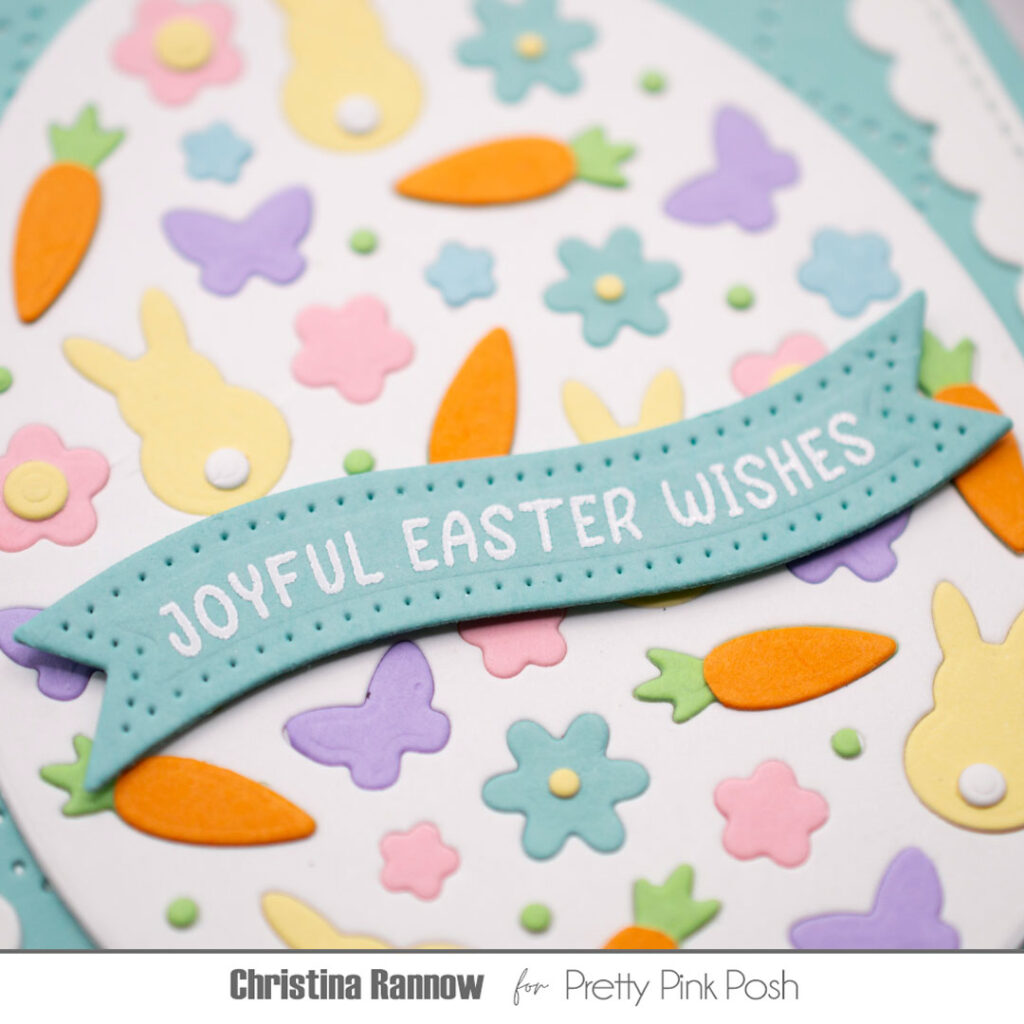
My first step was to choose my cardstock colors. I decided on a traditional pastel color palette to complement the spring and Easter icons that make up the Decorative Easter Egg. Then I die-cut the Decorative Egg and the backer piece from white cardstock and glued these together to be the base. Next I die-cut the Decorative Egg once from each of the cardstock colors I choose and began inlaying the icon pieces onto the white base. For some decorative details, I decided to trim the carrots and add green tops, give the larger flowers round centers, and add small round tails to the bunnies. You can skip this step, but I like the addition of these small embellishments.
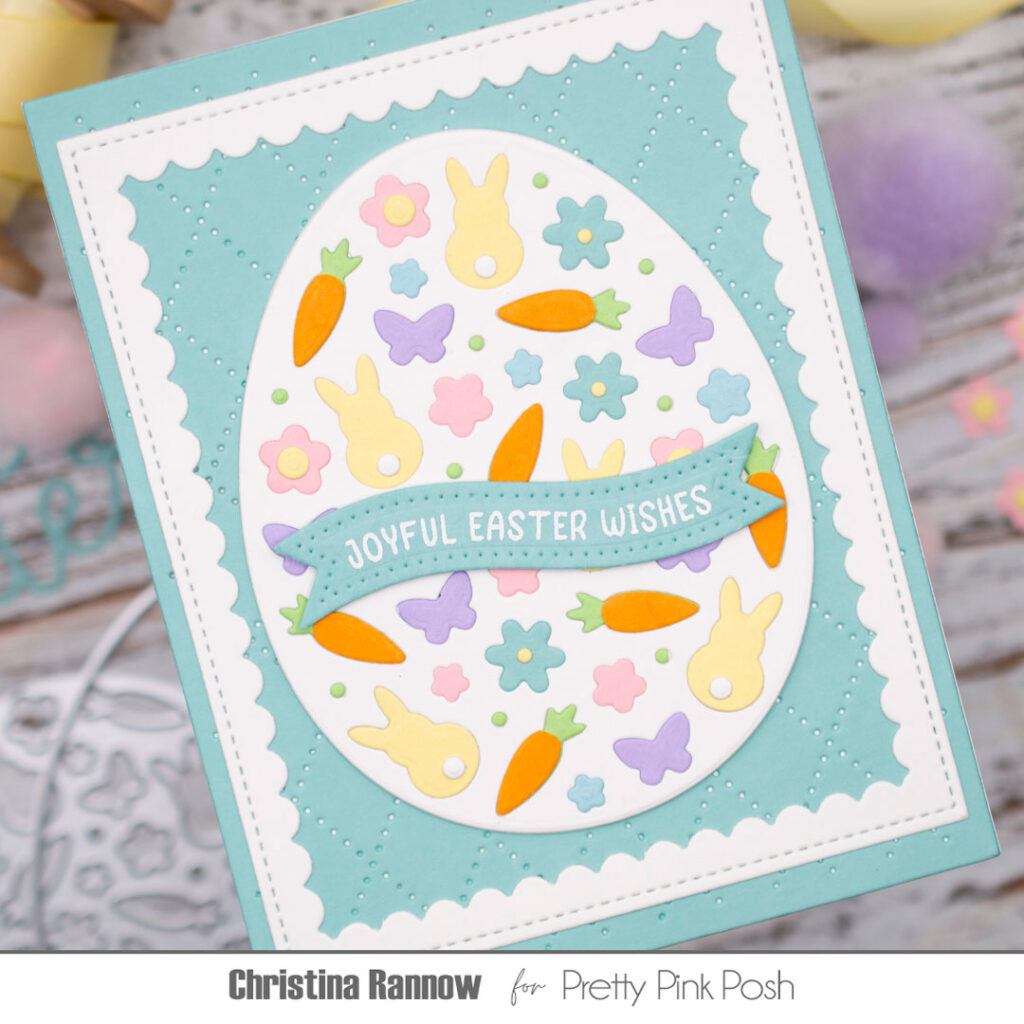
With the Decorative Easter Egg complete, I got to work on the background. First, I die-cut the Argyle Pierced Plate from Tidepool cardstock and added a white scallop frame. This provided me with the perfect framed space for the egg. The last step was to add a banner sentiment that I heat-embossed with white embossing powder on a new Banner Greetings 3 die.
Thank you for checking out this Easter card featuring an inlay technique using the new Decorative Easter Egg die set from the newest spring collection. See you again soon!
Absolutely obsessed with this die!!
I love the delicate scalloped frame you used here. Such a sweet card.
Sweet card! Love all the adorable Easter icons in the egg!