
Be Mine Ladybugs
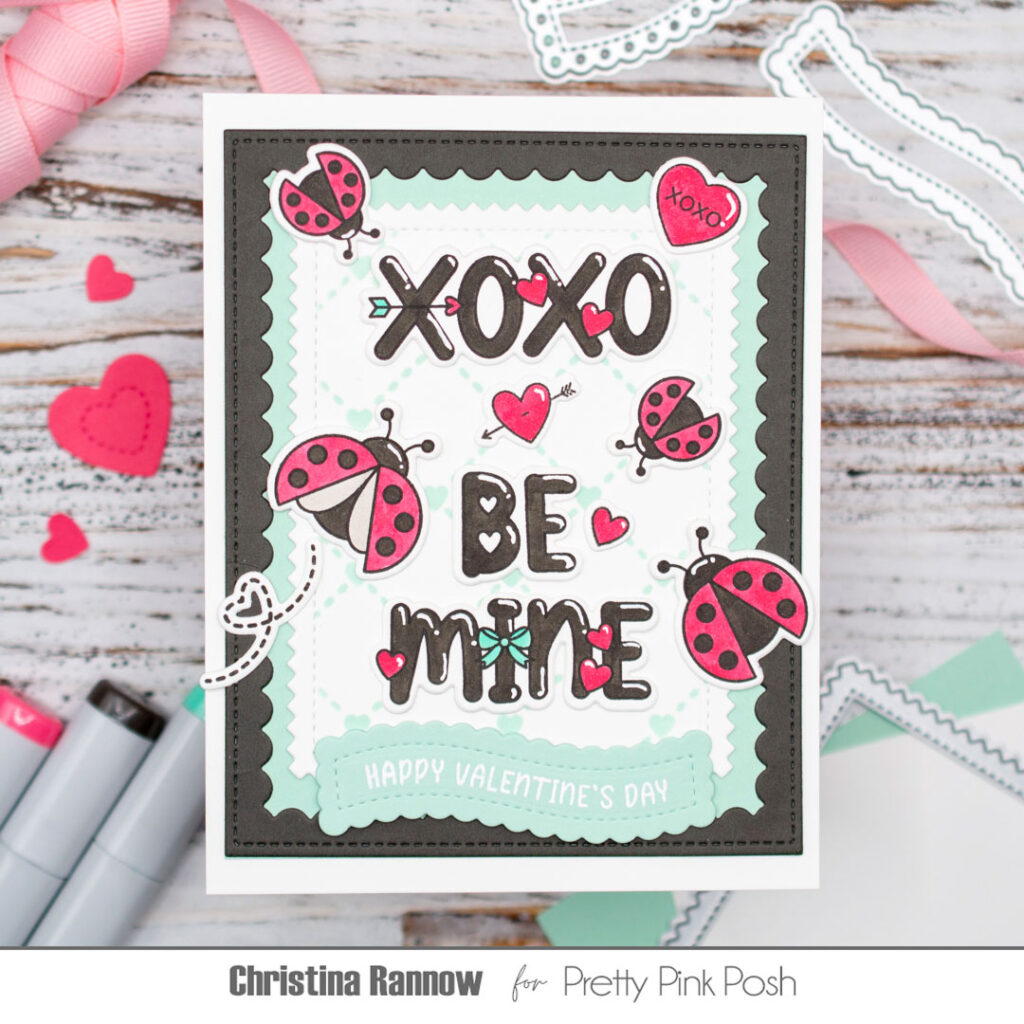
Hi friends! Christina here to share a darling Valentine’s Day card with you featuring two new stamp sets from the latest release. I used the Lovely Ladybugs and Valentine Word Scenes stamp sets to create this super cute design. I colored the images in a simple color palette of watermelon, minty green, and charcoal gray and placed them on a dainty Layered Heart Lattice background. Take a peek at my supply list, and then we’ll get started!
Lovely Ladybugs Stamp Set
Lovely Ladybugs Coordinating Dies
Valentine Word Scenes Stamp Set
Valentine Word Scenes Coordinating Dies
Valentine Icons Stamp Set – xoxo heart
Valentine Icons Coordinating Dies
Valentine Greetings Stamp Set – smaller hearts
Valentine Greetings Coordinating Dies
Valentine Banner Greetings Stamp Set
Banner Greetings 2 Dies
Pinking Rectangles Dies
Scallop Frames Dies
Layered Heart Lattice Stencil
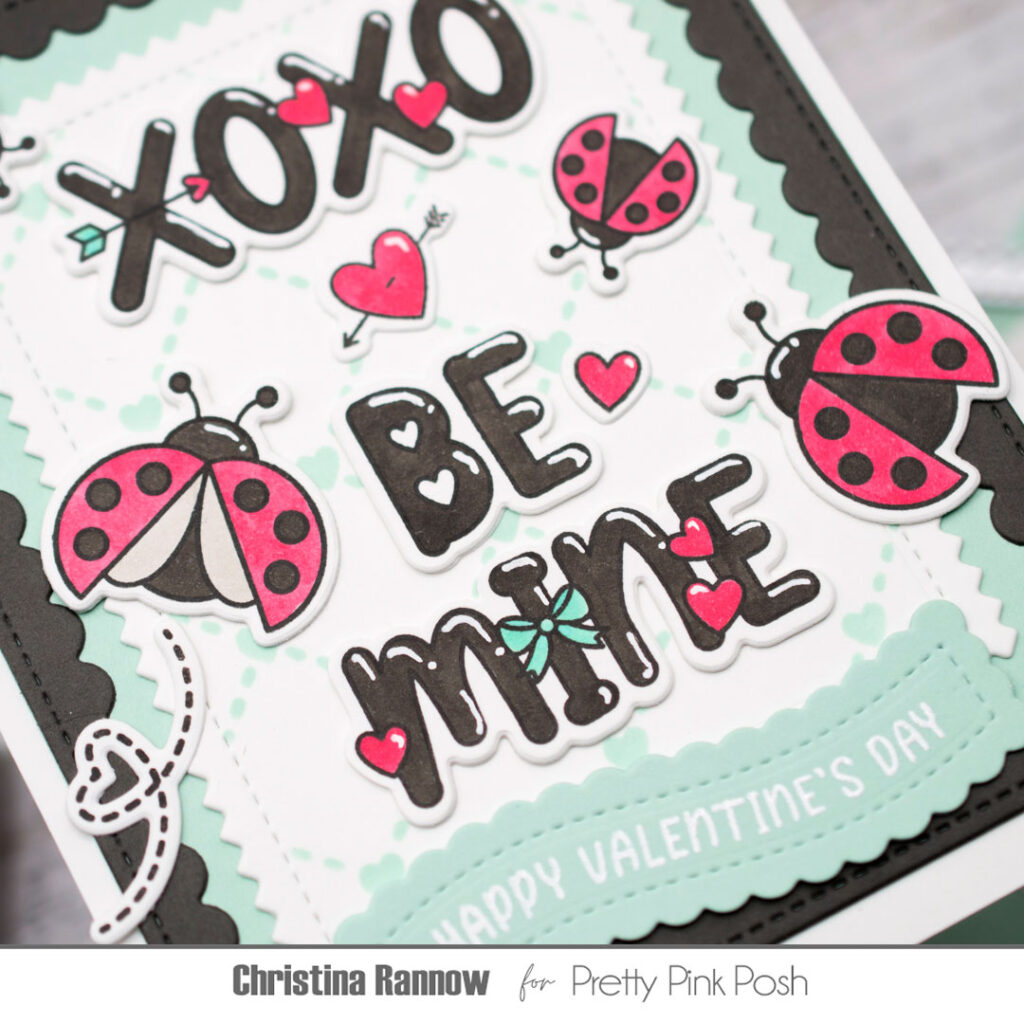
I started my card design by stamping the Lovely Ladybug images and the Valentine Word Scenes with black ink on white cardstock. Then I colored all the images with Copic markers W3, W7, RV14, and BG34. I used the coordinating dies to die-cut the images and did a little fussy cutting on the “Be Mine” word scene to separate them so I could stack them on my card front to better fit my design layout.
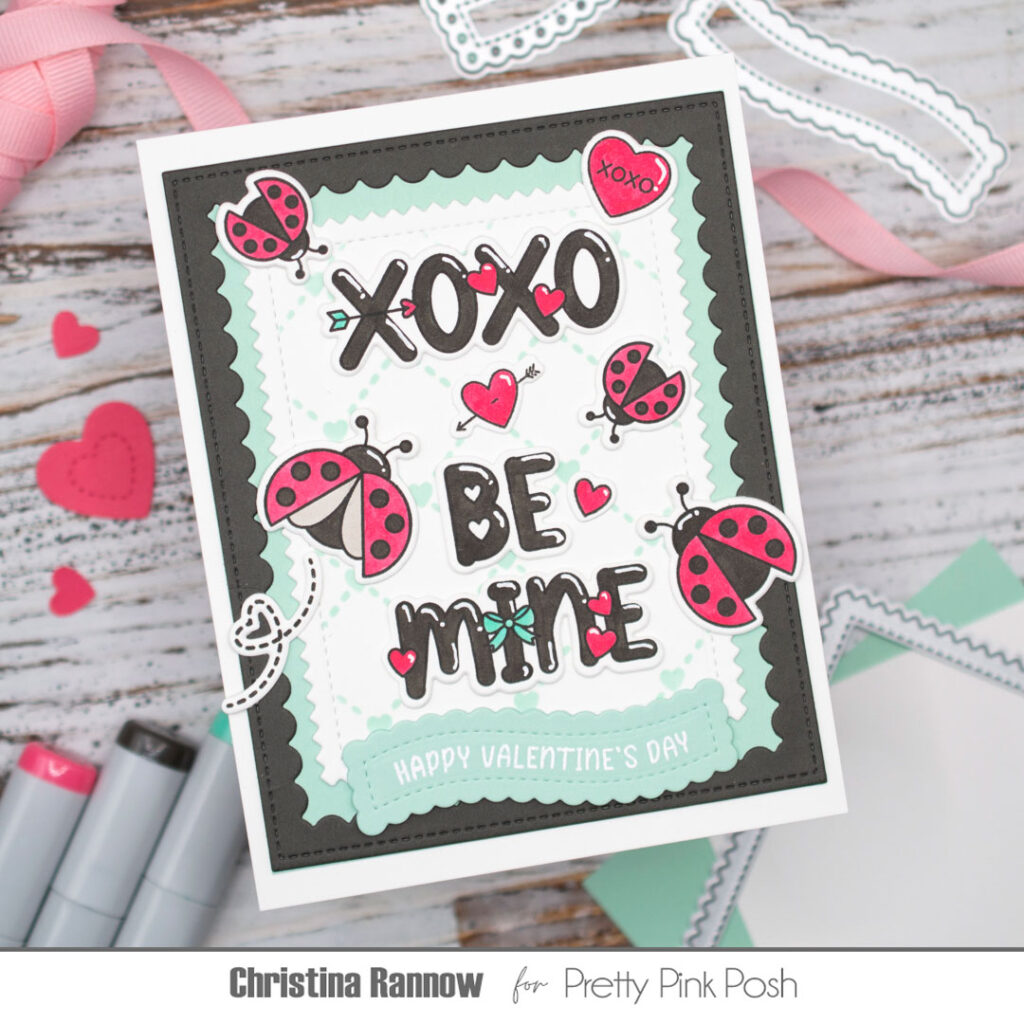
My next step was to stencil the Heart Lattice pattern on a Pinking Rectangle panel with minty green ink. Then I layered this panel onto a coordinating minty green cardstock and finished with a charcoal gray Scallop Frame. I centered everything on a side-fold card base, giving the design a thin white border.
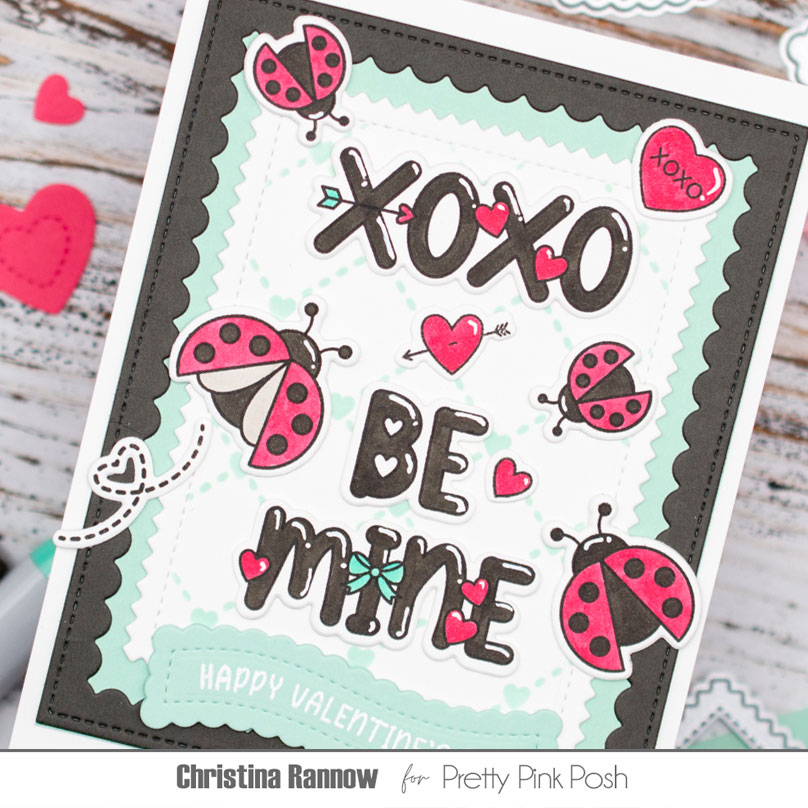
To bring the design together, I attached all the colored and die-cut images onto the lattice panel. I placed the word scenes first and then added the ladybugs flitting around the words and popped in a few heart icons. My last step was to add a Valentine Banner Greeting heat-embossed on minty green cardstock.
Thank you for checking out my Valentine’s Day card featuring some of the darling new products from the latest release. Have a lovely day!
This sure is a darling card! Like the color palette and love these little lady bugs. Eager for my little bugs to arrive and start creating with!! Thanks for the inspiration!
Super cute. The unusual color scheme works really well.