
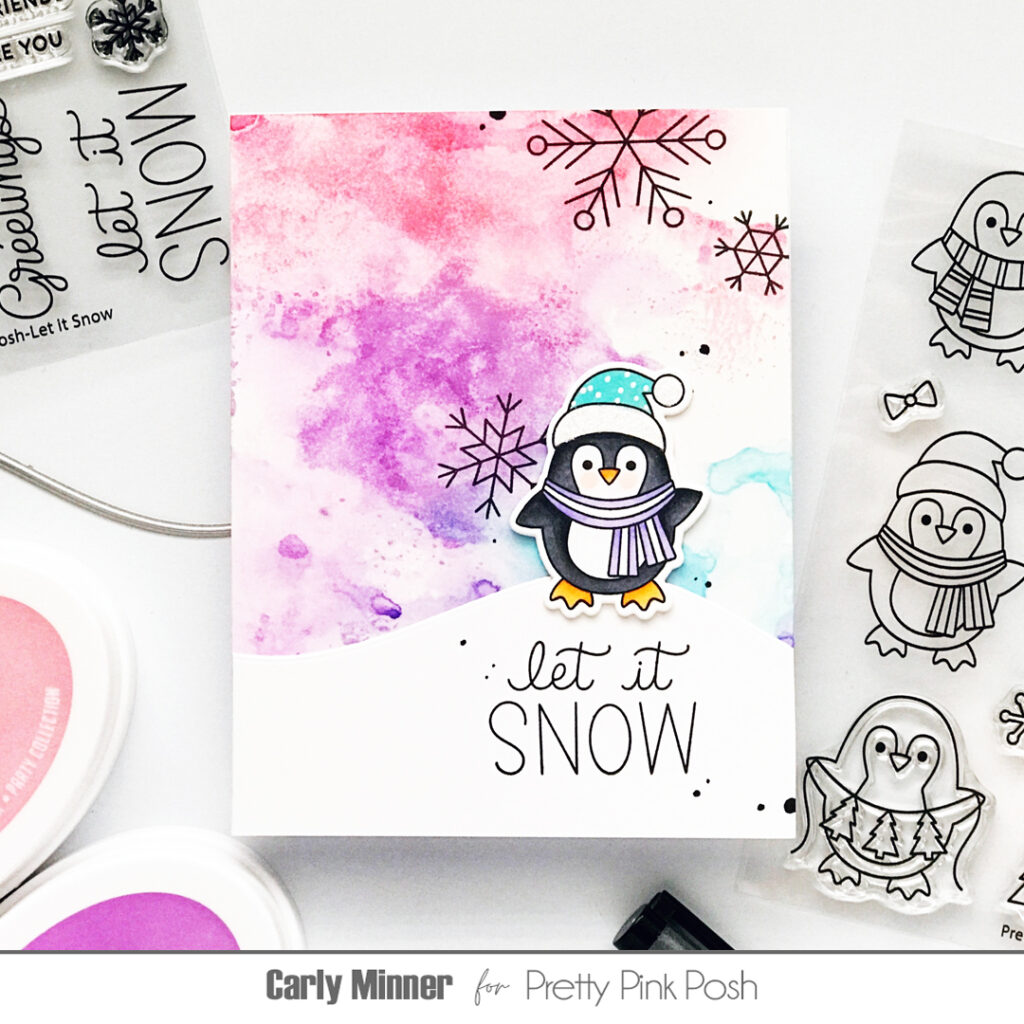
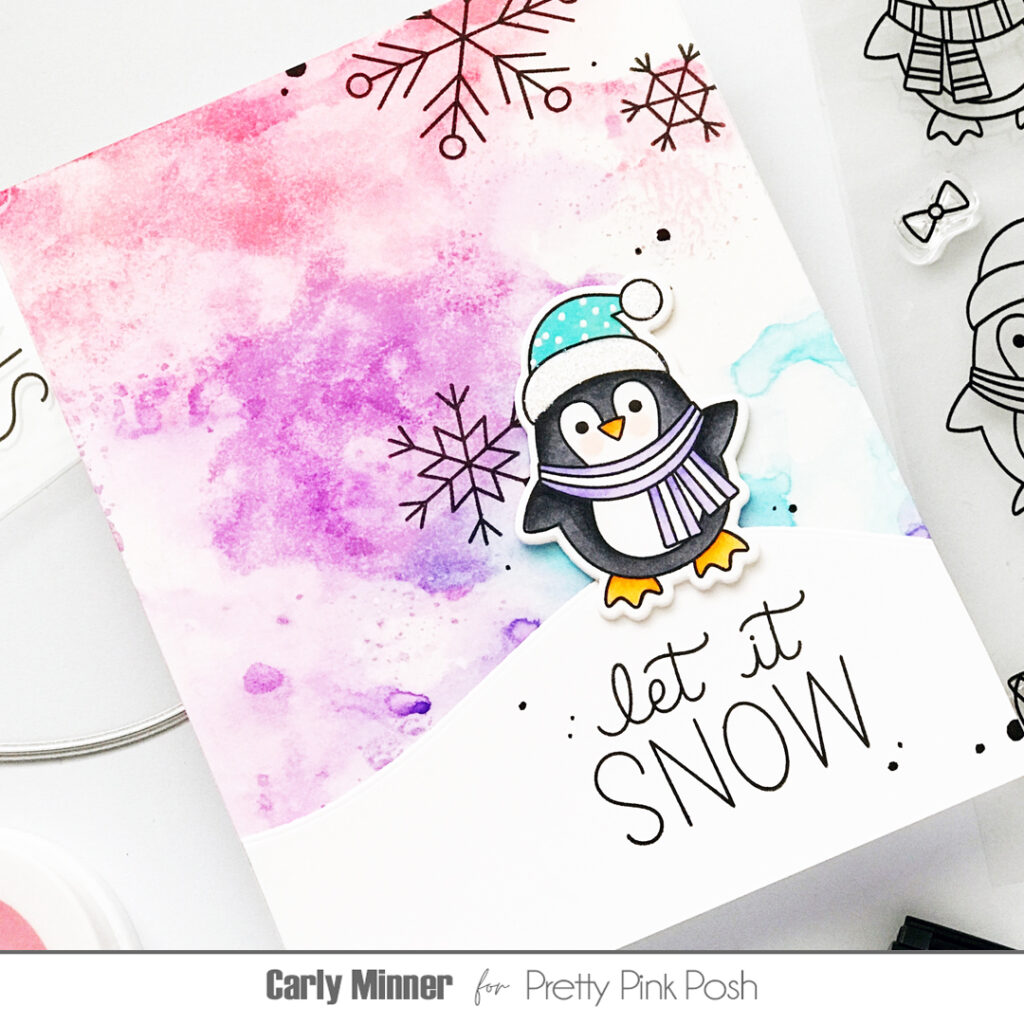
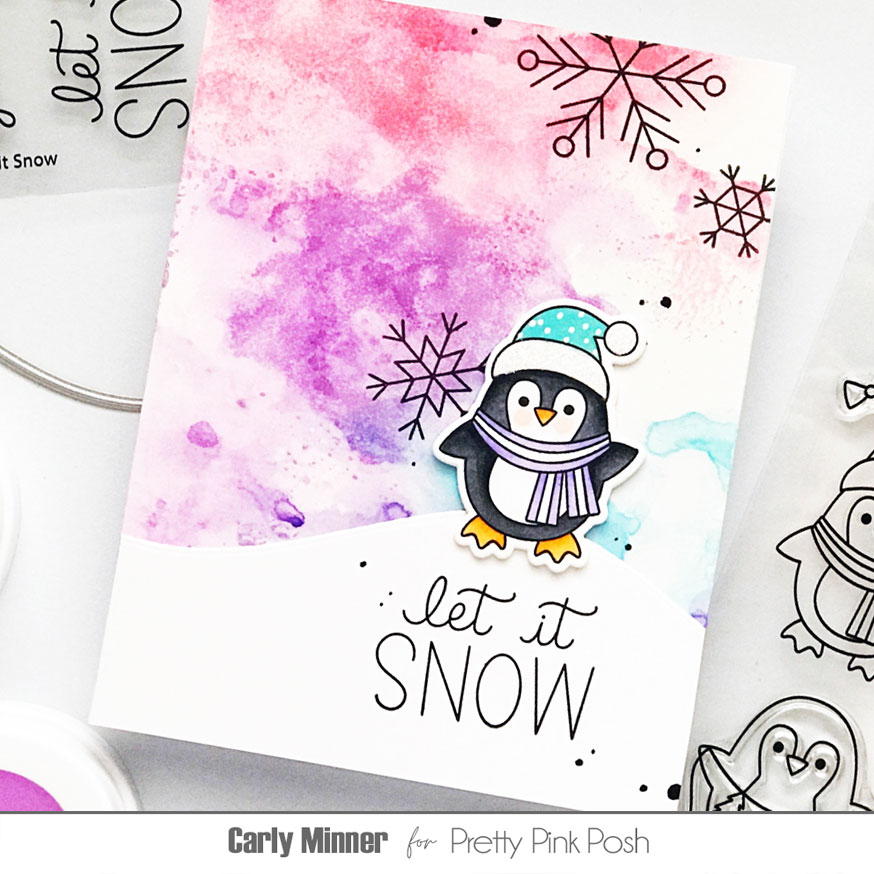
Ink Smooshing Winter Card
Hi friends, it’s Carly here today. Have you tried ink smooshing on your cards yet? It is a really fun and easy technique for creating backgrounds for handmade cards!
Watch the video above I Watch the video in HD on YouTube
Are you wondering what I’m talking about? LOL! Ink smooshing uses water-reactive inks, water and a surface to “smoosh” the inks onto cardstock to create a background.
Penguin Friends Stamps & Dies
Let It Snow Stamps
Snowflakes Stamps
Snowy Hills Borders Dies
To create this background, I swiped ink pads and dotted reinkers onto a piece of acetate, misted with water and “smooshed” it onto some smooth watercolor cardstock.
Tips for smooshing success…
- make sure to use cardstock that can handle water without pilling or falling apart.
- acetate/plastic is super flexible so it is easy to customize the shape of your “smoosh”.
- experiment with other slick surfaces too like acrylic blocks or even the lid of your MISTI.
- use colors that will mix harmoniously and/or dry between colors to keep from making “mud”.
- if dry panels are warped, try running through a laminator or your die cut machine (with no dies).
- start with a whole stack of cardstock panels because it’s super fun & you will want to keep going once you start!
Inks used: Catherine Pooler Designs It’s Girl, Sugar Plum, Pixie Dust and Oh Boy
I hope this card and video inspired you to try ink smooshing on your cards. It’s so easy and fun!
This is 100% certified delightful, Carly and PPP! Love it!