
Mouse Tea Party
Hello crafty friends, Marine here with you today. I’m back with this extra cute little scene showcasing a mix of previously released products: a lovely tea party for two mousy friends.
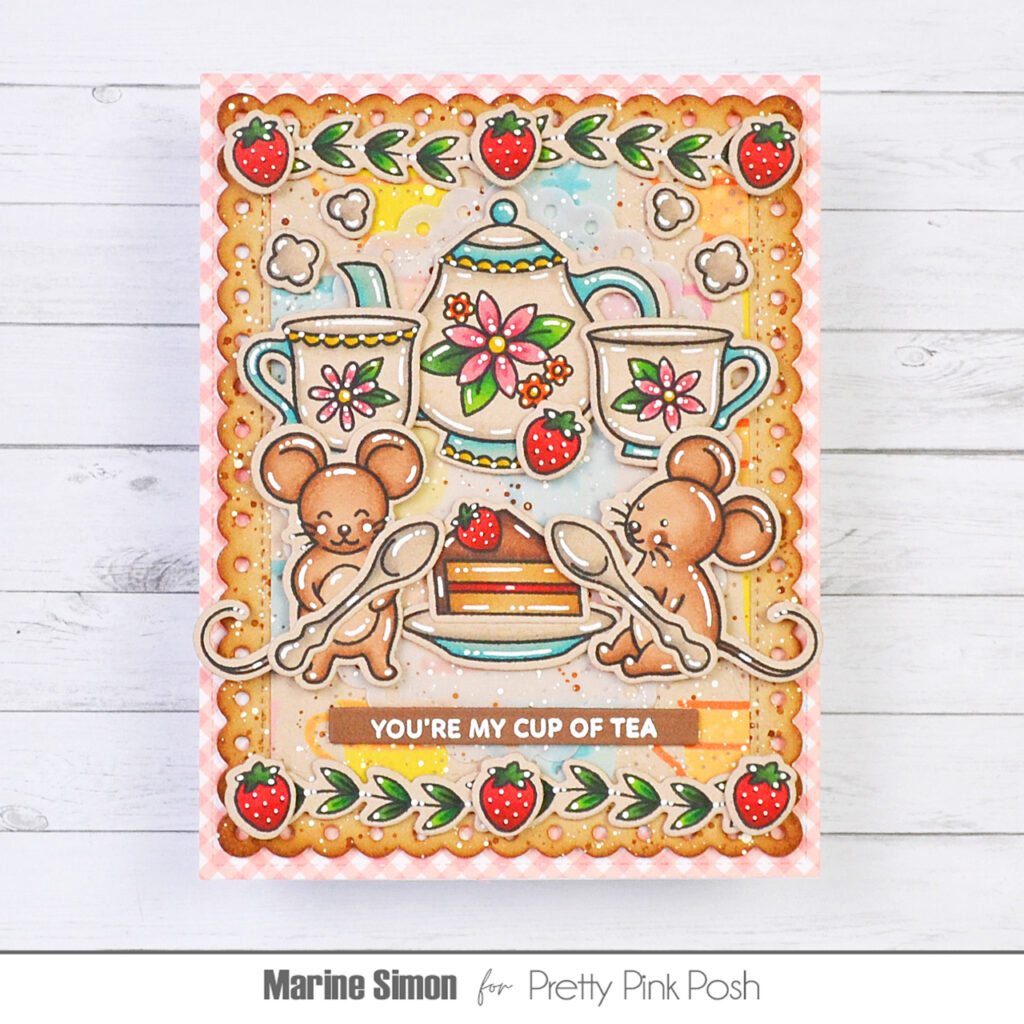
I started off with the background and cut a 4,5 x 3,25 inches panel out of kraft cardstock. I first added a fun dotted heart texture to this panel using the Pierced Hearts plate, and then I used the Layered Teacups stencil set, along with oxide inks, to create a teacup pattern. For the blue cups: tumbled glass + broken china, for the pink cups: saltwater taffy + worn lipstick, for the yellow cups: fossilized amber + spiced marmalade, and for the orange cups: spiced marmalade + ripe persimmon. I splattered water on my panel and dried it with a paper towel. I mixed some copic opaque white ink with water and used a slim brush to add white splatters all over the panel to bring brightness, and then I did the same with vintage photo distress ink for a bit of contrast.
Next I cut a large Eyelet Rectangle panel out of the same kraft cardstock as before, applied vintage photo distress ink to the edges to darken them a little bit, and then added white splatters and brown splatters to the scalloped edges of my panel. I also cut a large Eyelet Oval panel out of vellum, added the same splatters to it, and then set all my panels aside to dry.
I cut a 5,5 x 4,25 inches pink gingham panel, attached it to a white card base using liquid glue, and assembled a few things: I stuck my Eyelet Rectangle panel on the card base using 1mm foam tape, next the small Layered Teacups panel on top using liquid glue, and I kept the Eyelet Oval vellum panel aside for later.
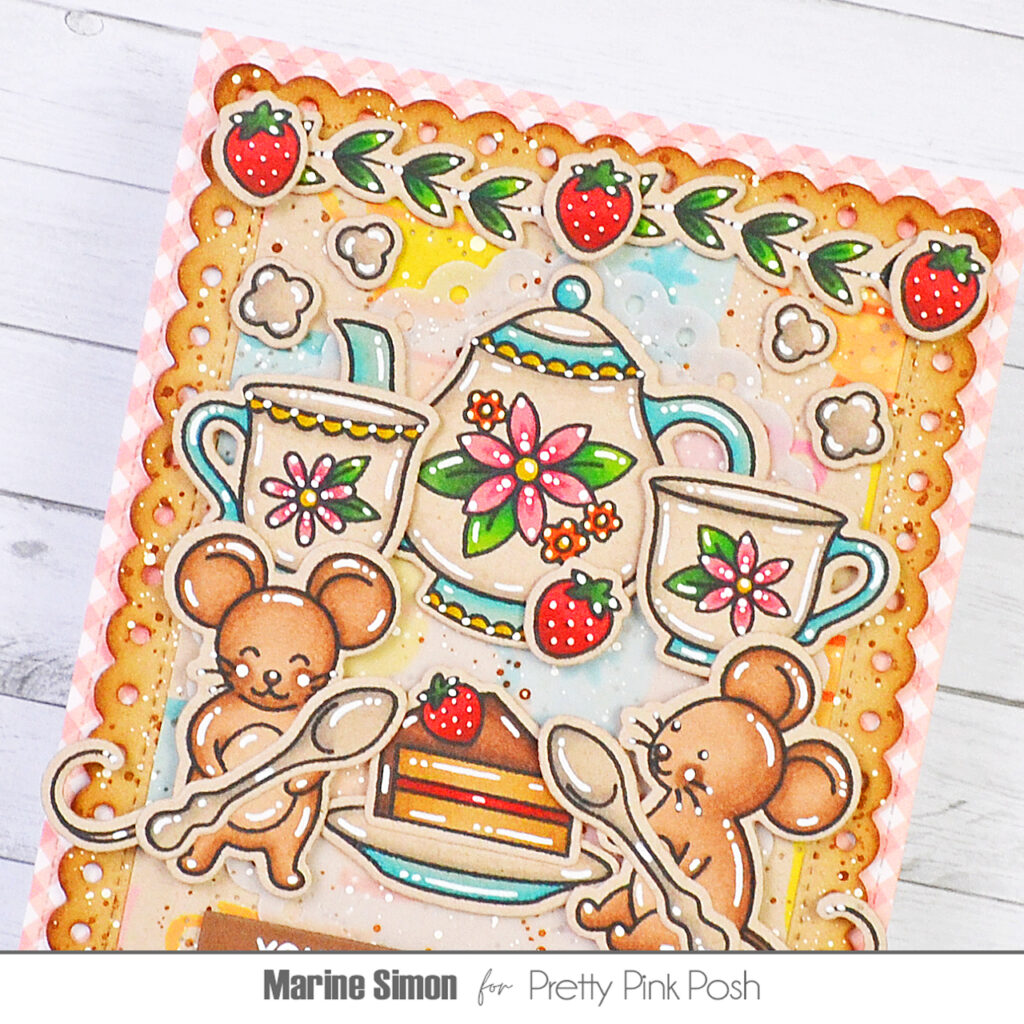
I stamped my images on kraft cardstock using an alcohol marker friendly black ink. I used the matching dies to cut them, and colored everything using my Ohuhu markers.
As always, here is a detailed list of the stamp sets I used: • Tea Time – teapot, teacups, plate, piece of cake, spoons • Friend Greetings – greenery • Mouse Friends – mice, strawberries • Valentine Train – steam.
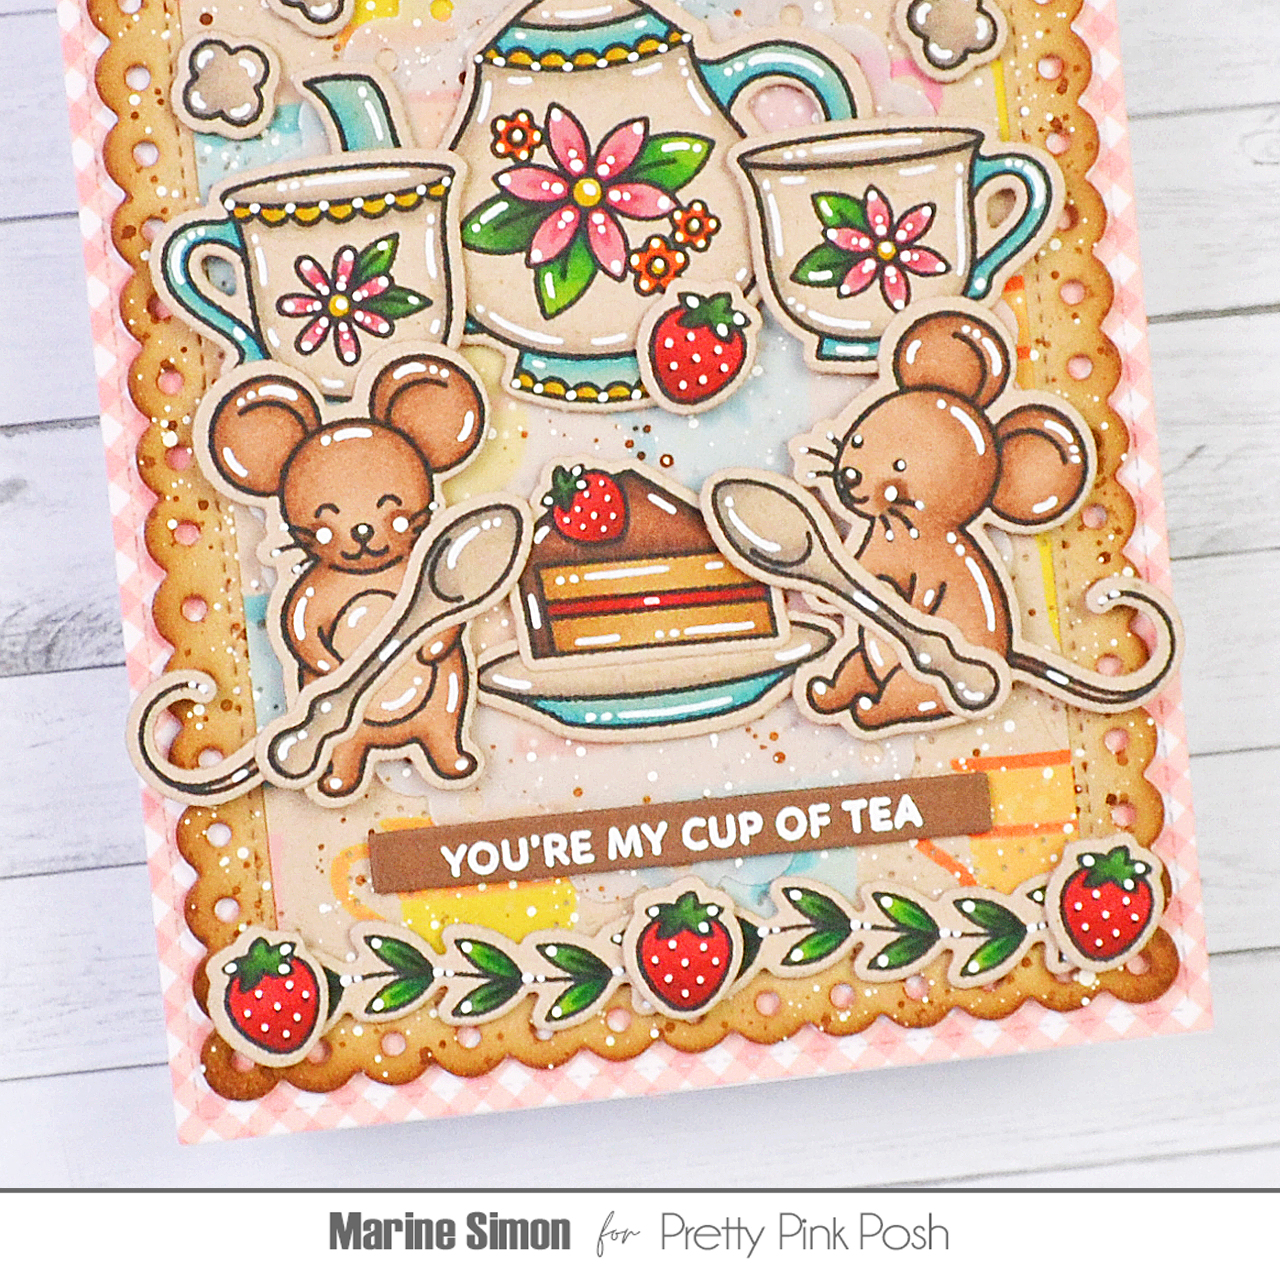
I temporarily taped the Eyelet Oval vellum panel right in the middle of the card base using washi tape, and then I attached the images using 1mm and 2mm foam squares, making sure to put the squares only on the vellum panel. I started with the teapot and teacups, next the plate with the piece of cake, and then the mice. I removed the washi tape, flipped my vellum panel over, added liquid glue at the back of the panel, right behind the images, and finally attached the vellum panel to the card. At the top and bottom, I stuck strawberries and greenery using foam squares again, and added steam above the teacups.
I white heat embossed “You’re my cup of tea” from Tea Time on dark brown cardstock, trimmed my greeting into a slim banner using a Sentiment Strips die, and then attached the banner right below the mice using foam squares. And to finish my card, I added highlights and details to the images using a white gel pen.
And that’s it! I hope that you like this cute and sweet Tea Time scene. Now, who wants to join the party? I think there is still some cake left! Thanks so much for stopping by, and see you next time.
THIS is amazing.