
Christmas Theme Week: Day 1
Hello crafty friends, Marine here, kicking off Christmas Theme Week with this set of Build A Stocking cards and their matching see-through Stocking Shaker tags. I went for my favorite color palette this season, which is red + pink + aqua + green, and did something I almost never do because I find it too messy: I used glitter to make my cards and tags even more festive.
Save 15% on all items in our Christmas section during theme week!
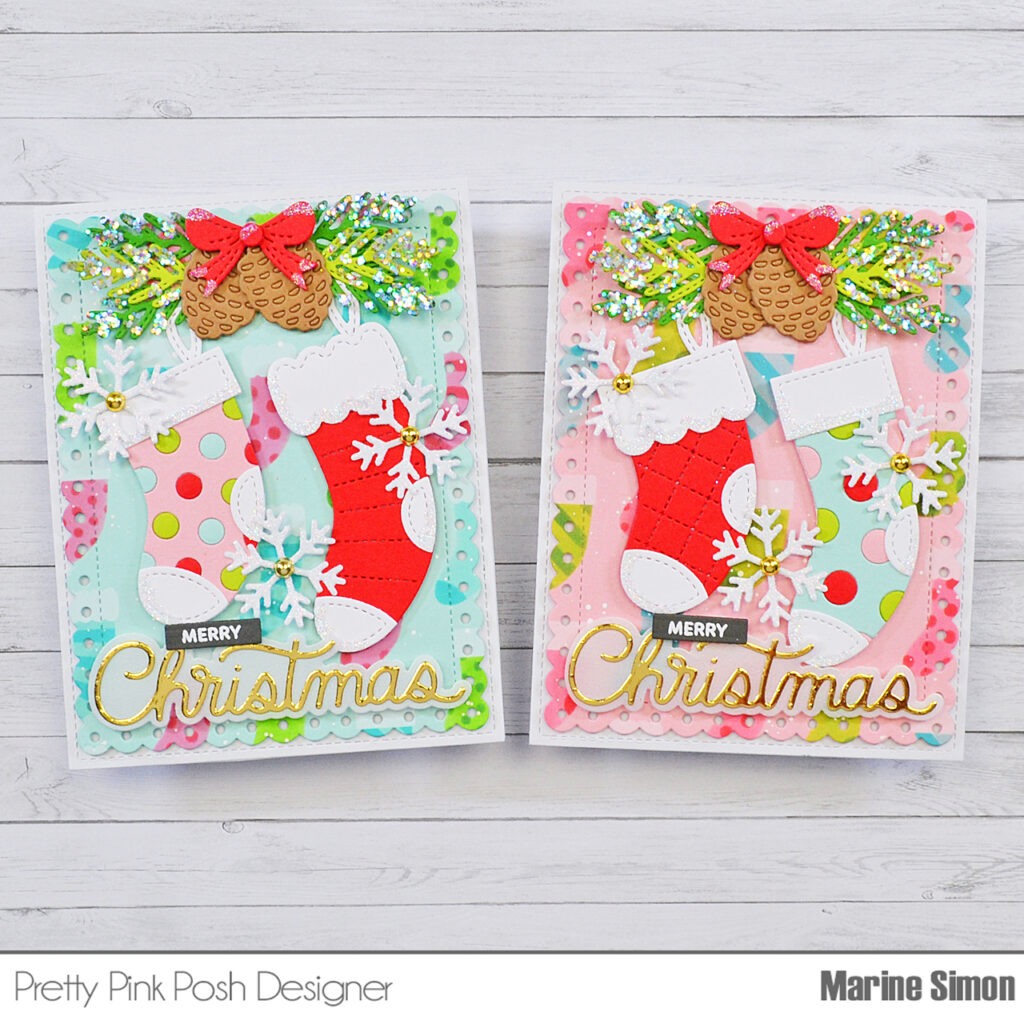
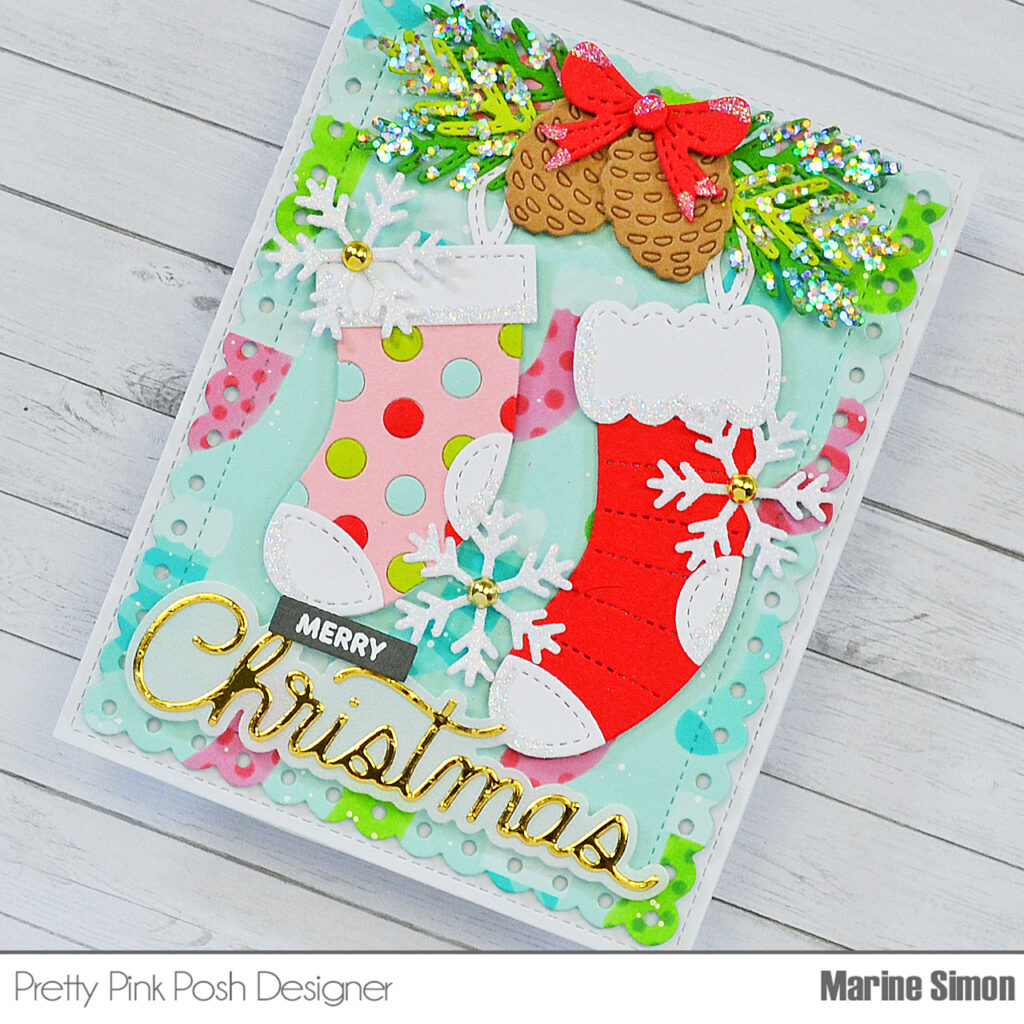
So, let’s start with the cards, shall we? I cut two Eyelets Rectangles: an aqua panel and a light pink panel, and used the Layered Stockings stencils to create stockings on both panels along with oxide inks. With the stencil (A) I used worn lipstick, salvaged patina and mowed lawn. With the stencil (B) I used festive berries, peacock feathers and rustic wilderness. And with the stencil (C) I used white pigment ink. And once all the layers were done, I mixed a little bit of copic opaque white ink with water, and used a small brush to make splatters on both panels.
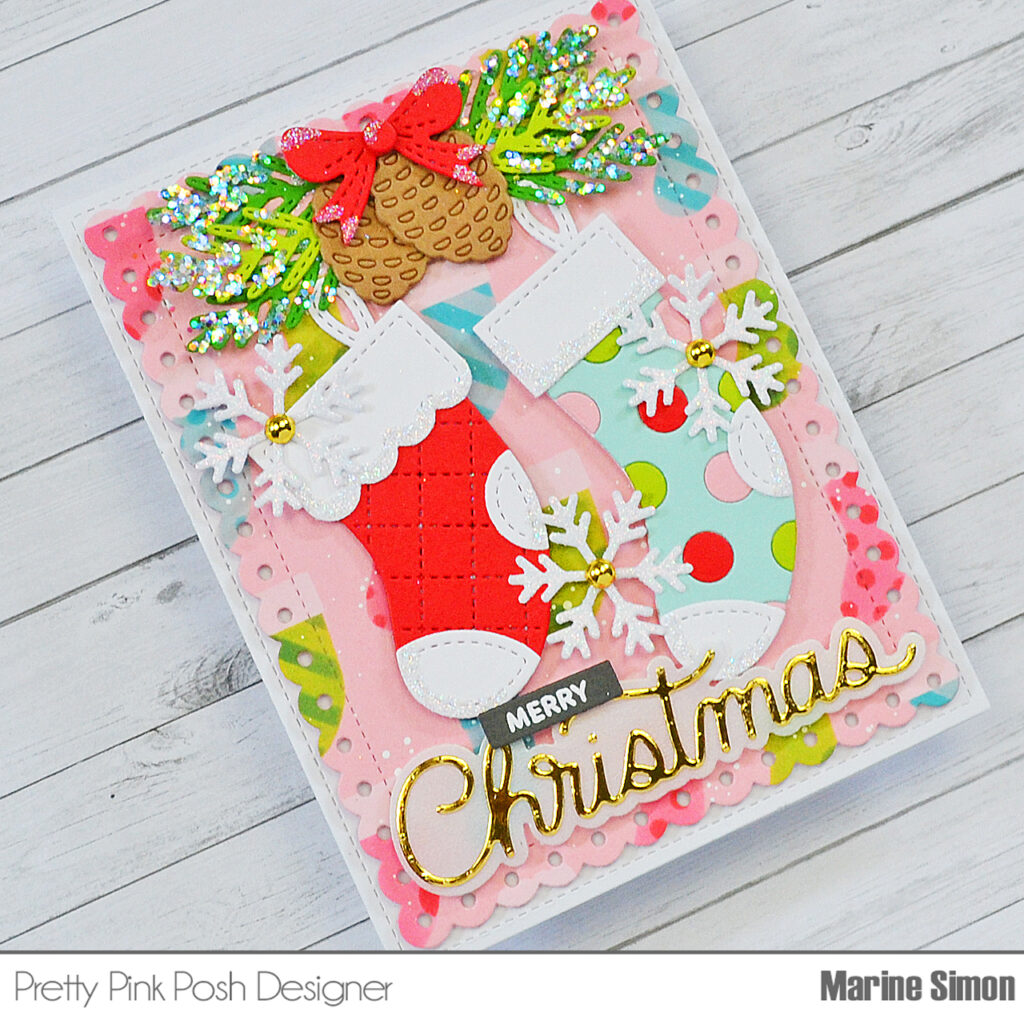
Next I die cut all the elements out of colored cardstock: • the stockings from Build A Stocking • the pine needles and pine cones from Winter Foliage • the snowflakes from Winter Mug • the bows from Holiday Mug Additions.
I assembled the different pieces, attached everything on my panels using 1mm foam squares and liquid glue, and then I created two identical “Merry Christmas” greetings. I white heat embossed “Merry” from Sentiment Strips: Christmas on a dark grey cardstock and trimmed it using a die from Sentiment Strips. I cut “Christmas” from Merry Christmas Shadow out of gold mirror cardstock, and its shadow out of vellum, I layered both pieces on top of each other, and attached my two-part greetings below the stockings on each panel. And finally I added glitter at different places, and a Metallic Gold Pearl in the center of each snowflake.
And I thought it would be fun to make matching tags, so I used the Stocking Shaker to make a couple of see-through tags. I started off by cutting four stockings out of red cardstock. At the back of two of them I attached a piece of acetate that I trimmed all around the stockings. On top of the two other stockings I also attached a piece of acetate that I trimmed. At the back of the first two stockings, I added foam strips, following the shape of my elements. I poured my shaker material inside each stocking: Jolly Santa confetti mix in one, and Candy Cane Lane confetti mix in the other. And then I stuck the two other stockings to the foam strips in order to close my Stocking Shakers.
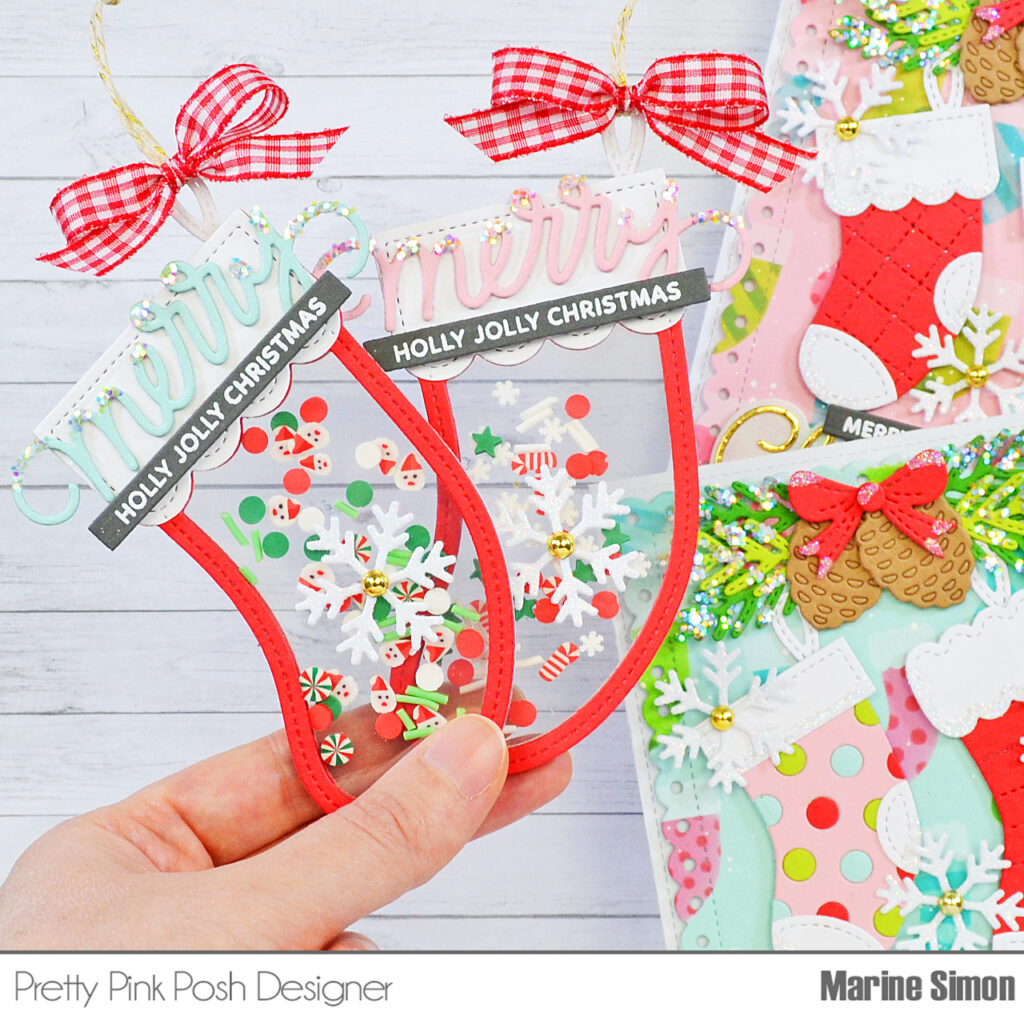
I cut two additional Stocking Shakers out of white cardstock, cut the top parts off and attached them on my shaker stockings. Next I cut six Merry Script words: three out of aqua cardstock that I layered on top of each other to create dimension, and three out of light pink cardstock. I also white heat embossed two “Holly Jolly Christmas” greetings from Sentiment Strips: Christmas on dark grey cardstock, trimmed them using a die from Sentiment Strips, and then attached those pieces on the white section of each stocking. To be able to hang those see-through stockings, I cut two white handles using a die from Build A Stocking, attached both pieces on the top right hand corner of each stocking, added twine, ribbon and glitter.
Finally I cut two white glitter snowflakes using a die from Winter Mug that I attached on each stocking, and glued a Metallic Gold Pearl in the middle of each snowflake as a final decorative touch. And that’s it! How fun it was to create this set of cards and tags, I hope that these will inspire you. Thanks so much for stopping by, have an amazing day!
I love the colors and layers!
Those see though shaker tags 😍😍😍🤯🤯
What glitter did you use?! Love it.