
Winter Penguin Friends
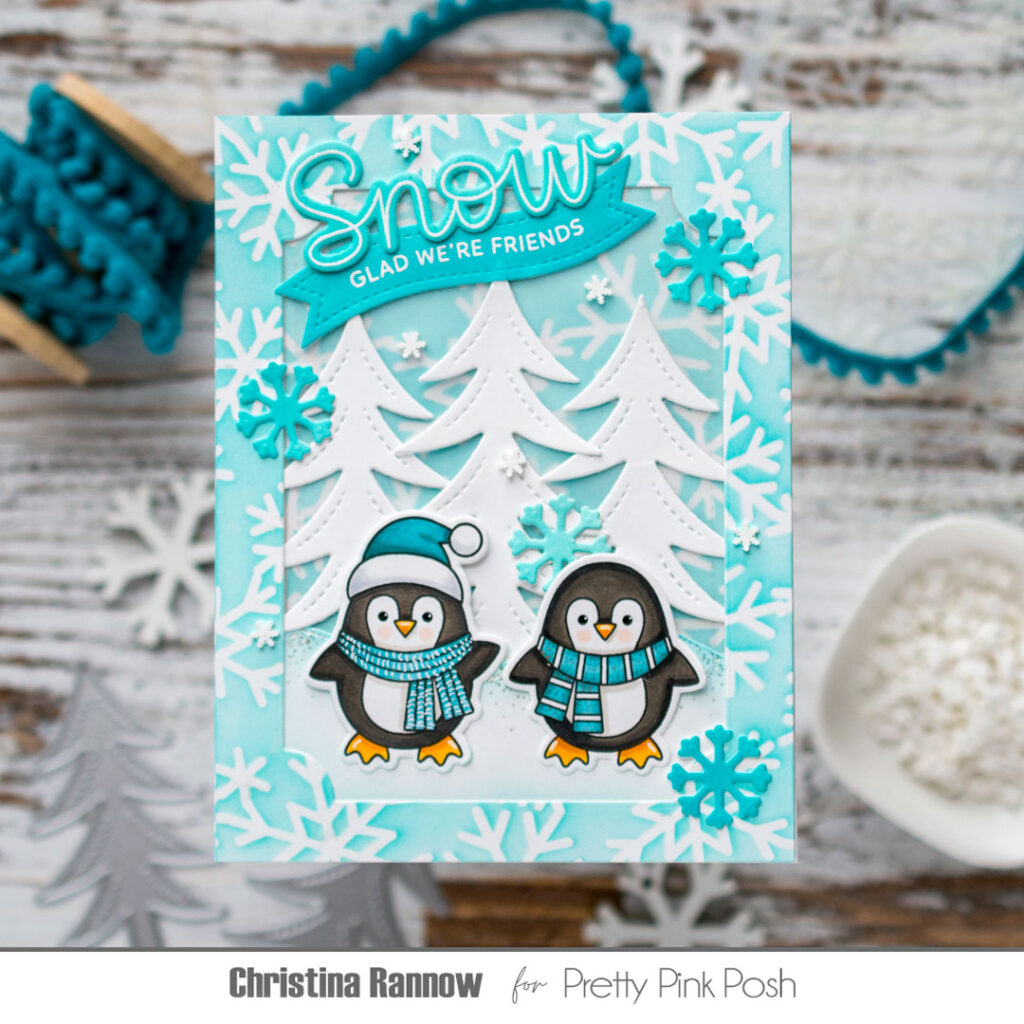
Hello, friends! It’s Christina, and I have a frosty fun card to share with you showcasing products from the latest release. I combined new stamps, dies, and stencils to create a winter wonderland perfect for these little Penguin Friends.
Penguin Friends Stamp Set
Penguin Friends Coordinating Dies
Let it Snow Stamp Set
Let it Snow Coordinating Dies
Banner Greetings 1 Dies
Notched Rectangles Dies
Winter Trees Dies
Snowy Hills Borders Dies
Big Christmas Cupcake Dies – snowflake diecuts
Snowflake Background Stencil
Winter Wonderland Clay Confetti
I started by creating the stenciled background. I used aqua blue ink to stencil the Snowflake Background on a white cardstock panel and then used a partial die-cutting technique to die-cut an elongated Notched Rectangle from the center of the panel. I kept both the positive and negative pieces from die-cutting and layered a piece of acetate over just the center rectangle portion. Next I die-cut some Winter Trees and a Snowy Hill from white cardstock. I lightly inked the edges of the snowy hill with aqua ink and tucked it into my background along with the trees.
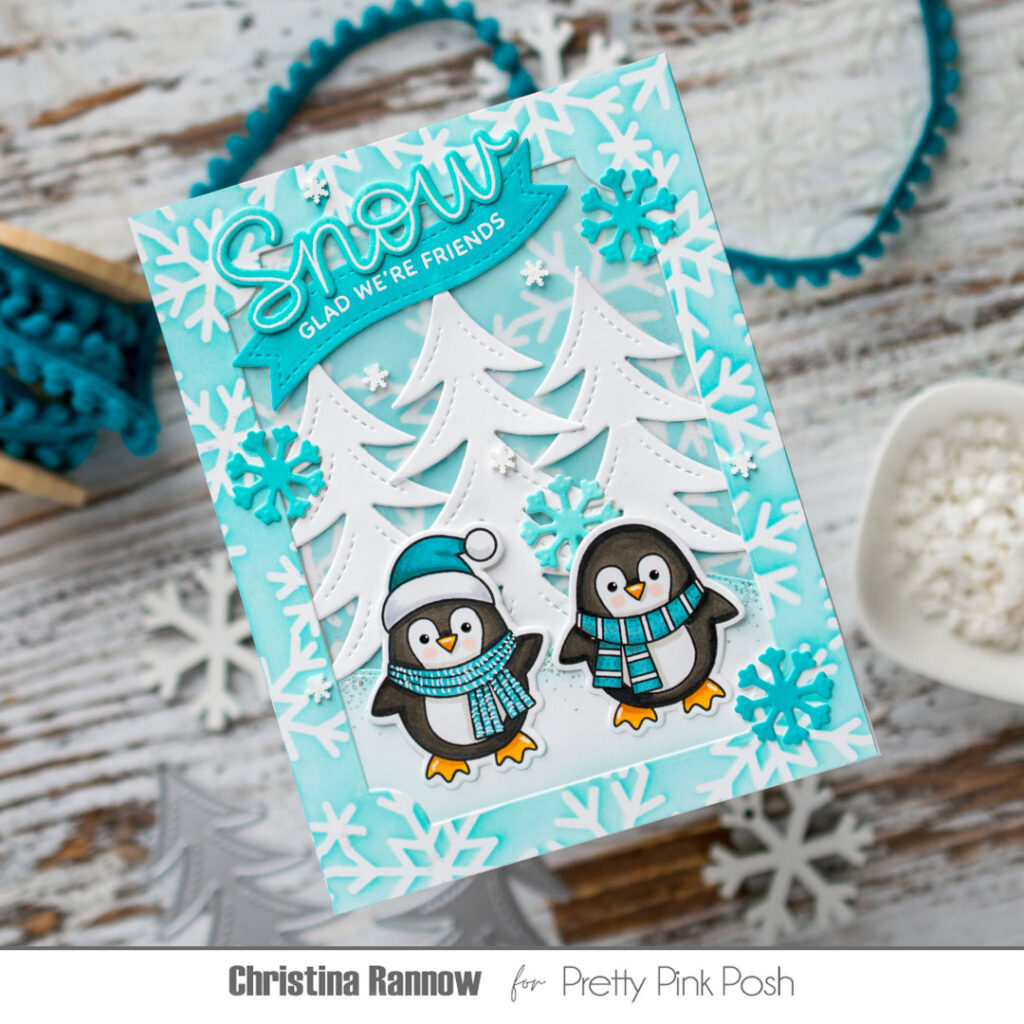
With the background finished, I moved on to the other elements of my card design. First I stamped two Penguin Friends with black ink and then colored the images with Copic markers.
Here’s a Copic coloring guide:
hat & scarves BG53, BG45, BG57, C1
penguin bodies W1, W3, N5
cheeks R00
feet Y17, YR15, YR24
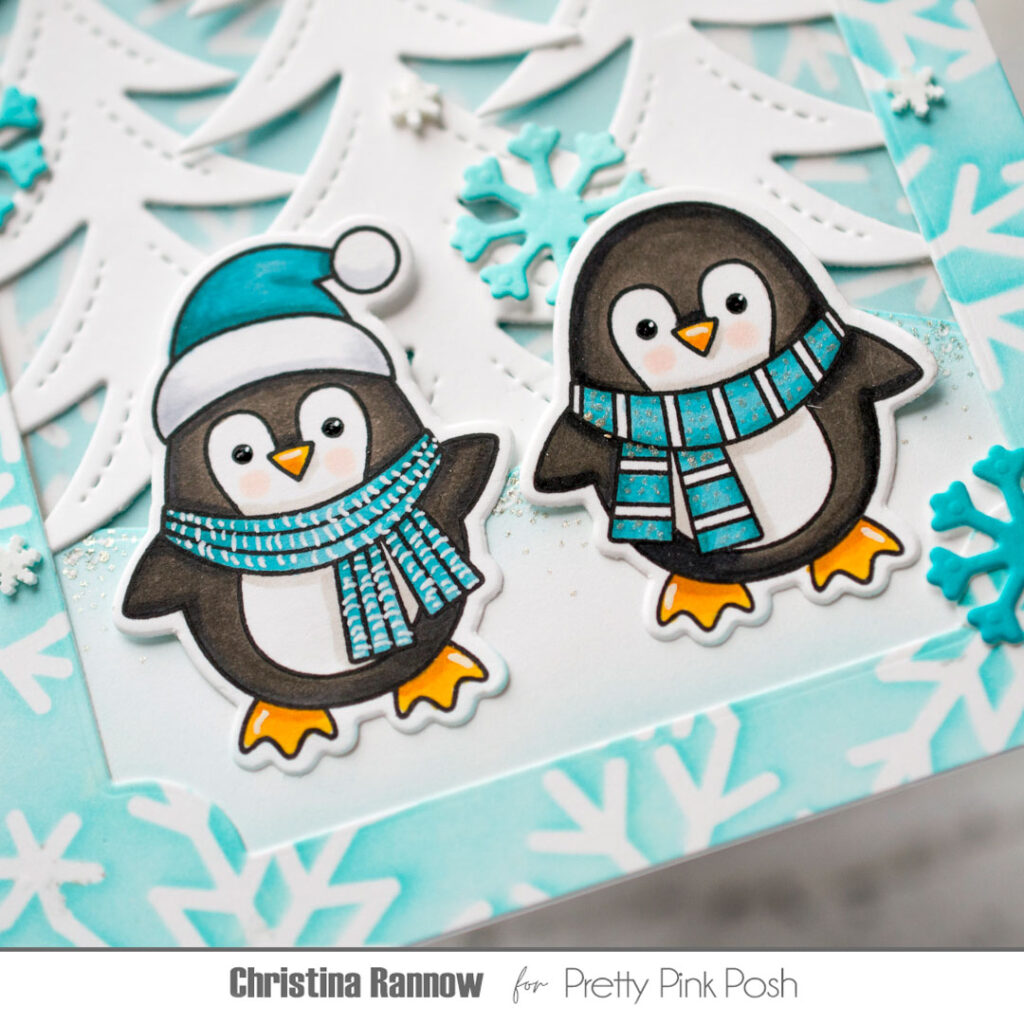
After coloring the images, I die-cut them with the coordinating dies and then used a glitter pen and a white gel pen to add highlights and decorative details to the scarves. With these cuties colored and die-cut, I added them to my scene along with a flurry of die-cut snowflakes that I first ink blended with a trio of aqua inks.
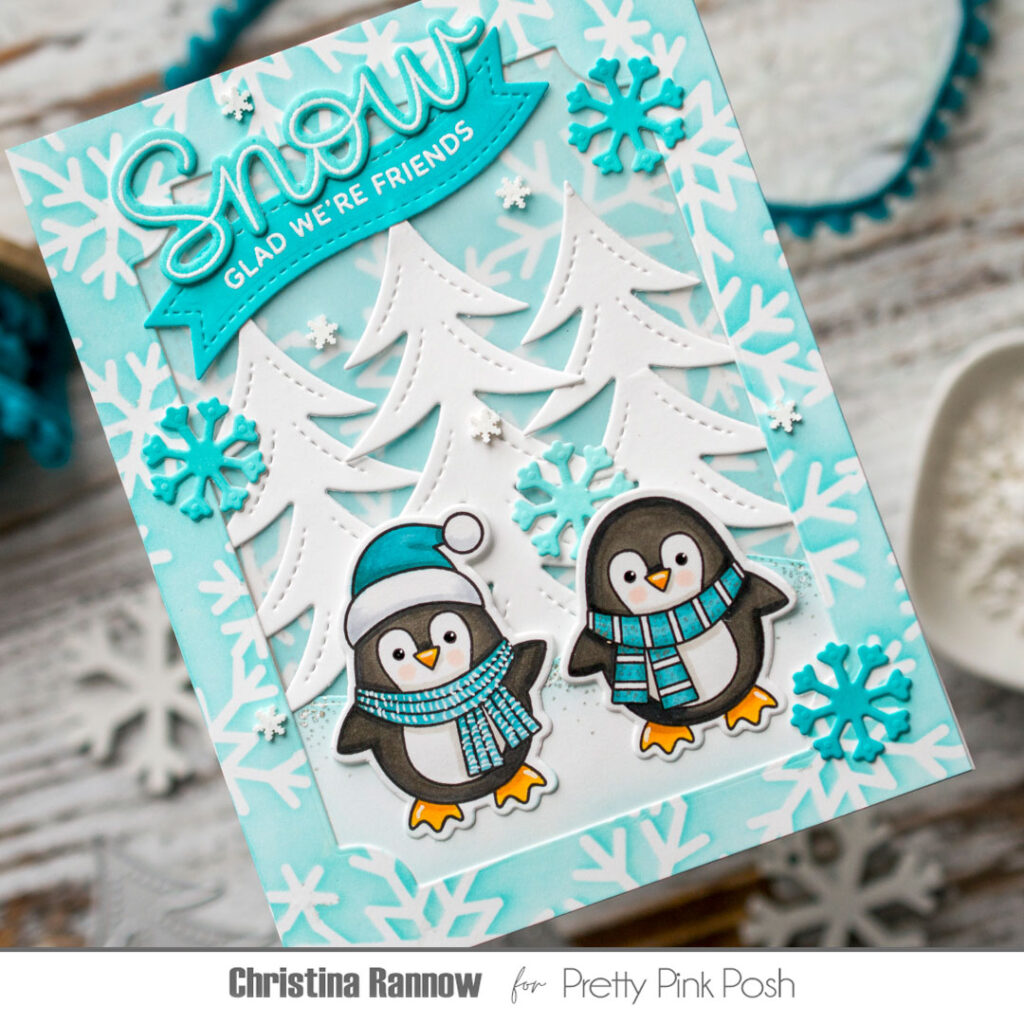
Next, I created the sentiment. I used stamps from the new Let it Snow set with an emboss-resist technique by heat-embossing the text with white embossing powder and then inking over it with aqua ink. I heat-embossed part of the sentiment on a Banner Greeting 1 die cut, using my MistI to help curve the sentiment to fit. After heat-embossing the word “Snow”, I die-cut it with the coordinating die. And the finishing touch was to add a few white clay snowflakes.
Thank you so much for checking out this frosty fun card featuring products from the new winter release.