
Googly Eyed Spiders
Hello crafty friends, Marine here, I’m happy to be back with this extra fun and spooky Halloween card showcasing some items from the August Release, including the amazing Spider Shaker die that I adore! I’m not a huge fan of spiders in real life, especially when they’re gigantic, but it’s impossible to hate them when they’re made out of paper and wearing fun wiggly eyes!
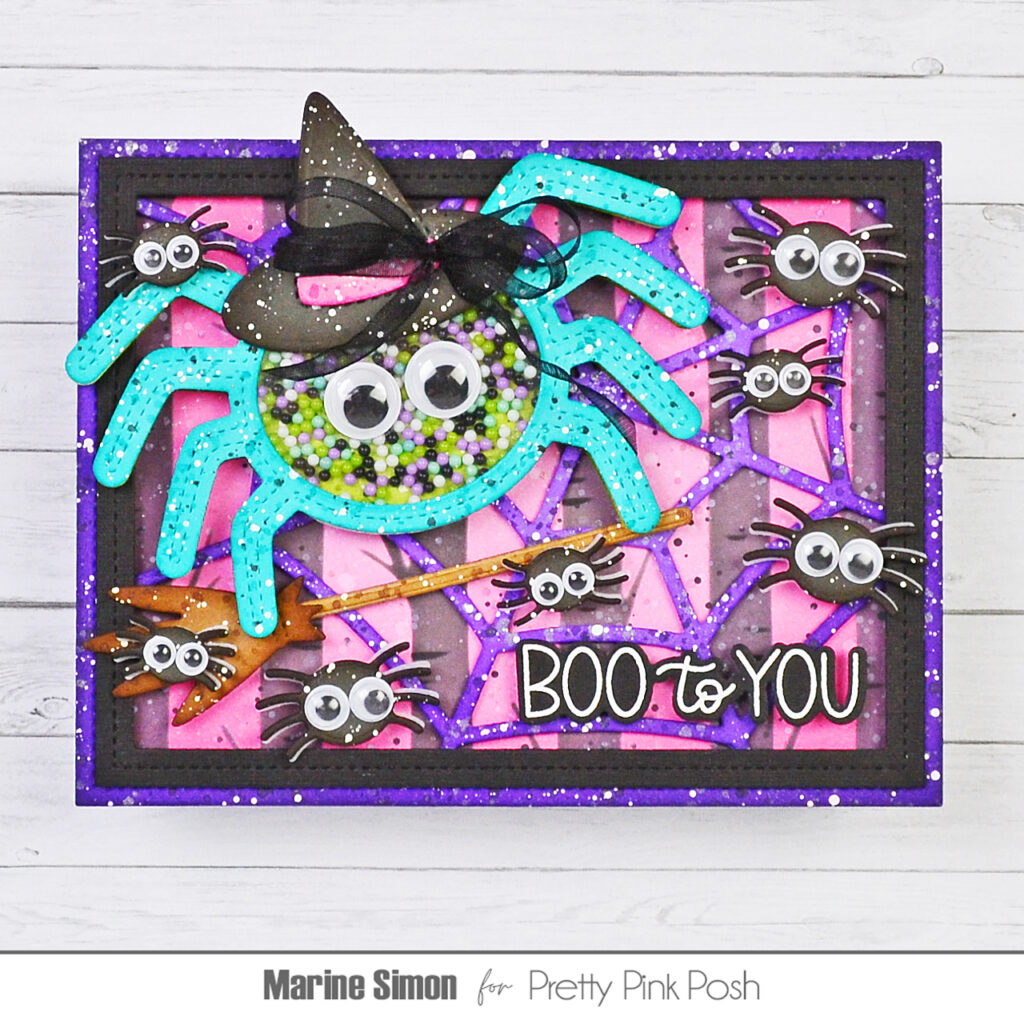
I started off by creating the background and cut a 5,5 x 4,25 inches Strathmore bristol smooth panel that I entirely covered with kitsch flamingo oxide ink. I added picked raspberry oxide ink to the edges to darken my pink background, and to give the illusion that my spooky scene takes place in the woods, I used the Layered Birch Trees stencils along with hickory smoke and black soot oxide inks to add a bunch of trees to my panel. I splattered water all over the panel and dried it with a paper towel, mixed some picked raspberry oxide ink with water and added pink splatters, I did the same with black soot oxide ink, and then the same again with copic opaque white ink using a slim brush.
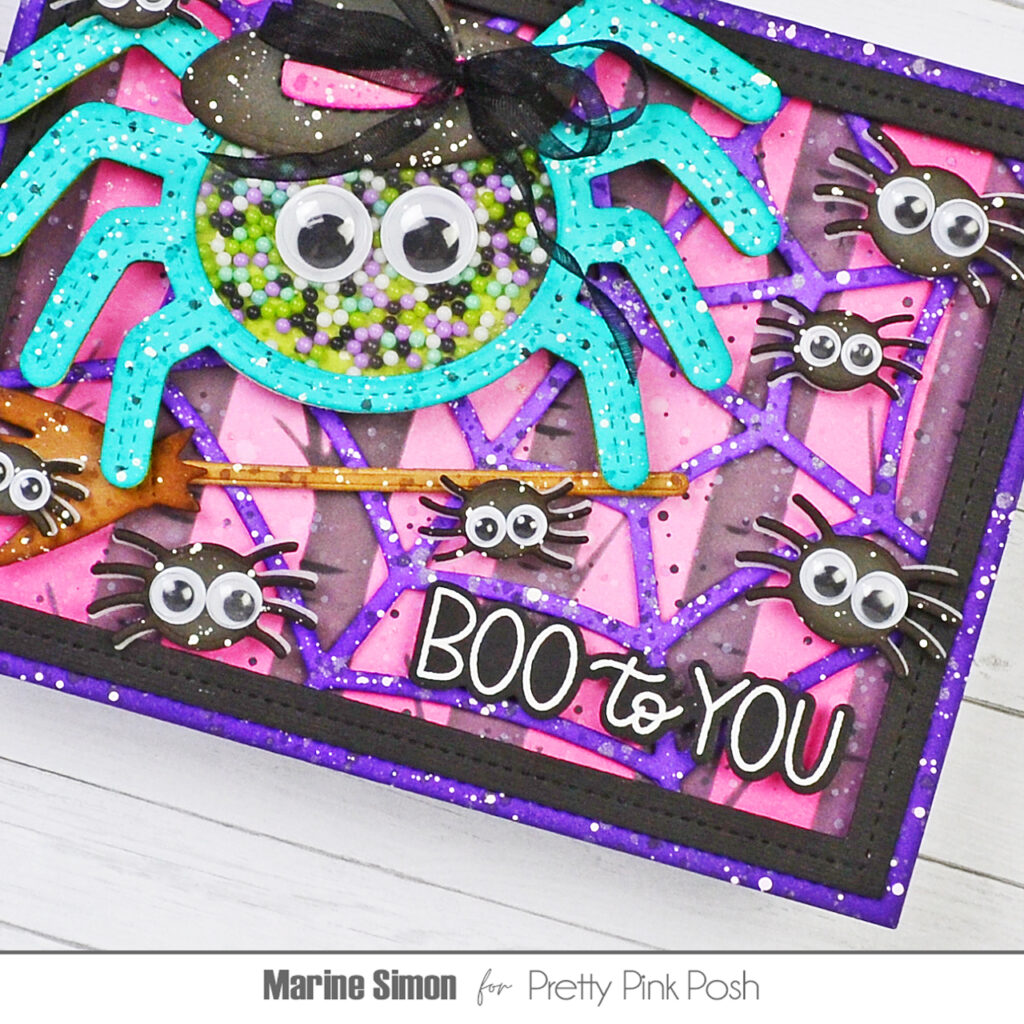
I cut my Spider Web Cover Plate panel out of light purple cardstock and brought more depth and interest to it using distress inks and texture. I first applied wilted violet distress ink, from the edges towards the center of the spider web, and then added villainous potion distress ink, but only to the edges, to darken my panel even more. For the textures, I started by mixing villainous potion distress ink with water and splattered dark purple droplets on my spider web background. I did the same with black soot oxide ink, with white ink as well, and then with brushed pewter mica spray to bring sparkles to this panel.
I stuck my Spider Web Cover Plate panel to my pink panel using 1mm foam squares, and to make my background even more interesting, I cut a Nature Essentials frame out of textured black cardstock and attached it to my purple panel using 1mm foam squares again. Finally, I attached my panel to a white card base using liquid glue.
Next I created my giant Spider Shaker, following those steps:
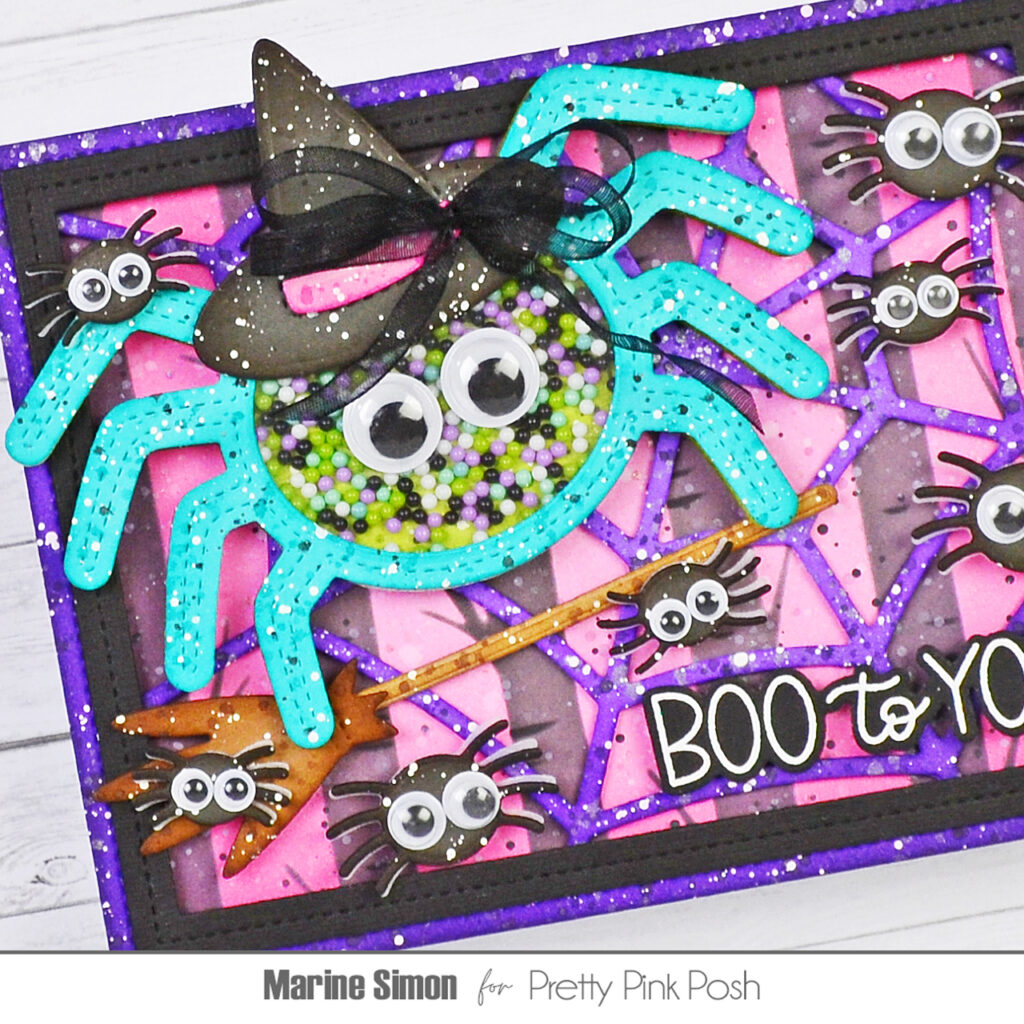
1. I cut a Spider Shaker frame out of aqua cardstock, added peacock feathers distress ink to the edges and legs, mixed that same ink with water and added splatters all over the spider, I did the same with black soot distress ink and then with copic opaque white ink,
2. I cut a whole Spider Shaker out of acetate and attached it at the back of my aqua spider frame using liquid glue,
3. Still at the back of the spider, I added foam strips all along her rounded body and on each leg as well,
4. I poured a bunch of Spellbound shaker beads inside the spider,
5. I cut a whole Spider Shaker out of light green cardstock, added peeled paint distress ink to the edges of the rounded body, mixed that same ink with water, added splatters on my green spider, and did the same with copic opaque white ink
6. I peeled the backing papers off the foam strips, and attached the green spider to the strips to totally close my Spider Shaker.
Next I cut the witch hat using dies from Halloween Mug Additions. I cut the hat out of dark grey cardstock, added a bit of black soot distress ink to the edges, mixed that same ink with water, added splatters to the hat, and then did the same with white ink. I cut the hat detail out of light pink cardstock, added picked raspberry distress ink to darken it a bit, and then added splatters. I attached that pink detail to the hat using 1mm foam squares, tied a black organza double bow and attached it to the witch hat using liquid glue.
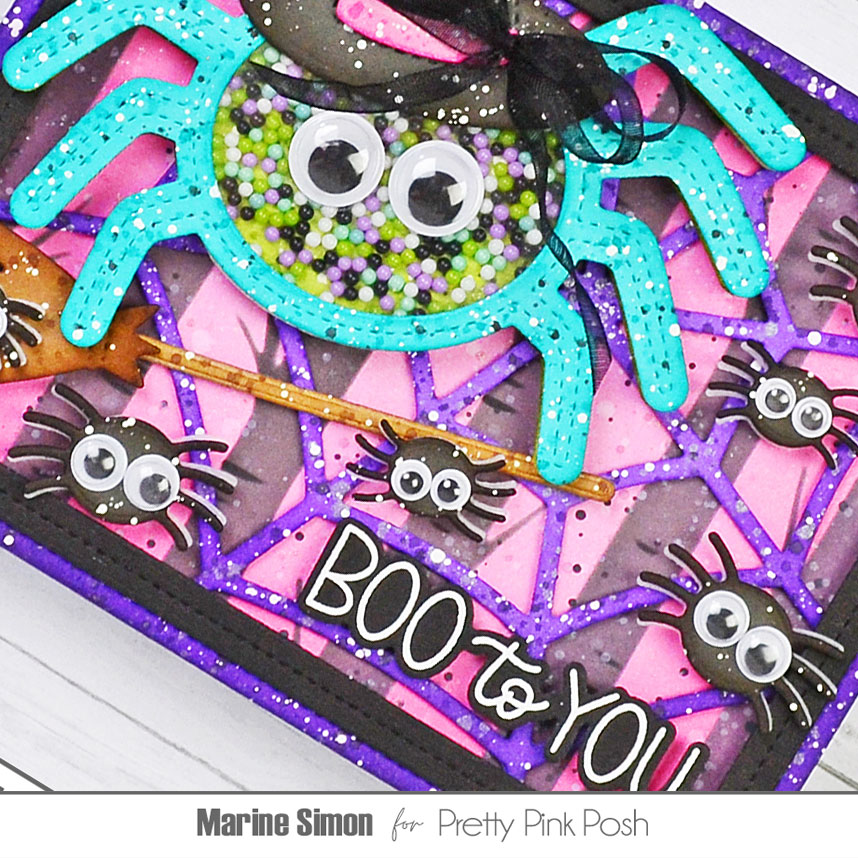
I wanted my Spider Shaker to be flying on a broom, so I cut two different pieces to build it. I cut the stick out of light kraft cardstock using a Halloween Mug Additions die, and the fluffy part of the broom out of dark kraft cardstock using a Halloween Holder Additions die. I added vintage photo distress ink to each piece to darken them, mixed some ground espresso distress ink with water and added splatters to both pieces, and then did the same with white ink.
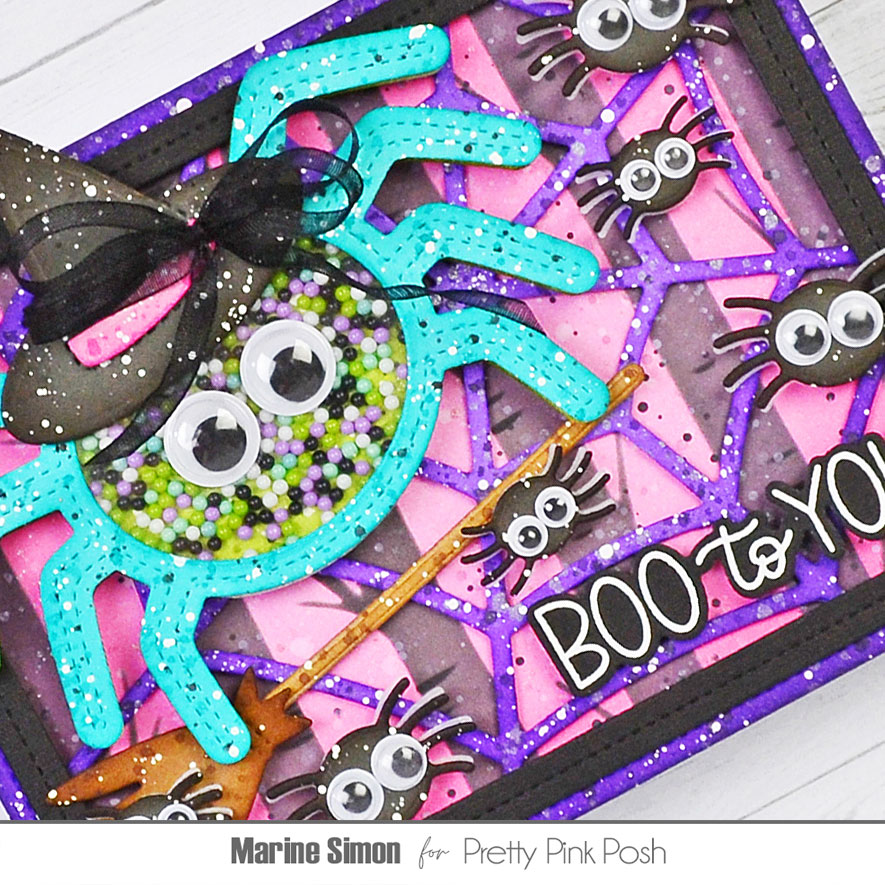
I also cut a bunch of spiders using dies from the Spider Web Cover Plate die set, and I wanted them to stand out against my background, so I first cut them out of dark grey cardstock, added black soot to the edges of each spider, as well as white ink splatters. I cut more spiders out of vellum using the same dies, attached a black spider to a vellum spider using 1mm foam squares, shifted the spiders a little bit to get those vellum legs noticeable, and then I gave each spider a pair of wiggly eyes.
I white heat embossed “Boo to you” from Halloween Greetings on black cardstock, cut it with the matching die, attached it at the bottom right hand corner of my card, and stuck some spiders, starting with the larger one, using foam squares. I slid the broom behind the Spider Shaker‘s legs, attached more spiders, stuck the hat on the big spider’s head, and finally gave her a pair of giant wiggly eyes. And that’s it! I hope that you like this fun shaker card. I know I’d have a panic attack seeing that many spiders in real life, but as I was saying at the beginning, as long as they’re made out of paper, I don’t mind playing with them!
Thanks so much for stopping by, and see you next time.