
Halloween Mummy Bear
Hello friends! Raquel here today sharing some inspiration with the Spider Web die! This die has just been released and I believe it’s a must have for all your Halloween themed projects.
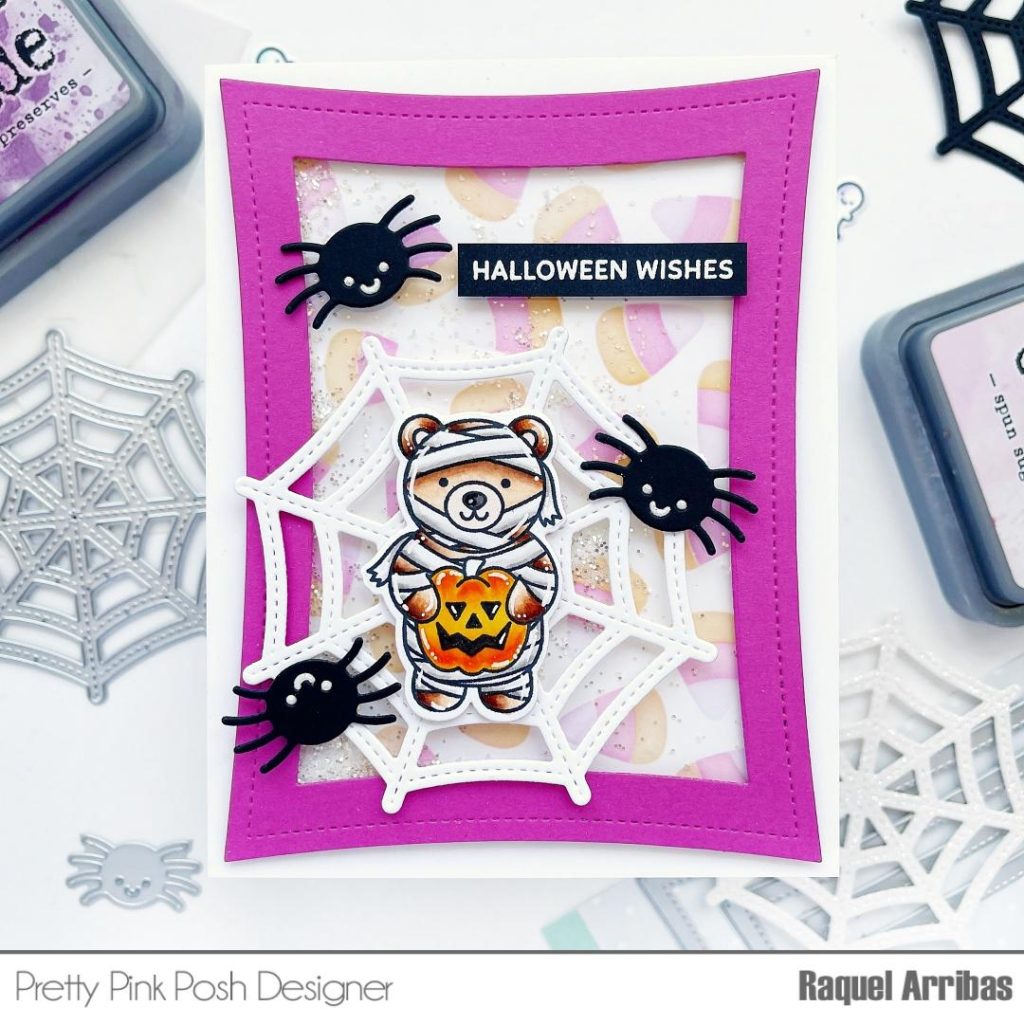
I started this project by using the Layered Candy Corn Stencils. Love these layered stencils to create fun and very quick backgrounds! I used Spun Sugar, Seedless Preserves and Wild Honey Distress Oxide Inks to color this fun corn.
Once the background was done, I trimmed it to 4 ¼ by 5 ½ inches. I couldn’t help creating a shaker with these stencils.
To create a frame to build my shaker, I used the new Wonky Stitched Rectangles. I used the largest rectangle to cut out a panel with an orchid cardstock. Then I used a rectangle die, two times shorter to create my frame.
COPIC MARKER COLORS
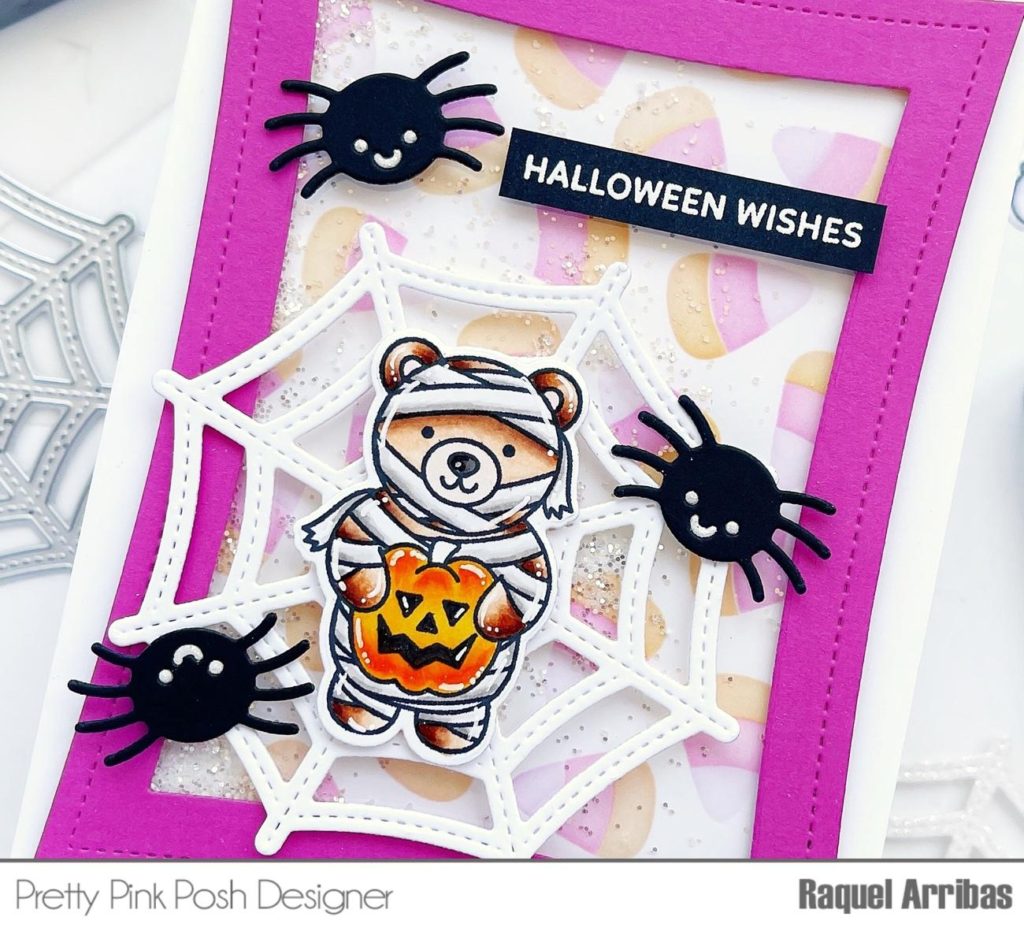
E30, E31, E33, E35 and E37 for the head, legs and arms.
W00 and W1 for the dressing.
Y17, YR04 and YR 07 for the pumpkin.
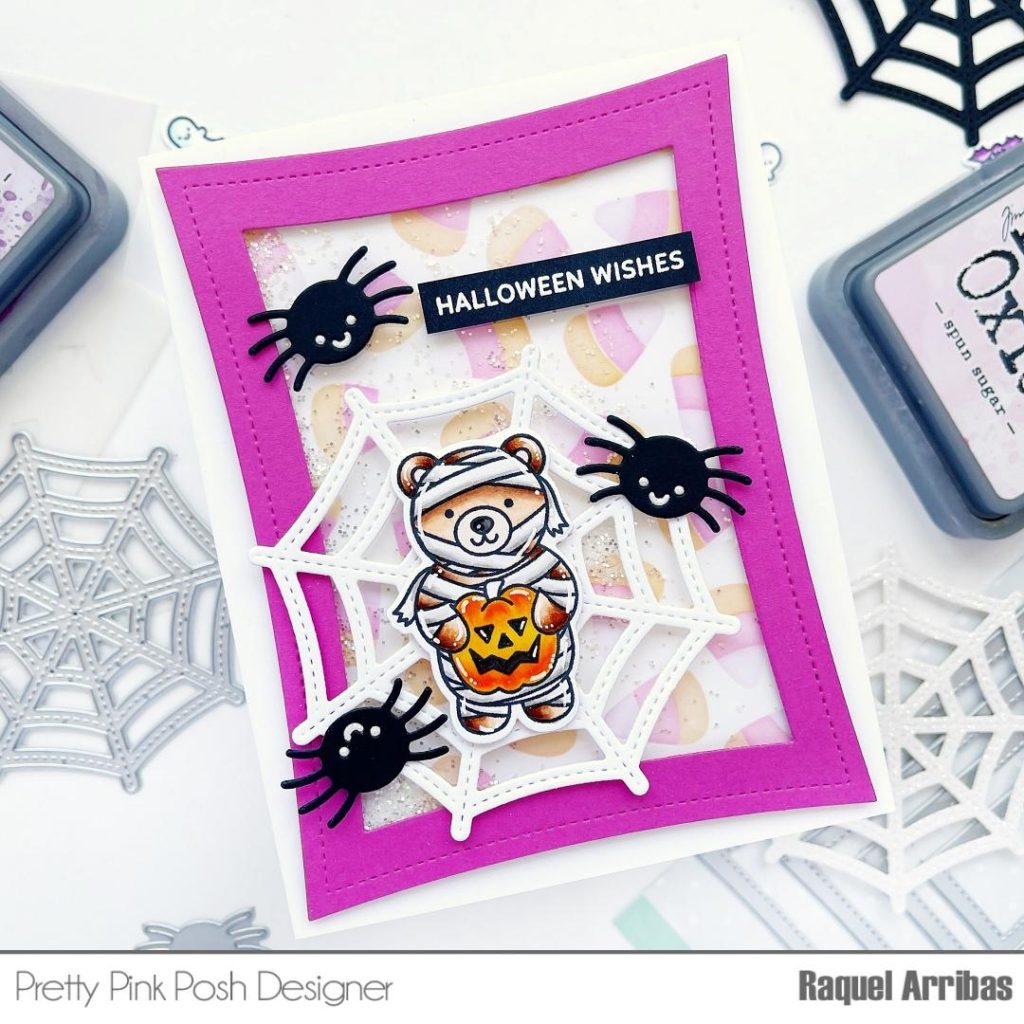
Then I adhered a piece of acetate and foam adhesive to the back and adhered it to the stenciled background where I had already sprinkled some white glitter. I didn’t want to add any more sequins or additional embellishments to my shaker as I thought the colorful background was enough.
Next up, I die cut a white web with the super cute Spider Web Die. My initial idea was to use black cardstock to cut it out but then I decided to use plain white cardstock, so the final result was more cohesive.
I did use black cardstock to cut out three spiders with the cutest spider die that is included in the Spider Web Die set.
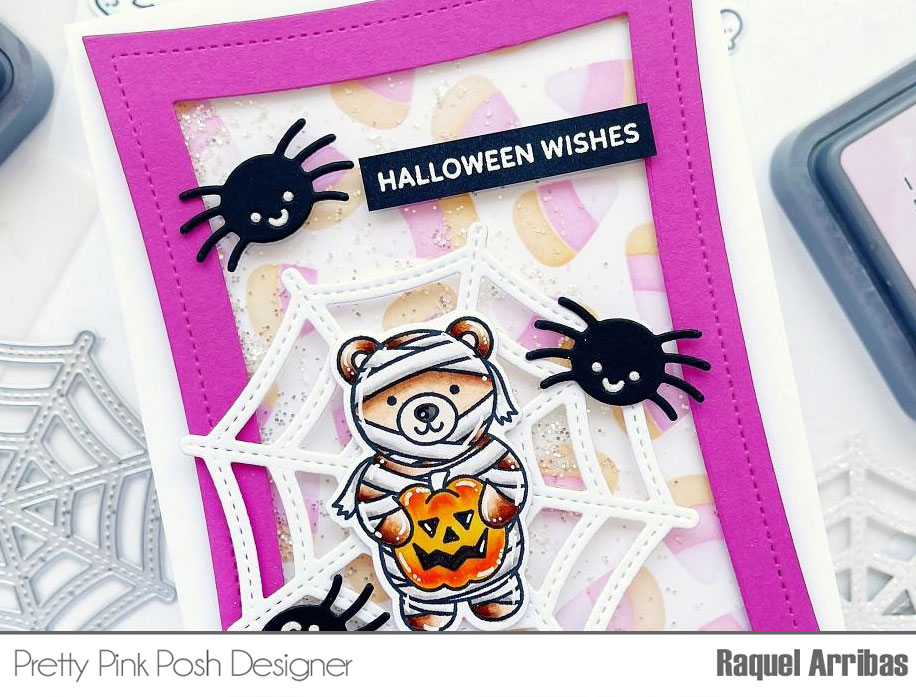
Lastly, I colored the sweet bear from the Halloween Critters Stamp Set using Copic Markers. I also white heat embossed the sentiment from the Halloween Envelopes Stamp set.
I hope you like this card and feel inspired to create with these super fun Halloween products.
Crafty hugs!