
Tutorial: Rainbow Jewel Shaker Card
Good morning! Ardyth here with a unique idea for a shaker die!
Watch the video above I Watch the video in HD on YouTube
Usually when I build a shaker card, I use foam tape for the shaker walls. But you can also stack a die cut to create the walls and that’s what I did here. I started by cutting the Lattice Background Die 5 times – 4 from plain white cardstock and 1 from a panel of cardstock that I had blended a rainbow of ink onto.
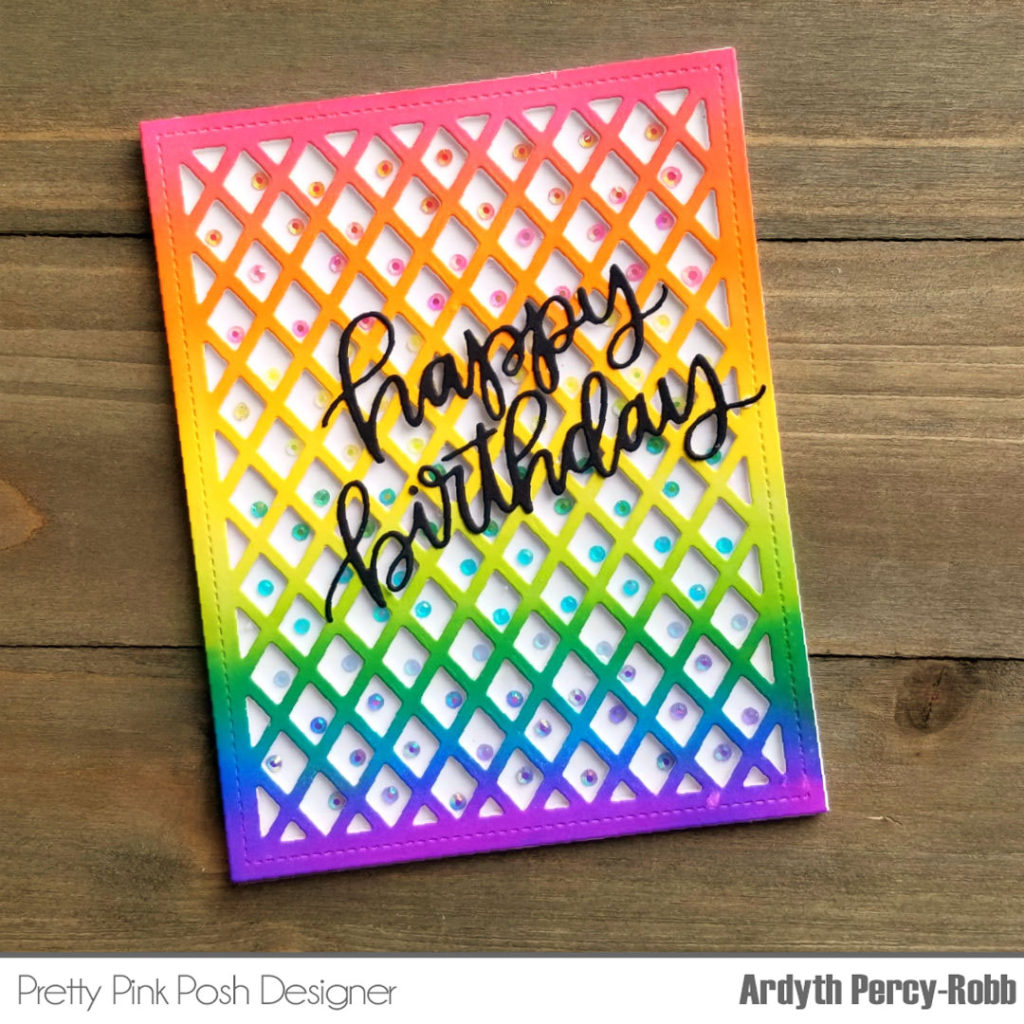
I used liquid glue to stack the 4 white die cuts and then glued a panel of acetate on top before gluing the rainbow die cut on the very top. When the glue was dry, I flipped it over, and there were lots of tiny windows just waiting to be filled!
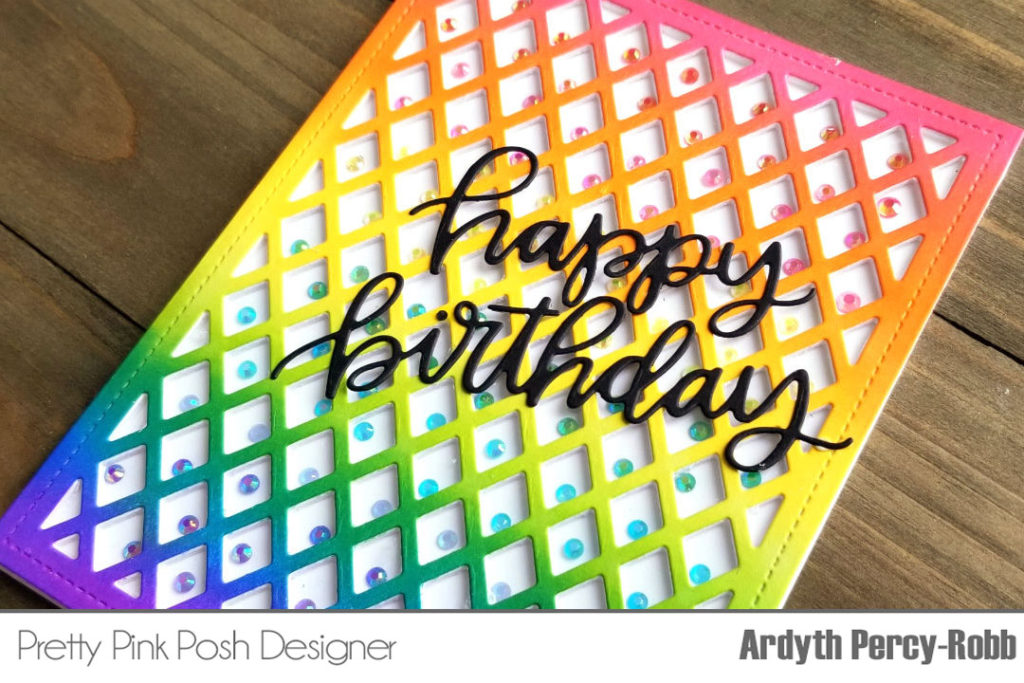
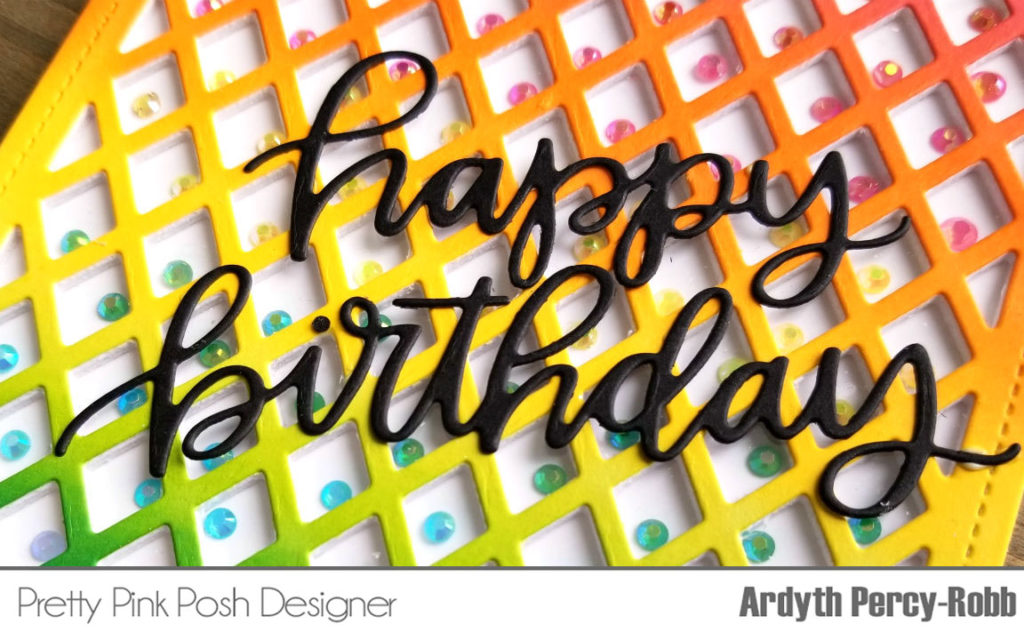
I put one tiny jewel in each window, using a jewel picker and craft pick to make sure that the faceted shiny side was facing out the window. I went in rainbow order, trying to match the rainbow on the front of the card.
Jewels used: Berry Splash Mix Jewels, Raspberry Jewels, Marigold Jewels, Caribbean Blue Jewels, Cornflower Jewels and Party Mix Jewels.
When I had all the windows filled, I put liquid glue on the back of the stacked die cuts and placed my cardbase on it.
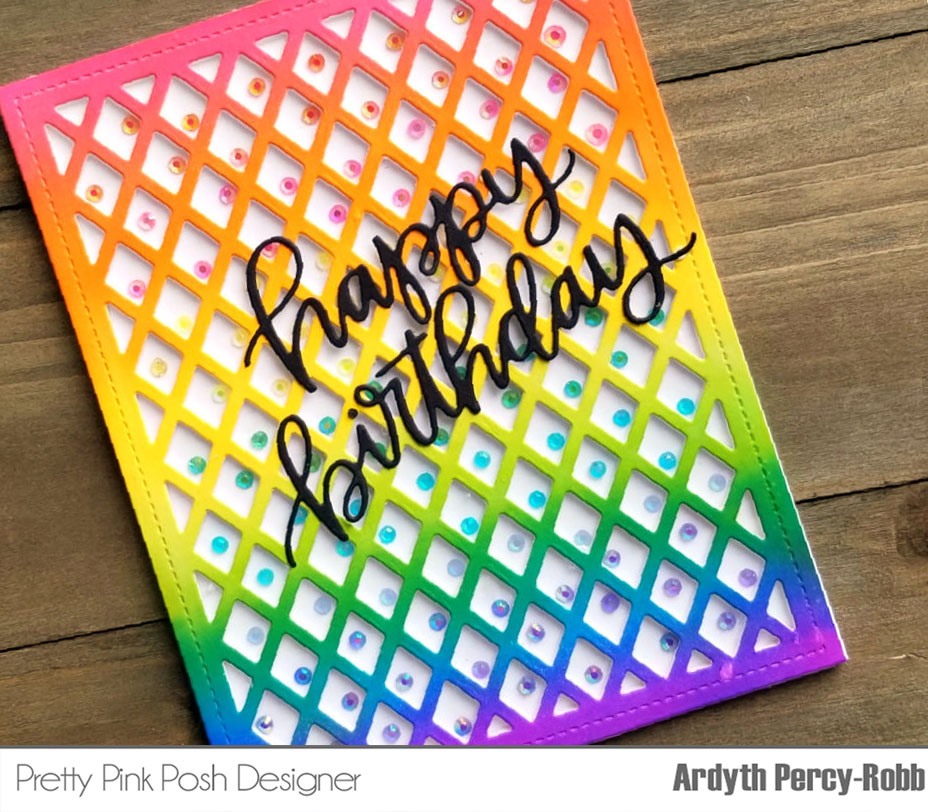
To finish the card, I simply added the Happy Birthday Script, which I had cut from black cardstock.
We hope you enjoyed this fun video tutorial. There are lots of great possibilities with this die set (and jewels)!
This is so fun! And awesome rainbow colors! :)
Absolutely love your technique and have to have that die. Your card is stunning. You are sooo creative and talented. Appreciate the inspiration you always share.
OMG! This is amazing but also INSANE I can’t believe you glued individual jewels in each slot!!!!!!!!!!!!!!!!!!!
Beautiful!
Love that fun, unique shaker! Beautiful colors.
Very pretty card, I might try this one for an extra special card.
Wow! This is an awesome shaker card! I love how Ardyth put a jewel in each window of this die cut. :)